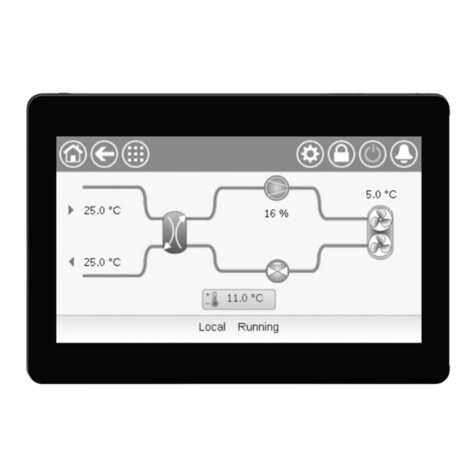
CIAT AQUACIATPOWER LD-ST Series User manual

Instruction manual
05 - 2021
10536
CONNECT TOUCH
AQUACIATPOWER (I)LD -ST / -HE (602-2000)


CONTENTS
PREFACE.................................................................... 4
1 - SAFETY CONSIDERATIONS ................................ 5
1.1 Safety guidelines ............................................... 5
1.2 Safety precautions............................................. 5
2 - CONTROL OVERVIEW.......................................... 6
2.1 Control system................................................... 6
2.2 System functionalities........................................ 6
2.3 Operating modes............................................... 6
2.4 CONNECT TOUCH control system.................... 6
3 - CONTROL COMPONENTS................................... 7
3.1 CONNECT TOUCH overview ............................ 7
3.2 Features overview ............................................. 7
4 - HARDWARE .......................................................... 8
4.1 Control boards................................................... 8
4.2 Power supply to boards ..................................... 8
4.3 Light Emitting Diodes on boards........................ 8
4.4 Pressure transducers......................................... 8
4.5 Temperature sensors......................................... 8
4.6 Actuators ........................................................... 8
4.7 Terminal block connections ............................... 9
4.8 RS485 wiring (best practice)............................. 10
5 - CONNECT TOUCH USER INTERFACE ............... 11
5.1 Menu structure.................................................. 12
5.2 Header buttons................................................. 14
5.3 Explore the synoptic screen.............................. 15
5.4 Start/Stop the unit............................................. 15
5.5 Set the schedule............................................... 16
5.6 Manage display settings ................................... 17
5.7 Monitor unit parameters.................................... 18
5.8 Modify unit parameters ..................................... 19
5.9 Override system configuration .......................... 19
5.10 Analyse history trends ...................................... 20
6 - WEB CONNECTION............................................. 21
6.1 Web interface ................................................... 21
6.2 Technical documentation.................................. 21
7 - CONNECT TOUCH CONTROL: MENU
STRUCTURE......................................................... 22
7.1 Main menu........................................................ 22
7.2 Configuration menu (CONFIG) ......................... 29
7.3 Network Parameters menu ............................... 34
7.4 System Menu.................................................... 36
7.5 Alarm Menu ...................................................... 38
8 - STANDARD CONTROL OPERATIONS AND
OPTIONS .............................................................. 39
8.1 Unit Start / Stop control..................................... 39
8.2 Heating / Cooling control .................................. 39
8.3 Supplementary heating..................................... 40
8.4 Water pumps control......................................... 40
8.5 Hydronic kit option............................................ 41
8.6 Control point ..................................................... 42
8.7 Capacity limitation ............................................ 43
8.8 Controlling capacity .......................................... 44
8.9 Night mode ....................................................... 44
8.10 Controlling the coil pressure ............................. 44
8.11 Setting holidays ................................................ 45
8.12 Dry cooler – free cooling option ........................ 45
8.13 Energy Management Module ........................... 45
8.14 Heat recovery option (desuperheater) .............. 45
8.15 Defrost cycle (heat pumps only) ....................... 46
8.16 Master/Slave control......................................... 46
8.17 BACnet IP option .............................................. 46
8.18 Brine options .................................................... 46
8.19 Refrigerant gas leak detection option ............... 46
8.20 Software Activation Key(s)................................ 47
9 - DIAGNOSTICS ..................................................... 48
9.1 Control diagnostics........................................... 48
9.2 E-mail notifications ........................................... 48
9.3 Alarms description............................................ 49
10 - MAINTENANCE.................................................. 55
EN-3 AQUACIATPOWER

PREFACE
The goal of this document is to give a broad overview of
the main functions of the control system used to control
AQUACIATPOWER LD -ST/-HE air-cooled liquid chillers and
AQUACIATPOWER ILD -ST/-HE reversible heat pumps with 160
to 520 kW cooling/heating capacity.
Instructions in this manual are given as a guide to good practice
in the installation, start-up and operation of the control system.
This document does not contain full service procedures for the
correct operation of the equipment.
The support of a qualified Manufacturer Service Engineer
is strongly recommended to ensure optimal operation of
the equipment as well as the optimization of all available
functionalities.
Note that this document may refer to optional components and
certain functions, options or accessories may not be available
for the specific unit.
IMPORTANT: All screenshots of the user interface provided
in this manual include text in English. After changing the
language of the system, all labels will be in the language
selected by the user.
Please read all instructions prior to proceeding with any
work. Pay attention to all safety warnings.
The information provided herein is solely for the purpose of
allowing customers to operate and service the equipment and it
is not to be reproduced, modified or used for any other purpose
without the prior consent of the Manufacturer.
Acronyms / Abbreviations
In this manual, the refrigeration circuits are called circuit A and
circuit B. Compressors in circuit A are labelled A1, A2, A3, A4,
whereas compressors in circuit B are labelled B1, B2, B3, B4.
Acronym Description
BMS
Building Management System
DGT
Discharge Gas Temperature
EHS
Electric Heater Stage
EMM
Energy Management Module
EWT
Entering Water Temperature
EXV
Electronic Expansion Valve
FC
Free Cooling
DCFC
Dry Cooler Free Cooling
HSM
Hydronic System Manager
LED
Light Emitting Diode
LWT
Leaving Water Temperature
OAT
Outdoor Air Temperature
SCT
Saturated Condensing Temperature
SST
Saturated Suction Temperature
VFD
Variable Frequency Drive
Abbreviation Description
Local-Off mode / LOFF
Operating type: Local Off
Local-On mode / L-On
Operating type: Local On
Local-Schedule mode / L-SC
Operating type: Local schedule
Master mode / Mast
Operating type: Master
Network mode / Net
Operating type: Network
Remote mode / Rem
Operating type: Remote
AQUACIATPOWER EN-4

1.1 Safety guidelines
Installation, start-up and servicing of equipment can be
hazardous if certain factors particular to the installation are
not considered: operating pressures, electrical components,
voltages, and the installation site (elevated plinths and built-up
structures).
Only qualified installation engineers and fully trained technicians
are authorised to install and start up the equipment.
All instructions and recommendations provided in the service
guide, installation and operation manuals, as well as on tags
and labels fixed to the equipment, components and other
accompanying parts supplied separately must be read,
understood and followed.
Failure to comply with the instructions provided by the
manufacturer may result in injury or product damage.
IMPORTANT: Only qualified service engineers should be
allowed to install and service the equipment.
1.2 Safety precautions
Only personnel qualified in accordance with IEC (International
Electrotechnical Commission) recommendations may be
permitted access to electrical components.
It is particularly recommended that all sources of electricity to
the unit should be shut off before any work is begun. Shut off
the main power supply at the main circuit breaker or isolator.
IMPORTANT: The equipment uses and emits
electromagnetic signals. Tests have shown that the
equipment conforms to all applicable codes with respect
to electromagnetic compatibility.
CAUTION
RISK OF ELECTROCUTION! Even when the main circuit
breaker or isolator is switched off, specific circuits may
still be energised as they may be connected to a separate
power source.
CAUTION
RISK OF BURNS! Electrical currents may cause
components to get hot. Handle the power cable, electrical
cables and conduits, terminal box covers and motor
frames with great care.
1 - SAFETY CONSIDERATIONS
EN-5 AQUACIATPOWER

2.1 Control system
AQUACIATPOWER chillers and heat pumps are equipped with
the CONNECT TOUCH control that serves as a user interface
and a configuration tool for controlling the chiller / heat pump
operation.
AQUACIATPOWER LD-ST chillers and AQUACIATPOWER ILD-ST
heat pumps are typically equipped with fixed speed fans, whereas
AQUACIATPOWER LD-HE chillers and AQUACIATPOWER ILD-HE
heat pumps use variable speed fans which reduce the unit energy
use during occupied and unoccupied periods, provide condensing
and evaporating pressure control and smooth fan start. The system
may also control fixed speed pumps or variable speed pumps with
a hydronic module.
IMPORTANT: The document may refer to optional
components and certain functions, options, or accessories
may not be available for the specific unit. Heating option
applies only to heat pumps and cooling-only units
equipped with a boiler.
2.2 System functionalities
The system controls the start-up of the compressors needed to
maintain the desired heat exchanger entering and leaving water
temperature. It constantly manages the operation of the fans in
order to maintain the correct refrigerant pressure in each circuit
and monitors safety devices that protect the unit against failure
and guarantee its optimal functioning.
2.3 Operating modes
The control may operate in three independent modes:
●Local mode: The unit is controlled by commands from the
user interface.
●Remote mode: The unit is controlled by dry contacts.
●Network mode: The unit is controlled by networks (Proprietary
Protocol). Data communication cable is used to connect the
unit to the proprietary protocol communication bus.
When the control operates autonomously (Local or Remote),
it retains all of its control capabilities but does not offer any
features of the Network.
CAUTION
Emergency stop! The Network emergency stop command
stops the unit regardless of its active operating type.
2.4 CONNECT TOUCH control system
●Allows users to control the unit via the CONNECT TOUCH
user interface.
●Provides web connectivity technology.
●Includes the trending functionality.
●Supports Enhanced Control Management (Connected
Services, Cristo Control, Power Control, Easy/Smart Control)
for multiple chillers/heat pump configuration.
●Provides direct BMS integration capabilities (Modbus RTU,
Modbus TCP/IP, BACnet/IP option or Lon option).
2 - CONTROL OVERVIEW
AQUACIATPOWER EN-6

3.1 CONNECT TOUCH overview
The CONNECT TOUCH system manages a number of mechanisms allowing the unit to operate effectively, including variable
speed fans’ control, fixed or variable speed pumps’ control, etc.
The CONNECT TOUCH control system is used to control the following types of AQUACIATPOWER range units:
AQUACIATPOWER LD ST Standard cooling-only air-cooled chillers
AQUACIATPOWER LD HE High efficiency cooling-only air-cooled chillers
AQUACIATPOWER ILD ST Standard air-to-water reversible heat pumps
AQUACIATPOWER ILD HE High efficiency air-to-water reversible heat pumps
3.2 Features overview
Feature Cooling-only Chillers Reversible Heat Pumps
LD -ST series LD -HE series ILD -ST series ILD -HE series
BMS connection ● ● ● ●
4.3" touch screen ● ● ● ●
Web connectivity ● ● ● ●
E-mail transmission ● ● ● ●
Occupied / Unoccupied mode management ● ● ● ●
Trending ● ● ● ●
Master/Slave control ● ● ● ●
Diagnostics ● ● ● ●
Cooling control ● ● ● ●
Free cooling (dry cooler mgmt.) ○ ○ ○ ○
Heating control - - ● ●
Boiler heating control ○ ○ ○ ○
Electric heating control - - ○ ○
Partial heat recovery ○ ○ ○ ○
Defrost mechanism - - ● ●
Free defrost control - - ● ●
Brine fluid ○ ○ ○ ○
Refrigerant leak detection ○ ○ ○ ○
Fixed speed fans ●-●-
Variable speed fans -●-●
XtraFan - ○-○
Anti-freeze protection ○ ○ ○ ○
Fixed speed pump(s) ○ ○ ○ ○
Variable speed pump(s) ○ ○ ○ ○
Communication
Proprietary protocol ● ● ● ●
Modbus RTU or TCP/IP ● ● ● ●
BACnet IP ○ ○ ○ ○
LonTalk ○ ○ ○ ○
●Supplied as standard
○Option
-Not available
3 - CONTROL COMPONENTS
EN-7 AQUACIATPOWER

4.1 Control boards
The electrical box includes all boards controlling the unit as well
as the CONNECT TOUCH user interface.
Each circuit is by default fitted with one SIOB board used to
manage all major inputs and outputs of the controller.
Options such as energy management module or free cooling
(dry cooler management) require the installation of additional
boards, i.e. EMM SIOB board for energy management module
and FC dry cooler board for free cooling. Additionally, units with
seven or eight fixed speed fans are fitted with an additional
auxiliary 2 board “AUX2 board”.
All boards communicate via an internal bus.
4.2 Power supply to boards
All boards are supplied from a common 24 VAC supply referred
to earth.
CAUTION
Maintain correct polarity (and grounded 0V) when
connecting the power supply to the boards, otherwise
the boards may be damaged.
In the event of a power supply interrupt, the unit restarts
automatically without the need for an external command. However,
any faults active when the supply is interrupted are saved and may
in certain cases prevent a given circuit or the unit from restarting.
The main board continuously monitors the information received
from various pressure and temperature probes and accordingly
starts the program that controls the unit.
The number of boards available in the electrical box depends on
the number of selected options.
4.3 Light Emitting Diodes on boards
All boards continuously check and indicate the proper operation
of their electronic circuits. A light emitting diode (LED) lights on
each board when it is operating properly.
●The red LED flashing for a two-second period indicates
correct operation. A different rate indicates a board or a
software failure.
●The green LED flashes continuously on all boards to show
that the board is communicating correctly over its internal
bus. If the green LED is not flashing, this indicates the
internal bus wiring problem or a configuration issue.
4.4 Pressure transducers
Three types of transducers (high pressure, low pressure, water
pressure) are used to measure various pressures in each circuit.
These transducers deliver 0 to 5 VDC. They are connected to
SIOB boards (circuit A and circuit B).
Discharge pressure transducers (high pressure type)
These transducers measure the discharge pressure in each
circuit. They are used to control condensing pressure or high
pressure load shedding. Discharge pressure sensors are
mounted on the discharge line piping of each circuit.
Suction pressure transducers (low pressure type)
These transducers measure the suc
t
ion pressure in each circuit.
They are used to control EXV, evaporating pressure (in heating
mode) and monitor suction pressure safeties related to the
compressor operating envelope. Suction pressure sensors are
located on the common suction piping of each circuit.
Pump inlet/outlet water pressure transducers (water
pressure type, hydronic kit option)
These transducers measure the hydronic kit pump inlet/outlet
water pressure and monitor the water flow. Pump inlet/outlet
water pressure sensors are mounted on the optional hydronic kit.
4.5 Temperature sensors
Temperature sensors constantly measure the temperature of
various components of the unit, ensuring the correct operation
of the system.
Water heat exchanger entering and leaving water
temperature sensors
The water heat exchanger entering and leaving water temperature
sensors are used for capacity control and safety purposes.
Outdoor air temperature sensor
This sensor measuring the outdoor air temperature is used for
start-up, setpoint temperature reset and frost control.
Suction gas temperature sensors
These sensors measure the suction gas temperature. They are
used for the EXV control. Suction gas temperature sensors are
located at the suction side of each circuit.
Master/slave water sensor (optional)
This sensor measures the common water temperature in the
master/slave system capacity control. It is installed only in the
case of master/slave units.
Defrost temperature sensors (heat pumps)
These sensors are used to determine the end of the defrost
cycle for a given circuit.
Temperature setpoint reset sensor (Energy Management
Module)
This sensor measures the space (room) temperature for the
purpose of setpoint reset.
4.6 Actuators
Electronic expansion valve
The electronic expansion valve (EXV) is used to adjust the
refrigerant flow to changes in the operating conditions of the
machine. The high degree of accuracy with which the piston is
positioned provides precise control of the refrigerant flow and
suction superheat.
Water flow switch
For units without internal pumps, a flow switch is mounted
to ensure that the minimum flow rate required for the correct
operation and protection of the system is maintained.
The minimum flow rate threshold depends on the unit size and
is configured automatically at the start-up. If the flow switch
fails, the alarm condition shuts off the unit.
Water heat exchanger pumps (optional)
The controller can regulate one or two fixed speed or variable
speed water heat exchanger pumps and takes care of the
automatic changeover between these pumps.
Four-way valve (heat pumps)
The control actuates the four-way valve for cooling / heating
mode and defrosts' sessions.
4 - HARDWARE
AQUACIATPOWER EN-8

4.7 Terminal block connections
Connections available at the user terminal block may vary
depending on the selected options. The following table
summarizes connections at the user terminal block.
IMPORTANT: Some contacts can be accessed only when
the unit operates in Remote mode.
Terminal block connections
Description Board Input/Output Connector Remarks
On/Off switch SIOB, circuit A DI-01 J1 Used for the unit On/Off control (Remote mode)
Heat/Cool switch SIOB, circuit A DI-04 J1 Used to switch between cooling and heating when the unit is in Remote
mode (Heat pumps only)
Second setpoint switch SIOB, circuit A DI-02 J1 Used to switch between setpoints
Demand limit switch 1 SIOB, circuit A DI-03 J1 Used to control demand limit
Alarm relay SIOB, circuit A DO-05 J23 Indicates alarms
Running relay SIOB, circuit A DO-06 J22 Used to signal a running status (at least one compressor started)
Desuperheater demand SIOB, circuit B DI-04 J1 Heat recovery is allowed
Lock switch SIOB, circuit B DI-02 J1 Used for the customer safety loops
Customer pump 1 SIOB, circuit B DO-05 J23 The control can regulate one or two evaporator pumps and automatically
change over between the two pumps
Customer pump 2 SIOB, circuit B DO-06 J22 The control can regulate one or two evaporator pumps and automatically
change over between the two pumps
Optional
Setpoint reset control SIOB, circuit A AI-10 J9 Allows the user to reset the currently selected setpoint
Occupancy override SIOB, EMM DI-01 J1 Used to switch between occupied (closed contact) and unoccupied mode
(open contact)
Demand limit switch 2 SIOB, EMM DI-02 J1 Used to control demand limit
Customer interlock SIOB, EMM DI-03 J1 Used for the customer safety loops
Ice done contact SIOB, EMM DI-04 J1 Used to control the setpoint for ice storage in unoccupied mode
Capacity limit control SIOB, EMM AI-10 J9 Used for capacity limitation
Chiller partially shutdown SIOB, EMM DO-05 J23 Indicates the shutdown of one of the circuits
Chiller totally shutdown SIOB, EMM DO-06 J22 Indicates the unit shutdown
Chiller capacity running output
(0 to 10 V) SIOB, EMM AO-01 J10 Reports the capacity percentage of the unit
Desuperheater customer pump SIOB, EMM
DO-01 J2 The control can regulate a customer pump for heat recovery.
The connection has to be done between the pin DO-01 of connector J2
and the pin IN-01 of connector J4
IN-01 J4
4 - HARDWARE
4.7.1 Volt-free contact (on/off and cooling/heating)
For chillers with a boiler or heat pumps, on/off contacts and
cooling/heating contacts are as follows:
Off Cooling Heating Auto
On/Off contact
open closed closed open
Cooling/heating contact
open open closed closed
Off: Unit is stopped
Cooling: Unit is allowed to start in Cooling
Heating:
Unit is allowed to start in Heating (chiller with boiler control or heat pump)
Auto: Unit can run in Cooling or Heating in accordance with the changeover
values. If the automatic changeover is enabled (Heat/Cool Select, GENUNIT –
General Parameters), the operating mode is selected based on OAT.
4.7.2 Volt-free setpoint selection contact
This dry contact is used to switch between setpoints. It is active
only when the control is in Remote mode.
Cooling Heating
Stp1 Stp2 Auto Stp1 Stp2 Auto
Setpoint selection contact
open closed - open closed -
4.7.3 Volt-free demand limit selection contact
Up to two dry contacts can be used to limit unit capacity.
Note that the second contact is available only for units with
the energy management module. Capacity limitation with two
contacts is as follows:
100% Limit 1 Limit 2 Limit 3
Demand limit 1 contact
open closed open closed
Demand limit 2 contact
open open closed closed
Please note that limit thresholds can be defined via the user
interface in the Setpoint menu (see section 7.1).
4.7.4 Ice storage (Energy Management Module)
For units with the optional Energy Management Module, the
control includes an additional setpoint (Ice setpoint) used for
ice storage control.
Cooling setpoint
CSP1 CSP2 ICE_STP
Occupancy schedule
occupied unoccupied unoccupied
Ice done switch
open/closed closed open
EN-9 AQUACIATPOWER

4.8 RS485 wiring (best practice)
For RS485 ports, one of the following cables can be used:
■two twisted pairs + a shield (RECOMMENDED)
■three wires + a shield
Note that “+” and “-” are communication signals and they are
from the same twisted pair.
The signal ground could be a single wire or a twisted pair and it
should be connected to the “C” pin of J10 (Modbus RTU) or J7
(Proprietary Protocol). This wire is required so that all nodes on
the bus share a common ground reference connection.
If a shield is used, then the shield cable should be properly
terminated and connected as short as possible at ONLY one
end to the chassis ground (4.3-inch controllers).
4.8.1 RS485 wiring: 4.3-inch controller
The following diagrams illustrate possible RS485 wiring
schemes for 4.3-inch controllers.
The first wiring scheme is the best option (RECOMMENDED),
but the second or the third wiring can also be used.
4 - HARDWARE
No.1 RS485 wiring diagram (RECOMMENDED)
No. 2 RS485 wiring diagram (CORRECT)
No. 3 RS485 wiring diagram (CORRECT)
No. 4 RS485 wiring diagram (INCORRECT - Do not use!)
No. 5 RS485 wiring diagram (INCORRECT - Do not use!)
4.8.2 RS485: Daisy chain configuration
The following illustration shows proper 3-wire cable with
a shield in a daisy chain configuration.
BC
D
Legend
B
Shield
C
Keep shield continued
D
Connect shield to earth ground only at one point
End of Line Resistor: Termination is only needed when running
at bus at very high speed over long distances.
The speed of the bus and the cable distance determine
whether termination is needed. It is meant to balance the bus
to minimize the ringing that may be caused by fast signals and
the inductance of the cabling.
At 9600 baud, termination will have little or no effect on the bus.
AQUACIATPOWER EN-10

5 - CONNECT TOUCH USER INTERFACE
①
⑯
⑮⑬
⑭
⑫
⑪
②③④⑥⑦ ⑧ ⑨
⑩
①Home button ⑩OAT (Outdoor Air Temperature)
②Back button ⑪Condenser fans
③Main menu button ⑫Unit capacity
④Heat exchanger ⑬EXV (Electronic Expansion Valve)
⑤Compressor ⑭Setpoint
⑥System menu ⑮Unit status
⑦Login button (restricted access to menus) ⑯LWT (Leaving Water Temperature)
⑧
⑨
Start/Stop button
Alarm button
⑰
⑱
EWT (Entering Water Temperature)
Water pump (optional)
Connections
Connections are located on the bottom of the controller.
■ The control oers communication protocols such as LEN, Proprietary Protocol, Modbus, or BACnet.
■It is possible to enable and disable end of line resistors via the System menu (see section 7.4).
■One Ethernet port allows for TCP/IP communication or BMS (Building Management System) connection.
Features of CONNECT TOUCH user interface
4.3" colour touch screen with quick display of alarms,
current unit operating status, etc.
Resistive touch screen technology
Trending capability
Web connectivity
Custom language support
CAUTION
If the touch screen is not used for a long period of time, the
screen goes blank. The control is always active and the
operating mode remains unchanged. Press anywhere on the
screen and the Home screen will be displayed.
⑤
⑰
⑱
EN-11 AQUACIATPOWER

5 - CONNECT TOUCH USER INTERFACE
5.1 Menu structure
No password required
User password required
(default password =11)
Legend:
Network Parameters menu
Email Conguration Modbus RTU Cong.
Modbus TCP/IP Cong. BACnet Cong.
Run Times Energy ManagementModes
DC Free Cooling Status Setpoint Conguration
Msc Status
Conguration Menu
Software Options
Trendings
General Parameters PressuresTemperatures
Inputs Pump Status
Outputs
Main menu
Home Main Menu System Menu Login Menu Unit Start / Stop
Unit Mode Alarm Menu
Alarm Menu
Energy Monitoring
Conguration menu
Control IdenticationNetwork MenuDate/Time Conguration
Add Options
Holiday Menu
Schedule Menu
Backup Conguration
Reset CongurationPump Conguration
General Conguration
AQUACIATPOWER EN-12

5 - CONNECT TOUCH USER INTERFACE
Alarm menu
Reset Alarms Current Alarms
Alarm History Major Alarm History
Software Info Hardware Info
CPU Load NetworkEOL Resistor
Date/Time Conguration Brightness
Language & Unit System
System Menu
Home Main Menu System Menu Login Menu Unit Start / Stop
Unit Mode Alarm Menu
Alarm Menu
EN-13 AQUACIATPOWER

HOME SCREEN
Home button Back button Main Menu button System Menu button
Home screen
displayed
Go back to the
previous screen
Main Menu
displayed
System Menu
displayed
Login button Start/Stop button Alarm button
Basic access Unit is stopped No alarm active on the unit
User access Unit is running
Blinking icon: Partial alarm (one
circuit affected by the existing
alarm) or Alert (no action taken
on the unit)
Steady icon: Alarm(s) active on
the unit
OTHER SCREENS
Login screen Parameters screen(s)
Login: Confirm advanced access login Save changes
Logout: Reset the user level access and go
to the splash screen Cancel your modifications
Force screen (override) Navigation buttons
Set force: Override the current command
(if possible)
Displayed when the menu includes more
than one page: Go to the previous page
Remove force: Remove the forced command Displayed when the menu includes more
than one page: Go to the next page
5.2 Header buttons
5 - CONNECT TOUCH USER INTERFACE
AQUACIATPOWER EN-14

5.3 Explore the synoptic screen
The Synoptic screen allows you to monitor the vapour-refrigeration
cycle. The diagram indicates the current status of the unit, giving
information on the unit capacity, the status of water heat exchanger
pumps, and the pre-defined setpoint parameter.
All unit functions can be accessed by pressing the Main menu button.
IMPORTANT: The Synoptic screen display may vary
depending on pumps configuration.
The bell located in the upper-right part of the
screen lights when any fault is detected.
5.4 Start/Stop the unit
With the unit in the Local off mode:
To display the list of operating modes and select the required
mode, press the Start/Stop button in the upper-right
corner of the Synoptic screen.
Local On
Local On: The unit is in the local control mode and allowed
to start.
Local Schedule
Local Schedule: The unit is in the local control mode and
allowed to start if the period is occupied.
Network
Network: The unit is controlled by network commands and
allowed to start if the period is occupied.
Remote
Remote: The unit is controlled by external commands and
allowed to start if the period is occupied.
Master
Master: The unit operates as the master in the master/slave
assembly and allowed to start if the period is occupied.
(Master button is displayed if Master/Slave Enable).
IMPORTANT:
When entering the menu, please note that the currently
selected item corresponds to the last running operating mode.
This screen is displayed only when the unit is currently
stopped. If the unit was in the running state, then the
Confirm stop message would be displayed.
To start the unit
1. Press the Start/Stop button.
2. Select the required Machine Mode.
3. The Home screen will be displayed.
To stop the unit
1. Press the Start/Stop button.
2. Confirm the unit shutdown by pressing Confirm Stop or
cancel the unit shutdown by pressing the Back button.
Home Main Menu
Current control parameters
Start/Stop
Login Alarms
5 - CONNECT TOUCH USER INTERFACE
System Menu
Go Back
EN-15 AQUACIATPOWER

5.5 Set the schedule
The control incorporates two time schedules, where the first one
(OCCPC01S) is used for controlling the unit start/stop, whereas
the second one (OCCPC02S) is used for controlling the dual
setpoint (Setpoint 1 used in Occupied mode / Setpoint 2 used
in Unoccupied mode).
The control offers the user the possibility of setting eight
occupancy periods where each occupancy period includes the
following elements to be defined:
Day of the week: Select the days when the period is
occupied.
Occupancy time ("occupied from" to "occupied to"): Set
occupancy hours for the selected days.
Timed Override Extension: Extend the schedule if necessary.
This parameter can be used in the case of some unplanned
events. Example: If the unit is normally scheduled to run
between 8:00 to 18:00, but one day you want the air-
conditioning system to operate longer, then set this timed
override extension. If you set the parameter to "2", then the
occupancy will end at 20:00.
NOTE: Time override extension is available only with the
optional Energy Management Module.
To set the unit start/stop schedule
1. Go to the Main menu.
2. Navigate to the Configuration menu (logged-in users only)
and select Schedule Menu (SCHEDULE).
3. Go to OCCPC01S.
4. Select appropriate check boxes to set the unit occupancy
on specific days.
5. Define the time of occupancy.
6. When the time schedule is set, the selected period will be
presented in the form of the green band on the timeline.
7. Press the Save button to save your changes or the Cancel
button to exit the screen without making modifications.
①Selection of days for the time schedule
②Start/end of the schedule
③Save
④Cancel
⑤Previous time period
⑥Next time period
IMPORTANT: Only logged-in users are allowed to access
the Configuration menu.
Each program is in unoccupied mode unless a schedule time
period is active.
If two periods overlap and are both active on the same day, the
occupied mode takes priority over the unoccupied period.
Example: Schedule setting
Hour MON TUE WED THU FRI SAT SUN HOL
0:00 P1
1:00 P1
2:00 P1
3:00
4:00
5:00
6:00
7:00 P2 P2 P3 P4 P4 P5
8:00 P2 P2 P3 P4 P4 P5
9:00 P2 P2 P3 P4 P4 P5
10:00 P2 P2 P3 P4 P4 P5
11:00 P2 P2 P3 P4 P4 P5
12:00 P2 P2 P3 P4 P4
13:00 P2 P2 P3 P4 P4
14:00 P2 P2 P3 P4 P4
15:00 P2 P2 P3 P4 P4
16:00 P2 P2 P3 P4 P4
17:00 P2 P2 P3
18:00 P3
19:00 P3
20:00 P3 P6
21:00
22:00
23:00
MON: Monday
TUE: Tuesday
WED: Wednesday
THU: Thursday
FRI: Friday
SAT: Saturday
SUN: Sunday
HOL: Holiday
Period / Schedule Starts at Stops at Active on (days)
P1: Period 1 0:00 3:00 Monday
P2: Period 2 7:00 18:00 Monday + Tuesday
P3: Period 3 7:00 21:00 Wednesday
P4: Period 4 7:00 17:00 Thursday + Friday
P5: Period 5 7:00 12:00 Saturday
P6: Period 6 20:00 21:00 Holidays
P7: Period 7 Not used in this example
P8: Period 8 Not used in this example
③ ④ ⑤
①
②
⑥
5 - CONNECT TOUCH USER INTERFACE
Occupied
Unoccupied
AQUACIATPOWER EN-16

5.6 Manage display settings
The Language & Unit System screen allows the user to do any
of the following:
- Select the language of the controller.
- Change the system of measurement (imperial or metric).
To access the User Login screen, press the Login button
in the upper-right corner of the Synoptic screen.
①Cursor indicating the selected language
②System of measurement: Metric/Imperial
NOTE: You may also leave the screen by pressing the Back
button. Your changes will be saved.
The CONNECT TOUCH control system allows users to add
new languages to the control. To learn more about language
customization, please contact your local Manufacturer
representative.
5.6.1 User login
Only logged-in users can access configurable unit parameters.
By default, user password is "11".
To log in as user
1. Press the Login button to open User Login Screen.
2. Press the Password box.
3. A dialog box appears ("keyboard view"). Provide the
password (11) and press OK.
4. The User Login screen appears.
5. Press the Logged-in button to save your changes or
the Logged-off button to exit the screen without making
modifications.
NOTE: You may also leave the screen by pressing the Back
button.
Security access settings
User-level security ensures that only authorised users
are allowed to modify critical unit parameters.
Only logged-in users are allowed to access the
Configuration menu.
It is strongly recommended to change the default
password of the user interface to exclude the possibility
of changing any parameters by an unqualified person.
Only people qualified to manage the unit should be
familiarized with the password.
5.6.2 User password
User password can be modied in the User Login menu.
To change your password
1. Press the Login button, and then select User Login.
2. Press the Change User Password button.
3. The Change User Password screen will be displayed.
4. Please provide the current password, and then type the new
password twice.
5. Press the Save button to conrm password update or the
Cancel button to exit the screen without making modications.
5.6.3 Service & Factory Login
Service and factory login menus are dedicated to service
technicians and factory line. To learn more about advanced
access control, please refer to the Control Service Guide
(service technicians only).
②
①
5 - CONNECT TOUCH USER INTERFACE
EN-17 AQUACIATPOWER

5.7 Monitor unit parameters
The Main menu screen provides access to the main control
parameters, including general parameters, inputs and outputs
status, etc.
To access the menu, press the Main menu button
located in the upper-left part of the Synoptic screen.
Specific unit parameters can be accessed by pressing the
icon corresponding to the desired category.
To go back to the Synoptic screen, press the Home button.
General unit parameters
The General parameters screen provides access to a set of
general unit parameters.
To access the General parameters screen, go to the Main
menu and select General Parameters (GENUNIT).
Press the Up/Down buttons to navigate between the
screens.
①Forceable point: In this example, it is used to change the unit mode
– Cooling / Heating / Automatic changeover.
5 - CONNECT TOUCH USER INTERFACE
①
AQUACIATPOWER EN-18

5.8 Modify unit parameters
The Configuration menu gives access to a number of user-
modifiable parameters such as pump configuration, schedule
menu, etc. The Configuration menu is password-protected.
To access the Configuration menu, press the Main menu
button located in the upper-left part of the Synoptic
screen, and then find and press Configuration Menu.
Press the field corresponding to the parameter to be
modified and introduce all the necessary changes.
Press the Up/Down buttons to navigate between the
screens.
Once all the necessary modifications have been made,
press the Save button to save your changes or the Cancel
button to exit the screen without making modifications.
5.9 Override system configuration
In some cases it is possible to override system configuration.
The override screen provides the option to issue the command
overriding the current operation of the unit.
To access the override screen, press the forceable point of the
data screen. Note that not all parameters can be overridden by
the control.
①Forced value
②Set force
③Auto
①
② ③
5 - CONNECT TOUCH USER INTERFACE
EN-19 AQUACIATPOWER

5.10 Analyse history trends
The Trendings screen allows you to monitor a set of selected
parameters.
To access the Trendings screen, go to the Main menu and
select Trendings (TRENDING).
Select the parameters to be displayed and press the Save
button in the lower-left part of the screen.
IMPORTANT: Please make sure that dates are not out of
range (not existing dates); otherwise, an error message
may be displayed.
Press or to navigate across the timeline or press
or to go to the beginning or the end of the selected
period.
Press the Zoom in button to magnify the view or the
Zoom out button to expand the viewed area.
Press the Refresh button to reload data.
5 - CONNECT TOUCH USER INTERFACE
AQUACIATPOWER EN-20
This manual suits for next models
3
Table of contents
Other CIAT Control System manuals
Popular Control System manuals by other brands

Sienci Labs
Sienci Labs LongMill V1 Assembly manual

Gilderfluke & Co
Gilderfluke & Co Sd-50/0 manual

StarLogixs
StarLogixs CybaMICRO 2011 quick start guide

ComfortPro Systems
ComfortPro Systems AquaHeat ProZone installation guide

Sawo
Sawo ASV 3 Assembling instructions

Klimor
Klimor EVO -T Operation and maintenance manual