CID Bio-Science CI-202 User manual

DECLARATION OF CONFORMITY
Manufacturer:
CID Bio Science, Inc.
1554 NE 3rd Ave
Camas, WA 98607
Declares that the CE-marked Product:
Product Model(s):
Model CI-202
FCC Compliance Statement:
This device complies with part 15 of the FCC Rules. Operation is subject to the following two
conditions: (1) This device may not cause harmful interference, and (2) this device must accept
any interference received, including interference that may cause undesired operation.
Complies With:
89/336/EEC Electromagnetic Compatibility Directive
73/23/EEC Low Voltage Directive
Compliance Standards:
EN 55027 RF Emissions Information
Technology Equipment
EN 50082-1 EMC Immunity Standard
EN 60950 Safety of Information
Technology Equipment
Including Electrical
Business Equipment
December 18, 2013
Leonard Felix
President

CI-202 Instruction Manual rev. 12/14/2012
DOCUMENT OVERVIEW
INTRODUCTION........................................................................................................................................ 3
CI-202 Specifications ............................................................................................................................ 4
Features.................................................................................................................................................. 4
Operating Instructions ............................................................................................................................... 6
Measure................................................................................................................................................... 6
View Data................................................................................................................................................ 7
Manipulate Files..................................................................................................................................... 8
Transfer Data from a File ................................................................................................................. 9
Clear a File......................................................................................................................................... 9
Delete a File..................................................................................................................................... 10
Create a File..................................................................................................................................... 10
Close a File....................................................................................................................................... 11
Set-Up Instrument................................................................................................................................ 11
Set-Up Measure Parameter........................................................................................................... 12
Set-Up Scanner Thresholds........................................................................................................... 12
Manual Threshold Adjustment....................................................................................................... 12
Set-Up Storage (check space or erase)....................................................................................... 13
Set-Up Auto Store Parameter........................................................................................................ 14
Calibrating the CI-202.............................................................................................................................. 15
CI-202 Threshold Set-up Procedure................................................................................................. 15
CI-202 Care............................................................................................................................................... 19
Charging the Battery............................................................................................................................ 19
Cleaning ................................................................................................................................................ 19
THEORY OF OPERATION..................................................................................................................... 20
Overview of the Parts of the Instrument........................................................................................... 20
The Width Scanner.............................................................................................................................. 20
Computing the Parameters ................................................................................................................ 20

CI-202 Instruction Manual rev. 12/14/2012
Computing Aspect Ratio and Shape Factor Information............................................................... 21
TROUBLESHOOTING............................................................................................................................ 22
Updating the Firmware........................................................................................................................ 22
Troubleshooting the LIBUSB.dll Error............................................................................................... 23
Technical Support.................................................................................................................................... 25
Customer Service ................................................................................................................................ 25
Frequently Asked Questions.............................................................................................................. 26
CID Hardware Warranty.......................................................................................................................... 29
CI-202 PRODUCTION TEST CHECK SHEET.................................................................................... 31
NOTE: This equipment has been tested and found to comply with the limits for a Class A digital device, pursuant to Part 15 of the
FCC Rules. These limits are designed to provide reasonable protection against harmful interference when the equipment is
operated in a commercial environment. This equipment generates, uses, and can radiate radio frequency energy and, if not installed
and used in accordance with the instruction manual, may cause harmful interference to radio communications. Operation of this
equipment in a residential area is likely to cause harmful interference in which case the user will be required to correct the
interference at their own expense.
Warning: This equipment has been tested and found to comply with the limits of CISPR 22 and EN 61326-1:2006 Class A. These
limits are designed to provide reasonable protection against harmful interference when the equipment is operated in a commercial
environment. This equipment generates, uses, and can radiate radio frequency energy and, if not installed and used in accordance
with the instruction manual, may cause harmful interference to radio communications.
Warning: This is a Class A product. In a domestic environment, this product may cause interference in which case the user may be
required to take adequate measures.

CI-202 Instruction Manual rev. 6/21/2017
1554 NE 3rd Ave, Camas, WA 98607, USA
Phone (360) 833-8835 Fax (360) 833-1914 sales@cid-inc.com http://www.cid-inc.com
3
INTRODUCTION
Congratulations on the purchase of your new CI-202 Portable Leaf Area Meter. Making leaf
measurements in the field or laboratory is now very easy with the CI-202 Portable Leaf Area
Meter. This state-of-the-art instrument has been designed to be the most portable leaf area
measurement system available. Although you are anxious to use your new meter, please take
the time to read this manual first.
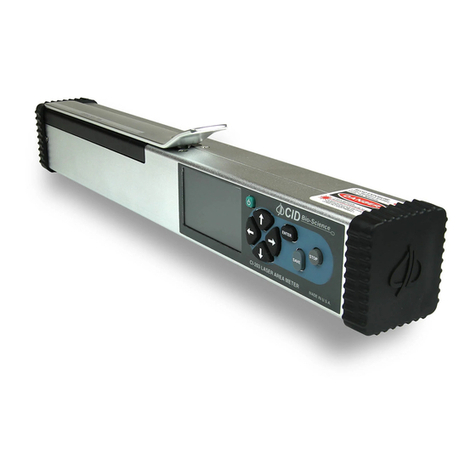
Figure 1. CI-202 Portable Leaf Area Meter

CI-202 Instruction Manual rev. 6/21/2017
1554 NE 3rd Ave, Camas, WA 98607, USA
Phone (360) 833-8835 Fax (360) 833-1914 sales@cid-inc.com http://www.cid-inc.com
4
CI-202 Specifications
Scanner:
670 nm Laser Diode
Laser specifications:
Class 3R
Power output of 4.25 mW
Max. Measuring Length:
36cm
Max. Measuring Width:
150mm
Max. Measuring Thickness:
15mm
Max. Scanning Speed:
127 mm/second
Area Units:
cm2
Accuracy:
±1% for samples > 10cm²
Resolution:
0.01cm2
Data Storage:
8,000 Measurements
Computer Interface:
USB 2.0
Display:
16 characters × 2 line LCD
Battery:
7.2V rechargeable NiMH
Battery Life:
15hrs
Operating Temperature:
0-50ºC
Weight:
1.50 Kg
Features
Quick, non-destructive measurements
Precise and accurate
Measures area, length, width, and perimeter
Will store up to 8,000+ data points
Download data and recharge via USB on your laptop in the car or the field
Durable and lightweight

CI-202 Instruction Manual rev. 6/21/2017
1554 NE 3rd Ave, Camas, WA 98607, USA
Phone (360) 833-8835 Fax (360) 833-1914 sales@cid-inc.com http://www.cid-inc.com
5
Ideal for field use
Calculates shape factor and aspect ratio
Single self-contained instrument with built-in LCD display
Samples may be scanned on the scan board.
No calibration required

CI-202 Instruction Manual rev. 6/21/2017
1554 NE 3rd Ave, Camas, WA 98607, USA
Phone (360) 833-8835 Fax (360) 833-1914 sales@cid-inc.com http://www.cid-inc.com
6
Operating Instructions
The CI-202 is a self-contained, hand-held instrument with a built-in display and batteries. It
contains an optical scanner to measure width.
Taking a measurement can be as simple as turning the instrument on, inserting a leaf on the
scan board, and scanning. The instrument does the rest.
To turn the instrument on or off, press the ON/OFF button. When the instrument comes on, a
copyright notice will appear for 1/2 second. Following this, several words will appear on the
display with the word “Measure” appearing in the upper left-hand corner of the display. You are
now in the CI-202 menu system.
Note: When there are no files to store data to, the measure menu items will not be available. To
correct this situation, create a file.
The following sections describe the menus and what they do. The CI-202 menu system allows
you to quickly and easily operate the instrument without constantly referring to this manual.
Whenever possible, the screen associated with a menu item will give you information about
choices that you can make. Usually, the top line of the screen will contain information about
where you are, and the bottom line will contain information about buttons to press to change the
current status.
Measure
In the measure mode, the top line of the screen will show the word “Measure” on the left, and
the name of a file on the right. The bottom line of the screen will have the word “start” in
brackets on the left, and the four direction arrows on the right.
Measure file00
<start>
The options are:
to select another mode with the up or down arrow keys
to select another file (if there is more than one file) with the right or left arrow keys
to take measurements
To start measuring, hit the enter key or the start key. This begins the measurement process.
The motor will start spinning up to speed as soon as the button is pressed, and the display will
read “Stabilizing”, then “Spinning Up”, then “Measuring”. At this point, move the scan head down
the scan board. When the scan head has been drawn out completely, the instrument will stop
automatically and display results of the measurement. At this point, preview the results, and

CI-202 Instruction Manual rev. 6/21/2017
1554 NE 3rd Ave, Camas, WA 98607, USA
Phone (360) 833-8835 Fax (360) 833-1914 sales@cid-inc.com http://www.cid-inc.com
7
decide whether it should be saved and to which file it should be saved to. The enter key will
cause the scanner to start and then the instrument will start measuring; if motion is not detected
within a few seconds, the scanner will shut down. The start key does the same thing, but if it is
held down, the scanner keeps spinning until you are ready to measure.
The display will show the name of the current file in the upper left-hand corner of the screen,
parameter name in the lower left-hand corner and parameter value in the lower right-hand
corner of the screen.
Note: Because of the amount of information displayed on this screen, the CI-202 cannot display
any prompts in this mode.
file00
area = 44.04 cm2
To bring another parameter into view, press the RIGHT or LEFT arrow key. Repeatedly
pressing the right arrow key will step you through area, length, width, perimeter, aspect ratio
and shape factor, in that order. Only parameters that can be saved to the current file will be
displayed. If changes are required before data is saved, use the up and down arrow keys to
step through the files. To discard the measurement, press the STOP button. Another
measurement may be taken at this time, if required. Depending on the set-up of the automatic
save function of the instrument (see Set-up Auto Store parameter section in the main section of
this manual) the measurement will or will not be saved.
To save the measurement, press the SAVE button. If the instrument is able to save this
measurement, the word “saved” will flash on the bottom line of display to confirm the data
saved. If there is insufficient storage space to save the measurement, the instrument will flash
the message “no room!” on the bottom line of the display.
View Data
In the view mode, the top line of the display will show the word “View” on the left and the name
of a file on the right. The bottom line will show the word “enter” on the left and the four direction
arrows on the right.
View file00
<enter>
The options are:
to select another mode with the up or down arrow keys

CI-202 Instruction Manual rev. 6/21/2017
1554 NE 3rd Ave, Camas, WA 98607, USA
Phone (360) 833-8835 Fax (360) 833-1914 sales@cid-inc.com http://www.cid-inc.com
8
to select a file (if there is more than one file) with the right or left arrow keys
to view battery life
to view voltages
start the viewing process by pressing the START/ENTER button
Note: Because of the amount of information displayed on this screen the CI-202 cannot display
any prompts in this mode.
file00 total
area = 345.0 mm2
One of three things will be displayed: the most current measurement sequence number, the
average of all measurements, or the total of all measurements. The bottom line will display the
parameter name on the left side and the parameter value on the right side.
To bring another parameter into view, press the RIGHT or LEFT arrow key. Repeatedly
pressing the right arrow will display area, length, width, perimeter, aspect ratio and shape factor
in that order. To bring another measurement into view, press the UP or DOWN arrow
key. Pressing the Up-arrow key will display the total values for all measurements in the file in
the following order: The first value shown is the average value for all of the measurements in
the file, the most recent measurement in the file and on through the first measurement taken.
Next, return to the total again. Think of this view mode as a computer spreadsheet that only
allows the user to view one cell at a time.
To return to the main view mode, press the STOP/RESET key.
To view battery life, arrow right or left until “View Battery” is displayed. Hit enter and it will
display battery life left.
Manipulate Files
The CI-202 gives an expanded ability to organize data collection by using a file structure similar
to that used by personal computers. The CI-202 has up to 256 files available. Select a unique
name for each file to control the data stored in each file to optimize the amount of data stored
for research that is carried out.
The file mode capabilities are: Clear, Delete, Create, and Close files. While in the file mode, the
top line of the screen will read “files” on the left and one of the words “Clear”, “Delete”, “Create”,
or “Close” on the right. The bottom line of the display will read “enter” on the left and the four
direction arrows on the right.
The options are:

CI-202 Instruction Manual rev. 6/21/2017
1554 NE 3rd Ave, Camas, WA 98607, USA
Phone (360) 833-8835 Fax (360) 833-1914 sales@cid-inc.com http://www.cid-inc.com
9
to select another mode, use the up or down arrow keys
to select a particular action to carrying out on files, use the right or left arrow keys
to start the selected action, use the START/ENTER key
Transfer Data from a File
Data can be downloaded from the CI-202 to a PC at any time the instrument is idle. Plug in the
USB cable to both the instrument and the PC and run the CI202dfV1006.exe program on the
PC (downloadable on the CID Bio-Science website). Power on the CI-202. Pressing the folder
icon will open an additional window with all of files saved on the CI-202. From here you can
download files, save files to the PC, and print files.
Under the file menu option on the CI-202, the four possible actions available are as follows:
Clear a File
When the START/ENTER key is pressed, “clear filename” is displayed on the top line, indicating
the unit is ready to clear the file with the name filename. Selecting enter will clear the data from
the selected file but keep the filename active for future data collection.
clear file00
<enter><stop>

CI-202 Instruction Manual rev. 6/21/2017
1554 NE 3rd Ave, Camas, WA 98607, USA
Phone (360) 833-8835 Fax (360) 833-1914 sales@cid-inc.com http://www.cid-inc.com
10
Delete a File
Pressing START/ENTER when “Delete files” is displayed on the top line indicates the unit is in
the delete file mode. This mode will erase a file completely from memory. In this mode, the top
line of the display reads “Delete” on the top left line and the name of a file on the right. The
bottom line of the display reads “enter” on the left and the up and down direction arrows on the
right.
Delete file00
<enter>
To delete a file, use the UP or DOWN arrow keys to select a file. Once a file is selected to be
deleted, press the START/ENTER key. The instrument will confirm the deletion with the line
“<erase> <stop>”. To delete the file, press the SAVE key. To escape without deleting the file,
press the STOP key.
Create a File
When the START/ENTER key is pressed, “Name: Files” is displayed on the top line, indicating
the unit is in create files mode. The top line of the screen will read “Name” on the left, and a file
name (e.g. “file00”) on the right. The bottom line will read “enter” at the left, “erase” at the
center, and the four direction arrows at the right.
Note: The Stop key can be pressed at any time to abort the file creation process and to return
to this point.
Name: file00
enter erase
Pressing the arrow keys will allow an alpha or numeric selection for a six-character file name.
The right and left arrow keys select which character in the file name to edit and the up and down
arrow keys are to choose a character. The chart below lists the available characters.
! " # $ % & ' ( ) * + , - x / 0 1 2 3 4 5 6 7 8 9 : ; < = > ?
@ A B C D E F G H I J K L M N O P Q R S T U V W X Y Z [ ¥ ] ^ _
Pressing the SAVE/ERASE key in the "Create files" mode deletes the character under the
cursor. Also, characters cannot be inserted. After naming the created file, press the
START/ENTER key twice to continue the file creation process by entering Parameter Set-

CI-202 Instruction Manual rev. 6/21/2017
1554 NE 3rd Ave, Camas, WA 98607, USA
Phone (360) 833-8835 Fax (360) 833-1914 sales@cid-inc.com http://www.cid-inc.com
11
Up. Should the file name be identical to another file name, the instrument will display the
message “duplicate name” on the top line of the display and “enter” on the bottom. All the data
is stored no matter what the YES/NO flag is set to for area, length width, perimeter, ratio, and
factor. If the Root Length flag is set to YES, then only length is stored, but the record length and
number of measurements possible is unchanged.
When entering file Parameter set-up, the top line of the display reads the name of a parameter
at the left and the word “yes” or “no” at the right. This indicates whether the particular
parameter will be flagged for display. The bottom line of the display will read “enter” at the left
and the four direction arrows at the right.
Note: “Root Length” Parameter must be set to “No” when “Setup Measure” mode is set
to measure “Leaf.”
area yes
<enter>
To set a flag for a parameter, select the parameter and press the DOWN key. The word on the
top right of the display will change from “yes” to “no” and that parameter will be flagged to not
display. To set the flag to display a parameter, select the parameter and press the Up-arrow
key; the word at the top right of the display will change from “no” to “yes”.
Once finished setting up the parameters for the file, press the ENTER key. The file confirmation
screen will appear. Press ENTER, again, for confirmation to create the file, or press STOP to
abort the process.
file00 created
<enter> <stop>
Close a File
Closing a file will move all temporary records to the file system. This will keep the records from
being lost should the battery be unplugged while the instrument is on. It may also assist in
downloading the temporary records to a PC.
Set-Up Instrument
The CI-202 has a number of utility functions that allow the user to manage the instrument’s
capability. These functions are accessed using the setup mode. When the instrument is in the
setup mode, the top line of the display reads “Setup” on the left and one of the words

CI-202 Instruction Manual rev. 6/21/2017
1554 NE 3rd Ave, Camas, WA 98607, USA
Phone (360) 833-8835 Fax (360) 833-1914 sales@cid-inc.com http://www.cid-inc.com
12
“Measure”, “scanner”, “auto save”, or “storage” on the right. The bottom line of the display reads
“enter” on the left and the direction arrows on the right.
Setup Measure
<enter>
The options are:
To select another mode using the up or down arrow keys
To select an area to set-up using the right or left arrow keys
To begin the set-up process by pressing the START/ENTER key
Set-Up Measure Parameter
Pressing the START/ENTER key when the “Setup Measure” is displayed on the top line allows
the unit to select between Leaf Area or Root length modes.
Measure = Leaf
<stop><save>
Use the up or down arrow keys to modify the value. Once satisfied with the set-up parameters,
press the SAVE key. To avoid saving the parameters, press the STOP key to abort the process.
Set-Up Scanner Thresholds
Note: Normally, there is no need to adjust the threshold of the CI-202 because the instruments
are factory-adjusted to a threshold level that is ideal for “all-around” use.
Manual Threshold Adjustment
First, adjust the threshold with the CI-202 over the reflective tape of the scan board. Select
“Setup Scanner” in the display window and press START. Select “HiThrld” and press START
again. Write down the threshold value displayed. Place a piece of white paper so it covers about
half of the laser scan area starting at the right-hand side (away from the rail). Select “LoThrld”
and press START. Again, write down the threshold value displayed.
First, calibrate the instrument alone with the instrument over the reflective tape of the scan
board. Select “Setup-Scanner” from the menu, then select “Manual” and press ENTER. The
motor should spin, and the laser should come on. The display should show something like this:

CI-202 Instruction Manual rev. 6/21/2017
1554 NE 3rd Ave, Camas, WA 98607, USA
Phone (360) 833-8835 Fax (360) 833-1914 sales@cid-inc.com http://www.cid-inc.com
13
T = 47 w = 0
<stop>
The “t” value is the threshold and the “w” is the width (in pixels) that the instrument is reading.
Use the up/down arrows to adjust the “t” value to 10 above the LoThrld value you wrote down
above. The HiThrld value must be at least 15 more than the new “t” value.
Press STOP to shut off the laser and motor. Press STOP again and press SAVE if you want to
keep the new threshold. Press the down arrow to get back to the Measure display. Press both
the left and the right arrows at the same time. The CI-202 will turn on the laser for a short period
while it measures the width. Press the up arrow and then the ENTER key to get back into the
setup scanner menu. Press the SAVE and STOP keys at the same time. A new display will
appear that allows you to see the precharge and other factory settings. Do not make any
changes to these settings. Press STOP and then STOP again. The instrument will ask “Save
changes? Press SAVE”. Test the instrument to see if it is working.
If the instrument malfunctions after manual threshold adjustment, contact CID, Inc. for
assistance.
Set-Up Storage (check space or erase)
Pressing the START/ENTER key when “Setup storage” is displayed on the top line indicates the
unit is in the storage setup mode. It will always start by indicating the total amount of storage
space that is in the instrument for files and data.
The top line of the display will read “space =” to the left, and the number of bytes to the right (16
bytes are used per measurement record). The bottom line of the display will read “stop” on the
left, and the up and down arrows on the right. Press the stop key to escape this mode, or the
up and down arrow keys to reach the format storage menu.
.
space = 128k
<stop>
Pressing the START/ENTER key when “format storage” is displayed on the top line indicates
the unit is in the storage format mode. Be careful! Formatting the storage space of the CI-202
will erase all data and all files. This is convenient when starting a new year’s work, for example,
but treat this command with care.

CI-202 Instruction Manual rev. 6/21/2017
1554 NE 3rd Ave, Camas, WA 98607, USA
Phone (360) 833-8835 Fax (360) 833-1914 sales@cid-inc.com http://www.cid-inc.com
14
In the format storage mode, the top line of the display will read “Clear all data”. The bottom line
of the display will have the word “stop” to the left and “enter” to the right.
Clear all data
<stop> <erase>
To delete every file in your instrument, press the ENTER key. The instrument will erase all data
from memory, leaving the maximum possible amount of memory for use. To stop the deleting
process, press the STOP key.
NOTE: When there are no files to store data to, the measurement menu items will not be
available. To correct this situation, create a file.
Set-Up Auto Store Parameter
Pressing the START/ENTER key when “Setup auto store” is displayed indicates the unit is in
the setup auto store mode. This allows the user to set-up the instrument to automatically store
measurements, and to start a new measurement without explicitly saving the old one. This
mode is convenient when taking fast, repetitive measurements and when it is not necessary to
review each measurement.
In the auto store setup mode, the top line of the display will read “auto store =” on the left and
either “yes” or “no” on the right. The bottom line of the display will read “stop” and “save” and
the directional arrows.
auto save = yes
<stop> <save>
To set the instrument up to automatically store measurements press, the Up-arrow key to bring
the word “yes” onto the display, then press the SAVE key to save the configuration. To set the
instrument up to automatically discard measurements, press the DOWN arrow key to bring the
word “no” onto the display, then press the SAVE key to save the configuration. To avoid
changing the configuration, press the STOP key.

CI-202 Instruction Manual rev. 6/21/2017
1554 NE 3rd Ave, Camas, WA 98607, USA
Phone (360) 833-8835 Fax (360) 833-1914 sales@cid-inc.com http://www.cid-inc.com
15
Calibrating the CI-202
Occasionally the CI-202 needs to have the timing parameters re-computed or the threshold
adjusted to bring the instrument back to measuring accurately. Each time a parameter is
adjusted on the CI-202, the instrument should have its timing parameters re-computed the next
time it is powered on. The CI-202 can require adjustment after extensive use in the field or
downloading/updating firmware. The recalibration is very quick and simple. After recalibrating,
the high and low thresholds should be checked and readjusted if necessary.
Power the instrument on. The image below should be displayed on the instrument’s
screen.
Press the LEFT and RIGHT arrow keys at the SAME time.
The motor will begin to start-up and spin. This step is quick, and the motor typically spins
for about four seconds.
Next, the motor will stop spinning. During this time, the display on the screen does not
change.
Scan a leaf or piece of paper of known size to test the accuracy of the instrument.
The high and low thresholds should be checked and adjusted if necessary.
CI-202 Threshold Set-up Procedure
The instructions below begin with checking the filter of the unit. This is done in Root Mode
(steps 1-14). Next, the thresholds are checked and adjusted for Root Mode (steps 15-27).
Beginning at Step 28, the unit is switched to Leaf Mode. The procedure can be started at Step
28, but it is recommended to perform all the steps all the way through. The Leaf Mode section
(steps 28-43) explains how to check and set the thresholds for leaf measurements. If the
scanner is not providing an accurate width reading, steps 44-47 provide the instructions for
accessing and adjusting the Scan Width of the unit. If the length measurements are not correct,
steps 48-52 focus on adjusting the Step Length, which is very important for instrument
accuracy.
1) Turn unit on by pressing the POWER button.
2) Use the UP or DOWN arrow to scroll until you see “Set-up Auto save”
3) Use the RIGHT arrow to scroll to “Set-up Measure.” Press ENTER.
Measure file01
<start>

CI-202 Instruction Manual rev. 6/21/2017
1554 NE 3rd Ave, Camas, WA 98607, USA
Phone (360) 833-8835 Fax (360) 833-1914 sales@cid-inc.com http://www.cid-inc.com
16
4) Use the UP or DOWN arrow to get to “Measure Root.” Press SAVE. The screen will
flash “measure root saved.” Then the screen will show “Set-up Measure.”
5) Use the RIGHT arrow key to scroll to “Set-up Scanner.” Press ENTER. You will see
“HiThld Scan.”
6) Use the UP or DOWN arrows to scroll to “filter scan.” Press ENTER. You will see
“Filter on On or Off”
7) Use the UP or DOWN arrow key to get to “Filter off.” Press STOP TWICE and then
SAVE. The screen will flash “Root params saved” indicating that the root parameters
have been saved. This will turn the filter off and save the changes.
8) The screen will come up “Set-up Scanner.” Press ENTER.
9) Use the UP or DOWN arrow key to get to “Manual Scan.” Press ENTER.
10)You will hear the motor start and the laser line will come on.
11)With the laser line over the reflective material only watch the “w” value. It should read
the value as w = 1.
12)When you MOVE the laser scanner over the inspection standard, the “w” value should
read 2. Press STOP. The inspection standard is a piece of white paper with known
length and width.
13)Use the UP or DOWN arrow to scroll to “Filter Scan.” Press ENTER.
14)The value in the bottom center of the screen should read 1.
15)Using the UP or DOWN arrow, turn the filter on and press STOP TWICE and SAVE
(the screen will flash “Root params saved”). This will turn the filter on and save the
setting. The screen will come up “Set-up scanner.” Press ENTER
16)Use the UP or DOWN arrows to get to “HiThld Scan.” Press ENTER.
17)You will see the “t” value and “w” value change. Watch the t value closely. The “t”
value will go down, then stop and set itself. Note the number it stops and sets at and
write down the number setting. It should settle below 50, with somewhere in the 20’s
being desirable.
18)Use the UP or DOWN arrow keys to get to the “LoThld Scan.” Place a piece of white
paper under the scan area on the right edge.
19)Press ENTER.
20)Again the “t” value will go down. The low threshold will also stop and set itself like the
high threshold did in step 17. Write down and note the number setting.
21)Add the HiThld setting number and the LoThld setting number and divide by 2. This
will give you your average setting number. Write down and note the number. Remove
the white paper from under the scanner.
22)When you have this information use the UP or DOWN arrow keys to scroll to “Manual
Scan.” Press ENTER.

CI-202 Instruction Manual rev. 6/21/2017
1554 NE 3rd Ave, Camas, WA 98607, USA
Phone (360) 833-8835 Fax (360) 833-1914 sales@cid-inc.com http://www.cid-inc.com
17
23)The motor will start, and you will see the “t” and “w” settings appear. Use the UP or
DOWN arrow keys to adjust your “t” value to your average setting number (from step
21).
24)Press STOP TWICE and then SAVE. This will save your threshold settings.
25)Use the DOWN arrow key to get to “Measure file01.” Make sure the scan area is clean
and clear.
26)With the laser over the reflective material only, press the RIGHT and LEFT arrows
simultaneously. You will hear the motor run briefly and stop. DO NOT MOVE THE
SCANNER WHILE IT IS RUNNING.
27)Press the RIGHT and LEFT arrow keys simultaneously one more time. This will
calibrate the unit for the Root Mode. (Note: You will follow the same instructions shortly
to calibrate the instrument in Leaf mode).
28)Use the UP or DOWN arrow to get to the “Set-up Scanner” and then the RIGHT arrow
to get to “Setup Measure.” Press ENTER.
29)Use the UP or DOWN arrows to change the setting to “Measure Leaf.” Press SAVE.
The screen will flash “Measure = leaf saved.”
30)Use the UP or DOWN arrow to get to “Set-up Measure.”
31)Use the RIGHT or LEFT arrow to get to “Set-up Scanner.”
32)Press ENTER.
33)Use the UP or DOWN arrow to get to “HiThld Scan.” Press ENTER.
34)You will see the “t” value on the left and the “w” value on the right. The values will
drop. Watch the “T” value and note when the numbers stop, and the setting is locked.
Note and write down the number.
35)Use the UP or DOWN arrow to get to “LoThld Scan.” Place a white sheet of paper
under the scan area. Press ENTER.
36)You will notice again the “t” value will drop. Note and write down the number
37)Add the two threshold values together and divide by 2. This will give you the average.
Remove the white paper.
38)Use the UP or DOWN arrow to get to “Manual Scan.” Press ENTER.
39)Using the UP or DOWN arrow, adjust the “t” value to the average setting computed in
step 37.
40)Press STOP TWICE and then press SAVE. This will save your threshold setting for the
Leaf mode (the screen will flash “Leaf params saved” indicating that the changes
made to the leaf parameters were saved).
41)Press the DOWN arrow until the screen displays “Measure file01.”
42)Press the LEFT and RIGHT arrows simultaneously. This will compute the Timing
parameters for the unit. REPEAT this step.

CI-202 Instruction Manual rev. 6/21/2017
1554 NE 3rd Ave, Camas, WA 98607, USA
Phone (360) 833-8835 Fax (360) 833-1914 sales@cid-inc.com http://www.cid-inc.com
18
43)The display should read “Measure file01.”
44) Use the UP arrow key scroll to “Set-up Scanner.” Press ENTER.
45)Press the SAVE and STOP buttons at the SAME time. This will take you to the hidden
menu.
46)Once in the hidden menu, use the RIGHT arrow key to get to “Scan width.” Press
ENTER. The motor and laser will turn on. MOVE the scanner onto the standard. Using
the UP or DOWN arrow keys, adjust the scan width (the top number) until the width in
mm displayed on the screen is the same as the width of the standard paper you are
using. Press STOP THREE times and then press SAVE. This will save your
adjustments. MOVE the unit down to where the laser line is only over the reflective
material.
47)Press the DOWN arrow one time to get to “Measure File01.” Press ENTER and take a
measurement of the standard. Press the RIGHT arrow key to get to the length reading.
If the measurement is correct for the length, no further adjustments are needed. If the
measurement is incorrect, “Step length” adjustments will be necessary while in the
hidden menu. Press STOP.
48)To get to hidden menu REPEAT steps 43 thru 45.
49)Once there, use the RIGHT arrow key to get to “Step Length.” If your readings were
low, you should raise the step length setting. If the measurements were high, you
should lower the step length setting. Once you have made your adjustments, press
STOP TWICE and SAVE to save the adjustments.
50)Press the DOWN arrow to get back to “Measure file01.”
51)REPEAT steps 47 thru 49 as needed to calibrate the instrument to the correct length of
the standard and the correct width of the standard.
52)Once you have calibrated the unit to read the correct measurements of the standard
you are ready to take measurements with the CI-202.
Re-compute the timing parameters of the CI-202 by pressing the LEFT and RIGHT arrow at the
same time from the Measure Menu after adjusting the threshold.

CI-202 Instruction Manual rev. 6/21/2017
1554 NE 3rd Ave, Camas, WA 98607, USA
Phone (360) 833-8835 Fax (360) 833-1914 sales@cid-inc.com http://www.cid-inc.com
19
CI-202 Care
Charging the Battery
When “Low Battery” is displayed, the battery is discharged below the recommended operating
level. Measurements may continue for another 15 minutes; however, we recommend the battery
be recharged as soon as possible. To charge the battery, plug the instrument into a computer
USB port or the supplied charger. The instrument should be turned on while plugged into the
USB port of a computer to get the fastest charging. Charge for at least 14 hours to get full
charge on the batteries. Storing a battery in a discharged state could permanently damage it.
Cleaning
Treat the CI-202 as any other fine optical instrument. Keep the lens clean and free from
scratches. When not in use, keep the instrument in its protective case. Use only a mild
detergent and damp cloth to clean the exterior areas of the instrument. Use a high-quality lens
cleaning cloth to clean the window. Do not submerse or use an overly wet cloth to clean the
instrument. Do not drop the instrument.
For an extended storage period, we recommend storing the instrument in a cool and dry place.
Table of contents
Other CID Bio-Science Measuring Instrument manuals
Popular Measuring Instrument manuals by other brands
sauermann
sauermann CTV 210-R quick start guide

Associated Research
Associated Research hypot III 3605 Operation and service manual
Fluke
Fluke MICROSCANNER user guide
JENCO
JENCO 3321 Operation manual
Microtemp Electronics
Microtemp Electronics ST-1B Installation and operating instructions
TSI Instruments
TSI Instruments Q-TRAK XP 7585 quick start guide
