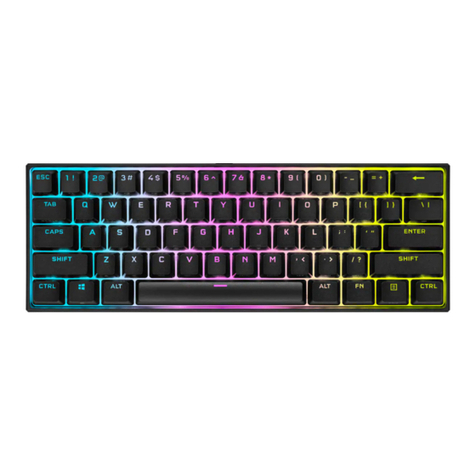
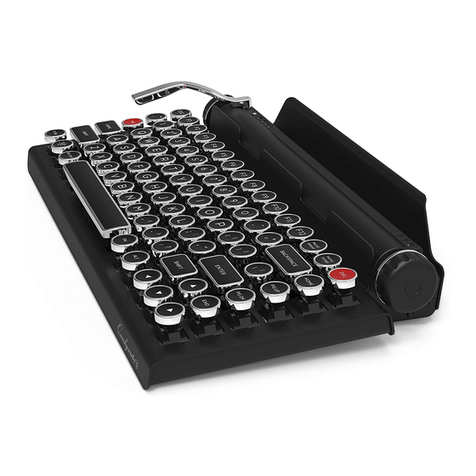
CIDOO Nebula User manual

欢迎您选购CIDOO Nebula机械键盘,希望您使用愉快, 功能操作说明请
参以下内容。
灯光设置按键
FN+↑: 背光灯效亮度增加 FN+↓: 背光灯效亮度减小
FN+{【: 背光灯效速度减小 FN+} 】: 背光灯效速度增加
FN+ENTER :关闭/开启背光灯 FN+\| :切换背光灯效
FN+→ : 背光灯色相加 FN+← : 背光灯色相减
FN+ ;: : 背光灯饱和度加 FN+ ’” : 背光灯饱和度减
FN+ Backspace: 长按FN+ Backspace三秒键盘恢复到出厂设置
FN+SPACE:无线模式下按下可查询电量,1!到0)分别为10%~100%电量,
松开后退出查询功能
多媒体按键
FN+1: F1 FN+2: F2
FN+3: F3 FN+4: F4
FN+5: F5 FN+6: F6
FN+7: F7 FN+8: F8
FN+9: F9 FN+0: F10
FN+-_: F11 FN+ =+: F12
FN+Esc : ` FN+I: PRTSC
FN+O: SCROLL LOCK FN+P: PAUSE
FN+DEL: INSERT FN+PG UP:HOME
FN+PG DN:END FN+WIN: 锁定WIN建
右上角旋钮开关顺时针旋转为音量加, 逆时针旋转为音量减, 下压为静音
Windows and MAC OS 系统
在键盘的背后左上位置,切换Windows 和MAC 系统
有线/蓝牙5.0/ 2.4G 三种模式连接方法
有线模式:
请将键盘左上角三段拨动开关打至中间(USB模式),并将USB线插入到你的
电脑设备中,键盘背光灯亮起并变为默认的RGB灯效,则表示连接成功。
蓝牙模式配对方法:
请按照以下步骤将键盘和您的设备来进行蓝牙配对
1.CIDOO Nebula 蓝牙键盘最多可同时连接3个蓝牙设备. 打开键盘左上角三
段拨动开关至BT位置 .按住 FN + Q 或者按住 FN + W 或者按住FN + E 3-5
秒. 当对应按键指示灯开始快速闪烁蓝色,表示键盘在可配对状态.
2.在要连接的设备上打开蓝牙,搜索并选择其中一组FN + Q对应设备名
CIDOO Nebula -1,FN + W对应设备名CIDOO Nebula -2,FN + E对应设备
名CIDOO Nebula -3,点击连接配对
3.键盘与你的设备连接成功后,对应按键设备指示灯会停止闪烁并常亮蓝色
3S后熄灭,短按FN+Q或者FN+W 或者FN+E键切换已经配对好的蓝牙设备。
关闭键盘电源开关蓝牙断开,重新打开电源开关,CIDOO Nebula 会默认回
连到蓝牙断开前使用的设备
2.4G模式使用方法:
请将键盘左上角三段拨动开关打至右边2.4G位置,并将接收器插入电脑USB
接口中,此时R键常亮绿灯3S,然后键盘背光灯亮起,则表示2.4G设备已连
接成功。
2.4G对码连接方法:
键盘出厂默认已经完成2.4G对码,如果需要重新配对,可按如下方法重新对码.
长按FN+R 3~5秒,“R”键指示灯闪烁绿色,再将接收器插入USB接口,“R”键
停止闪烁,键盘背光灯亮起并变为默认的RGB灯效,则表示对码成功。
自动休眠模式
蓝牙和2.4G模式时,键盘无按键操作5分钟后背光关闭,按任意按键唤醒键盘
蓝牙模式时,键盘无按键操作30分钟后进入深度休眠模式,蓝牙断开,按任
意按键将退出深度休眠模式,RGB背光亮起并回连蓝牙
充电指示灯:
当键盘的电池电量低时(电池电量小于3.5V)FN键会持续闪烁红灯,充电
时FN键会常亮红灯, 充满后FN键会熄灭红灯并跟随当前背光灯效
自定义设置
CIDOO Nebula 支持有线模式及2.4G模式下使用VIA 程序改键布局
注意:请确保您的键盘已正确插入电脑设备
VIA 安装步骤如下:
1.请访问https://github.com/WestBerryVIA/via-releases/releases选择您
需要的最新的VIA软件然后下载并安装在电脑上 .如下图
CIDOO Nebula 默认配置了0-3层4个层级,每个单独的按键都可以拥有多个
功能.
这对于较小的键盘很重要,因为它们没有足够的按键来实现所需的所有功能。
特殊键设置
在此可以通过按键变更功能将特殊按键替换到你想要的按键上,实现该功能的
快捷操作.
QMK灯光
CIDOO Nebula 软件中默认提供了多种不同的RGB灯光效果,你可以在上面改
变灯光亮度,速度,颜色以及定制你自己想要的灯光效果,也可以更改按键来
操作你设定好的灯光效果.
其他客制化
CIDOO Nebula 提供其他功能按键的客制化改键
CIDOO Nebula默认定制的0-3层键盘布局图
层0:当你使用键盘连接到Win系统设备时,请将右上角拨动开关切换至WIN
位置,层0将被激活使用
层0:当你使用键盘连接到Mac系统设备时,请将右上角拨动开关切换至MAC
位置,层0将被激活使用,其中按键Left Alt=Left Option Left Win=Left
Command Right Alt= Right Option
层2:当你使用键盘连接到Win/Mac系统设备时,通过VIA改键设置任意按
键为MO(2)保存后,长按MO(2)按键层2将被激活使用
层3:当你使用键盘连接到Win/Mac系统设备时,通过VIA改键设置任意按键
为MO(3)保存后,长按MO(3)按键层3将被激活使用
按键说明
层1:当你使用键盘连接到Win/Mac系统设备时,长按Fn1(3)按键层1将被激
活使用
3.如下画面表示VIA软件安装完成并成功连接.
如果VIA软件无法识别您的键盘,请联系我们的客服人员寻求帮助
如果您的键盘已经插入VIA会自动检测你的键盘是否兼容。键盘记忆是持久的,
这意味着无论你在哪里插入键盘,它都会记住设置。
在VIA软件页面上半部分,鼠标点击选择你想要更改的按键,然后再用鼠标点
击VIA软件页面下半部分中你想要更改的按键,该按键功能生效.
更多设置板块请见以下说明:
宏设置
CIDOO Nebula 按键中没有设置多媒体按键,在此可以通过VIA软件映射多
媒体按键到你想要的按键上,实现多媒体快捷操作.
2.从CIDOO 官网下载或者从商家处获得CIDOO Nebula 2.4G.JSON 和
CIDOO Nebula USB.JSON文件并上传到VIA软件, USB JSON文件请在有
线模式下使用,2.4G JSON请在键盘2.4G使用模式下使用, 如下图
Thank you for purchasing our CIDOO NEBULA mechanical keyboard ,
We hope you will be pleased with both the product and service you received .
The following is detailed introduction of the functions and operation method
of this product.
Default Hot Keys
Hold FN + listed keys to activate
LED keys
FN+↑: LED backlight brightness Increase
FN+↓: LED backlight brightness decrease
FN+{【: LED backlight speed decrease
FN+} 】: LED backlight speed increase
FN+ENTER :Turn off/on the backlight
FN+\|: Toggle LED backlight mode
FN+→ : LED backlight hue increase
FN+← : LED backlight hue decrease
FN+ ;:【: LED backlight saturation increase
FN+'" : LED backlight saturation decrease
FN+ Backspace: Long press FN+ Backspace for 3 seconds to reset the
keyboard to the factory setting.
Media Keys
FN+1: F1 FN+2: F2
FN+3: F3 FN+4: F4
FN+5: F5 FN+6: F6
FN+7: F7 FN+8: F8
FN+9: F9 FN+0: F10
FN+-_: F11 FN+ =+: F12
FN+ Esc : ` FN+I: PRTSC
FN+O: SCROLL LOCK FN+P: PAUSE
FN+DEL: INSERT FN+PG UP:HOME
FN+PG DN:END FN+WIN: WIN lock
Windows and MAC OS
Toggle switch at the back of the keyboard
Battery Checking
FN+SPACE: Battery level indicator .From !1 to )0 stands for 10%~100%
( estimate only )
Knob
The upper right knob switch rotates clockwise to increase volume,
counterclockwise to decrease volume, and presses down to mute.
USB Wired/BT5.0/2.4G Tri Mode Pairing Method:
Wired Mode:
Please toggle the mode switch to the middle (USB mode), and then insert
USB cable to your computer, the keyboard backlight lights on and turns to
the default of RGB backlight effect, which means connection successful.
Bluetooth® Pairing Instructions:
Perform the following steps to pair this keyboard with your device(s).
1.CIDOO Nebula mechanical keyboard can connect up to 3 devices at the
same time . Please toggle the mode switch to the Bluetooth mode. And long
press FN + Q/W/E for 3~5 seconds to enter pairing mode. At this time, the
Q/W/E key flashes blue quickly indicate that its ready to connect .
2.Open the Bluetooth settings on your device and scan for available devices.
Locate and select any device name of three group " CIDOO Nebula-1 "
“CIDOO Nebula-2”, “CIDOO Nebula-3 ”
3. Once the keyboard has connected to your device, the Q/W/E key will
cease flashing, and indicating that Bluetooth pairing was successful.
Short press "FN" and "Q" or “FN” and "W" or “FN” and “E” keys to switch
paired Bluetooth device.
The Bluetooth connection has memory . It will disconnect when power off
the keyboard ,and the keyboard will re-connect to the last device when power
on the keyboard again.
2.4Ghz Wireless Connection:
1.Please toggle the mode switch to 2.4Ghz mode .Plug in receiver into your
device .The “R” key led will light on green for 3 seconds and whole keyboard
backlight light on indicates that 2.4G connected successfully .
2.4Ghz pairing instruction
The keyboard 2.4Ghz mode is default paired . If you need to re-pair 2.4Ghz
mode , Please perform the following operations :
Long press FN+R key enter 2.4g pairing mode . At this time, the R key
flashes green color quickly. Insert 2.4G dongle to USB port .After the
connection is successful, the R key stops blinking.
Auto Sleep Mode
After 5 minutes without a keypress, the backlighting will turn off to conserve
battery. Any keypress will light on backlight .
After 30 minutes without a keypress, the keyboard entry deep sleep under
Bluetooth mode, Bluetooth disconnect, any keypress will exit deep sleep
mode, RGB lights turn on, and the Bluetooth re-connect the keyboard
Battery Charging:
FN key will blink red when the keyboard is low battery (battery voltage less
than 3.5V). It is steady red light when charging, Turns to the default RGB
backlighting once charging is complete.
Custom Configuration
CIDOO NEBULA supports remap the keys via VIA firmware in wired mode
and 2.4G mode
Note:Make sure your keyboard is properly plugged into your computer device
VIA installation steps are as follows:
1.Please visit https://github.com/WestBerryVIA/via-releases/releases to
download the latest VIA application for your computer’s OS here. See
below photo :
3.Installation is completed and VIA software connected successfully if it is
show as below photo.
Here you can remap the key to replace the special key to the key you want,
to achieve the quick operation of the function.
LED light
CIDOO NEBULA VIA software provides many different RGB lighting effects
by default. You can change the lighting brightness, speed, color and
customize the lighting effect you want. You can also change the key to
operate the lighting effect you set.
Others custom
CIDOO NEBULA Layers allow you to configure your keyboard with more
behaviors than its number of physical keys .
CIDOO NEBULA default customized 0-3 layer keyboard layout.
Layer0:This layer will be activated when the keyboard to be connected to
the Win system device, please toggle the upper right corner switch to the
WIN position,
Layer0: This layer will be activated when the keyboard to be connected to
a Mac system device, switch the toggle switch in the upper Right corner to
the MAC position. The key Left Alt=Left Option Left Win=Left Command
Right Alt= Right Option.
Keys description
Layer2:This layer will be activated when your keyboard’s system toggle
switched to Windows or Mac and key mapped any keys to MO(2), save
and then long press it.
Layer3:This layer will be activated when your keyboard’s system toggle
switch to Windows or Mac , key mapped any keys to MO(3), save and
then long press it.
Layer1:This layer will be activated when your keyboard’s system toggle
switched to Windows or Mac system and long press Fn1(3) key.
If VIA software does not recognize your keyboard, please contact our
customer service staff for assistance.
VIA automatically detects your keyboard compatibility if it's plugged in.
Keyboard memory is persistent, which means that wherever you plug in
keyboard, it remembers the settings.
On the top half of VIA software, choose one key which you want to change
by your mouse, and then select the key on the bottom half of VIA software,
and it was effected.
See below for more information about configuration
Macros setting
CIDOO NEBULA does not have physical multimedia keys, you can remap
the keys through the VIA software to achieve the function.
CIDOO NEBULA is configured with 4 layers from 0 to 3 by default, and each
individual key can have multiple functions.
This is important for smaller keyboards, where there aren’t enough physical
keys to do all the functionality you need.
Special keys setting
2.Download CIDOO Nebula 2.4G.JSON and CIDOO Nebula USB.JSON
files from CIDOO official website or distributor ,and upload it to VIA software.
Note :Select the appropriate JSON file ( 2.4g if on 2.4g or USB if on wired )
See below photo:
CIDOO NEBULA
65% VIA Tri-mode Mechanical Keyboard
minimalistic design inheriting the originality style
THIS IS EXACTLY WHAT I LIKE THANK YOU
Hue+ 灯效色相加 Sat+ 灯效饱和度+
RGB Md+ 下一个RGB灯光模式 RGB Tog... 关闭/开启键盘背光
Win... 切换Windows模式 Mac... 切换Mac模式
Hue- 灯效色相减 Sat- 灯效饱和度减
BT 1 蓝牙设备1 BT 2 蓝牙设备2
BT 3 蓝牙设备3 Brght+ 键盘背光亮度加
Lock Win 锁Windows键 RGB SPD RGB灯光速度减
Brght- 键盘背光亮度减 RGB SPI RGB灯光速度加
Fn1(3) 长按Fn1(3),层1将激活 MO(2) 长按MO(2),层2将激活
MO(3) 长按MO(3),层3将激活
Hue+ Hue Increase Sat+ Light Saturation+
RGB Md+ RGB Mode Next RGB Tog... Turn On/Off Backlight
Win... Switch to Windows mode Mac... Switch to Mac Mode
Hue- Hue Decrease Sat- Light Saturation
BT 1 Bluetooth Device 1 BT 2 Bluetooth Device 2
BT 3 Bluetooth Device 3 Brght+ Backlight Increase
Lock Win Lock Windows Key RGB SPD RGB Speed Increase
Brght- Backlight Decrease RGB SPI RGB Speed Increase
Fn1(3) Layer 1 will be activated when holding this key
MO(2) Layer 2 will be activated when holding this key
MO(3) Layer 3 will be activated when holding this key
Table of contents
Other CIDOO Keyboard manuals


