manuals.online logo
Brands
  1. Home
  2. •
  3. Brands
  4. •
  5. Cimbali
  6. •
  7. Coffee Maker
  8. •
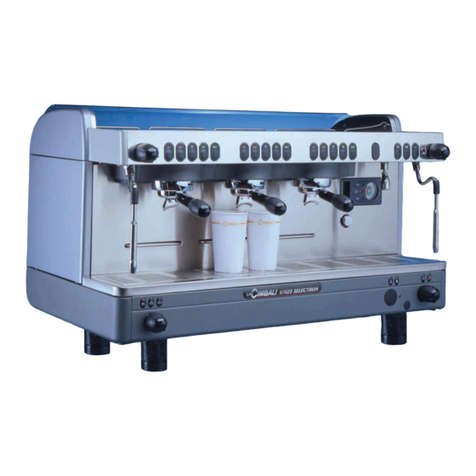
  9. Cimbali E98UP Quick start guide

Cimbali E98UP Quick start guide

(rev. 1909)
MANUALE DEL TECNICO
ENGINEER'S MANUAL
MANUEL DU TECHNICIEN
TECHNIKERHANDBUCH
MANUAL DEL TÉCNICO
MANUAL DO TÉCNICO
E98UP - M23UP
I
DT / A - C / S
101
1a
7
6
15
9
7
6
14
11
8
C / S
2
DT / A
16 17 18 19 20
II
LEGENDE
1Hauptschalter
1a Schalter zur Aktivierung der
Wasserkesselbeheizung
2 Druckknopftafeln / Bedienung der
Kaffeegruppen
6 Dampfrohr (beweglich)
7 Dampfhahn
8 Teewasserrohr (beweglich)
9 Teewasser Hahn / Taste
10 Filterhalter
11 Tassen-einsatzschale
14 Manometer Pumpe / Manometer
Kessel
15 Wanne
16 Taste Abgabe 1 Espressokaffee
17 Taste Abgabe 2 Espressokaffees
18 Taste kontinuierliche Ausgabe /
STOP / Prog
19 Taste Abgabe 1 normaler Kaffee
20 Taste Abgabe 2 normaler Kaffees
LEYENDA
1Interruptor general
1a Interruptor accionamiento
resistencias caldera
2 Botoneras / Interruptor erogación
café
6 Tubo (lanza) vapor orientable
7 Mando regulación vapor
8 Tubo (lanza) agua caliente
9 Mando / Botón erogación agua
caliente
10 Portaltro
11 Bandeja apoya-tazas
14 Manómetro bomba / Manómetro
caldera
15 Bandeja
16 Botón erogación 1 café fuerte
17 Botón erogación 2 cafés fuertes
18 Botón erogación contínua /
STOP / Prog
19 Botón erogación 1 café suave
20 Botón erogación 2 cafés suaves
LEGENDA
1Interruptor geral
1a Interruptor de inserimento de
resistências da caldeira
2Quadro de botões / Interruptor
erogação café
6Tubo vapor orientável
7Manípulo regulação do
vapor
8Tubo água quente
9Manípulo / Botão distribuição água
quente
10 Porta-ltro
11 Grelha apoya-chávenas
14 Manómetro bomba / Manómetro
caldeira
15 Bandeja
16 Botão distribuição 1 café
forte
17 Botão distribuição 2 cafés fortes
18 Botão distribuição contínua /
STOP / Prog
19 Botão distribuição 1 café ligeiro
20 Botão distribuição 2 cafés ligeiros
PTESDE
LEGENDA
1 Interruttore generale
1a Interruttore inserimento resistenze
caldaia
2 Pulsantiera / Interruttore
erogazione caffè
6Lancia vapore orientabile
7 Manopola regolazione vapore
8 Lancia acqua calda
9 Manopola / Pulsante erogazione
acqua calda
10 Portaltro
11 Piano appoggiatazze
14 Manometro pompa / Manometro
caldaia
15 Bacinella
16 Pulsante erogazione 1 caffè corto
17 Pulsante erogazione 2 caffè corti
18 Pulsante erogazione continua /
STOP / Prog
19 Pulsante erogazione 1 caffè lungo
20 Pulsante erogazione 2 caffè
lunghi
LEGEND
1Main ON/OFF switch
1a Boiler heat resistance switch
2 Pushbutton Panel / Coffee
dispensing switch
6 Swivel steam jet pipe
7 Steam adjustment knob
8 Hot water dispensing pipe
9 Hot water dispensing knob / button
10 Filter holder
11 Cup tray
14 Pump pressure gauge / Boiler
pressure gauge
15 Pan
16 Dispensing push button - 1 short
coffee
17 Dispensing push button - 2 short
coffees
18 Continual dispensing /STOP /
Prog - push button
19 Dispensing push button - 1 long
coffee
20 Dispensing push button - 2 long
coffees
LEGENDE
1Interrupteur général
1a Interrupteur branchement
résistance chaudière
2Clavier / Interrupteur de débit du
café
6Tuyau (lance) orientable de la
vapeur.
7Poignée de réglage de la vapeur.
8Tuyau (lance) d’eau chaude.
9Poignée / Touche de débit de
l’eau chaude.
10 Porte-ltres.
11 Plateau appuie-tasses
14 Manomètre de la pompe /
Manomètre de la chaudière
15 Cuvette.
16 Touche débit 1 café court
17 Touche débit 2 café court
18 Touche distribution
continue / STOP / Prog
19 Touche débit 1 café long
20 Touche débit 2 café long
IT EN FR
III
L1
L
~410(16.1)
~260(10.2)
Ø~100(3.9)
315 (12.4)
518 (20.4)
117(4.6)
552 (21.7)
93 (3.7)
550 (21.65)
L
L1 m m
inches
PesoKg
pounds
m m
inches
820
40.1
570
22.4 30.3
770
32.3
2 gr. 3 gr.
1020
DIMENSIONS
63
139 172
78
Pmax
[ bar ]
Tmax
[ °C ]
tipo di macchina
Type of machine
type de machine
Maschinentypen
modelo de la máquina
tipo de la màquina
2 gruppi
2 groups
2 groupes
2 Einheiten
2 grupos
2 grupos
3 gruppi
3 groups
3 groupes
3 Einheiten
3 grupos
3 grupos
Fluido - Fluid - Fluide
Flüssig - Fluido - Fluido
Capacità - Capacity - Capacité [ L ]
Fassungsvermögen - Capacidad - Capacidade
Caldaia
Service boiler
Chaudière
Heizkessel
Caldera
Caldeira
2 133
acqua/vapore
water/steam
eau/vapeur
wasser/dampf
agua/vapor
água/vapor
11 17.5
Scambiatore
Heat exchanger
Échangeur de chaleur
Wärmeaustauscher
Intercambiador de calor
Permutador de calor
12 133
acqua
water
eau
Wasser
agua
água
0.65 x 2 0.65 x 3
1
Indice - Index - Index - Inhaltsverzeichnis - Indice - Indice
Indice - Index - Index - Inhaltsverzeichnis - Indice - Indice 1
Scaldatazze (dove previsto) - Cup Warmer (where applicable) - Chauffe-tasses (si prévu)
Tassenwärmer (falls vorgesehen) - Calienta-tazas (donde esté previsto) -
Aquecedor de chávenas (quando previsto) 2
Resistenza - Electric heating - Résistance - Elektrische Heizung - Resistencia -
Resistência 3
Erogazione caffè - Coffee dispensing - Distribution de café - Kaffeeabgabe -
Suministro café - Distribuição do café 4
Programmazione dosi caffè (solo versioni DT / A) - Programming the coffee measures
(only DT / A version) - Programmation des doses de café (Uniquement pour version DT / A)
Programmierung der Kaffeedosierung (Nur für Machine DT / A) - Programación dosis café
(sólo para versión DT / A) - Programação das doses do café (Só para verção DT / A). 6
Anomalie - Guasti - Defects - Malfunctions - Anomalies - Avaries - Anomalien -
Störungen - Anomalías - Averías - Anomalias - Avaria 8
Scheda unicata - Unied board - Fiche uniée
Einheitliches Informationsblatt - Tarjeta unicada - Ficha unicada 11
Smontaggio e regolazioni - Disassembly and Setting - Demontage - Reglages -
Abmontierung und Einstellungen - Desmontaje Y Regolaciones - Desmontagem e Regulações 15
Schema elettrico - Wiring diagram - Schema electrique - Elektrischer Schaltplan -
Esquema electrico - Esquéma electrico 22
Circuito idraulico - Hydraulic circuit - Circuit hydraulique - Hydraulikplan -
Circuito hidraulico - Circuito hidraulico 28
Pagina -Page -Page
Seite -Página -Página
2
Scaldatazze (dove previsto) - Cup Warmer (where applicable) - Chauffe-tasses (si prévu)
- Tassenwärmer (falls vorgesehen) - Calienta-tazas (donde esté previsto) -
Aquecedor de chávenas (quando previsto)
ON
A
Per attivare il riscaldamento, premere l'interruttore (A)
controllando che si accenda la spia corrispondente.
Press the button (A) and check to see that the light turns on.
Pour activer le chauffage, appuyer sur l'interrupteur (A) et
vérier que le voyant correspondant s'allume.
Zum Einschalten der Heizung den Schalter (A) drücken
und überprüfen, dass sich die dazugehörige Kontrollleuchte
einschaltet.
Apretar el botón (A) controlando que se encienda la luz.
Para ativar o aquecimento, premir o interruptor (A)
vericando se acende a respetiva luz.
IT
EN
FR
DE
ES
PT
ATTENZIONE: L’installazione e lo smontaggio devono essere eseguite esclusivamente da personale
tecnico qualicato e autorizzato.
Togliere tensione alla macchina prima di eseguire tutte le operazioni.
WARNING: Installation and disassembly must only be performed by qualied and authorized technicians.
Switch off the power to the machine before performing these steps.
ATTENTION: L’installation et le démontage doivent être effectués exclusivement par le personnel
technique qualié et autorisé.
Débrancher la machine avant d’effectuer toutes les opérations.
ZU BEACHTEN: Die Installation und die Demontage dürfen nur durch qualizierte und ofziell Fachkräfte
vorgenommen werden.
Vor Ausführung gleich welcher Arbeitsschritte die Spannungsversorgung der Maschine unterbrechen.
ATENCIÓN: La instalación y el desmontaje tienen que ser realizados exclusivamente por personal técnico
cualicado y autorizado.
Desconectar la tensión de la máquina antes de efectuar todas las operaciones.
ATENÇÃO: A instalação e a desmontagem têm de ser executadas exclusivamente por pessoal técnico
qualicado e autorizado.
Retirar a tensão à máquina antes de executar todas as operações.
3
14
P
10
1 1A
1
1A
OFF
ON
Premere l’interruttore luminoso generale (1) portandolo
sulla posizione ON ; la relativa spia si accende e si
illuminano anche i tasti.
Se il livello dell’acqua in caldaia è inferiore al minimo la
caldaia verrà riempita no al livello ottimale, indicato dal
ripristino della pressione di rete nel manometro pompa.
SOLO DOPO che il processo di caricamento caldaia
è stato completato premere l’interruttore luminoso
attivazione resistenza (1a) portandolo sullaposizioneON
; la relativa spiasi accende e iniziala fase diriscaldamento.
Attendere no a quando sul manometro (14) viene indicata
la pressione prevista per l'esercizio (circa 1,2 bar).
A questo punto la macchina è pronta per il lavoro.
Resistenza - Electric heating - Résistance - Elektrische Heizung - Resistencia -
Resistência
Press the luminous main switch (1) into position ON
; the related indicator light switches on and the key also
light up.
If the water level in the boiler is lower than the minimum
limit, the boiler will be lled to the right level, indicated by
restored pressure in the manometer-pump.
ONLY AFTER the boiler lling process has been
completed should you press the light switch that
activates the resistance (1A) into position ON ; the
related indicate light switches on and the heating phase
begins.
Wait until the operating pressure (approx. 1.2 bar) appears
on the manometer (14).
At this point, the machine is ready for use.
1 2
EN EN
IT IT
FR
FR
Appuyer sur l’interrupteur lumineux général (1) en
position ON ; le voyant s’allume et les touches s’éclairent
eux aussi.
Si le niveau de l’eau dans la chaudière est inférieur au
minimum, la chaudière sera remplie jusqu’au niveau optimal,
indiqué par le rétablissement de la pression de réseau du
manomètre de la pompe.
SEULEMENT APRES que le processus de chargement
de la chaudière a été achevé, appuyer sur l’interrupteur
lumineux d’activation de la résistance (1A) en position
ON ; le voyant s’allume et la phase de réchauffement
commence.
Attendre jusqu’à ce que le manomètre (14) indique la
pression prévue pour l’exercice (environ 1,2 bar).
A ce stade la machine est prête pour le travail.
PRESTARE PARTICOLARE ATTENZIONE
ALLA SEQUENZA DI AZIONAMENTO DEGLI
INTERRUTTORI (1) E (1A).
CAREFULLY PAY ATTENTION TO THE
SEQUENCE FOR ACTIVATING THE
SWITCHES (1) AND (1A).
FAIRE PARTICULIEREMENT ATTENTION
A LA SEQUENCE D’ACTIONNEMENT DES
INTERRUPTEURS (1) ET (1A).
4
Resistenza - Electric heating - Résistance - Elektrische Heizung - Resistencia -
Resistência
14
P
10
1 1A
1
1A
OFF
ON
1 2
ES ES
DE DE
PT
PT
Den beleuchteten Hauptschalter (1) drücken und auf
ON stellen; die entsprechende Kontrolllampe beginnt zu
leuchten und auch die Tastenbeleuchtung schaltet sich ein.
Sobald das Wasser im Heizkessel der Maschine unter den
Mindeststand absinkt, wird das Wasser auf den optimalen
Stand nachgefüllt (Anzeige über erneute Rückkehr des
vorgeschriebenen Betriebsdrucks auf dem Manometer
der Pumpe).
ERST NACHDEM der Aufheizprozess des Kessels
abgeschlossen wurde, den beleuchteten Schalter für
die Aktivierung des Widerstands (1a) drücken und auf
stellen ON; die entsprechende Kontrolleuchte leuchtet
auf, um dem Beginn der Beheizungsphase anzuzeigen.
WartenSie,bis auf demManometer(14) der vorgeschriebene
Betriebsdruck angezeigt wird (ca. 1,2 bar).
Anschließend ist die Maschine betriebsbereit.
ACHTEN SIE AUF DIE REIHENFOLGE DER
AKTVIERUNG DER EINAUSSCHALTER (1)
UND (1A).
PRESTAR PARTICULAR ATENCIÓN A LA
SECUENCIA DE ACCIONAMIENTO DE LOS
INTERRUPTORES (1) Y (1A).
Presioneelinterruptorluminosogeneral(1),colocándolo
enla posiciónON ; el correspondiente indicadorluminoso
se enciende y se iluminan también las teclas.
Si el nivel del agua en la caldera es inferior al mínimo, la
caldera se llenará hasta el nivel óptimo, indicado por el
restablecimiento de la presión de la red en el manómetro
de la bomba
.
SÓLO DESPUÉS DE que el proceso de carga de la
caldera haya nalizado, presione el interruptor luminoso
de activación de la resistencia (1a), colocándolo en la
posición ON ; el relativo indicador luminoso se enciende
e inicia la fase de calentamiento.
Esperar hasta que en el manómetro (14) se indique la
presión prevista para el ejercicio (aproximadamente 1,2 bar).
Premir o interruptor luminoso geral (1) colocando-o na
posição ON ; acende-se a respetiva luz e também se
iluminam os botões.
Se o nível da água na caldeira for inferior ao mínimo a
caldeira será enchida até ao nível óptimo, indicado pelo
restabelecimento da pressão de rede no manómetro da
bomba.
SÓ DEPOIS que tenha sido completado o processo
de enchimento da caldeira é que se pode premir o
interruptor luminoso de ativação da resistência (1a),
colocando-o na posição ON ; o respectivo indicador
acende-se e inicia a fase de aquecimento.
Aguardar até quando no manómetro (14) estiver indicada
a pressão prevista para o exercício (1,2 bar aprox.).
PRESTAR UMA ATENÇÃO ESPECIAL À
SEQUÊNCIA DE ACCIONAMENTO DOS
INTERRUPTORES (1) E (1A).
5
DT / A
18
C / S
2
Erogazione caffè - Coffee dispensing - Distribution de café - Kaffeeabgabe - Suministro
café - Distribuição do café
Versioni DT / A. Premere il tasto erogazione caffè
corrispondente alla dose desiderata, rimarrà acceso solo
il led in corrispondenza del tasto selezionato ed inizierà
l'erogazione; l'arresto avverrà automaticamente.
Premere, invece, il tasto (18) per effettuare erogazioni
continue.
L’erogazione, sia dosata che continua, può essere interrotta
in qualsiasi momento premendo il tasto (18).
Versioni C / S. Premere il tasto erogazione caffè (2) ed
effettuare l'erogazione.
Al raggiungimento della dose desiderata, arrestare
l'erogazione premendo nuovamente il tasto (2).
IT
DT / A version. Press the coffee dispensing key
corresponding tothe preferreddose.The LED corresponding
to the selected key will remain lit and the coffee will be
dispensed. It will stop automatically.
Press the push button (18) for continuous dispensing.
Dispensing, whether for dosed servings or in the continuous
dispensing mode, can be interrupted at any time by pressing
the push button (18).
C / S version. Press the coffee dispensing button (2) and
dispense.
When the desired dose is obtained, press button (2) again
to stop dispensing.
EN
FR
Versions DT / A.Appuyer sur la touche de distribution
de café correspondant à la dose désirée. Seule la LED
correspondant à la touche sélectionnée restera allumée
et la distribution commencera ; l’arrêt sera automatique.
Appuyer sur la touche (18)pour obtenir des distributions
continues.
La distribution, dosée ou continue, peut être interrompue
à n’importe quel moment en appuyant sur la touche (18).
Versions C / S. Appuyer sur la touche de distribution de
café (2) et procéder à la distribution.
Une fois la dose souhaitée atteinte, arrêter la distribution
en appuyant à nouveau sur la touche (2).
DE
Machine DT / A.Drücken Sie die Taste zur Kaffeeabgabe
entsprechend der gewünschten Dosis; es bleibt lediglich
die Kontrollleuchte der ausgewählten Abgabeeinheit
eingeschaltet und die Kaffeeabgabe beginnt. Die Abgabe
wird automatisch beendet.
Zur kontinuierlichen Abgabe dagegen müssen Sie die
Taste (18) drücken.
Sowohl die dosierte als auch die kontinuierliche Abgabe
kann zu jedem beliebigen Zeitpunkt durch Betätigung der
Taste (18) unterbrochen werden.
Machine C / S. Drücken Sie die Kaffeeabgabetaste (2)
und führen Sie die Abgabe durch.
Sobald die gewünschte Dosis Kaffee abgegeben wurde,
müssen Sie den Abgabezyklus anhalten, indem Sie erneut
die Taste (2) drücken.
Versión DT / A.Presione la tecla de “erogación café”
correspondiente a la dosis deseada; permanecerá
encendido sólo el led en correspondencia de la tecla
seleccionada y luego empezará la erogación; la parada
se realizará automáticamente.
Apretar el botón (18) para efectuar erogaciones continuas.
La erogación, tanto dosicada como continua, se puede
interrumpir en cualquier momento apretando el botón (18).
Versión C / S. Pulse el botón de erogación café (2) y
efectúe la erogación.
Cuando se alcance la dosis deseada, interrumpa la
erogación pulsando otra vez el botón (2).
ES
PT
Versões DT / A.Premir o botão de distribuição do
café relativo à dose desejada; só cará aceso o led
que corresponde ao botão selecionado e começará a
distribuição; a paragem ocorrerá automaticamente.
Premir o botão (18) para efetuar distribuições contínuas.
A distribuição, seja doseada seja contínua, pode ser
interrompida em qualquer momento premindo o botão (18).
Versões C / S. Premir o botão de distribuição de café (2)
e efetuar a distribuição.
Obtida a dose desejada, interromper a distribuição premindo
novamente o botão (2).
6
Come entrare in programmazione
Per entrare in programmazione, premere e mantenere
premuto il tasto STOP/prog (18) per alcuni secondi; il suono
intermittente del buzzer indica che la macchina è in fase di
programmazione.
Per terminare questa fase, una volta effettuata la dosatura
dei vari tasti erogazione caffè, premere nuovamente il tasto
STOP/prog (18).
“Prima di procedere con la programmazione dei
pulsanti erogazione caffè riempire il portaltro con
la corretta dose di caffè macinato.
Non utilizzare i fondi dei caffè precedenti per la
programmazione delle dosi. “
Innestare, serrando bene, il portaltro (10) al gruppo, posizio-
nando la tazza (o le tazze) al di sotto del becco (o becchi) del
portaltro (10).
Premere, e mantenere premuto, il pulsante erogazione caffè
(16, 17, 19 o 20) corrispondente alla dose da programmare
prescelta.
Quando la quantità di caffè in tazza ha raggiunto il livello
desiderato rilasciare il tasto erogazione caffè.
Ripetere le sopracitate operazioni per gli altri pulsanti caffè.
N.B.: in caso dierrata programmazione, ripeterel’operazione
utilizzando una nuova dose di caffè macinato.
EN
FR
IT
How to access the programming function
To enter the programming mode, press push button (18)
and keep it pressed for a few seconds; the buzzer sounds
intermittently.
To exit the programming mode, after programming the vari-
ous drinks, press push button (18) again.
“Before programming the coffee dispensing push
buttons ll the lter holder with the correct serving
of ground coffee. Don’t use coffee grouts for pro-
gramming servings. ”
Fit and tighten the lter holder (10) on the coffee dispenser
unit, positioning the cup (or cups) under the nozzle (or
nozzles) of the lter holder (10).
Press (and keep momentarily pressed) the coffee dispens-
ing push button (16, 17, 19 or 20) corresponding to the
required serving to be programmed.
When the amount of coffee in the cup reaches the required
level, release the coffee dispensing push button.
Repeat the above operations for the other coffee push
buttons.
Note: if you make a programming mistake, use a new dose
of ground coffee and repeat the operation.
Comme entrer dans la programmation
Pour entrer dans la programmation, appuyer et garder
enfonçée la touche (18) pendant quelques secondes (son
intermittant du buzzer).
Pour terminer la phase de programmation, une fois pro-
grammées les différentes boissons, appuyer à nouveau
sur la touche (18).
“Avant de procéder avec la programmation des
commandes du débit de café, remplir le porte-ltres
par une bonne dose de café moulu. Ne pas utiliser
les fonds de café précédents pour la programmation
des doses.”
Plaçer, en le serrant bien, le porte-ltres (10) a groupe et
poser la tasse (ou les tasses) sous le bec (ou les becs)
du porte-ltres (10).
Appuyer (et continuer à appuyer) sur le touche de débit du
café (16, 17, 19 ou 20) correspondant à la dose choisie
pour la programmation.
Lorsque la quantité de café dans la tasse a atteint le niveau
désiré, relâcher la touche de débit du café.
Répéter éventuellement les opérations indiquées ci-dessus
pour les autres touches relatives au café.
N.B.: en cas de programmation erronée, répéter l'opération
en utilisant une nouvelle dose de café moulu.
Programmazione dosi caffè (solo versioni DT / A) - Programming the coffee measures (only
DT / A version) - Programmation des doses de café (Uniquement pour version DT / A) -
Programmierung der Kaffeedosierung (Nur für Machine DT / A) - Programación dosis café
(sólo para versión DT / A) - Programação das doses do café (Só para verção DT / A).
DT / A
181716 2019
10
7
PT
ES
DE
Zugang zur Programmierung
Um Zugang zur Programmierung zu erhalten, müssen Sie
die Taste (18) einige Sekunden.
Zur Beendigung der Programmierungsphase und nach er-
folgter Programmierung der gewünschten Medien müssen
Sie erneut die Taste (18) drücken.
“Vor der Programmierung der Tasten zur Kaffee-
abgabe müssen Sie den Filterhalter mit der vor-
geschriebenen Menge mit vorgemahlenem Kaffee
füllen. Benutzen Sie zur Programmierung derAbga-
bemenge in keinen Fall Kaffeesatz.”
Setzen Sie den Filterhalter (10) fest auf die Abga-
beeinheit, und stellen Sie eine (oder zwei)
Espressotassen unter die Öffnung/en des
Filterhalters (10). Halten Sie die Taste ‘Kaffeeabgabe’ (16,
17, 19 , oder 20) entsprechend der zu programmierenden
Menge gedrückt. Sobald der Kaffee in der gewünschten
Menge ausgetreten ist, müssen Sie die Taste ‘Kaffee-
abgabe’ loslassen. Nehmen Sie die o.a. beschriebenen
Vorgänge ggf. zur Programmierung weiterer Tasten zur
Kaffeeabgabe vor.
Como entrar en la programación
Para entrar en la programación, apretar y mantener apreta-
dor el botón (18) durante unos segundos, hasta que sean
intermitentes el sonido del zumbador.
Para terminar la fase de programación, cuando se hayan
programado las diferentes bebidas, apretar otra vez el
botón (18).
“Antes de iniciar la programación de los botones de
erogación del café, llenar el portaltro con la correcta
dosis de café molido.
No utilizar los fondos de cafés anteriores para la
programación de las dosis.”
Volver a montar, apretando bien, el portaltro (10) en el
grupo, colocando
la taza (o las tazas) debajo de la boquilla (o boquillas) del
portaltro (10).
Apretar y mantener apretado el botón de erogación del café
(16, 17, 19 ó 20) correspondiente a la dosis elegida que
hay que programar.
Cuando la cantidad de café en la taza haya llegado al nivel
deseado, dejar de apretar el botón de erogación del café.
Eventualmente, repetir las antedichas operaciones para los
otros botones del café.
Como entrar em programação
Para entrar em programação, carregar e manter carregada
a tecla STOP/prog (18) por alguns segundos; o som
intermitente do buzzer indica que a máquina se encontra
em fase de programação.
Para terminar esta fase, uma vez efectuado o doseamento
das várias teclas de distribuição do café, carregar de novo
na tecla STOP/prog (18).
“Antes de proceder com a programação dos botões
de distribuição do café, encher o porta-ltro com
a dose de café moído correcta. Não utilizar as
borras dos cafés anteriores para a programação
das doses”.
Introduzir, apertando bem, o porta-ltro (10) no grupo,
posicionando a chávena (ou as chávenas) debaixo do bico
(ou dos bicos) do porta-ltro (10).
Carregar no botão de distribuição do café (16, 17, 19 ou
20) correspondente à dose desejada, Quando a quantidade
de café na chávena tiver alcançado o nível desejado,
abandonar a tecla de distribuição do café.
Repetir as operações acima indicadas para os outros botões
do café.
N.B.: em caso de programação errada, repetir a operação
utilizando uma dose nova de café moído.
DT / A
181716 2019
10
Programmazione dosi caffè (solo versioni DT / A) - Programming the coffee measures (only
DT / A version) - Programmation des doses de café (Uniquement pour version DT / A) -
Programmierung der Kaffeedosierung (Nur für Machine DT / A) - Programación dosis café
(sólo para versión DT / A) - Programação das doses do café (Só para verção DT / A).
8
Anomalie - Guasti - Defects - Malfunctions - Anomalies - Avaries - Anomalien -
Störungen - Anomalías - Averías - Anomalias - Avarias
ANOMALIA CAUSA RIMEDIO
La macchina per caffè non funziona. Interruzione energia elettrica. Controllare presenza energia elettrica.
Controllare posizione interruttore
generale (1).
La macchina per caffè non si
riscalda.
Posizione sbagliata interruttore (1a). Premere interruttore (1a).
Perdita dal bordo del portaltro (10). Guarnizione sottocoppa sporca di caffè. Pulire con lo spazzolino in dotazione.
Tempo d’erogazione caffè troppo
breve.
Caffè macinato troppo grosso.
Caffè troppo vecchio.
Restringere la macinatura.
Sostituire il caffè.
Caffè scende goccia a goccia. Fori ltro otturati o foro uscita portaltro
(10) sporco.
Macinatura troppo ne.
Pulire.
Allargare la macinatura.
Perdita di acqua sotto la macchina. Pozzetto di scarico intasato.
Foro bacinella di scarico otturato.
Pulire.
Pulire.
Macchina calda, non eroga caffè. Rubinetto di rete o rubinetto addolcitore
chiusi.
Mancanza di acqua in rete.
Aprire i rubinetti.
Attenderne il ritorno o chiamare un
idraulico.
L’autolivello rimane in funzione. Stesse cause del punto precedente. Stessi rimedi del punto precedente.
IT
EN
PROBLEM CAUSE SOLUTION
The coffee machine does not work. No electricity supply. Check the electricity supply.
Check the position of the main switch
(1).
The coffee machine is not heating up. Wrong position of the switch (1a). Press the switch (1a).
Leaking from the lter holder rim (10). Underpan gasket dirty with coffee. Clean using the special brush provided.
Coffee dispensing time too short. Coffee ground too coarse .
Coffee too old.
Use a ner grind.
Use new coffee.
Coffee drips out of machine. Filter holes blocked or filter holder
(10) outlet hole dirty.
Coffee ground too ne.
Clean.
Use a coarser grind.
Loss of water under the machine. Discharge well clogged up.
Discharge basin hole blocked.
Clean.
Clean.
Machine heated up, but it does not
dispense coffee.
Water supply or water softener tap
closed.
No water in system.
Open the taps
Wait until water is available or call a
plumber.
The automatic level-control devices
remain in operation.
Same causes as above. Same solution as above.
9
Anomalie - Guasti - Defects - Malfunctions - Anomalies - Avaries - Anomalien -
Störungen - Anomalías - Averías - Anomalias - Avarias
FR
ANOMALIE CAUSE SOLUTION
Lamachine à caféne fonctionnepas. Interruption de l’énergie électrique. Vérier la présence d’énergie électrique.
Vérier la position de l’interrupteur
général (1).
La machine à caffé ne se réchauffe
pas.
Position erronnée de l’interrupteur (1a). Appuyer sur l’interrupteur (1a).
Le porte-ltre (10) fuit. La garniture de la soucoupe est encrassée
de café.
Nettoyer avec la petite brosse fournie
avec la machine à café.
Le temps de distribution du café est
trop court.
Café moulu trop gros.
Café trop vieux.
Réduire le grain de mouture du café.
Remplacer le café.
Le café descend goutte à goutte. Les petits trous du ltre sont encrassés ou
l'orice de sortie du porte-ltre (10) est sale.
Mouture du café trop n.
Nettoyer.
Augmenter le grain de mouture.
Fuite d’eau sous la machine. Puisard d'évacuation trop plein.
Sortie du bac collecteur bouché.
Nettoyer.
Nettoyer.
La machine est chaude mais elle ne
distribue pas de café.
Le robinet du réseau ou le robinet de
l’adoucisseur est fermé.
Absence d’eau dans le réseau.
Ouvrir les robinets.
Attendre le rétablissement du réseau
ou appeler un plombier.
Le niveau fonctionne constamment. Mêmes causes qu’au point précédent. Mêmes solutions qu'au point précédent.
DE
STÖRUNG STÖRUNGSURSACHE MASSNAHME
Die Kaffeemaschine
funktioniert nicht.
Unterbrechung der
Netzstromversorgung.
Kontrollieren Sie die Netzstromversorgung.
Kontrollieren Sie die Stellung des
Hauptschalters (1).
Keine Erwärmungsfunktion. Falsche Stellung des Schalters (1a). Drücken Sie den Schalter (1a).
Austritte aus dem Rand des
Filterhalters (10).
Dichtung mit Kaffeeresten verschmutzt. Reinigen Sie die Dichtung mit der
mitgelieferten Bürste.
Kaffeeabgabezyklus zu kurz. Kaffee zu grob gemahlen.
Kaffee zu alt.
Mahlen Sie den Kaffee entsprechend feiner.
Verwenden Sie frischen Kaffee.
Kaffee tritt nur tropfenweise
aus.
Filterlöcher verstopft oder
Filterhalterauslass (10) verschmutzt.
Kaffee zu fein gemahlen
Reinigen.
Mahlen Sie den Kaffee entsprechend gröber.
Wasseraustritt unterhalb der
Maschine.
Ablassschacht verstopft.
Loch in Ablassbecken verstopft.
Reinigen.
Reinigen.
Maschine ist warm, gibt aber
keinen Kaffee ab.
Wasserzuführung oder
Wasserenthärterzuführung gesperrt.
Kein Trinkwasser in der Leitung.
Öffnen Sie die Ventile der Wasserzuführung
bzw. Wasserenthärterzuführung.
Warten Sie die Zufuhr von Leitungswasser ab,
oder wenden Sie sich an einen Installateur.
Der Füllstandsmesser bleibt
in Betrieb.
Gleiche Ursachen wie im vorigen Punkt
beschrieben.
Gleiche Abhilfemaßnahmen wie im vorigen
Punkt beschrieben.
10
Anomalie - Guasti - Defects - Malfunctions - Anomalies - Avaries - Anomalien -
Störungen - Anomalías - Averías - Anomalias - Avarias
ES
PT
ANOMALÍA CAUSA SOLUCIÓN
La máquina de café no funciona. Interrupción de la energía eléctrica. Controlar presencia energía eléctrica.
Controlar la posición del interruptor
general (1).
La máquina de café no se calienta. Posición incorrecta del interruptor (1a). Pulsar el mando del interruptor (1a).
Pérdidas en el borde del portaltro
(10).
Guarnición sub-copa sucia de café. Limpiar con el cepillo suministrado.
Tiempo de suministro del café
demasiado corto.
Café molido demasiado grueso.
Café demasiado viejo.
Moler el café más no.
Sustituir el café.
El café sale gota a gota. Oricios del ltro obturados u oricio de
salida del portaltro (10) sucio.
Café molido demasiado no.
Limpiar.
Moler el café más grueso.
Pérdidas de agua debajo de la
máquina.
Pozo de desagüe obturado.
Oricio bandeja de desagüe obturado.
Limpiar.
Limpiar.
La máquina está caliente pero no
suministra café.
Válvula de la red o válvula del
ablandador cerrados.
Falta de agua en la red.
Abrir.
Esperar a que vuelva el agua o llamar
a un fontanero.
El autonivel permanece en
funcionamiento.
Las mismas causas que el punto
anterior.
Las mismas medidas que el punto
anterior.
ANOMALIA CAUSA SOLUÇÃO
A máquina para café não funciona. Interrupção da energia elétrica Vericar se há energia elétrica.
Vericar a posição do interruptor geral
(1).
A máquina de café não aquece. Posição errada do interruptor (1a). Carregar o interruptor (1a).
Perda pelo bordo do porta-ltro (10). Presença de café na guarnição do contentor
inferior.
Limpar com a escova em dotação.
Tempo de distribuição do café curto
demais.
Moagem do café grossa demais.
Café antigo demais.
Moagem mais na.
Substituir o café.
O café sai gota a gota. Furos do ltro entupidos ou furo de saída
do porta-ltro (10) sujo.
Moagem do café na demais.
Limpar.
Moagem mais grossa.
Perda de água por baixo da máquina. Esgoto entupido.
Furo da bacia de descarga entupido.
Limpar.
Limpar.
Máquina quente, não distribui café. Torneira da rede ou torneira anti-calcário
fechadas.
Falta de água da rede.
Abrir as torneiras.
Aguardar o regresso do fornecimento
da água ou chamar um canalizador.
O nível automático permanece ligado. As causas são as mesmas do ponto anterior. Mesmas soluções do ponto anterior.
11
CN11CN10
EV
1° Gr.
2° Gr.
3° Gr.
4° Gr.
A
S
ON
Dip 1÷8
CN14
CN2
CN1
CN12
CN13
J1 OFF ON
Scheda unicata - Unied board - Fiche uniée
Einheitliches Informationsblatt - Tarjeta unicada - Ficha unicada
D92 A - SMART A 1, 2, 3 gr. NO NO OFF OFF OFF OFF OFF OFF OFF OFF OFF ON
NO SI/YES OFF OFF ON OFF OFF OFF OFF OFF OFF ON
D92 S - SMART S 1, 2, 3 gr. NO (n.d.) OFF OFF OFF OFF OFF ON OFF ON OFF ON
E61 Jubilée (24V) SI/YES SI/YES OFF OFF ON OFF OFF ON OFF OFF ON OFF
SI/YES NO OFF OFF OFF OFF OFF ON OFF OFF ON OFF
NO SI/YES OFF OFF ON OFF OFF ON OFF OFF OFF OFF
NO NO OFF OFF OFF OFF OFF ON OFF OFF OFF OFF
E91 A Ambassador
2, 3, 4 gr.
SI/YES NO
OFF OFF OFF OFF OFF ON ON OFF ON
ON
SI/YES SI/YES OFF OFF ON OFF OFF ON ON OFF ON ON
NO NO OFF OFF OFF OFF OFF ON ON OFF OFF ON
NO SI/YES OFF OFF ON OFF OFF ON ON OFF OFF ON
E91 S Ambassador 2, 3, 4 gr. SI/YES (n.d.) OFF OFF ON OFF OFF ON OFF ON ON ON
NO (n.d.) OFF OFF OFF OFF OFF ON OFF ON OFF ON
E91 S Diplomat
2, 3, 4 gr.
SI/YES (n.d.)
OFF OFF ON OFF OFF ON OFF ON ON
ON
NO (n.d.) OFF OFF OFF OFF OFF ON OFF ON OFF ON
E92 S Elite 2, 3, 4 gr. SI/YES (n.d.) OFF OFF ON OFF OFF ON OFF ON ON ON
NO (n.d.) OFF OFF OFF OFF OFF ON OFF ON OFF ON
E97 A 2, 3 gr. NO NO OFF OFF OFF OFF OFF OFF OFF OFF OFF ON
NO SI/YES OFF OFF ON OFF OFF OFF OFF OFF OFF ON
SI/YES NO OFF OFF OFF OFF OFF OFF OFF OFF ON ON
SI/YES SI/YES OFF OFF ON OFF OFF OFF OFF OFF ON ON
E97 A 4 gr. SI/YES NO OFF OFF OFF OFF OFF OFF ON OFF ON ON
SI/YES SI/YES OFF OFF ON OFF OFF OFF ON OFF ON ON
NO NO OFF OFF OFF OFF OFF OFF ON OFF OFF ON
NO SI/YES OFF OFF ON OFF OFF OFF ON OFF OFF ON
E97 S 2, 3 gr. NO (n.d.) OFF OFF OFF OFF OFF ON OFF ON OFF ON
E98 A 1, 2, 3 gr. NO NO
OFF OFF OFF OFF OFF OFF OFF OFF OFF
ON
NO SI/YES OFF OFF ON OFF OFF OFF OFF OFF OFF ON
SI/YES NO OFF OFF OFF OFF OFF OFF OFF OFF ON ON
SI/YES SI/YES OFF OFF ON OFF OFF OFF OFF OFF ON ON
E98 A 2, 3 gr. TR NO NO OFF ON OFF OFF OFF OFF OFF OFF OFF ON
NO SI/YES OFF ON ON OFF OFF OFF OFF OFF OFF ON
E98 A
4 gr.
SI/YES NO
OFF OFF OFF OFF OFF OFF ON OFF ON
ON
SI/YES SI/YES OFF OFF ON OFF OFF OFF ON OFF ON ON
NO NO OFF OFF OFF OFF OFF OFF ON OFF OFF ON
NO SI/YES OFF OFF ON OFF OFF OFF ON OFF OFF ON
E98 A 4 gr. TR NO NO OFF ON OFF OFF OFF OFF ON OFF OFF ON
NO SI/YES OFF ON ON OFF OFF OFF ON OFF OFF ON
E98 RE A-2 (n.d.) NO
OFF OFF OFF OFF OFF OFF OFF ON OFF
ON
(n.d.) SI/YES OFF OFF ON OFF OFF OFF OFF ON OFF ON
E98 RE S-2 (n.d.) NO OFF OFF OFF OFF OFF OFF OFF ON OFF ON
Emblema S (24V) 2, 3, 4 gr. SI/YES (n.d.) OFF OFF ON ON OFF OFF ON ON ON OFF
Enova A 1*, 2, 3 gr. SI/YES SI/YES OFF OFF ON OFF OFF ON ON OFF ON ON
Enova S 1*, 2, 3 gr. SI/YES (n.d.) OFF OFF OFF OFF OFF ON ON OFF ON ON
Stylema A
2, 3 gr.
NO NO
OFF OFF OFF OFF OFF OFF OFF ON OFF
ON
NO SI/YES OFF OFF ON OFF OFF OFF OFF ON OFF ON
SI/YES NO OFF OFF OFF OFF OFF OFF OFF ON ON ON
SI/YES SI/YES OFF OFF ON OFF OFF OFF OFF ON ON ON
Stylema A 2, 3 gr. TR NO NO OFF ON OFF OFF OFF OFF OFF ON OFF ON
NO SI/YES OFF ON ON OFF OFF OFF OFF ON OFF ON
Stylema A (24) 2, 3 gr. NO NO OFF OFF OFF OFF OFF OFF OFF ON OFF OFF
NO SI/YES OFF OFF ON OFF OFF OFF OFF ON OFF OFF
SI/YES NO OFF OFF OFF OFF OFF OFF OFF ON ON OFF
SI/YES SI/YES OFF OFF ON OFF OFF OFF OFF ON ON OFF
Stylema S 2, 3 gr. NO (n.d.) OFF OFF OFF OFF OFF OFF OFF ON OFF ON
SI/YES (n.d.) OFF OFF ON OFF OFF OFF OFF ON ON ON
Stylema S 2, 3 gr. TR NO (n.d.) OFF ON OFF OFF OFF OFF OFF ON OFF ON
OFF ON
Dip 3
MACCHINE - MACHINES
MACHINES - MASCHINEN
MÁQUINAS - MÁQUINAS
Mix PRG Dip 1 Dip 2 CN10
CN11
Dip 4 Dip 5 Dip 6 Dip 7 Dip 8 CN14
D92 A - SMART A 1, 2, 3 gr. NO NO OFF OFF OFF OFF OFF OFF OFF OFF OFF ON
NO SI/YES OFF OFF ON OFF OFF OFF OFF OFF OFF ON
D92 S - SMART S 1, 2, 3 gr. NO (n.d.) OFF OFF OFF OFF OFF ON OFF ON OFF ON
E61 Jubilée (24V) SI/YES SI/YES OFF OFF ON OFF OFF ON OFF OFF ON OFF
SI/YES NO OFF OFF OFF OFF OFF ON OFF OFF ON OFF
NO SI/YES OFF OFF ON OFF OFF ON OFF OFF OFF OFF
NO NO OFF OFF OFF OFF OFF ON OFF OFF OFF OFF
E91 A Ambassador
2, 3, 4 gr.
SI/YES NO
OFF OFF OFF OFF OFF ON ON OFF ON
ON
SI/YES SI/YES OFF OFF ON OFF OFF ON ON OFF ON ON
NO NO OFF OFF OFF OFF OFF ON ON OFF OFF ON
NO SI/YES OFF OFF ON OFF OFF ON ON OFF OFF ON
E91 S Ambassador 2, 3, 4 gr. SI/YES (n.d.) OFF OFF ON OFF OFF ON OFF ON ON ON
NO (n.d.) OFF OFF OFF OFF OFF ON OFF ON OFF ON
E91 S Diplomat
2, 3, 4 gr.
SI/YES (n.d.)
OFF OFF ON OFF OFF ON OFF ON ON
ON
NO (n.d.) OFF OFF OFF OFF OFF ON OFF ON OFF ON
E92 S Elite 2, 3, 4 gr. SI/YES (n.d.) OFF OFF ON OFF OFF ON OFF ON ON ON
NO (n.d.) OFF OFF OFF OFF OFF ON OFF ON OFF ON
E97 A 2, 3 gr. NO NO OFF OFF OFF OFF OFF OFF OFF OFF OFF ON
NO SI/YES OFF OFF ON OFF OFF OFF OFF OFF OFF ON
SI/YES NO OFF OFF OFF OFF OFF OFF OFF OFF ON ON
SI/YES SI/YES OFF OFF ON OFF OFF OFF OFF OFF ON ON
E97 A 4 gr. SI/YES NO OFF OFF OFF OFF OFF OFF ON OFF ON ON
SI/YES SI/YES OFF OFF ON OFF OFF OFF ON OFF ON ON
NO NO OFF OFF OFF OFF OFF OFF ON OFF OFF ON
NO SI/YES OFF OFF ON OFF OFF OFF ON OFF OFF ON
E97 S 2, 3 gr. NO (n.d.) OFF OFF OFF OFF OFF ON OFF ON OFF ON
E98 A 1, 2, 3 gr. NO NO
OFF OFF OFF OFF OFF OFF OFF OFF OFF
ON
NO SI/YES OFF OFF ON OFF OFF OFF OFF OFF OFF ON
SI/YES NO OFF OFF OFF OFF OFF OFF OFF OFF ON ON
SI/YES SI/YES OFF OFF ON OFF OFF OFF OFF OFF ON ON
E98 A 2, 3 gr. TR NO NO OFF ON OFF OFF OFF OFF OFF OFF OFF ON
NO SI/YES OFF ON ON OFF OFF OFF OFF OFF OFF ON
E98 A
4 gr.
SI/YES NO
OFF OFF OFF OFF OFF OFF ON OFF ON
ON
SI/YES SI/YES OFF OFF ON OFF OFF OFF ON OFF ON ON
NO NO OFF OFF OFF OFF OFF OFF ON OFF OFF ON
NO SI/YES OFF OFF ON OFF OFF OFF ON OFF OFF ON
E98 A 4 gr. TR NO NO OFF ON OFF OFF OFF OFF ON OFF OFF ON
NO SI/YES OFF ON ON OFF OFF OFF ON OFF OFF ON
E98 RE A-2 (n.d.) NO OFF OFF OFF OFF OFF OFF OFF ON OFF ON
(n.d.) SI/YES OFF OFF ON OFF OFF OFF OFF ON OFF ON
E98 RE S-2 (n.d.) NO OFF OFF OFF OFF OFF OFF OFF ON OFF ON
Emblema S (24V) 2, 3, 4 gr. SI/YES (n.d.) OFF OFF ON ON OFF OFF ON ON ON OFF
Enova A 1*, 2, 3 gr. SI/YES SI/YES OFF OFF ON OFF OFF ON ON OFF ON ON
Enova S 1*, 2, 3 gr. SI/YES (n.d.) OFF OFF OFF OFF OFF ON ON OFF ON ON
Stylema A
2, 3 gr.
NO NO
OFF OFF OFF OFF OFF OFF OFF ON OFF
ON
NO SI/YES OFF OFF ON OFF OFF OFF OFF ON OFF ON
SI/YES NO OFF OFF OFF OFF OFF OFF OFF ON ON ON
SI/YES SI/YES OFF OFF ON OFF OFF OFF OFF ON ON ON
Stylema A 2, 3 gr. TR NO NO OFF ON OFF OFF OFF OFF OFF ON OFF ON
NO SI/YES OFF ON ON OFF OFF OFF OFF ON OFF ON
Stylema A (24) 2, 3 gr. NO NO OFF OFF OFF OFF OFF OFF OFF ON OFF OFF
NO SI/YES OFF OFF ON OFF OFF OFF OFF ON OFF OFF
SI/YES NO OFF OFF OFF OFF OFF OFF OFF ON ON OFF
SI/YES SI/YES OFF OFF ON OFF OFF OFF OFF ON ON OFF
Stylema S 2, 3 gr. NO (n.d.) OFF OFF OFF OFF OFF OFF OFF ON OFF ON
SI/YES (n.d.) OFF OFF ON OFF OFF OFF OFF ON ON ON
Stylema S 2, 3 gr. TR NO (n.d.) OFF ON OFF OFF OFF OFF OFF ON OFF ON
OFF ON
Dip 3
MACCHINE - MACHINES
MACHINES - MASCHINEN
MÁQUINAS - MÁQUINAS
Mix PRG Dip 1 Dip 2 CN10
CN11
Dip 4 Dip 5 Dip 6 Dip 7 Dip 8 CN14
DT/A
C/S
12
Prêter particulièrement attention, dans les différentes congurations de la machine, à la présence ou non
du pont entre les connecteurs CN10 et CN11:
ON = pont présent (il congure le circuit soupape électrique à 220V)
OFF = aucun pont (il congure le circuit soupape électronique à 24V)
Pour une conguration correcte des machines, faire référence à la colonne CN10 - CN11 à la page suivant.
IMPORTANT: UNE CONFIGURATION DIFFERENTE DE CELLE QUI EST INDIQUEE POURRAIT COMPROMETTRE LA FICHE DE
FACON DEFINITIVE.
LA FICHE CONTENUE DANS LE KIT EST CONFIGUREE SANS PONT.
Prestare particolare attenzione, nelle varie congurazioni macchina, alla
presenza o meno del ponticello fra i connettori CN10 e CN11:
ON =
ponticello presente (congura circuito elettrovalvole a 220V)
OFF = nessun ponticello (congura circuito elettrovalvole a 24V)
Per la corretta congurazione macchine, fare riferimento alla colonna
CN10 - CN11 nella pagina seguente.
IMPORTANTE: UNA CONFIGURAZIONE DIVERSA DA QUELLA INDICATA
POTREBBE COMPROMETTERE IN MODO DEFINITIVO LA SCHEDA.
LA SCHEDA NEL KIT È CONFIGURATA: SENZA PONTICELLO.
Prestar particular atención a las diferentes conguraciones de la máquina, así como a la presencia o no del
puente entre los conectores CN10 y CN11:
ON = puente presente (congura el circuito de las electroválvulas a 220V)
OFF = ningún puente (congura el circuito de las electroválvulas a 24V)
Para una correcta conguración de las máquinas, hay que hacer referencia a la columna CN10 - CN11 de la siguiente
página.
IMPORTANTE: UNA CONFIGURACIÓN DIFERENTE DE LA INDICADA PODRÍA COMPROMETER DE FORMA DEFINITIVA
LA TARJETA.
LA TARJETA CONTENIDA EN EL KIT ESTÁ CONFIGURADA: SIN PUENTE.
Prestar uma atenção especial, nas várias congurações da máquina, à presença ou não da ponte entreosconectores
CN10 e CN11:
ON = ponte presente (congura circuito electroválvulas de 220V)
OFF = nenhuma ponte (congura circuito electroválvulas de 24V)
Para a conguração correcta das máquinas, remeter-se à coluna CN10 - CN11 na página seguinte.
IMPORTANTE: UMA CONFIGURAÇÃO DIFERENTE DA INDICADA PODERIA COMPROMET DE MODO DEFINITIVO A FICHA.
A FICHA NO KIT É CONFIGURADA: SEM PONTE.
Achten Sie bei der Konguration der Maschine auf die Präsenz oder Nichtpräsenz einer Überbrückung
zwischen den Steckverbindern CN10 und CN11:
ON = mit Überbrückung (Konguration für Magnetventile 220 V)
OFF = ohne Überbrückung ((Konguration für Magnetventile 24V)
Beziehen Sie sich zur vorschriftsmäßigen Konguration der Maschine auf die Spalte CN10 - CN11 der folgenden
Seite.
WICHTIG: BEI EINER VON DEN O.A. ANGABEN ABWEICHENDEN KONFIGURATION BESTEHT DIE GEFAHR EINER
DEFINITIVEN UNWIRKSAMKEIT DER ELEKTRONIKKARTE.
DIE ZUM KIT GEHÖRIGE ELEKTRONIKKARTE IST FÜR STECKVERBINDER OHNE ÜBERBRÜCKUNG
KONFIGURIERT.
Carefully check, in the various machine congurations, if there is a bridge
between connectors CN10 and CN11:
ON = bridge present (congure circuit solenoid valves at 220V)
OFF = no bridge (congure circuit solenoid valves at 24V)
For correct machine conguration, refer to column CN10 - CN11 on the
following page.
IMPORTANT: A CONFIGURATION THAT DIFFERS FROM WHAT IS INDICATED
CAN SERIOUSLY COMPROMISE THE CARD.
THE CARD IN THE KIT IS CONFIGURED WITHOUT A BRIDGE.
IT
EN
PT
ES
DE
FR
CN1 =
24V
CN2 = 220VCN11
CN10
OFF
CN1 =
220V
A
CN2 = 220VCN11CN10
ON
13
IT EN
DE
FR
(*) di serie
CN10/CN11 “OFF”, nessun ponticello (elettrovalvole 24V)
CN10/CN11 “ON”, ponticello presente (elettrovalvole 220V)
CN14 ON, abilita il miscelatore nelle macchine con
programmazione
Dip1 ON, inserimento dati standard (¹)
(¹) Al termine delle operazioni di inserimento dati
standard, riportare il DIP 1 sulla posizione OFF.
Dip2 ON, nelle macchine con termoriserva (TR)
Dip3 - ON, abilita la programmazione
- ON, abilita il miscelatore nelle macchine
senza programmazione
Dip4 ON, abilita interfaccia computer
Dip5 Non usato
Dip6 ON, solo per alcuni modelli
Dip7 ON, solo per alcuni modelli
Dip8 ON, solo per alcuni modelli
Mix miscelatore
n.d. non disponibile
PRG programmazione
TR termoriserva
(*) de série
CN10/CN11 “OFF”, aucun pont (soupape électronique 24V)
CN10/CN11 “ON”, pont présent (soupape électrique 220V)
CN14 ON, dans les machines avec mélangeur et la
programmation
Dip1 ON, introduction informations standard (¹)
(¹) à la n des opérations d’introduction des
informations standard, remettre le DIP 1 sur
la position OFF
Dip2 ON, dans les machines à thermoréserveTR
Dip3 - ON, met en marche la programmation
- ON, dans les machines avec mélangeur
sans programmation
Dip4 ON, met en marche l’interface de l’ordinateur
Dip5 Non utilisé
Dip6 ON, seulement pour certains modèles
Dip7 ON, seulement pour certains modèles
Dip8 ON, seulement pour certains modèles
Mix mélangeur
n.d. non disponible
PRG programmation
TR thermoréserve
(*) serienmäßig
CN10/CN11 “OFF”, ohne Überbrückung (Magnetventile 24V)
CN10/CN11 “ON”, mit Überbrückung (Magnetventile 220V)
CN14 ON, bei Maschinen mit Mischwerk und
Programmierung
Dip1 ON, Eingabe Standarddaten (¹)
(¹) Nach Abschluß der Eingabe der
Standarddaten muß der Dip-Switch-Schalter
1 auf OFF zurückgestellt werden.
Dip2 ON, bei Maschinen mit Thermoreserve TR
Dip3 - ON, Freigabe zur Programmierung
- ON, bei Maschinen mit Mischwerk ohne
Programmierung
Dip4 ON, Freigabe Computer-Schnittstelle
Dip5 Nicht belegt
Dip6 ON, nur bei bestimmten Modellen
Dip7 ON, nur bei bestimmten Modellen
Dip8 ON, nur bei bestimmten Modellen
Mix Mischwerk
n.d. nicht belegt
PRG Programmierung
TR Thermoreserve
(*) standard
CN10/CN11 “OFF”, no bridge (solenoid valve 24V)
CN10/CN11 “ON”, bridge present (solenoid valve 220V)
CN14 ON, mixer is enabled in machines with
programming
Dip1 ON, input of standard data (¹)
(¹) Upon completion of the standard data
input operations, position DIP 1 to OFF again.
Dip2 ON, in machines with TR thermoreserve unit
Dip3 - ON, programming is enabled
- ON, mixer is enabled in machines without
programming
Dip4 ON, computer interface enabled
Dip5 Not used
Dip6 ON, only for certain models
Dip7 ON, only for certain models
Dip8 ON, only for certain models
Mix mixer
n.d. not available
PRG programming
TR thermoreserve unit
14
PTES (*) de série
CN10/CN11 “OFF”, nenhuma ponte (electroválvulas 24V)
CN10/CN11 “ON”, ponte presente (electroválvulas 220V)
CN14 ON, nas máquinas com misturador e
programação
Dip1 ON, introdução dados standard (¹)
(¹) No m das operações de introdução
dos dados standard, recolocar o DIP 1 na
posição OFF.
Dip2 ON, nas máquinas com termo reserva TR
Dip3 - ON, habilita a programação
- ON, nas máquinas com misturador sem
programação
Dip4 ON, habilita o interface do computador
Dip5 Não Usado
Dip6 ON, apenas para alguns modelos
Dip7 ON, apenas para alguns modelos
Dip8 ON, apenas para alguns modelos
Mix misturador
n.d. não disponível
PRG programação
TR termo reserva
(*) de serie
CN10/CN11 “OFF”, ningún puente (electroválvulas 24V)
CN10/CN11 “ON”, puente presente (electroválvulas 220V)
CN14 ON, en las máquinas con mezclador y
programación
Dip1 ON, introducción datos estándares (¹)
(¹) Al nal de las operaciones de introducción
datos estándares, restablecer el DIP 1 a
la posición OFF.
Dip2 ON, en las máquinas con termorreserva TR
Dip3 - ON, habilita la programación
- ON, en las máquinas con mezclador sin
programación
Dip4 ON, habilita interfaz computer
Dip5 No Usado
Dip6 ON, sólo para algunos modelos
Dip7 ON, sólo para algunos modelos
Dip8 ON, sólo para algunos modelos
Mix mezclador
n.d. no disponible
PRG programación
TR termorreserva
15
Scaldatazze - Cup Warmer - Chauffe-Tasses - Tassenwärmer - Calientatazas - Escalda
chávenas
2
1
ALL OPERATIONS MUST BE PERFORMED WITH THE MACHINE OFF AND COLD.
TO ALWAYS USE THE NECESSARY SAFETY EQUIPMENT (SHOES/GLOVES).
TOUTES LES OPERATIONS DOIVENT ETRE EFFECTUEES AVEC LA MACHINE ETEINTE À FROID.
TOUJOURS UTILISER LES DISPOSITIFS DE PRÉVENTION DES ACCIDENTS DU TRAVAIL
(CHAUSSURES, GANTS).
BEI ALLEN NACHSTEHENDEN ARBEITEN MUSS DIE STROMZUFUHR ZUM GERÄT UNTERBROCHEN SEIN.
ALLE ZUM ANHEBEN UND ZUR VERLAGERUNG DER MASCHINE EINGESETZTEN PERSONEN
MÜSSEN EINE ENTSPRECHENDE ARBEITSSCHUTZAUSRÜSTUNG (SICHERHEITSSCHUHE, HANDSCHUHE)
VERWENDEN.
TODA LAS OPERACIONES DEBEN SER EFECTUADAS CON LA MÁQUINA APAGADA CON AGUA FRÍA.
SE UTILICEN SIEMPRE LOS DISPOSITIVOS NECESARIOS PARA LA PREVENCIÓN DE ACCIDENTES
(CALZADO, GUANTES).
TODAS AS OPERAÇÕES DEVEM SER REALIZADAS COM A MÁQUINA DESLIGADA DE FRIO.
SEJAM UTILIZADOS SEMPRE OS DISPOSITIVOS CONTRA ACIDENTES NECESSÁRIOS
(SAPATOS, LUVAS).
TUTTE LE OPERAZIONI DEVONO ESSERE EFFETTUATE A MACCHINA SPENTA E FREDDA.
UTILIZZARE SEMPRE I NECESSARI DISPOSITIVI ANTINFORTUNISTICI (SCARPE, GUANTI).
SMONTAGGIO E REGOLAZIONI - DISASSEMBLY AND SETTING - DEMONTAGE - REGLAGES
- ABMONTIERUNG UND EINSTELLUNGEN - DESMONTAJE Y REGOLACIONES - DESMON-
TAGEM E REGULAÇÕES
16
3
Scarico acqua dalla caldaia - Draining the boiler water - Dispositif d'évacuation eau de la
chaudière - Ablassen des Wassers aus dem Kessel - Descarga del agua de la caldera - Despejo
da água da caldeira

This manual suits for next models

1

Other Cimbali Coffee Maker manuals

Cimbali Ambassador SE E91 User manual

Cimbali

Cimbali Ambassador SE E91 User manual

Cimbali FAEMA Technical manual

Cimbali

Cimbali FAEMA Technical manual

Cimbali M32 Bistro dt1 User manual

Cimbali

Cimbali M32 Bistro dt1 User manual

Cimbali M2 Barsystem C10 User manual

Cimbali

Cimbali M2 Barsystem C10 User manual

Cimbali DT/A Technical manual

Cimbali

Cimbali DT/A Technical manual

Cimbali M24 C Technical manual

Cimbali

Cimbali M24 C Technical manual

Cimbali M29 SELECTRON User manual

Cimbali

Cimbali M29 SELECTRON User manual

Cimbali MD MAGNUM OD User manual

Cimbali

Cimbali MD MAGNUM OD User manual

Cimbali M32 Classic User manual

Cimbali

Cimbali M32 Classic User manual

Cimbali S39 TouchScreen User manual

Cimbali

Cimbali S39 TouchScreen User manual

Cimbali M2 Barsystem Use and maintenance manual

Cimbali

Cimbali M2 Barsystem Use and maintenance manual

Cimbali S39 TouchScreen Technical manual

Cimbali

Cimbali S39 TouchScreen Technical manual

Cimbali M53 Configuration guide

Cimbali

Cimbali M53 Configuration guide

Cimbali M1 TurboSteam User manual

Cimbali

Cimbali M1 TurboSteam User manual

Cimbali M34 SELECTRON Technical manual

Cimbali

Cimbali M34 SELECTRON Technical manual

Cimbali M1 MilkPs User manual

Cimbali

Cimbali M1 MilkPs User manual

Cimbali M100 RE Technical manual

Cimbali

Cimbali M100 RE Technical manual

Cimbali M39 Bistro User manual

Cimbali

Cimbali M39 Bistro User manual

Cimbali M32 Bistro dt1 User manual

Cimbali

Cimbali M32 Bistro dt1 User manual

Popular Coffee Maker manuals by other brands

Siemens CT636LES1-1 user manual

Siemens

Siemens CT636LES1-1 user manual

Wolf EC24/S Use & care guide

Wolf

Wolf EC24/S Use & care guide

Philips HD7813/58 manual

Philips

Philips HD7813/58 manual

Bosch TCA64 SERIES Instructions for use

Bosch

Bosch TCA64 SERIES Instructions for use

Gourmia GCM-4000 user manual

Gourmia

Gourmia GCM-4000 user manual

Hamilton Beach 49754 - Programmable 12 Cup Coffeemaker Use & care guide

Hamilton Beach

Hamilton Beach 49754 - Programmable 12 Cup Coffeemaker Use & care guide

Braun Aromaster Compact 8 User instructions

Braun

Braun Aromaster Compact 8 User instructions

Cino eC Installation and maintenance manual

Cino

Cino eC Installation and maintenance manual

Krups Grind & Brew KM8328 manual

Krups

Krups Grind & Brew KM8328 manual

Hamilton Beach 840153800 owner's manual

Hamilton Beach

Hamilton Beach 840153800 owner's manual

Bunn HC-2 HC-3 OPERATING & SERVICE MANUAL

Bunn

Bunn HC-2 HC-3 OPERATING & SERVICE MANUAL

dyras DYR SK2001-C6 instruction manual

dyras

dyras DYR SK2001-C6 instruction manual

Bosch Tassimo TAS 55 series instruction manual

Bosch

Bosch Tassimo TAS 55 series instruction manual

Grindmaster PrecisionBrew B-3WL parts list

Grindmaster

Grindmaster PrecisionBrew B-3WL parts list

Fisher & Paykel EB60DSXB1 manual

Fisher & Paykel

Fisher & Paykel EB60DSXB1 manual

Gaggia CUBIKA manual

Gaggia

Gaggia CUBIKA manual

Jura J600 Instructions for use

Jura

Jura J600 Instructions for use

Curtis ThermoPro TP2S Service manual

Curtis

Curtis ThermoPro TP2S Service manual

manuals.online logo
manuals.online logoBrands
  • About & Mission
  • Contact us
  • Privacy Policy
  • Terms and Conditions

Copyright 2025 Manuals.Online. All Rights Reserved.