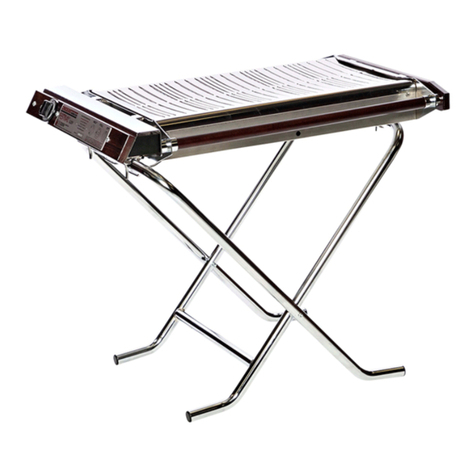
Cinders Barbecues CATERER User manual

ASSEMBLY AND OPERATING INSTRUCTIONS
CATERER PROPANE BARBECUE
THIS IS YOUR INSTRUCTION BOOKLET
DO NOT THROW IT AWAY
THIS BOOKLET MUST BE READ THOROUGHLY
BEFORE THE BARBECUE IS OPERATED
FOR USE IN GREAT BRITAIN AND IRELAND
Issue 5
1st February 2001
CINDERS BARBECUES LIMITED
High Bentham, Lancaster LA2 7NB
Tel: 015242 62900
Fax: 015242 62955
Email:info@cindersbarbecues.co.uk
www.cindersbarbecues.co.uk

2
USE OUTDOORS ONLY
CONTROL FLARES BY AVOIDING
VERY FATTY FOODS

3
DIMENSIONS
HEIGHT: 790mm LENGTH: 1700mm DEPTH: 660mm WEIGHT: 44.5 Kgs
GAS
*NOTE This barbecue is designed for use on ‘PROPANE ONLY’ (G31) at a supply
pressure of 1.0 bar (1000 mbar) (14.5 psi).
HEAT INPUT
Heat input = 20.0 kW 1450 g/hr
INJECTOR SIZE
AMAL 60cc
APPLIANCE CATEGORY
Appliance Category: 13P
“USE OUTDOORS ONLY”. (BS and EN)
“READ THE INSTRUCTIONS BEFORE USING THE APPLIANCE”.
“WARNING: ACCESSIBLE PARTS MAY BE VERY HOT. KEEP YOUNG
CHILDREN AWAY” (BS EN 498)
“WARNING: THIS APPLIANCE GETS VERY HOT. TAKE SPECIAL CARE
WHEN CHILDREN OR ELDERLY PEOPLE ARE PRESENT”.
CYLINDER SIZE
This barbecue is designed for use with gas cylinders of 19 kg.
ASSEMBLY INSTRUCTIONS
Hold the barbecue on its side and release the legs from their respective retaining clips
at each end of the appliance. Swing the leg assemblies fully out so that the inner
struts can be unfolded into the erected position and press firmly into the same
retaining clips. Do not use the space between the body and the drain can retaining
hoop. Stand the barbecue upright and as level as possible. Use any standard ring-pull
drinks can as a fat drain container. Thread them through their ring-pull holes onto the
stainless steel clips, which emerge from the underpan within the area of the chromed
hoop at either end of the barbecue.

4
CHANGING CYLINDERS
This barbecue is designed for use with propane cylinders of 19 kg in weight. WHEN
CHANGING cylinders follow the instructions in order as noted below.
a) Turn ‘OFF’ the barbecue by first turning the cylinder valve on the gas
bottle in a clockwise direction.
b) Turn ‘OFF’ clockwise both gas taps situated at the ends of the barbecue.
c) Extinguish all naked lights, cigarettes and other sources of ignition in the
vicinity of the barbecue.
d) The regulator can now be disconnected from the gas cylinder valve by
turning clockwise with the aid of the cylinder spanner provided.
e) Screw the black cylinder sealing plug into cylinder valve on the empty
cylinder by turning anticlockwise with a screwdriver.
f) Ensure that the cylinder valve on the full cylinder is turned ‘OFF’ by
turning in a clockwise direction. Remove the black sealing plug from the
cylinder valve by turning clockwise with a screwdriver.
WARNING: THE CHANGING OF CYLINDERS MUST BE CARRIED OUT
IN A FLAME FREE ENVIRONMENT.
The following paragraphs headed CONNECTING THE REGULATOR,
POSITIONING THE GAS CYLINDER, and LIGHTING THE BARBECUE must be
carried out in strict sequence.
CONNECTING THE REGULATOR
Check that the hose is completely over the nozzles on the regulator and on the
barbecue and that it is secured firmly in place with a hose clip at each end. Examine
the flexible hose regularly and get your dealer to fit new hose if perished, worn or
damaged in any way.
LPG ATTACKS NATURAL RUBBER –ONLY USE HOSE TO BS:3212 TYPE
2 SUPPLIED BY YOUR DEALER.
When connecting the regulator to the cylinder avoid undue twisting of the flexible
hose. The approved regulator supplied with this barbecue is preset at 1.0 bar and is
for use on ‘PROPANE ONLY’. THE LEAFLET IS ATTACHED TO THE
REGULATOR. THIS MUST BE READ THOROUGHLY AND THE
CONNECTING INSTRUCTIONS FOLLOWED EXACTLY. THE CYLINDER

5
SPANNER SUPPLIED WITH THIS GAS BARBECUE MUST BE USED TO
TIGHTEN THE REGULATOR CONNECTOR INTO THE CYLINDER
VALVE. A LEAKAGE CHECK SHOULD BE CARRIED OUT WITH A
SOAPY WATER SOLUTION ON THE REGULATOR TO CYLINDER
VALVE CONNECTION AT THIS STAGE.
POSITIONING OF THE GAS CYLINDER
Ensure that the gas cylinder is not placed in contact or underneath the barbecue. We
recommend that the cylinder should be placed as far from the barbecue as possible
without placing undue strain on the hose.
Ensure that the cylinder is placed on a flat, level surface and that the hose is neither
stretched nor twisted.
The cylinder must be located to give good access to connect and disconnect the
regulator to or from the cylinder.
POSITIONING THE BARBECUE
The barbecue is designed to be freestanding.
Ensure that the barbecue is placed on a flat surface with the clearances specified in the
figure below between any side, rear or overhead obstructions. When selecting the
location ensure the barbecue is not placed near combustible materials or in a windy
environment.

6
2000 mm
690 mm
1000 mm
LIGHTING THE BARBECUE
a) Turn ‘OFF’ clockwise the gas taps at either end of the barbecue.
b) Fit the regulator as instructed on page 4 of this instruction document.
c) Turn ‘ON’ the gas cylinder by turning the cylinder valve anticlockwise.
d) Insert a lighted taper or gas match into the appropriate brass lighting hole
(located centrally underneath) for the side to be lit and turn ‘ON’ the
appropriate gas tap by again turning anticlockwise. The burner should
light.
e) If the burner does not light immediately, turn ‘OFF’ the gas tap by turning
clockwise and try again after a period of 5 minutes has elapsed.
f) To light the other burner repeat operations (d) and (e) noted above.

7
TURNING OFF THE BARBECUE
To turn ‘OFF’ one side of the barbecue turn the appropriate gas tap clockwise.
To turn ‘OFF’ the whole barbecue first turn the cylinder valve in a clockwise
direction.
Turn the gas taps situated at the ends of the barbecue clockwise to the ‘OFF’ position.
DO NOT ATTEMPT TO RE-LIGHT THE BARBECUE FOR FIVE MINUTES.
WARNING –GAS LEAKAGE.
Should a gas leak be suspected, close the cylinder valve and extinguish all naked
lights. LOCATE THE LEAK BY SMELL, OR WITH A SOAPY SOLUTION
BRUSHED ONTO JOINTS. A LEAK WILL SHOW UP AS BUBBLES. NEVER
USE A MATCH OR NAKED LIGHT TO SEARCH FOR LEAKS.
STORING THE BARBECUE
It is important that the barbecue is stored in dirt free, damp free conditions indoors
when not in use for any period of time. The barbecue should always be disconnected
from the cylinder during storage.
The cylinder must always be stored outdoors when not in use.
The barbecue should be stored in an upright position and be secured if necessary.
CLEANING THE BARBECUE
Burn off all fatty debris inside the body of the barbecue after cooking. Allow the
barbecue to cool before moving. The grill top may be cleaned in place with a wire
brush and then finished off with steel wool. The rest of the appliance can be cleaned
with hot soapy water. TAKE CARE NOT TO BLOCK ANY PORTION OF THE
BURNER AERATION PORT, LOCATED NEXT TO EITHER GAS CONTROL
VALVE.
Ensure the grease drain holes under the ends of the appliance are clear and will allow
the fat to flow away into the drain cans. The drain cans must be removed before the
barbecue is folded for storage. Any variety of drinks ring-pull can may be used, and
later discarded.
Fold and stand the barbecue on end with one control valve below. An ejection chute
is provided to allow any loose debris to fall out. Repeat this operation on the other
end of the appliance to clear the remaining burner chamber.

8
WARNINGS
THIS APPLIANCE GETS VERY HOT. TAKE CARE WHEN CHILDREN OR
ELDERLY PEOPLE ARE PRESENT. (BS:5258:Pt14)
ACCESSIBLE PARTS MAY BE VERY HOT. KEEP YOUNG CHILDREN
AWAY. (BS EN 498)
USE OUTDOORS ONLY (BS AND EN)
TAKE CARE NOT TO TOUCH THE TOP OR SIDES OF THE BARBECUE AS
THESE AREAS GET EXTREMELY HOT AND WILL RESULT IN BURNS.
PROTECTIVE GLOVES MUST BE USED WHEN USING THIS BARBECUE.
DO NOT MOVE THE APPLIANCE WHILST IT IS ALIGHT OR IN THE HOT
CONDITION.
ANY MODIFICATION OF THE APPLIANCE MAY BE DANGEROUS.
THIS APPLIANCE SHALL BE KEPT AWAY FROM FLAMMABLE
MATERIALS.
CATERING TIPS
Portions should be kept as thin, or as lean, or as pre-cooked as presentable. It is
important to try a wide range of food products.
SMOKE AND FLAME IS DIRECTLY RELATED TO THE AMOUNT OF FAT IN
THE FOOD.
Choose staff with outgoing personalities.
Rosemary is a herb which gives an attractive aroma when scattered on occasionally.
Always be sure to have a spare full cylinder on hand and contact ‘CINDERS’ on any
point of difficulty or interest.
MAINTENANCE
ALL THE SERVICING AND MAINTENANCE OF THIS APPLIANCE MUST NOT
BE CARRIED OUT BY THE OWNER. ALWAYS USE A COMPETENT
DEALER, OR CONTACT THE MANUFACTURER.
The burners may be withdrawn from the appliance after removing the wooden end
guards.
a) To do this, remove both screws with heads protruding through the wooden
guards and remove guards from both ends of the appliance.

9
b) Undo compression fittings connected to the stainless steel pipe that runs the
length of the appliance.
c) Remove burner at hose end of the appliance. Ensure the burner is free from
dust and foreign matter and then replace and reconnect the compression
coupling joint.
d) Remove burner from other end of appliance and again ensure the burner is free
from dust and foreign matter. Replace and reconnect the compression
coupling joint.
e) After this operation has been carried out a leakage check must be carried out
on the compression joints, including the joint for the hose connection. *NOTE
do NOT carry out leakage checks in an enclosed area, or in an area which is
not well ventilated. Propane is heavier than air.
Major servicing, refinishing and internal cleaning is recommended at least once per
season, according to usage. ‘CINDERS’ provide this service and should be contacted
in good time.
When not in use the barbecue should be covered and stored in a dust free place in the
vertical, folded position.
High phosphate foods (bacon, cured sausage etc) may increase the risk of corrosion of
this unit if not cleaned correctly:
1. After foods with a high phosphate content have been cooked ensure that the
unit is thoroughly cleaned.
2. Remove gas burner from unit and wash fire box out with lots of clean water to
dissolve nitrate salts. (More water means more dilution).
3. Wash burners and replace, check at all compression joints for leakage with
soapy water, if in doubt consult a qualified gas engineer.

10
SPARE PARTS LIST
Part No Description Qty
Cat-Center-Bodies Caterer body double and center 1
CPCatUKBurnerL/H Caterer Burner L/H complete 1
CPCatUKBurnerR/H Caterer Burner R/H Complete 1
Cav/CatUK –Hose Kit Cav/Cat Hose/Reg/Spanner kit 1
UKCat-Tap/tee Gok valve tee/Jet complete 1
UKCat/Tap/elbow Gok valve elbow/Jet Complete 1
CatUK Manual Instruction Manual Caterer Uk 1
UkCavCat-Spanner Kit Regulator cap/spanner 1
Jets 60 Size 60cc Jets (1bar)UK 2
Cat-Link Tube Caterer Link tube 1
CatHot-Grill Top Cat/Hot Grill top 1
CavCatEnd-CP Cav/Cat End plate 2
Cat-Handrail Caterer Dowel Complete 2
Cav/Cat-WoodEnd Cav/Cat Wood End stained 2
CP-Pin Leg Pin leg 2
Cat/Hot Short Leg Caterer Inner leg 2
CP-Leg Lug Leg lugs 4
Leg Bung Leg bungs 8

11
USE OUTDOORS ONLY
CONTROL FLARES BY AVOIDING
VERY FATTY FOODS
Table of contents
Other Cinders Barbecues Grill manuals
