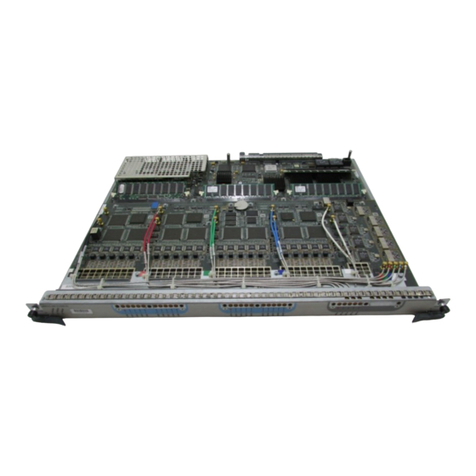
Cisco CX-CIP2-ECA2 Series Operating and maintenance instructions

1
Doc. No.
Copyright © 1996
Cisco Systems, Inc.
All rights reserved.
Second-Generation Channel Interface
Processor (CIP2) Installation and Configuration
78-3335-02
Product Numbers: CX-CIP2-ECA1=, CX-CIP2-ECA2= , CX-CIP2-ECAP1=,
CX-CIP2-PCA1=, CX-CIP2-PCA2=, CX-CIP2-U-ECA1=, CX-CIP2-U-ECA2=,
CX-CIP2-U-ECAP1=, CX-CIP2-U-PCA1=, CX-CIP2-U-PCA2=, CAB-PCA-Y=,
CAB-PCA-VA=, CAB-PCA-VB=
This document contains instructions for installing (or replacing) the second-generation Channel
Interface Processor (CIP2) in the Cisco 7000 series routers and the Cisco 7500 series routers.
Important Note to Users The following Cisco Internetwork Operating System (Cisco IOS)
releases support the CIP2: Cisco IOS Release 10.2(13), or later, Release 10.3(13), or later,
Release 11.0(10), or later, or Release 11.1(5) or later.
Prior to these Cisco IOS releases being available, CIP2 is supported with a special microcode image.
This microcode image is available through download from Cisco Connection Online (CCO), on
diskettes shipped with the CIP2 when shipped separately from a system (as a spare), or is already in
Flash memory on a preconfigured system. For instructions on placing CIP2 microcode in Flash
memory, see the section “CIP2 Microcode” on page 37.
Once CIP2 microcode has been copied into Flash memory, a configuration command must be
specified to instruct the Cisco IOS to use this microcode image instead of the microcode image
bundled with your version of the Cisco IOS. For instructions on configuring the Cisco IOS to use a
CIP2 microcode image from Flash memory, refer to the section “Configuring Microcode” on
page 39.
For additional specific CIP2 software and hardware requirements, refer to the section “Software and
Hardware Prerequisites” on page 13. For complete and detailed descriptions of CIP2-related
interface and configuration commands, configuration options, and requirements, refer to the
publications listed in the section “If You Need More Information” on page 2.

2Second-Generation Channel Interface Processor (CIP2) Installation and Configuration
Document Contents
Document Contents
This document includes the following sections:
•If You Need More Information
•What Is the CIP2, page 4
•Installation Prerequisites, page 13
•What Is the Cisco 7000 Series?, page 19
•What Is the Cisco 7500 Series?, page 22
•Installation, page 25
•Checking the Installation, page 35
•CIP2 Microcode, page 37
•Using Flash Memory, page 41
•Running Diagnostic Tests, page 44
•Cisco Connection Online, page 46
If You Need More Information
The Cisco Internetwork Operating System (Cisco IOS) software running your router contains
extensive features and functionality. The effective use of many of many of these features is easier if
you have more information at hand. For additional information on configuring and maintaining the
Cisco 7000 series and Cisco 7500 series routers and CIP2, the following documentation resources
are available to you:
•Cisco Connection Documentation, Enterprise Series CD-ROM
This publication and additional Cisco Systems publications are available on a CD-ROM called
Cisco Connection Documentation, Enterprise Series, which is Cisco’s online library of product
information. The CD-ROM is updated and shipped monthly, so it might be more up to date than
printed documentation. To order Cisco Connection Documentation, Enterprise Series CD-ROM,
contact a Cisco Sales or Customer Service representative.
•Refer to the following modular configuration, modular command reference, and support
publications, as appropriate for your configuration:
—Configuration Fundamentals Configuration Guide
—Configuration Fundamentals Command Reference
—Security Configuration Guide
—Security Command Reference
—Wide-Area Networking Configuration Guide
—Wide-Area Networking Command Reference
—Network Protocols Configuration Guide, Part 1
—Network Protocols Command Reference, Part 1
—Network Protocols Configuration Guide, Part 2
—Network Protocols Command Reference, Part 2
—Network Protocols Configuration Guide, Part 3
Second-Generation Channel Interface Processor (CIP2) Installation and Configuration 3
If You Need More Information
—Network Protocols Command Reference, Part 3
—Bridging and IBM Networking Configuration Guide
—Bridging and IBM Networking Command Reference
—Configuration Builder Getting Started Guide
—Troubleshooting Internetworking Systems
—Debug Command Reference
—System Error Messages
—Cisco IOS Software Command Summary
—Cisco Management Information Base (MIB) User Quick Reference
•For hardware installation and maintenance information on the Cisco 7000 series and Cisco 7500
series routers, refer to the following publications:
—Cisco 7000 Hardware Installation and Maintenance
—Cisco 7010 Hardware Installation and Maintenance
—Cisco 7505 Hardware Installation and Maintenance
—Cisco 7507 Hardware Installation and Maintenance
—Cisco 7513 Hardware Installation and Maintenance
•To view Cisco documentation or obtain information about documentation, refer to the Cisco
Connection Documentation, Enterprise Series CD-ROM, to the section “Cisco Connection
Online,” on page 46, or call Customer Service at 800 553-6387 or 408 526-7208. Customer
Service hours are 5:00 a.m. to 6:00 p.m. Pacific time, Monday through Friday (excluding
Cisco Information Packet that shipped with your router.

4Second-Generation Channel Interface Processor (CIP2) Installation and Configuration
What Is the CIP2
What Is the CIP2
This section discusses channel attachment and the CIP2, its LED functions, and its memory and
cable requirements.
Channel Attachment Overview
A mainframe channel (referred to as a channel) is an intelligent processor that manages the protocol
on the communications media and controls the data transfer to and from the main central processing
unit (CPU) storage. Devices called input/output processors (IOPs) communicate between the host
CPU and the channel. One IOP controls multiple channels, and there is no relationship between the
number of CPUs and the number of IOPs.
The channel relieves the mainframe CPU of direct communication with input/output (I/O) devices,
which saves processing cycles and allows data processing and communications tasks to run
concurrently. Channels use one or more channel paths as the links between mainframes and I/O
devices. I/O devices are connected directly to control units, which provide the logical capabilities
required to operate and control the I/O devices.
CIP2 Overview The CIP2 provides up to two channel-attached interfaces for Cisco 7000 series and Cisco 7500
series routers, eliminating the need for a separate front-end processor.
The CIP2 interfaces are combinations of a bus and tag (also called an original equipment
manufacturer’s interface [OEMI] and a parallel I/O interface) adapter and an Enterprise Systems
Connection (ESCON) adapter.
The bus and tag adapter is called the Parallel Channel Adapter (PCA), and the ESCON adapter is
called the ESCON Channel Adapter (ECA). The PCA and ECA connect directly to the CIP2, and
any combination of the two adapters can be used.
Note The ECA and PCA adapters can be upgraded or replaced (in the field) by a Cisco-certified
maintenance provider only. The CIP2 supports online insertion and removal (OIR), which allows
you to install or remove a CIP2 while the system is operating, without shutting down system power.
Caution To prevent system problems in Cisco 7000 series and Cisco 7500 series systems running
Cisco IOS images earlier than Cisco IOS Release 11.1(5), CIP2 (second-generation) cards must not
be installed in the same chassis system with CIP (first-generation) cards.

Second-Generation Channel Interface Processor (CIP2) Installation and Configuration 5
What Is the CIP2
CIP2 DescriptionThe CIP2 (see Figure 1) consists of a motherboard that is mounted on a metal carrier and one or two
ECA and/or PCA interfaces. (The CIP2’s readsChannel Interface Processor 2.) The ECA and PCA
interfaces attach to the motherboard by means of a multipin connector located at the rear edge of the
adapter. The CIP2 has two DRAM SIMMs (see Figure 1) and comes configured with 32 MB of
DRAM as the minimum standard (default) memory configuration. The CIP2 also has a Flash
memory device for storing the CIP2 microcode boot image. (See Figure 1.)
Figure 1 Channel Interface Processor, Horizontal Orientation
Note The ECA and PCA adapters can be upgraded or replaced (in the field) by a Cisco-certified
maintenance provider only.
Caution To prevent damage, and to prevent insertion problems caused by misalignment of the
adapters and motherboard, do not attempt to remove the adapters or motherboard from the carrier.
CIP2 Model Numbers
There are three CIP2 carrier types, which offer the following five interface adapter combinations:
•Single PCA on a PCA/ECA carrier (CX-CIP2-PCA1)
•Combination PCA and ECA (CX-CIP2-ECAP1)
•Single ECA on a dual ECA carrier (CX-CIP2-ECA1)
•Dual ECA on a dual ECA carrier (CX-CIP2-ECA2)
•Dual PCA on a dual PCA carrier (CX-CIP2-PCA2)
Add an equal sign (=) to the product number when you order interface processors as spares.
Flash memory
DRAM
SIMMs U1
U2
H6671
1
0
PCA ECA
PRESENT
LOADED
SIGNAL
ONLINE
PORT 0
PORT 1
ENABLED

6Second-Generation Channel Interface Processor (CIP2) Installation and Configuration
What Is the CIP2
The ECA has a female, duplex connector, and the PCA has a female, DB-78 connector. Figure 2
shows the ECA and PCA interface combinations.
Figure 2 CIP2 Interface Adapter Combinations
CIP2 DRAM Configurations
Each CIP2 model is available in the following configurations of dynamic random-access memory
(DRAM) single in-line memory modules (SIMMs):
•32-MB DRAM—MEM-CIP-32M1
•64-MB DRAM—MEM-CIP-64M(=)
•128-MB DRAM—MEM-CIP-128M(=)
Note CIP2 DRAM can be upgraded in the field by Cisco-certified service personnel only.
1. 32 MB of DRAM is the default memory configuration for the CIP2.
H7108
1
0
0
1
0
1
1
1
0
Single PCA
PCA and ECA
Single ECA
Dual ECA
Dual PCA
0

Second-Generation Channel Interface Processor (CIP2) Installation and Configuration 7
What Is the CIP2
CIP2 LED Indicators and Sequences
Following are the functions of the CIP2 LEDs. (See Figure 3.)
Figure 3 CIP2 LED Indicators
•Enabled—Indicates that the CIP2 has been enabled for operation by the system.
•Present—Indicates that the ECA or PCA adapter has been detected by the CIP2.
•Loaded—Indicates that the ECA or PCA adapter firmware has been completely loaded.
•Signal—For the ECA, this LED indicates that the Sync signal has been detected. For the PCA,
this LED indicates that the Operational Out signal has been detected. Note that even though a
system reset and selective reset both cause the operational out signal to drop, the signal LED will
still be on during those sequences.
•Online—For the ECA, this LED indicates that an establish-logical-path request has been
received from the channel. For the PCA, this LED indicates that the PCA is ready to establish
connection to the host channel.
Following are the sequences for the CIP2 LED indicators. The enabled LED is not part of the
following sequences. On cold boots, the following LED sequences apply:
The following LED sequence indicates that the CIP2 is waiting for commands from the RP (or RSP).
Present Loaded Signal Online
Port 1 On On Off Off
Port 0 Off Off Off Off
Present Loaded Signal Online
Port 1 On On On On
Port 0 On On Off Off
Present Loaded Signal Online
Port 1 On On On On
Port 0 On On On On
Present Loaded Signal Online
Port 1 Off Off Off Off
Port 0 Off Off Off Off
PRESENT
LOADED
SIGNAL
ONLINE
PORT 0
PORT 1
H2433
ENABLED

8Second-Generation Channel Interface Processor (CIP2) Installation and Configuration
What Is the CIP2
On warm boots, the LEDs flash briefly. On downloads, the following three LED sequences apply;
the first indicates that the system is downloading volatile programmable logic device (VPLD) code:
The following sequence indicates that the CIP2 is downloading microcode:
The following sequence indicates that the CIP2 is starting to execute the microcode:
ESCON and Bus and Tag Specifications
Table 1 lists the specifications for the ESCON and bus and tag interfaces.
Table 1 ESCON and Bus and Tag Specifications
1. The IBM 3044 C/D (host side/remote side) copper-to-fiber repeater can be used to extend this distance up to 1.2 miles (2 km).
2. MBps = megabytes per second.
3. For bus and tag, the signaling rate matches the channel data rate. For example, if you use a 3.0 MBps channel, the signaling rate is
3.0 MBps. The ESCON interface signals at a constant rate; the bus and tag interface signals at the data rate.
4. Mbps = megabits per second.
5. The CIP2 ESCON requires dynamic = NO with HCD.
6. Where 256 represents available unit addresses, 16 represents the number of partitions (LPARs), 16 represents the number of control
unit images, and 253 represents the number of ESCON director paths. It is unlikely a system would have the resources to support the
total number of available addresses.
Present Loaded Signal Online
Port 1 On On On On
Port 0 On On On Off
Present Loaded Signal Online
Port 1 Off Off Off Off
Port 0 On On On On
Present Loaded Signal Online
Port 1 Off Off Off Off
Port 0 Off Off Off Off
Characteristic ESCON Bus and Tag
Supported processor I/O architectures ESA/390 System/370
370/Xa
ESA/390
Bit transmission Serial Parallel
Maximum distance (for LED with ESCON) 1.9 miles (3.1 km) point-to-point
5.7 miles (9.2 km) with two ESCON Directors 400 ft (122 m)1
Channel data rate Up to 17 MBps2Up to 4.5 MBps
Signaling rate3200 Mbps44.5 MBps
Cable types Fiber-optic (62.5/125 micron multimode) Copper bus and tag
Connection types Dynamic5Static
Number of addressable devices per channel 256 x 16 x 16 x 2536256
Connectable control units per channel Up to 59 (through a 9032 ESCON Director) Up to 8
Connectable channels per adapter Up to 59 (through a 9032 ESCON Director)
Varies by control unit 1

Second-Generation Channel Interface Processor (CIP2) Installation and Configuration 9
What Is the CIP2
ESCON Cable The ECA interface uses 62.5/125 micrometer, multimode, fiber-optic cable with male duplex
connectors at each end. (See Figure 4.) ESCON cables are not available from Cisco Systems. Refer
to the ESCON specifications in Table 1, and contact your cable supplier or the vendor of your host
CPU to order the correct ESCON cable.
Figure 4 ESCON Interface Duplex Connector for the ECA
H2454

10 Second-Generation Channel Interface Processor (CIP2) Installation and Configuration
What Is the CIP2
Bus and Tag CablesFollowing are descriptions and illustrations of the bus and tag cables.
Y Cable
The bus and tag cable with three 78-pin connectors (shown in Figure 5) has a DB-78 male (PCA)
connector on the CIP2 end, a DB-78 female connector on the next-control-unit end, and a DB-78
male connector on the from-host end.
Figure 5 PCA Bus and Tag Cable (CAB-PCA-Y)
The model number is CAB-PCA-Y (referred to as the Y cable)The male connector might be labeled
IN and is typically black, but can also be a dark gray. The female connector might be labeled OUT
and is typically light gray. The female OUT cable is nearest to the select/bypass switch, which is
discussed on the following page. (The IBM part number is 89F8392; however, this is subject to
change.)
Caution The Y cable must connected directly to the PCA. Do not connect any other cables directly
to the PCA.
H2444
Male, DB-78 PCA connector
Female, DB-78 connector to
next control unit (light gray)
Male, DB-78 connector from
host (dark gray or black)
Male, DB-78
terminator block

Second-Generation Channel Interface Processor (CIP2) Installation and Configuration 11
What Is the CIP2
Note the switch marked S(for select mode) and B(for bypass mode). The switch is located on the
rear of the PCA connector. (See Figure 6.) The select/bypass switch is required to allow the cable to
be separated from the PCA without “opening” the select-out loop.
Caution To prevent halting the system or negatively affecting the mainframe operating system,
verify that the select/bypass switch is in bypass mode before you remove the PCA connector from
the CIP2.
Figure 6 Select/Bypass Switch on the Rear of the PCA Connector (CAB-PCA-Y Bypass Shown)
In select mode the PCA is operational, and the select-out signal is passed in a loop to all control lines
on the channel. All control units have a relay that shorts the incoming select-out signal to the
outgoing select-out signal when power is not applied to the control unit. When power is applied, the
relay is opened, and the signal is passed to the PCA.
Without the select/bypass switch in bypass mode, the channel would need to be taken offline before
servicing or replacing a CIP2. If the selected address does not match, the select-out signal is passed
to the next control unit. If the select-out signal gets all the way back to the channel, the control unit
being addressed is not present.
Note In bypass mode, the incoming select-out signal is shorted to the outgoing select-out signal,
bypassing the PCA and allowing other devices on the channel to function properly.
Caution Make sure you provide adequate strain relief for the heavy bus and tag cables that attach
to the PCA, to prevent damaging the PCA connector on the CIP2 by unintentionally disconnecting
the Y cable from the PCA connector.
VA and VB Cables
The two bus and tag cables with connector blocks have a DB-78 (male or female) connector on the
CIP2 end and 48-pin type-A connector blocks on the bus and tag ends. (See Figure 7.) VA and VB
cables are 56 inches (1.42 meters) in length.
For the bus and tag cable that attaches between the host and the PCA, the model number is
CAB-PCA-VA, and it is referred to as the VA cable. The female 78-pin connector might be labeled
IN and is typically light gray. The cable labeled P2 is bus, and the cable labeled P3 is tag. Looking
into the end of the female 78-pin connector (on the VA cable), with the wide part of the connector
D-shell on top, the P2 (bus) cable is on the right, and the P3 (tag) cable is on the left. The plastic on
the ends of the bus and tag connectors might be black or dark gray.
H2445

12 Second-Generation Channel Interface Processor (CIP2) Installation and Configuration
What Is the CIP2
The IBM part number is 12G8058; however, this is subject to change. The VA cable ships with a
terminator; the Cisco model number CAB-PCA-VA includes this terminator. The terminator and VA
cable together have the IBM part number 12G7988; however, this is subject to change.
For the bus and tag cable that attaches between the next control unit and the PCA, the model number
is CAB-PCA-VB, and it is referred to as the VB cable. The male 78-pin connector might be labeled
OUT and is typically black or dark gray. The cable labeled P2 is bus, and the cable labeled P3 is tag.
Looking into the end of the male 78-pin connector (on the VB cable), with the wide part of the
connector D-shell on top, the P2 (bus) cable is on the left, and the P3 (tag) cable is on the right. The
plastic on the ends of the bus and tag connectors might be light gray (as opposed to the black or dark
gray plastic on the VA cable). The IBM part number is 12G7933; however, this is subject to change.
Caution To prevent potential system problems, do not connect the VB cable directly to the PCA.
You must connect the Y cable to the PCA, then connect the VB cable to the Y cables as appropriate.
Figure 7 PCA Bus and Tag, VA and VB Cables
The Y cable always attaches to the PCA. The VA cable attaches between the male end of the Y cable
and the host. The VB cable attaches between the female end of the Y cable and the next (or new)
control unit. Do not connect the VB cable directly to the PCA. If the PCA is the last control unit,
channel termination is required at the end of the Y cable that points away from the host. (See
Figure 5.) For attachment instructions refer to the section “Attaching the CIP2 to the Channel” on
page 30.
DB-78 connector
Bus
Tag
H2432
Light gray for
CAB-PCA-VA
(female)
Dark gray or black
for CAB-PCA-VB
(male)
Dark gray for
for CAB-PCA-VA;
light gray for
CAB-PCA-VB
(plastic end)
48-pin type-A
connector blocks

Second-Generation Channel Interface Processor (CIP2) Installation and Configuration 13
Installation Prerequisites
Caution To preventdamaging thePCA connector on the CIP2by unintentionallydisconnecting the
Y cable from the PCA connector, provide adequate strain relief for the heavy bus and tag cables that
attach to the PCA.
Installation Prerequisites
Before you install the CIP2, review the safety and electrostatic discharge (ESD)-prevention
guidelines in this section to avoid injuring yourself or damaging the equipment. This section also
provides a list of parts and tools you will need to perform the installation, and lists the software and
microcode requirements.
Software and Hardware Prerequisites
You can determine the current version of software or microcode stored in Flash memory either by
removing the processor module and checking the Flash device’s label or by configuring the system
to boot the system software from Flash memory, reloading the system, and using show commands
to check the version that is loaded and running. Refer to the section “CIP2 Microcode,” on page 37,
for basic configuration information, and to the appropriate software documentation for complete
configuration instructions and examples. If the displays indicate that the required system software
and microcode is not available in your system, refer to the section “Cisco Connection Online,” on
page 46, for information about contacting a service representative for upgrade information.
Following are important software and hardware prerequisites concerning the CIP2:
•To operate with the CIP2, the Cisco 7000 series systems require Cisco IOS Release 10.2(13), or
later, Release 10.3(13), or later, Release 11.0(10) or later, or Release 11.1(5) or later.
•To operate with the CIP2, the Cisco 7500 series systems require Cisco IOS Release 10.3(13), or
later, Release 11.0(10), or later, or Release 11.1(5) or later.
Note Refer to Table 2, on page 14, for the specific Cisco IOS images.
•The CIP2 operates with the CxBus in the Cisco 7000 series routers with either of the following
processor types:
—Route Processor (RP) and Switch Processor (SP) (or Silicon Switch Processor [SSP])
combination.
—7000 Series Route Processor (RSP7000) and 7000 Series Chassis Interface (RSP7000CI)
combination.
•The CIP2 operates with the CyBus in the Cisco 7500 series systems, which use the Route Switch
Processor (RSP).
Caution To prevent system problems in Cisco 7000 series and Cisco 7500 series systems, running
Cisco IOS images earlier than Cisco IOS Release 11.1(5), CIP2 (second-generation) cards must not
be installed in the same chassis system with CIP (first-generation) cards.
Table 2 (on the following page) lists the specific Cisco IOS software release images that are
compatible with the CIP2.

14 Second-Generation Channel Interface Processor (CIP2) Installation and Configuration
Installation Prerequisites
Table 2 Cisco IOS Release Image Names
The showversionand showhardwarecommands display the current hardware configuration of the
router, including the system software version that is currently loaded and running. The
show microcodecommandlists thebundled microcode(targethardware) versionfor each processor
type. The CIP (and now CIP2) microcode is no longer bundled in Cisco IOS 11.1 and later, so the
show microcode command lists the default microcode which should be used with this Cisco IOS
version. The show controller cbus command shows the microcode version you are running. (For
complete descriptions of configuration commands, refer to the publications listed in the section “If
You Need More Information” on page 2.)
You can determine the current version of software or microcode stored in Flash memory either by
removing the processor module and checking the Flash device label or by using the show controller
cbus command and checking the EPROM version number in the output. Refer to the section “CIP2
Microcode,” on page 37, for basic configuration information, and to the appropriate software
documentation for complete configuration instructions and examples, listed in the section “If You
Need More Information” on page 2.
If the displays indicate that the required system software and microcode is not available in your
system, refer to the section “Cisco Connection Online,” on page 46, or contact a service
representative for upgrade information.
1. The Cisco IOS Release 10.2, Release 10.3, and
Release 11.0 image names that specifically contain a
“2” are compatible with the CIP2. All Cisco IOS
Release 11.1 image names are compatible with the
CIP2.
Cisco IOS Release Image Names1
Release 10.2 gs7-k2
gs7-p2-m
Release 10.3 gs7-k2-mz
gs7-p2-mz
rsp-k2-mz
rsp-p2-mz
Release 11.0 gs7-k2-mz
gs7-p2-mz
gs7-ak2-mz
rsp-k2-mz
rsp-p2-mz
rsp-ak2-mz
Release 11.1 gs7-p-m
gs7-aj
gs7-ajv
gs7-j
gs7-jv
gs7-pv
gs7-s
gs7-p
rsp-p-m
rsp-aj
rsp-ajv
rsp-j
rsp-jv
rsp-pv
rsp-p

Second-Generation Channel Interface Processor (CIP2) Installation and Configuration 15
Installation Prerequisites
Safety Guidelines
This section lists safety guidelines you should follow when working with any equipment that
connects to electrical power or telephone wiring.
Electrical EquipmentFollow these basic guidelines when working with any electrical equipment:
•Before beginning any procedures requiring access to the chassis interior, locate the emergency
power-off switch for the room in which you are working.
•Disconnect all power and external cables before moving a chassis.
•Do not work alone when potentially hazardous conditions exist.
•Never assume that power has been disconnected from a circuit; always check.
•Do not perform any action that creates a potential hazard to people or makes the equipment
unsafe.
•Carefully examine your work area for possible hazards such as moist floors, ungrounded power
extension cables, and missing safety grounds.
Telephone Wiring Use the following guidelines when working with any equipment that is connected to telephone
wiring or to other network cabling:
•Never install telephone wiring during a lightning storm.
•Never install telephone jacks in wet locations unless the jack is specifically designed for wet
locations.
•Never touch uninsulated telephone wires or terminals unless the telephone line has been
disconnected at the network interface.
•Use caution when installing or modifying telephone lines.
Preventing Electrostatic Discharge Damage
ESD damage, which can occur when electronic cards or components are improperly handled, results
in complete or intermittent failures. Each processor module contains a printed circuit card that is
fixed in a metal carrier. Electromagnetic interference (EMI) shielding, connectors, and a handle are
integral components of the carrier. Although the metal carrier helps to protect the board from ESD,
use an ESD-preventive wrist or ankle strap whenever you handle any electronic system component.
Following are guidelines for preventing ESD damage:
•Always use an ESD-preventive wrist or ankle strap and ensure that it makes good skin contact.
•When you work at the interface processor end of the chassis, connect the equipment end of the
strap to a captive installation screw on an installed interface processor, or to any unpainted
chassis surface.
•When you install a processor module, use the ejector levers to properly seat the bus connectors
in the backplane, then tighten both captive installation screws. These screws prevent accidental
removal, provide proper grounding for the system, and help to ensure that the bus connectors are
seated in the backplane.

16 Second-Generation Channel Interface Processor (CIP2) Installation and Configuration
Installation Prerequisites
•Handle processor modules by the carrier handles and carrier edges only; never touch the board
or any connector pins.
•When you remove a processor module, place it card side up on an antistatic surface or in a static
shielding bag. Immediately place the module in a static shielding bag if you need to return it to
the factory.
•Avoid contact between electronic equipment and clothing. Antistatic straps only protect the
equipment from ESD voltages on the body; ESD voltages on clothing can still cause damage.
Caution For safety, periodically check the resistance value of the antistatic strap. The
measurement should be between 1 and 10 megohms.
Online Insertion and Removal—An Overview
The OIR feature allows you to remove and replace interface processors while the system is
operating; you do not need to notify the software or shut down the system power.
Note This section describes the mechanical functions of the system components and emphasizes
the importance of following the correct procedures to avoid unnecessary board failures. This section
is for background information only; specific procedures for the CIP2 are contained in the following
sections.
Each interface processor contains a male connector with which it connects to the system backplane.
Each card (male) connector comprises a set of tiered pins, in three lengths. The pins send specific
signals to the system as they make contact with the backplane. The system assesses the signals it
receives and the order in which it receives them to determine what event is occurring and what task
it needs to perform, such as reinitializing new interfaces or shutting down removed ones.
For example, when inserting an interface processor, the longest pins make contact with the
backplane first, and the shortest pins make contact last. The system recognizes the signals and the
sequence in which it receives them. The system expects to receive signals from the individual pins
in this logical sequence, and the ejector levers help to ensure that the pins mate in this sequence.
When you remove or insert an interface processor, the backplane pins send signals to notify the
system, which then performs as follows:
1Rapidly scans the backplane for configuration changes.
2Initializes all newly inserted interface processors, noting any removed interfaces and placing
them in the administratively shut down state.
3Brings all previously configured interfaces on the interface processor back to the state they were
in when they were removed. Any newly inserted interfaces are put in the administratively shut
down state, as if they were present (but unconfigured) at boot time. If a similar interface
processor type has been reinserted into a slot, its ports are configured and brought on line up to
the port count of the original interface processor.
The system brings on line only interfaces that match the current configuration and were previously
configured as up; all others require that you configure them with the configure command.
OIR functionality enables you to add, remove, or replace interface processors with the system on
line, which provides a method that is seamless to end users on the network, maintains all routing
information, and ensures session preservation.

Second-Generation Channel Interface Processor (CIP2) Installation and Configuration 17
Installation Prerequisites
Tools and Parts Required
You need the following tools and parts to install or replace a CIP2. If you need additional equipment,
contact a customer service representative for ordering information.
•Number 2 Phillips or one-quarter-inch flat-blade screwdriver for the captive installation screws
on the CIP2. (Although most interface processors use slotted screws, some interface processor
carriers use Phillips screws.)
•A new CIP2 with one of the product numbers listed on page 1 or in the section “CIP2 Model
Numbers” on page 5.
•The appropriate cables for your CIP2 type: bus and tag for a PCA (with terminal blocks or 78-pin
connectors) and/or ESCON fiber with duplex connectors for an ECA.
•ESD-preventive wrist strap or other device for preventing ESD damage.
•Interface processor filler (MAS7K-BLANK) if you are removing a CIP2 and not installing a new
CIP2 or other interface processor in the empty slot.
Microcode Overview
Microcode, also known as firmware, is a set of processor-specific software instructions that enables
and manages the features and functions of a specific processor type. At system startup or reload, the
system loads the microcode for each processor type present in the system.
The CIP2 microcode boot image resides in a Flash memory device on the CIP2 motherboard. The
entire CIP2 microcode image is delivered on a Flash memory card, on floppy disks, or is available
via download from CCO.
New microcode is released to enable new features, improve performance, or fix bugs in earlier
versions. The Cisco 7000 series and Cisco 7500 series routers feature downloadable software and
microcode for most upgrades. These features enable you to download new (upgraded) images
remotely, store the images in router memory, and load the new images at system startup without
having to physically access the router. You can store multiple versions for a specific processor type
in Flash memory, and use configuration commands to specify which version the system should load
at startup. All interfaces of the same type (for example, all CIP2s) use the same microcode image.
Caution To ensure proper operation of the CIP2, and to preclude system problems, you should use
only the CIP2 microcode image that is recommended for the version of Cisco IOS you are running.
By default, the CIP2 microcode is loaded from either the flash memory (if you have a 7000 and 7010
with a RP) or the Flash memory card in slot0. The default version can be found by entering the show
microcode command.

18 Second-Generation Channel Interface Processor (CIP2) Installation and Configuration
Installation Prerequisites
Following is an example of the show microcode command output:
Router# show microcode
Microcode bundled in system
Card Microcode Target Hardware Description
Type Version Version
---- --------- --------------- -----------
SP 11.14 11.x SP version 11.14
SSP 11.14 12.x SSP version 11.14
EIP 10.1 1.x EIP version 10.1
TRIP 10.3 1.x TRIP version 10.3
FIP 10.2 2.x FIP version 10.2
HIP 10.2 1.x HIP version 10.2
FSIP 182.3 1.x FSIP version 182.3
MIP 11.4 1.x MIP version 11.4
AIP 10.13 1.x AIP version 10.13
FEIP 173.3 2.x FEIP version 173.3
Microcode flash default images
Card Microcode
Type Version device:filename
---- --------- -------------------
CIP 22-8 slot0:cipp22-8 - Not present
Note The filenames of all CIP2 microcode images use the following nomenclature: cippnn-n,
where nis the specific microcode version.

Second-Generation Channel Interface Processor (CIP2) Installation and Configuration 19
What Is the Cisco 7000 Series?
The Cisco 7000 series consists of the Cisco 7000 and Cisco 7010 routers.
Note For specific software and hardware requirements for the Cisco 7000 series systems, refer to
the section “Software and Hardware Prerequisites” on page 13.
In the Cisco 7000, slot 5 is reserved for the RSP7000 (7000 RSP slot shown in Figure 8), which
contains the system processor and performs packet switching functions; slot 6 is reserved for the
RSP7000CI (7000 CI slot shown in Figure 8), which contains all of the environmental monitoring
functionsfor the Cisco 7000. The remaining fiveslots (slots 0 through4) are for interfaceprocessors,
including the CIP2.
Figure 8 Cisco 7000 with RSP7000 and RSP7000CI Installed (Interface Processor End)
H5288
Interface processor slots 0 123 4 RSP
7000
slot 5
RSP
7000CI
slot 6
Upper
power supply
Lower
power supply
I
O
DC FAIL
AC POWER
I
O
DC FAIL
AC POWER
Captive
installation screw
Captive
installation screw
EJECT
SLOT 0
SLOT 1
NORMAL
CPU HALT
RESET
AUX.
CONSOLE
ROUTE SWITCH PROCESSOR
ENABLE
ENABLE

20 Second-Generation Channel Interface Processor (CIP2) Installation and Configuration
What Is the Cisco 7000 Series?
Figure 9 shows the interface processor end of the Cisco 7000, which provides access to the seven
processor slots and the removable power supplies. When facing the interface processor end of the
chassis, the SP (or SSP) and RP slots are on the far right. The five interface processor slots are
numbered 0 to 4 from left to right and are reserved for interface processors, including the CIP2.
Figure 9 Cisco 7000 with RP and SP (or SSP) Installed (Interface Processor End)
H2358
Slot 0 123 4 SP
or
SSP
slot
RP
slot
Upper
power supply
Lower
power supply
I
O
DC FAIL
AC POWER
I
O
DC FAIL
AC POWER
Captive
installation screw
Captive
installation screw
This manual suits for next models
12
Table of contents
Other Cisco Recording Equipment manuals

Cisco
Cisco Quick Set C20 User manual

Cisco
Cisco TelePresence ISDN Link User manual

Cisco
Cisco CLI User manual

Cisco
Cisco T1 Quick start guide

Cisco
Cisco 7604-RSP720C-R User manual

Cisco
Cisco 15310-EIA-HD-A Instruction Manual

Cisco
Cisco Flex 7500 Series User manual

Cisco
Cisco 4492R Original instructions

Cisco
Cisco 2500 Series Quick reference guide

Cisco
Cisco WS-F6K-VPWR-GE= Quick start guide