Citizen CYBER AQUALAND User manual

English English English English English English
74 75
English
F
Fi
ir
rs
st
t,
,c
ca
an
nc
ce
el
lt
th
he
el
lo
ow
wp
po
ow
we
er
rm
mo
od
de
e.
.
This watch is initially in the low power mode (time display
or calendar display). Before using the watch, cancel the
low power mode using the procedure described below.
If the display is out, this indicates that the watch is
insufficiently charged. In this case, perform the following
procedure after sufficiently recharging the watch by
referring to the section on " Before Use" in this manual.
<Procedure>
When the low power mode is
canceled by simultaneously
pressing button (A) and button (D)
for at least two seconds, the
watch returns to the normal
display.
* Refer to the section on " Low
power mode (Temporally
function)" in this manual for
further information on the low
power mode.
(
C
)(
B
)
(
D
)(
A
)
Unauthorized reproduction of any or all of this manual is strictly prohibited.
The contents of this manual are subject to change without notice.
The manufacturer is not responsible for any or all damages, lost profits or demands from a third party
resulting from use of this manual or products described therein.
• Windows 98, Windows Me, Windows 2000 and Windows XP are the registered trademarks of the
Microsoft Corporation, USA.
• The algorithm of this dive computer is licenced from the Defence and Civil Institute of
Environmental Medicine (DCIEM) of Canada.

7776
S
Sa
af
fe
et
ty
yP
Pr
re
ec
ca
au
ut
ti
io
on
ns
s:
:O
Ob
bs
se
er
rv
ve
ea
at
tA
Al
ll
lT
Ti
im
me
es
s
The following provides an explanation of those matters that should be observed at all
times to prevent injury to the wearer or other persons as well as damage to property
before they occur.
The degree of injury or damage resulting from incorrect use while ignoring
the indicated matters is classified and explained using the following
markings.
WARNING This marking indicates matters for which there is the
risk of death or serious injury.
CAUTION This marking indicates matters for which there is the
risk of injury or property damage only.
The types of matters to be observed are classified and explained using the
following mark (the following indicates two examples of icons).
This mark indicates that caution or attention is required.
This mark indicates prohibited matters.
WARNING
Read this manual carefully and pay attention to all warnings. Make sure you fully
understand the use, displays and limitations of the watch. Neglecting to understand
and follow the instruction manual may cause errors to be made during diving that may
lead to serious injury or death.
I
In
nt
tr
ro
od
du
uc
ct
ti
io
on
n
Thank you for your purchase of the Citizen CYBER AQUALAND. Please read this manual
carefully before using your watch to ensure that it is used properly. Furthermore, make
sure to store this manual in a safe place for future reference as necessary.
CYBER AQUALAND is a diver's watch containing a built-in dive computer and provided
with its own depth gauge. The watch is able to automatically store various data (maximum
depth, dive time, etc.) generated during diving as well as diving profile data, and display
that data in the form of log data.
By installing AQUALAND GRAPH 2001 in your personal computer from the CD-ROM
provided with the watch, you can incorporate data stored in the watch in your PC using the
communication unit and infrared communication interface provided. You can enter text
into diving data that has been incorporated into your PC, generate graphs of diving data or
attach still pictures or animated image data all with a simple procedure, and then manage
this data collectively in the form of diving logs. Since these logs can be printed out or
converted into HTML documents, storage of diving records is both simple and convenient.
In addition, the use of CAPgm, which is installed simultaneous to installation of
AQUALAND GRAPH 2001, makes it possible to make various watch settings (including
travel time, alarm and timer settings) while also allowing different graphics to be displayed
on the watch for different days.
We hope that the use of CYBER AQUALAND will allow you to get even more enjoyment
out of your recreational diving activities.
* To users using a previous HYPER AQUALAND product (Model No. D20*):
• If you are using the DOS version or Windows Ver. 1/Ver. 2 of AQUALAND GRAPH
(HYPER AQUALAND dedicated software), you can use existing diving data managed
with each version of AQUALAND GRAPH by importing that data to AQUALAND GRAPH
2001.
• HYPER AQUALAND data can also be received using AQUALAND GRAPH 2001
software. Please note, however, that the type of communication unit and connection
cable differ between CYBER AQUALAND and HYPER AQUALAND.
(Please refer to the AQUALAND GRAPH 2001 instruction manual contained on the CD-
ROM provided for further information regarding the procedures for importing and
receiving data.)

WARNING
In order to ensure safe diving, dive while allowing an adequate margin of safety
relative to the displayed no-decompression limit time.
WARNING
Never dive in a manner that requires a decompression stop (decompression diving).
If decompression diving should happen to occur, immediately start to ascend while
observing an ascent rate of no more than 18 m/min. Make a decompression stop
while ascending in accordance with decompression stop instructions.
When making a decompression stop, never ascend to a depth less than the instructed
depth. In addition, since it is difficult to maintain a constant depth when there are high
waves and so forth, make decompression stops at depths a little deeper than the
instructed depth to prevent decompression sickness.
* A permanent error (ERROR) occurs when continuing to dive while ignoring decompression
stop instructions during the course of decompression diving, and the watch will not switch to
the dive mode for 24 hours after that time.
WARNING
Avoid traveling in an aircraft while the surface mode is activated. Traveling in an
aircraft without allowing sufficient time to rest after diving results in the risk of
decompression sickness. It is recommended to avoid traveling in an aircraft for at
least 24 hours after diving whenever possible even if the surface mode is no longer
displayed. There are no rules for completely preventing decompression sickness
caused by flying in an aircraft after diving.
CAUTION
Skin diving after scuba diving is not recommended. It is recommended to avoid skin
diving for at least two hours after scuba diving and not to exceed a depth of 5 m.
Data Storage
• The various data recorded in the watch may be lost when subjected to incorrect use
or the effects of strong electricity and electrical noise as well as during a malfunction
and repair. Always make sure to keep a separate record of important data recorded
in the watch. Diving data in particular should be transferred to your PC or recorded
in a log book as quickly as possible.
7978
WARNING
• Diving is a potentially dangerous sport. When using this watch for diving,
make sure to have a correct understanding of this watch as described in
this manual and strictly adhere to the procedures for its operation. The
watch may not function properly if handled in a manner not described in
this manual.
• This watch should not be used as a primary instrument for diving.
• Diving while using this watch is limited to recreational diving (no
decompression diving) in salt water at a water temperature of +10°C to
+40°C. This watch cannot be used for decompression diving, saturation
diving using helium gas, diving at high altitudes (300 m or more above sea
level) or diving outside the above temperature range. In addition, this
watch can not be used for nitrox diving (diving using a mixed gas of oxygen
and nitrogen in which the oxygen concentration is richer than air tanks used
for ordinary diving).
• Although this watch provides data for decompression diving in cases of
emergency, never attempt to use this watch for decompression diving since
this is potentially dangerous.
In addition, the watch does not display depth correctly when used in water
other than salt water (specific gravity: 1.025).
• Even recreational diving can be dangerous. Users are requested to obtain
the proper scuba diving training from a qualified instructor, acquire the
necessary experience and skills for safe diving and completely master the
handling and operation of this watch before using this watch as an auxiliary
instrument for diving. Insufficient or improper training may cause errors to
be made during diving that may lead to serious injury or death.
• Sudden atmospheric fluctuations and changes in water temperature may
have an effect on the display and performance of the watch. Since this
watch is not intended to be used as a specialized instrument, and is only
intended to display information to serve as a reference for minimizing
decompression sickness and other dangers, it is not designed to guarantee
the safety of the user. Always make sure to use this watch in combination
with other instruments (such as a diving table, residual pressure gauge and
water depth gauge). Never use it as a primary instrument for diving.
• This watch is designed on the premise of being used only by one person.
Never lend to or share this watch with another person while resting on the
surface (while the surface mode is activated). In addition, do not use the
data displayed by the watch as diver data for persons other than the user.

Using the Dive Plan Mode............................................................................... 113
1. Switching the Display.................................................................................... 113
2. Calling Up No-Decompression Limit Time.................................................... 113
3. Dive Alarm .................................................................................................... 114
4. Setting the Dive Alarm.................................................................................. 114
5. Dive Alarm Monitor ....................................................................................... 114
Using the Scuba Log Mode and Skin Log Mode .......................................... 115
1. Calling Up Scuba Diving Log Data ............................................................... 115
2. Calling Up Skin Diving Log Data................................................................... 116
3. Deleting Log Data......................................................................................... 116
Using the Dive Mode ....................................................................................... 117
1. Reading the Display during Depth Measurement......................................... 117
2. Depth Measurement ..................................................................................... 119
3. Dive Time Measurement............................................................................... 119
4. Water Temperature Measurement................................................................ 119
5. No. of Dives Per Day and Recording Log Data ............................................ 119
6. Ending the Dive Mode .................................................................................. 120
Using the Surface Mode.................................................................................. 120
Low power mode (Temporally function) ....................................................... 121
1. Switching the Display.................................................................................... 121
2. Setting the Time and Date............................................................................ 122
Data Communication Functions .................................................................... 123
1. Communication Unit ..................................................................................... 123
2. Infrared Communication ............................................................................... 124
A. Communication Range............................................................................. 124
B. Infrared Communication Mode Operating Procedure .............................. 125
3. Data Communication with PC....................................................................... 126
A. Preparations for Communication.............................................................. 126
B. Sending and Receiving Data.................................................................... 127
4. Data Communication between Watches....................................................... 128
Accessory Software ........................................................................................ 129
1. Operating Environment................................................................................. 129
2. Installation..................................................................................................... 130
A. Installing the USB Driver .......................................................................... 130
B. Installing AQUALAND GRAPH 2001 (accessory software) ..................... 135
C. Startup and Ending AQUALAND GRAPH 2001 and CAPgm .................. 136
All Reset ........................................................................................................... 136
Formatting Flash Memory............................................................................... 137
Troubleshooting .............................................................................................. 138
Handling Precautions (For the watch)........................................................... 140
Warranty and Service...................................................................................... 142
Specifications .................................................................................................. 143
Please Direct Inquiries To: ............................................................................. 145
8180
C
CO
ON
NT
TE
EN
NT
TS
S
Introduction ........................................................................................................... 76
Checking Accessories ...................................................................................... 82
Before Use.......................................................................................................... 83
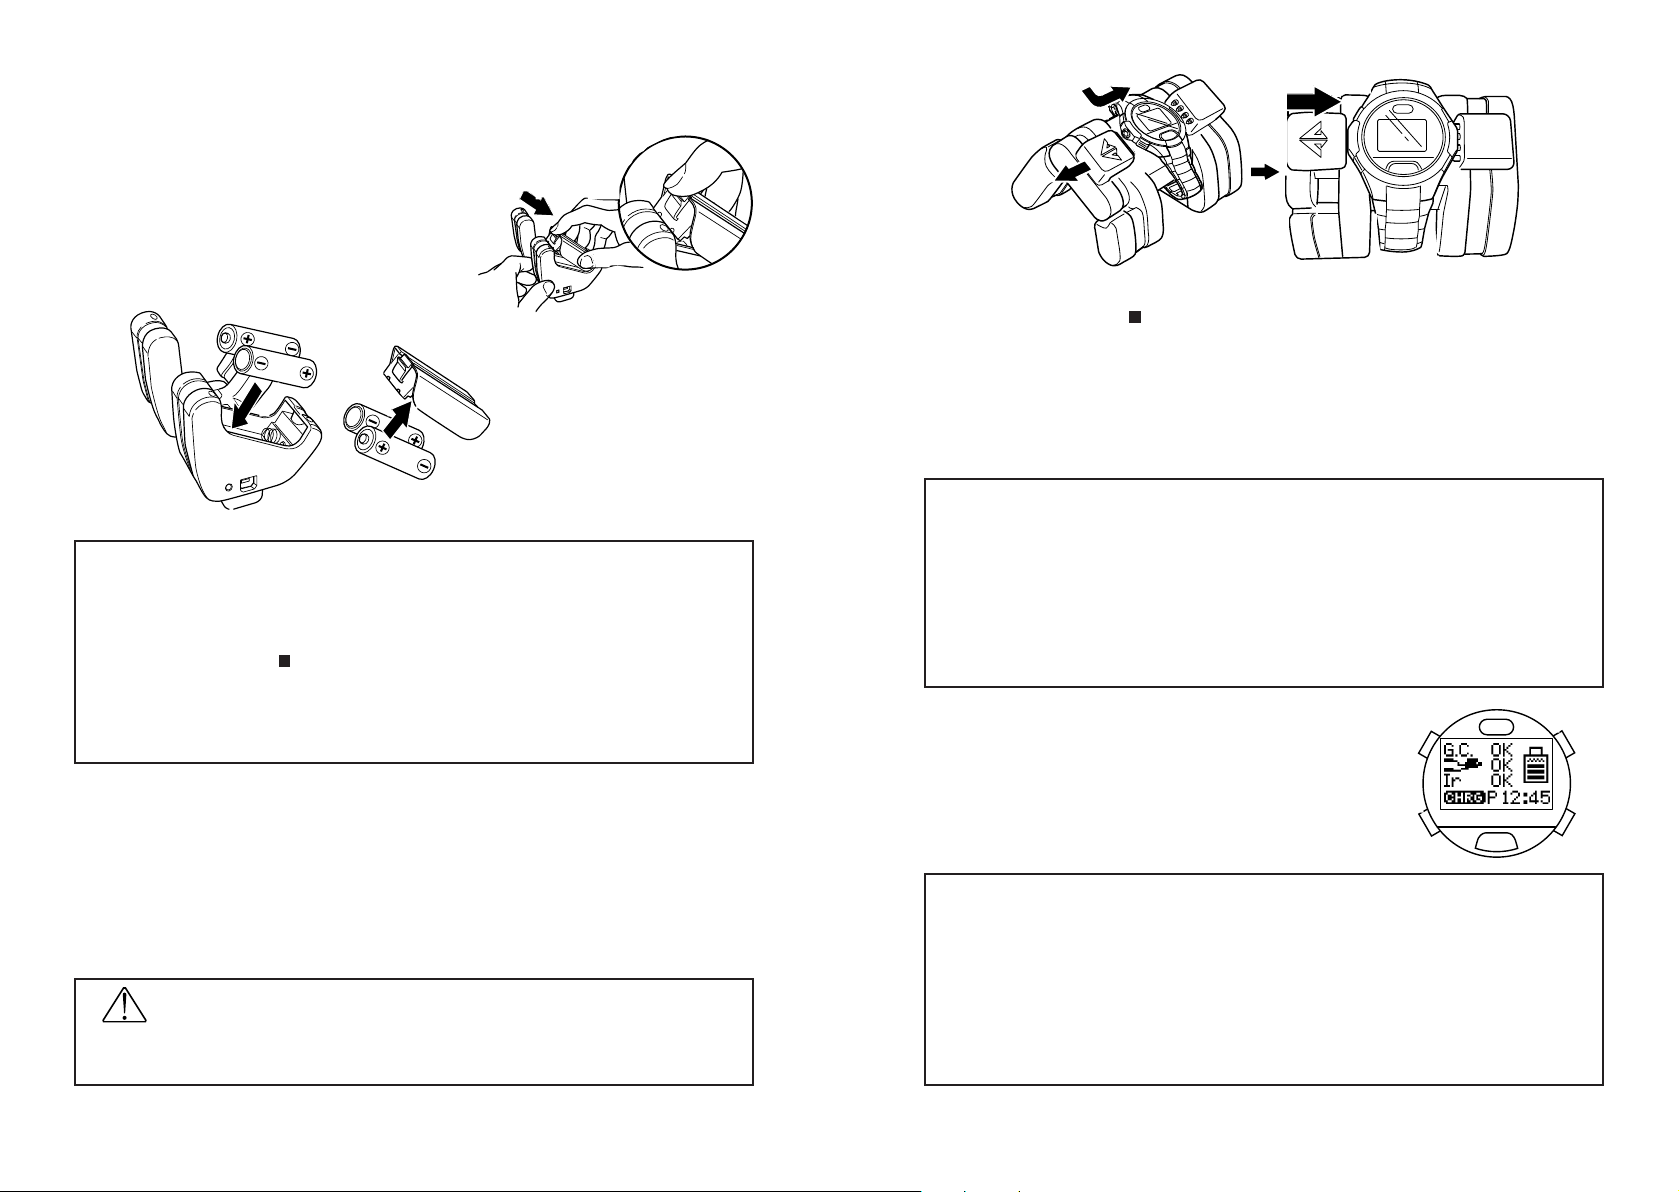
1. Installing Batteries in Communication Unit ..................................................... 84
2. Charging the Watch........................................................................................ 84
Cautions Regarding Use During Diving .......................................................... 86
Features.............................................................................................................. 88
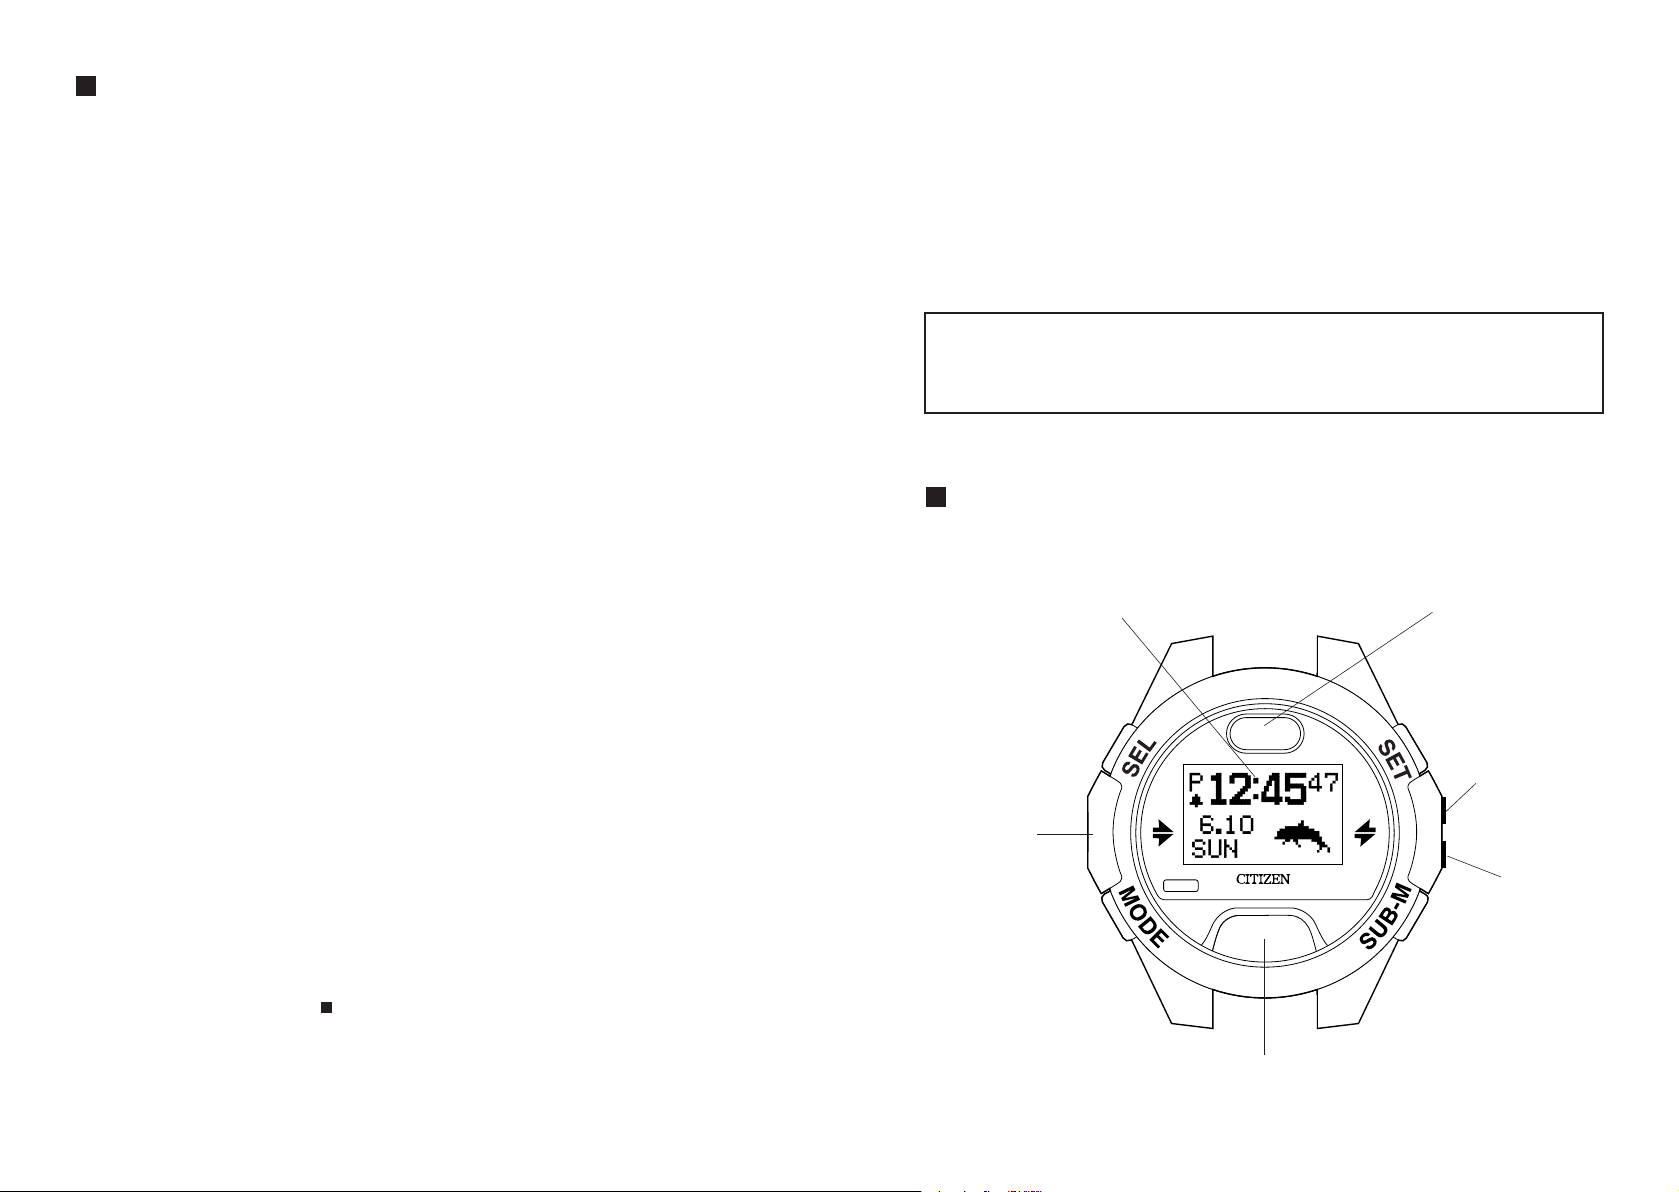
Names of Components ..................................................................................... 89
Display Mode (Functions)................................................................................. 90
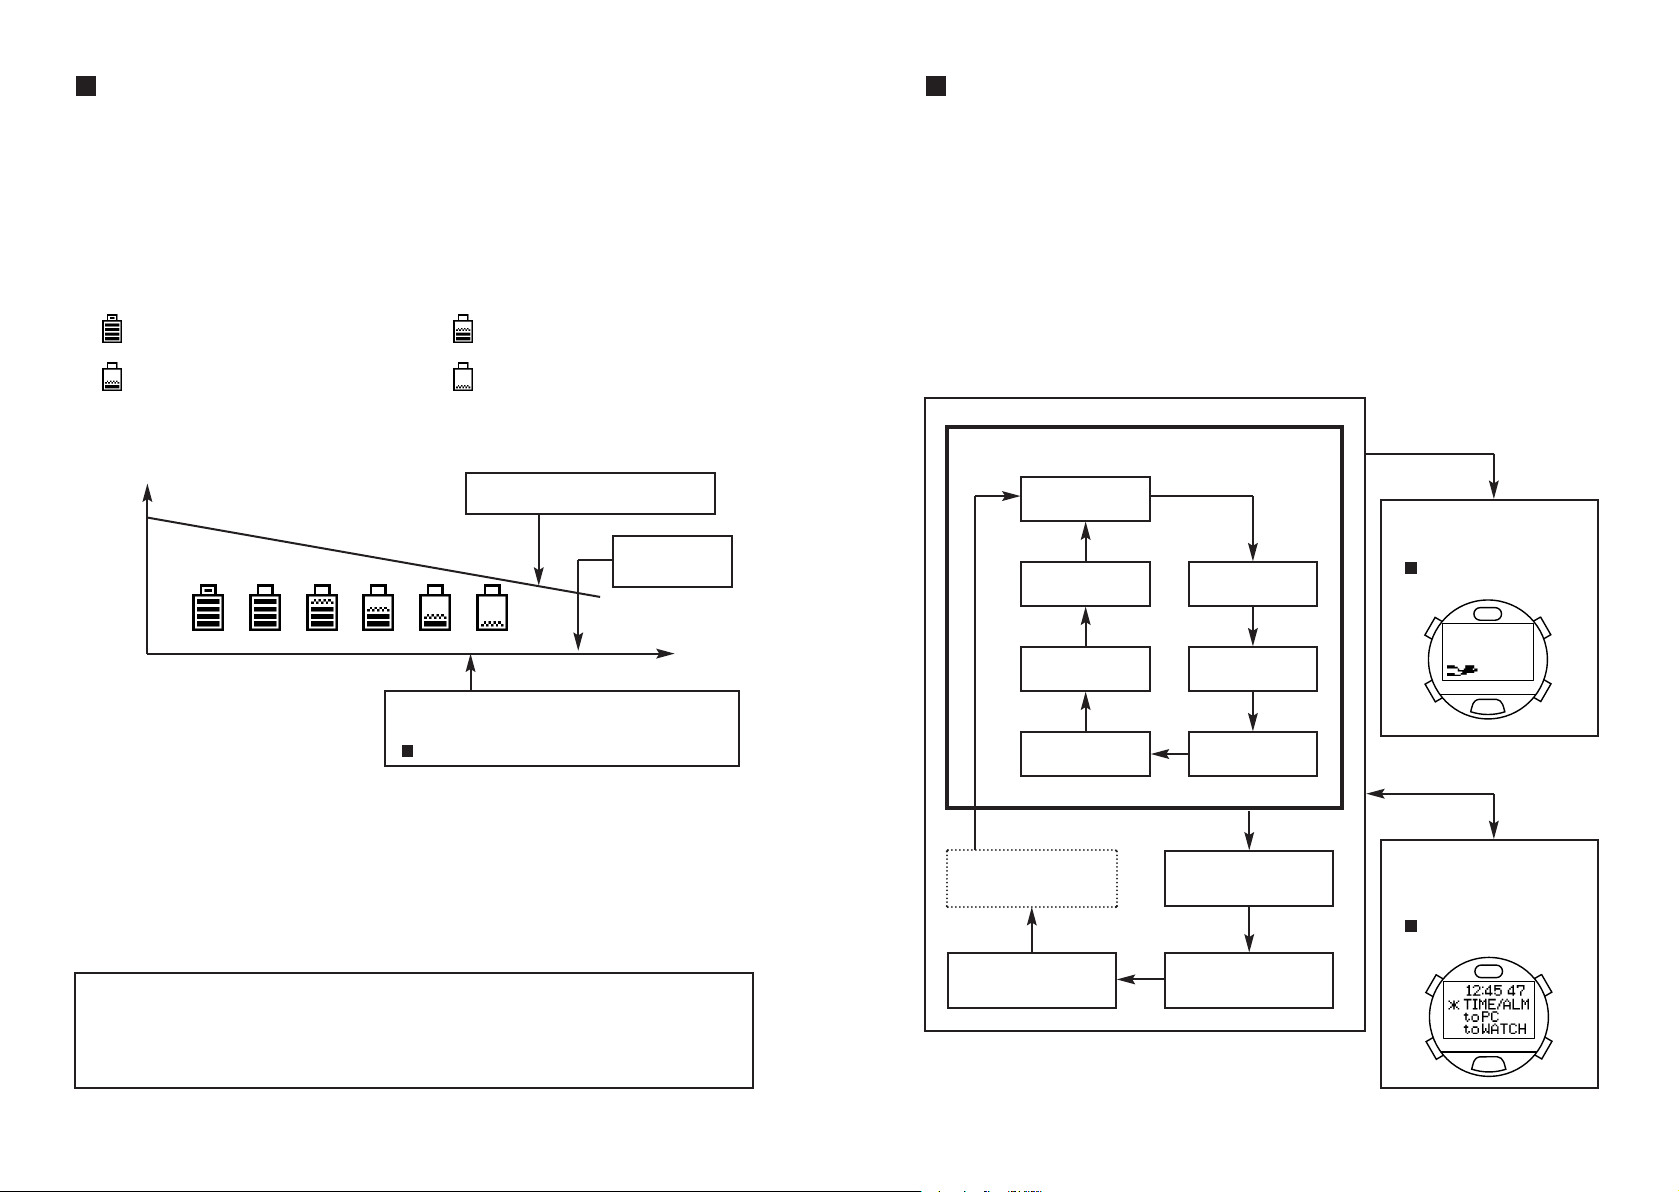
Battery Charge Indicator and Continuous Usage Time ................................. 92
1. How to Read the Battery Charge Indicator..................................................... 92
2. Continuous Usage Time ................................................................................. 92
Switching the Mode........................................................................................... 93
Using the EL Light............................................................................................. 94
Using the Standard Mode ................................................................................. 95
1. Time Mode...................................................................................................... 95
A. Switching the Display ................................................................................. 95
B. Setting the Time and Date ......................................................................... 95
C. Daily Graphic ............................................................................................. 96
2. Travel Time Mode........................................................................................... 97
A. Switching the Display ................................................................................. 97
B. Setting the Travel Time .............................................................................. 97
C. Intercharging Locations Between Travel Time Mode and Time Mode....... 98
3. Destination Timer Mode.................................................................................. 98
A. Setting the Destination Timer..................................................................... 99
B. Destination Timer Measuring Procedure.................................................. 100
4. Alarm Mode .................................................................................................. 101
A. Alarm ON/OFF and Alarm Monitor........................................................... 101
B. Setting the Alarm...................................................................................... 101
5. Chronograph Mode....................................................................................... 102
A. Reading the Display ................................................................................. 102
B. Chronograph Timing Procedure............................................................... 102
6. Timer Mode................................................................................................... 103
A. Setting the Timer...................................................................................... 103
B. Timer Measuring Procedure..................................................................... 104
7. System Monitor Mode................................................................................... 105
A. Switching the Display ............................................................................... 105
B. Battery Charge Indicator .......................................................................... 105
C. Flash Memory Status Display .................................................................. 106
D. Garbage Collection Operating Procedure................................................ 106
Locations Displayed by this Watch ............................................................... 107
Warning Functions .......................................................................................... 108
Diving Terms Used by this Watch.................................................................. 111

8382
✩
✩Attachment of Ferrite Core
Attach the ferrite core to the USB cable provided by referring to the illustration below.
Loop the USB cable
once at the base of
the B type connector
(side that is connected
to the communication
unit), insert the overlap-
ping portion of the
cable into the groove
inside the ferrite core
and securely close the
ferrite core.
CAUTION
Always make sure to attach the enclosed ferrite core to the USB cable prior to use.
Failure to properly attach the ferrite core may cause electromagnetic interference to
affect offect other eguipment.
B
Be
ef
fo
or
re
eU
Us
se
e
Always make sure to fully charge the watch prior to use using the
communication unit provided.
The battery (secondary battery) used by the watch is of the rechargeable type. Charging
is performed using the communication unit after installing four size AA alkaline batteries
(battery no. LR-6).
* It is not necessary to connect the watch to a PC during charging.
Charging is performed using only the batteries in the communication unit.
CAUTION
• The communication unit is not waterproof. Do not allow it to come in contact with
water or become wet. In addition, sand or dust inside the communication unit can
cause a malfunction. Use caution when using the communication unit outdoors.
• Since improper use of the batteries can result in the risk of leakage of battery fluid or
rupture, use particular caution with respect to the following items.
• Install the batteries with the polarity (+,-) correctly aligned.
• Do not mix different types of batteries installed in the communication unit.
• Do not use fresh batteries with old ones. When replacing the batteries, replace all
of the batteries with four fresh batteries of the same type.
Move to this
position
C
Ch
he
ec
ck
ki
in
ng
gA
Ac
cc
ce
es
ss
so
or
ri
ie
es
s
After opening the package, first check that all of the following products and accessories
are present.
Size AA alkaline batteries - 4
Communication unit - 1
USB cable (1.5 m) - 1
(with ferrite core - 1)
User's Manual (this manual)
Carrying case
(For the communication unit)
* Please make sure to attach the enclosed
ferrite core to the USB cable before use.
ferrite core
CD-ROM - 1
Watch body - 1

8584
(3) Charging will begin if the watch is properly connected to the communication unit. The
LED on the right side of the communication unit lights when charging begins, and goes
out when charging is completed (when the watch is fully charged).
(4) Sufficiently open the locking tab of the communication unit and remove the watch from
the communication unit.
* Approximately 5-6 hours is required for charging when the secondary battery is completely
drained.
* Try to recharge the watch before the secondary battery becomes completely drained. There is
no risk of overcharging no matter how long the watch is connected to the communication unit.
* When the LED does not light and the battery charge indicator of the watch does not indicate
that the watch is fully charged even if the watch has been attached to the communication unit,
the batteries of the communication unit are worn out. Replace all four of the batteries with
fresh batteries and repeat charging.
* Attempting to attach or remove the watch without opening the locking tab sufficiently may
cause the connection pins to become worn or damaged resulting in malfunction of the
communication unit.
Watch Display During Charging
Once charging begins, the watch automatically switches to
the system monitor mode (battery charge indicator) after the
diver mark in the lower left section of the watch display
flashes. ("CHRG" is displayed in the lower left section of
the display.)
* When the communication unit is connected to a PC with the USB cable, the watch displays
the USB communication display (data transfer standby display). Charging is performed while
the LED on the communication unit is lit even during data transfer with the PC using the USB
communication interface.
* When the watch has been charged to a certain extent (when all the sections of the battery
charge indicator are lit), although the diver mark remains flashing without the watch switching
to the system monitor mode, charging is still performed correctly even in this state.
* Although "CHK" may flash in the lower left section of the display during charging, charging is
performed correctly in this case as well. "CHK" is no longer displayed and the display returns
to normal when the watch is removed from the communication unit after charging is
completed.
* If the watch display is not showing before charging, simultaneously press buttons (A), (B), (C)
and (D) with the watch attached to the communication unit to perform the all reset procedure.
(Refer to the section on " All Reset" for information on the all reset procedure.)
(
C
)(
B
)
(
D
)(
A
)
1. Installing Batteries in Communication Unit
(1) Remove the battery cover on the bottom of the
communication unit. The battery cover is
removed by lifting up the tab while pushing in the
direction of the arrow (OPEN).
(2) Install two size AA alkaline batteries each (total
of four batteries) in the communication unit and
battery cover while properly aligning their
polarity.
(3) Attach the battery cover.
* Securely attach the battery cover. If not attached securely, there may be defective contact
with the batteries.
* When removing the battery cover, be careful not to damage your nail.
* When charging the watch using the communication unit for the first time, the USB driver
Installation Wizard is displayed on the PC if the communication unit is connected to a PC.
Refer to the section on " Accessory Software" for information regarding installation of the
USB driver.
* The batteries in the communication unit will gradually become worn down even when not
charging. It is recommended to remove the batteries from the communication unit when not
charging the watch for a long period of time.
2. Charging the Watch
(1) Sufficiently open up the locking tab on the left side of the communication unit.
(2) Attach the watch to the communication unit so that the two center connection pins of
the four connection pins on the communication unit make contact with the two
terminals (gold) at the 3:00 position on the watch.
* In cases when a watch having a metal band cannot be connected to the communication unit
due to the band being too short, remove the leg of the communication unit (removable). Slide
the watch through the location where the leg was removed to attach to the communication unit.
WARNING
When removing the leg from the communication unit, keep the removed leg out of the
reach of children to prevent accidental swallowing.

8786
• Confirm that "ERR" (error) or "CHK" (check) is not displayed on the display.
• Confirm that the band is securely attached to the watch body.
• Confirm that the band and glass are free of cracks, scratches, chips and other
abnormalities.
• Confirm that the time and date are set correctly.
• Confirm that the depth alarm and dive time alarm are set correctly.
• If there is a considerable difference between the watch temperature and the water
temperature (such as in cases of entering water after having the left the watch in bright
sunlight), water depth cannot be measured accurately. In such cases, immerse the
watch in the water for at least 5 minutes and then dive after the watch temperature has
become acclimated to the water temperature.
<Cautions During Diving>
• Avoid ascending too rapidly. Rapid ascending can cause decompression sickness and
have other detrimental effects on the body. Observe the safe ascent rate at all times.
• Please note that when underwater, it may be difficult to hear the sound of the dive alarm
or other alarms depending on surrounding conditions (such as breathing noise and air
bubble noise) and the manner in which the watch is worn.
• Be careful not to run out of air. This watch does not manage the amount of air remaining
in the air tank. The diver is responsible for managing the amount of air remaining.
• In the event the watch should happen not to operate properly while underwater, either
ascend immediately while following the instructions of the instructor or begin ascending
immediately at an ascent rate of no more than 18 m per minute and make a safety stop
at 5 m as long as your air lasts.
<Cautions After Diving>
• Make sure to rest sufficiently after diving by checking the surface mode (which measures
the amount of time elapsed after diving and no fly time).
• After removing any moisture, mud, sand or other foreign matter adhered to the watch by
thoroughly rinsing with fresh water, completely wipe off the watch with a dry cloth.
• Do not attempt to remove the sensor cover or poke at it with a sharp object to attempt to
remove any dirt or debris trapped in the pressure sensor. In addition, do not spray the
pressure sensor with air under high pressure such as that from an air gun. In the case
that debris has become trapped in the pressure sensor, rinse it out with fresh water. If it
is still unable to be removed, consult Citizen Consumer help desk or your nearest
Customer Support Center.
CAUTION Fresh Water Diving
• This watch is designed on the premise of diving in salt water. It will not display water
depth accurately in water other than salt water.
• Only use the watch after receiving special safety training when using the watch for diving
in fresh water.
• Since this watch displays water depth as converted based on salt water (specific gravity:
1.025), the true water depth in fresh water is actually 2.5% deeper than the displayed
water depth.
• Example: Water depth displayed as 20 m x 1.025 = 20.5 m (actual water depth)
C
Ca
au
ut
ti
io
on
ns
sR
Re
eg
ga
ar
rd
di
in
ng
gU
Us
se
eD
Du
ur
ri
in
ng
gD
Di
iv
vi
in
ng
g
WARNING
This watch cannot be used as a primary instrument for diving.
When using the watch during diving, always make sure to receive the proper
diving instruction and training and use the watch while obeying all rules.
• Inspect the watch to make sure that all functions operate properly before diving.
• It is recommended to only use this watch for recreational diving down to a depth of about
18 m. Do not attempt to dive below the limit depth of 40 m during recreational diving.
• Always make sure to allow an ample margin for no-decompression time.
• Perform adequate safety stops and decompression stops. Even in the case of no-
decompression diving, always make a safety stop at 5 m to ensure safety. In addition, in
the case the decompression stop display appears, try to stop for a period longer than
that indicated on the display.
• Allow for a sufficient rest period after diving in accordance with safety rules. Boarding an
airplane or moving to a high altitude without allowing for a sufficient rest period after
diving results in the risk of decompression sickness.
PROHIBITED Prohibited Use During Diving
Never attempt to use this watch for diving under the following circumstances.
• When diving is prohibited in the system monitor mode:
··· The watch will not switch to the dive mode when [ ] has changed to NG.
• When the watch has stopped running or an error has occurred (be careful not to bump
the watch against hard objects such as equipment or rocks when diving).
• When measuring depth outside the guaranteed water temperature range or at high
altitudes:
··· The temperature range in which the water depth measurement accuracy of this watch
is guaranteed is +10 to +40°C.
··· This watch is not compatible with diving at high altitudes. Never use this watch when
diving at high altitudes (300 m or more above sea level).
• When engaged in dangerous behavior or when a situation is judged to be dangerous:
··· This watch is not built to function as a preventive or emergency instrument such as for
use during marine accidents.
• When using in a helium gas atmosphere (saturation diving, etc.):
··· Use under these conditions can cause a malfunction or damage to the watch.
• Use for nitrox diving:
··· This watch cannot be used for diving using a mixed gas other than that of air tanks for
ordinary air diving.
WARNING Cautions Regarding Use During Diving
<Cautions Before Diving>
• Sufficiently charge the watch and confirm that the watch is reliably charged and that the
watch can be used for diving by referring to the system monitor mode. If the watch is not
sufficiently charged, the watch will not switch to the dive mode even if diving is started.
In addition, try to start a dive after first sufficiently charging the watch before diving to
avoid having the watch become insufficiently charged while diving.

Other Convenient Functions
•This watch is also equipped with a travel time function that enables you to easily display
local time when traveling or on business overseas, as well as a destination timer
function that displays the amount of time remaining until you reach your destination.
•You can select from 15 types of preset sounds that are heard in each of the alarm,
destination timer and timer modes.
•An EL illumination function is provided that makes it possible to confirm display contents
even in dark locations.
•Other convenient functions offered by this watch include a 24 hour format alarm,
chronograph capable of timing up to 99 hours 59 minutes 59.99 seconds in 1/100
second increments, and a timer function that can be set up to 99 minutes.
Since this product requires special techniques and equipment for final adjustment and
confirmation following completion of repairs, all repairs (excluding the watch band)
must be performed at CITIZEN. Please contact Citizen Consumer help desk or your
nearest Customer Support Center when requesting repairs or inspections.
N
Na
am
me
es
so
of
fC
Co
om
mp
po
on
ne
en
nt
ts
s
Display screen (full dot display)
Button (C)
Pressure sensor
Button (D)
EL light button
Infrared transmitter/receiver
Button (B)
Water sensor
(data transfer
terminal pin)
Charging
terminal pin
Button (A)
•This watch is also equipped with a battery charge indicator that provides a general
indication of the charge level of the secondary battery, as well as an insufficient charge
warning function that informs the wearer that the secondary battery is insufficiently
charged on the display.
88 89
CITY
SET/RES
FWD
STA/STP
TIME
REV
TRANS
DIVERS 200M
F
Fe
ea
at
tu
ur
re
es
s
This watch is provided with numerous convenient
functions used during diving.
•Various information is displayed to serve as a reference for safe diving by calculating
residual body nitrogen based on depth during diving, dive time and previous dive
history, etc. (Dive Computer Function).
* Decompression Calculation Algorithm
This watch employs the calculation formula of the Canadian Defense and Civil Institute of
Environmental Medicine (DCIEM).
•Measurement of water depth begins automatically simply by placing the watch on your
wrist and entering the water, and various data (depth, elapsed time, etc.) are measured
automatically while diving.
•This watch distinguishes between skin diving and scuba diving according to diving
conditions (depth and dive time), and a maximum of 100 sets of log data are
automatically recorded for both types of diving.
•This watch is also provided with various warning functions necessary for safe diving.
•Log data and profile data (up to 2 hours) automatically recorded in the watch can be
transferred to a PC by using the communication unit and infrared communication
function provided, making it possible to easily manage and generate graphic
representations of transferred data on your PC.
Various watch functions can be set on your PC.
•The following watch settings can be transferred to and edited on your PC using the
communication unit and infrared communication function provided.
• Addition, deletion and alteration of locations displayed in each mode by the watch
• Various travel time, alarm and destination timer settings
• Setting of dive alarm used during diving and entry of the number of previous dives.
• Setting of daily graphics and graphics displayed on anniversaries (graphic display)
This watch is also equipped with an infrared
communication function.
•The wrist watch infrared communication standard (IrWW) is used for infrared
communication. This enables the time and alarm time to be set between watches using
this standard.
•If a friend or acquaintance has the same watch, data can be transferred between those
watches (including time, date, alarm and dive alarm settings). In addition,
communication with a PC can also be performed using infrared communication.
No need to change the battery.
•The secondary battery used for the power source is completely free of mercury and
other hazardous substances making it environmentally friendly.
•The secondary battery of the watch is charged using the communication unit provided
(four size AA batteries). Once fully charged, the watch can be used continuously for
about one month under standard operating conditions. (Continuous usage time varies
according to the use of additional functions and other conditions of use. For further
details, refer to the section on " Battery Charge Indicator and Continuous Usage Time".)

Dive Mode
This mode is used for diving. The watch automatically switches to the dive mode when a
dive is started, and displays current water depth, dive time and other data required while
diving during the course of a dive.
Surface Mode
In this mode, the watch displays the elapsed time since completion of the most recent
scuba dive and the amount of time flying in an aircraft is prohibited (maximum 24 hours)
(no fly time). The surface mode is no longer displayed once the no fly time has elapsed.
Infrared Communication Mode
This mode is for communicating with a PC or communicating between watches using the
infrared communication function.
Low power mode (Temporally function)
The low power mode is a temporally function for powering the watch with the minimum
amount of current consumption. The watch automatically switches to the low power mode
when it has become insufficiently charged.
Do not wear the watch in the low power mode under normal circumstances.
Although the watch can be manually switched to this mode by operating the
buttons, all functions except for time and date display and correction do not
operate. In addition, the watch cannot be switched from the low power mode
to the dive mode.
D
Di
is
sp
pl
la
ay
yM
Mo
od
de
e(
(F
Fu
un
nc
ct
ti
io
on
ns
s)
)
Standard Mode
The watch is usually used in this mode. The standard mode consists of the following
seven sub-modes.
1. Time Mode
In this mode, the watch is used to display and correct the time and date (main time)
that are the basic parameters of this watch. This mode is normally displayed when
wearing the watch.
2. Travel Time Mode
In this mode, the watch displays the time and date for a different location from the time
mode.
3. Destination Timer Mode
In this mode, the watch displays the time remaining until a preset arrival time in 1
second units after a destination and arrival time have been preset. This convenient
function can be used when traveling or on business overseas.
* Maximum measuring range: 99 hours 59 minutes 59 seconds
4. Alarm Mode
In this mode, the watch can be used to switch the alarm on and off and correct the
alarm time.
5. Chronograph Mode
In this mode, the watch measures time with a chronograph up to 99 hours, 59 minutes
59.99 seconds.
6. Timer Mode
In this mode, the watch measures time with a count down timer in 1 second units (and
can be set up to 99 minutes in 1 minute units).
7. System Monitor Mode /
In this mode, the watch displays the charge level of the secondary battery along with a
general indication of the usage status of flash memory.
Dive Plan Mode
This mode is used to prepare a plan for the next dive. In this mode, the watch displays the
no-decompression limit time during the next dive and is used to set the dive alarms to be
used during the next dive.
Scuba Log Mode - SCUBA
This mode is used to confirm the logs of previous scuba diving. In this mode, the watch
displays various data (logs) for scuba diving automatically recorded while diving.
Skin Log Mode - SKIN
This mode is used to confirm the logs of previous skin diving. In this mode, the watch
displays various data (logs) for skin diving automatically recorded while diving.
90 91

93
S
Sw
wi
it
tc
ch
hi
in
ng
gt
th
he
eM
Mo
od
de
e
• The mode changes in the order of standard mode, dive plan mode, scuba log mode, skin
log mode and surface mode each time button (D) is pressed.
• The sub-mode of the standard mode changes in the order of time, travel time, destination
timer, alarm, chronograph, timer and system monitor each time button (A) is pressed in
the standard mode.
• The watch automatically switches to the dive mode (preliminary dive display) when the
water sensor gets wet in any mode (excluding the infrared communication mode and low
power mode).
• The watch switches to the infrared communication mode (initial display) when button (D)
is pressed for at least 2 seconds in any mode (excluding the dive mode and low power
mode).
[Dive Mode
(preliminary dive display)]
* Refer to the section on
" Using the Dive Mode" for
further details.
If the water sensor
gets wet
(A)
(A)
(A) (A)
(A)
(A)
Button (D) pressed for at
least 2 seconds
[Infrared
Communication Mode
(initial display)]
* Refer to the section on
" Data Communication
Functions" for further details.
Time
Travel time
Destination timer
Alarm
[Standard Mode]
System monitor
Timer
Chronograph
Surface
(only when activated) Dive Plan
Scuba LogSkin Log
92
About 60% charged to fully charged
Nearly insufficiently charged. Charge
the watch promptly. Since the watch
may become insufficiently charged
during diving, charge the watch
sufficiently before diving.
About 10-20% charged
Insufficiently charged. The watch cannot
be used for diving. Charge the watch
immediately.
* The above illustration provides a
graphic representation of the
amount of residual charge in the
secondary battery and the changes
in the battery charge indicator.
B
Ba
at
tt
te
er
ry
yC
Ch
ha
ar
rg
ge
eI
In
nd
di
ic
ca
at
to
or
ra
an
nd
dC
Co
on
nt
ti
in
nu
uo
ou
us
s
U
Us
sa
ag
ge
eT
Ti
im
me
e
An approximate indication of the amount of charge remaining in the secondary battery can
be confirmed on the display. The battery charge indicator can be displayed in either the
time mode of the standard mode (location display) or the system monitor mode.
1. How to Read the Battey Charge Indicator
The battery charge indicator changes in the manner shown below according to the amount
of elapsed time the watch has been used.
2. Continuous Usage Time
This watch will continue to run for about 1 month (until the insufficient charge warning
function is activated) once it has been fully charged.
This is roughly based on the conditions of use indicated below.
• Diving (water depth measurement): Twice/week (30 min./dive)
• Alarm: 30 seconds/day
• Chronograph measurement: 1 hour/week
• EL light: 4 seconds/day
* The continuous usage time of the watch becomes shorter the more often the alarm,
chronograph and other functions are used. In addition, the continuous usage time is further
reduced by infrared communication.
* Since the water sensor is activated when the watch gets wet even when not diving, the
continuous usage time becomes correspondingly shorter.
(
C
)(
B
)
(
D
)(
A
)
(
C
)(
B
)
(
D
)(
A
)
All watch
functions stop.
The "Insufficient Charge Warning Function (BATT
displayed)" is activated at about this time. Charge
the watch immediately. (Refer to the section on
" Warning Functions" for further details.)
Usage
time
Amount of Battery Charge
(A)
(D)
(D) (D)
(D)
(D)
The watch switches to the "Low
power mode" at about this time.

U
Us
si
in
ng
gt
th
he
eS
St
ta
an
nd
da
ar
rd
dM
Mo
od
de
e
1. Time Mode
This mode is the basic mode of this watch and is used to correct and display the time and
date.
A. Switching the Display
• The display switches between the Day Display and Location Display each time button
(C) is pressed.
• When button (B) is pressed when either the Day Display or Location Display is displayed,
the display changes to the Enlarged Display. Pressing button (B) again returns it to the
original display.
B. Setting the Time and Date
(1) The watch enters the correction state (display is flashing) when
button (C) is pressed for at least 2 seconds during any display of
the time mode.
(2) The location on the display that is flashing changes in the order
shown below each time button (C) is pressed.
* The surface mode is no longer displayed once measurement of no fly time (timer) is completed
after scuba diving. The watch switches to the time mode of the standard mode when button
(D) is pressed in the skin log mode when the surface mode is not activated.
* When none of the buttons are pressed for about 3 minutes in any of the modes of the
standard mode, dive plan mode, scuba log mode or skin log mode, the watch automatically
returns to the time mode of the standard mode (except that it returns to the surface mode
when the surface mode has been activated).
* The watch switches to the low power mode when buttons (A) and (D) are pressed for at least
2 seconds in the time mode of the standard mode.
* If "BATT", "ERR" or "CHK" is flashing in the lower left section of the display in any of the modes
(indicating that a warning function has been activated), and during correction in any mode, the
watch does not switch to the dive mode even if the water sensor gets wet.
* The hourglass mark and "LOADING" are displayed when switching to the dive mode, infrared
communication mode or low power mode. The water sensor along with all button operations
do not function while these are displayed.
U
Us
si
in
ng
gt
th
he
eE
EL
LL
Li
ig
gh
ht
t
The EL light is illuminated for about 1 second when the EL
light button on the front of the watch is pressed in any of the
modes except for the infrared communication mode. The
EL light is illuminated for about 5 seconds when the EL light
button is pressed continuously.
CAUTION
Since the display may be difficult to see when confirming the display during night
diving, confirm the contents of the display with external lighting such as an
underwater light.
94 95
(
C
)(
B
)
(
D
)(
A
)
[Day Display]
Month, date
Day
Alarm ON
mark
Location
EL light button Battery Charge
indicator
Time
Flashing
Time
(B)
(C)
(C) (C) (C) (C)
(C) (C) (C) (C)
(C)
Daily graphic
[Location Display]
(
C
)(
B
)
(
D
)(
A
)
[Enlarged Display]
(
C
)(
B
)
(
D
)(
A
)
Location
Contrast
(CONT)
12H/24H format
switching
Date Month Year
Daylight savings
time switching
Seconds Minutes Hours

2. Travel Time Mode
The travel time mode is used to display the date and time of another location separate
from the Main Time of the time mode (Main time). Simply select a location desired to be
displayed in the travel time mode from the pre-registered locations to automatically display
the time and date for that location as determined by converting the time difference. In
addition, the location displayed in the travel time mode and the location displayed in the
time mode can be easily interchanged.
A. Switching the Display
The time difference from the Coordinated Universal Time (UTC) along with the time
difference from the time in the time mode are displayed for as long as button (B) is
pressed in the travel time mode.
B. Setting the Travel Time
(1) The location flashes when button (C) is pressed for at least
2 seconds in the travel time mode.
(2) The location is changed by pressing button (B) or button (A).
• Pressing button (B) calls up the next location each time it is
pressed, while pressing button (A) calls up the next location in
the reverse order each time it is pressed. (Pressing either button
continuously enables the location to be changed rapidly.)
• Refer to the section on " Locations Displayed by this Watch" for information on displayed
locations.
(3) The setting for daylight savings time (ON (set) or OFF (canceled)) flashes when button
(C) is pressed.
(4) Daylight savings time is corrected by pressing button (B) or button (A).
• The display switches back and forth between the settings each time button (A) or button (B) is
pressed.
(5) Pressing button (D) returns the watch to the normal display.
* The 12 hour or 24 hour format is used in accordance with the setting in the time mode.
* Daylight savings time cannot be set for Coordinated Universal Time (UTC).
* In the case the setting for daylight savings time is changed when the location in the travel time
mode is the same as the location in the time mode, the setting for daylight savings time is
applied to the time mode as well.
* The watch automatically returns to the normal display of the travel time mode when none of
the buttons are pressed for about 3 minutes in the correction state (display flashing).
* The watch can be immediately returned to the normal display of the travel location mode by
pressing button (D) in the correction state (display flashing).
* The watch automatically returns to the time mode when none of the buttons are pressed for
about 3 minutes in the travel time mode.
(3) Correct the flashing item by pressing either button (B) or button (A).
• Pressing button (B) advances the display by one step at a time, while pressing button (A)
moves the display back by one step at a time. (Pressing either button continuously causes the
display to change rapidly.)
• Refer to the section on " Locations Displayed by this Watch" for information on displayed
locations.
• The watch returns to 00 seconds simultaneous to pressing button (B) or button (A) when
correcing seconds. (If the seconds are between 30 and 59 seconds at that time the minutes
advance by 1.)
• When the display is set to switching daylight savings time (ON or OFF is flashing) or switching
the 12H/24H format, the display switches back and forth between the settings each time
button (A) or button (B) is pressed.
(4) Pressing button (D) returns the watch to the normal display.
* The year can be set from 2000 to 2099. However, January 1, 2000 is designated as a special
date for use by the hardware system of this watch. If the watch is attempted to be used for
infrared or USB communication or is switched to the low power mode while set to this date,
all the display elements on the watch are displayed and the watch returns to the initial setting.
Please do not set your watch to January 1, 2000.
* Once the date has been set, it is not necessary to correct for leap years or the end of the
month. (Dates such as February 30 that do not actually exist are not displayed even during
correction.)
* Pay attention to AM (A) and PM (P) when using the 12 hour format.
* When daylight savings time has been set (ON), the time advances by 1 hour from the current
time and "ST" appears on the display. Daylight savings time cannot be set for Coordinated
Universal Time (UTC).
* The day is corrected automatically by correcting the year, month and date.
* The watch automatically returns to the normal display when none of the buttons are pressed
for about 3 minutes in the correction state (display flashing).
* The watch can be immediately returned to the normal display by pressing button (D) in the
correction state (display flashing).
C. Daily Graphic
The daily graph is set with the "CAPgm" PC software. The graphic registered for daily
graphic is displayed each day in the lower right section of the Day Display. In addition,
daily graphics registered for anniversaries are preferentially displayed on days on which
anniversaries have been set. Refer to the "CAPgm" user’s manual provided with the
accessory software contained on the CD-ROM for further details on setting and displaying
daily graphics.
96 97
(
C
)(
B
)
(
D
)(
A
)
(
C
)(
B
)
(
D
)(
A
)
[Normal Display]
Location
Time
(B)
Month, date
Flashing
Time difference from
UTC
Time difference from
time in time mode
[Time Difference Display]

A. Setting the Destination Timer
(1) The watch switches to the correction state (display flashes)
when button (C) is pressed for at least 2 seconds in the
destination timer mode.
(2) The flashing item changes in the order shown below each time
button (C) is pressed.
(3) The flashing item can be corrected by pressing either button (B) or button (A).
• Pressing button (B) advances the display by one step at a time, while pressing button (A)
moves the display back by one step at a time. (Pressing either button continuously causes the
display to change rapidly.)
• Refer to the section on " Locations Displayed by this Watch" for information on displayed
locations.
• When switching daylight savings time (ON or OFF is flashing), the display switches back and
forth between the settings each time button (A) or button (B) is pressed.
• When button (B) is pressed while in the alarm number selection state (an alarm number is
flashing), the next alarm number is called up each time it is pressed. When button (A) is
pressed in the alarm number selection state, the next alarm number is called up in the reverse
order each time it is pressed. Select "Silent" when you do not want the alarm to sound.
• You can monitor the alarm corresponding to the flashing alarm number by pressing button (B)
or button (A) in the alarm number selection state for as long as the button is pressed. (The next
or previous alarm number is momentarily displayed the instant the button is pressed, while
pressing either button continuously causes the set alarm to sound.)
(4) Pressing button (D) finalizes the setting after which the destination timer starts to run
and the remaining time until the arrival time is displayed.
* The 12 hour or 24 hour format setting is in accordance with the setting in the time mode.
* In the case the remaining time until the set arrival time exceeds 100 hours, the destination
timer stops at the arrival time display and then starts running automatically when the remaining
time until the arrival time is within 99 hours, 59 minutes and 59 seconds.
* When the arrival time has been set going back more than 100 hours, the destination timer
stops at the arrival time display.
* In the case of correcting the arrival time while the destination timer is running, the destination
timer starts running according to the newly set arrival time.
* The remaining time is recalculated in the case the time or daylight savings time setting is
corrected for the location set with the destination timer in the time mode or travel time mode
while the destination timer is running.
* The watch automatically returns to the arrival time display or remaining time display when
none of the buttons are pressed for about 3 minutes in the correction state (display flashing).
* The watch can be immediately returned to the arrival time display or remaining time display by
pressing button (D) in the correction state (display flashing).
C. Interchanging Locations Between Travel Time Mode and Time Mode
When a location in a time zone that is frequently used is set in the travel time mode, and
this interchanging procedure is performed after having arrived at that location, the time
and date of the location displayed in the travel time mode can be displayed in the time
mode. As a result, the time and date of the location that had been displayed in the time
mode is now displayed in the travel time mode.
<Procedure>
Press buttons (B) and (C) simultaneously for at least 2 seconds in the travel time mode.
The location in the time mode and location in the travel time mode are interchanged and
the watch displays the time mode.
Example: Location set in time mode (main time): TOKYO
Location set in travel time mode: LONDON
3. Destination Timer Mode
The destination timer measures and displays the amount of time remaining until arriving at
a destination up to a maximum of 99 hours, 59 minutes and 59 seconds after having set
the destination and arrival time when traveling or on business overseas. Once the arrival
time is reached, an alarm informing you of arrival sounds for about 30 seconds and "Dest"
is displayed on the display. After arrival, elapsed time from the time of arrival is measured
for up to 99 hours, 59 minutes and 59 seconds.
In addition, the alarm informing you of arrival at your destination can be selected from 15
types of alarm sounds.
98 99
[Before
interchanging]
[Arrival Time
Display]
Destination
Arrival time
Remaining time
Current time in
time mode
Display of location
before interchanging
Display of location
after interchanging
[During interchanging]
Buttons (B) and (C) for at least 2 seconds
[After interchanging]
(
C
)(
B
)
(
D
)(
A
)
(
C
)(
B
)
(
D
)(
A
)
[Remaining Time Display
(during measurement)]
Alarm
number Minutes Hours Date
Location
Daylight savings
time switching
Year Month
Flashing
(C) (C) (C)
(C)
(C) (C) (C)

4. Alarm Mode
Once this alarm is set (ON), the alarm sounds for approximetely 30 seconds at the same
time every day and "Alarm" is displayed on the display. The alarm can be turned off by
pressing any button when it is sounding. In addition, the alarm tone can be selected from
15 types of alarm sounds when setting the alarm.
A. Alarm ON/OFF and Alarm Monitor
The alarm is switched between ON (set) and OFF (canceled) each time button (B) is
pressed in the alarm mode. Once the alarm has been set, the alarm ON mark is
displayed in the time mode. When button (B) is pressed continuously in the alarm mode,
you can monitor the selected alarm tone for as long as button (B) is pressed.
B. Setting the Alarm
(1) The watch switches to the correction state (display flashes) when button (C) is pressed
for at least 2 seconds during then the normal display in the alarm mode. The flashing
item can be corrected.
(2) The flashing item changes in the order shown below each time
button (C) is pressed.
(3) The flashing item can be corrected by pressing either button (B)
or button (A).
• Pressing button (B) advances the display by one step at a time, while pressing button (A) moves the
display back by one step at a time. (Pressing either button continuously causes the display to change
rapidly.)
• When button (B) is pressed while in the alarm number selection state (an alarm number is flashing), the
next alarm number is called up each time it is pressed. When button (A) is pressed in the alarm number
selection state, the next alarm number is called up in the reverse order each time it is pressed. Select
"Silent" when you do not want the alarm to sound. In this case, the alarm time is notified only with
"Alarm" on the display.
• You can monitor the alarm corresponding to the flashing alarm number by pressing button (B) or button
(A) in the alarm number selection state for as long as the button is pressed. (The next or previous alarm
number is momentarily displayed the instant the button is pressed, while pressing either button
continuously causes the set alarm to sound.)
(4) Pressing button (D) finalizes the alarm setting.
* The 12 hour or 24 hour format setting is in accordance with the setting in the time mode.
* The watch automatically returns to the normal alarm display when none of the buttons are
pressed for about 3 minutes in the correction state (display flashing).
* The watch can be immediately returned to the normal alarm display by pressing button (D) in
the correction state (display flashing).
* The watch automatically returns to the time mode when none of the buttons are pressed for
about 3 minutes during the normal alarm display.
B. Destination Timer Measuring Procedure
Once the destination timer has been set, measurement begins automatically. Once the
timer reaches the arrival time, an alarm sounds for about 30 seconds informing you that
the time is up. After the time on the destination timer is up, elapsed time from the arrival
time flashes on the display for up to 99 hours, 59 minutes and 59 seconds. After this time
has elapsed, the watch returns to the arrival time display.
* The alarm that sounds when the arrival time is reached can be turned off by pressing any
button.
* If the alarm to inform of arrival is set to "Silent", arrival time is notified only with the "Dest"
display on the display.
<Displaying Arrival Time Set during Measurement>
(1) When button (B) is pressed while the destination timer is running, the set arrival time
(destination location and time) is displayed.
(2) When button (B) is pressed again while the arrival time is displayed, the time and
location of the time mode relative to the set arrival time are displayed.
(3) Pressing button (B) again returns the watch to the remaining time display.
* The watch automatically returns to the remaining time display when none of the buttons are
pressed for about 3 minutes during the arrival time confirmation displays described in steps (1)
and (2) above.
* The watch automatically returns to the time mode when none of the buttons are pressed for
about 3 minutes in the destination timer mode (including when the destination timer is
running).
100 101
[Remaining
Time Display]
[Alarm ON]
Alarm time
Flashing
Current time
(B)
(C) (C)
Remaining
time Flashing
Location
(B)
(B)
(B) Arrival time
Location in time mode
Time in time mode relative to
arrival time
Time up
[Elapsed Time
Display]
(
C
)(
B
)
(
D
)(
A
)
(
C
)(
B
)
(
D
)(
A
)
[Alarm OFF]
Hours Minutes Alarm
number

6. Timer Mode
The timer of this watch can be set up to 99 minutes in 1 minute units. An alarm sound
indicating that the time is up sounds for about 30 seconds and "Timer" is displayed on the
display when the time on the timer is up. The timer then returns to the initial set time and
stops.
In addition, the alarm sound indicating that time is up following completion of timing can be
selected from 15 types of alarm sounds.
A. Setting the Timer
(1) The minutes flash when button (C) is pressed for at least 2
seconds in the timer mode.
(2) Set the minutes by pressing button (B) or button (A).
• Pressing button (B) advances the display by one minute at a time
while pressing button (A) moves back the display by one minute at a
time. (Pressing either button continuously causes the display to
change rapidly.)
(3) The time up alarm number flashes when button (C) is pressed.
(4) Set the time up alarm number by pressing button (B) or button (A).
• Pressing button (B) calls up the next time up alarm number each time it is pressed, while
pressing button (A) calls up the next time up alarm number in the reverse order each time it is
pressed. Select "Silent" when you do not want the time up alarm to sound.
• You can monitor the time up alarm of the number that is flashing by pressing button (B) or
button (A) for as long as the button is pressed. (The next or previous time up alarm number. is
momentarily displayed the instant the button is pressed, while pressing either button
continuously causes the set time up alarm to sound.)
(5) Pressing button (D) returns the watch to the timer setting display.
* The watch automatically returns to the timer setting display when none of the buttons are
pressed for about 3 minutes in the correction state (display flashing).
* The watch can be immediately returned to the timer setting display by pressing button (D) in
the correction state (display flashing).
5. Chronograph Mode
The chronograph function of this watch is able to measure time in 1/100 units for up to 99
hours, 59 minutes and 59.99 seconds. The chronograph returns to the reset display
(0:00'00"00) and stops after 100 hours have elapsed.
A. Reading the Display
<1/100 Second Display>
The digits for 1/100 seconds of the
chronograph are only displayed for 1
minute when the chronograph is started
and after returning to the measurement
display from the split time display, after
which they are no longer displayed.
However, the 1/100 second digits are also
displayed when the chronograph is
stopped and during the split time display.
B. Chronograph Timing Procedure
(1) The chronograph is repeatedly started and stopped each time button (B) is pressed.
(2) The split time is displayed for about 10 seconds when button (C) is pressed during
measurement. The most recent split time is measured and displayed each time button
(C) is pressed. ("SPL" flashes while split time is displayed.)
(3) Pressing button (C) while the chronograph is stopped returns the watch to the reset
display.
* Split time refers to the amount of time that has elapsed from the starting line to some
intermediate point.
* The watch automatically returns to the time mode when none of the buttons are pressed for
about 3 minutes during the chronograph reset display.
* The watch automatically returns to the surface mode when none of the buttons are pressed
for about 3 minutes in the chronograph mode (including during timing) when the surface mode
has been activated (while resting on the surface).
* If the mode is switched to the low power mode during chronograph timing, chronograph
timing is interrupted and the watch returns to the reset display.
102 103
(
C
)(
B
)
(
D
)(
A
)
[Chronograph Reset Display]
[Timer Setting Display]
Hours, minutes,
seconds
1/100 seconds
Current time
Minutes,
seconds
Flashing
Current time
After 10 seconds
(B) (B)
(C)
(C)
Reset Timing
Split time
Stop
(
C
)(
B
)
(
D
)(
A
)

7. System Monitor Mode
This mode provides a general indication of the amount of charge remaining in the
secondary battery along with the usage status of flash memory.
A. Switching the Display
• The display switches back and forth each time button (B) is pressed in the system
monitor mode.
• The watch's identification number is displayed when button (C) is pressed during the
flash memory status display.
* The watch automatically returns to the time mode when none of the buttons are pressed for
about 3 minutes in the system monitor mode.
B. Battery Charge Indicator
The battery charge indicator provides a general reference
for determining the amount of charge remaining in the
secondary battery. In addition, it also indicates whether or
not each function can be operated ("OK" or "NG") at the
current battery charge level. When the watch is sufficiently
charged in the case "NG" is indicated for each function, the
display changes to "OK" and each of the functions can be
operated.
G.C.: Garbage Collection
This indicates whether or not the garbage collection operation can be performed.
* This watch uses flash memory to store the various setting and diving data of the watch edited
with a personal computer. Whenever new data is recorded in flash memory, areas of memory
that are no longer used as well as areas of memory in the gaps between files are generated in
the flash memory. Garbage collection refers to an operation that creates continuous areas of
available memory so that these areas can be reused automatically.
: Diving Function
This indicates whether or not the watch can be used for diving.
* When "NG" is displayed, the watch will not switch to the dive mode. The watch can therefore
not be used for diving in this state.
Ir: Infrared Communication Function
This indicates whether or not the infrared communication function can be used for data transfer
with a personal computer or between watches.
B. Timer Measuring Procedure
(1) The timer is repeatedly started and stopped each time button (B) is pressed.
(2) The watch returns to the setting display when button (C) is pressed while the timer is
stopped.
* The alarm that sounds when the time is up can be turned off by pressing any button.
* Only "Timer" appears on the display to indicate that the time is up when the time up alarm has
been set to "Silent".
* The watch automatically returns to the time mode after about 3 minutes have passed during
the timer setting display.
* The watch returns to the surface mode when none of the buttons have been pressed for about
3 minutes in the timer mode (including during timing) when the surface mode has been
activated (while resting on the surface).
* If the mode is switched to the dive mode, infrared communication mode or low power mode
during timing, timing is interrupted and the watch returns to the setting display.
<Repeating Measurement>
The timer is instantly returned to the setting display and resumes timing when button (C) is
pressed during timer measurement.
104 105
[Battery Charge
Indicator Display]
Current time
(B)
ID number
Current time
Battery charge
indicator
(
C
)(
B
)
(
D
)(
A
)
(
C
)(
B
)
(
D
)(
A
)
(
C
)(
B
)
(
D
)(
A
)
[Flash Memory Status
Display]
(B)
(B) (C)
(C)
(B)
Setting display Timing
Stop
Time up

L
Lo
oc
ca
at
ti
io
on
ns
sD
Di
is
sp
pl
la
ay
ye
ed
db
by
yt
th
hi
is
sW
Wa
at
tc
ch
h
The locations displayed in the time, travel time and destination timer sub-modes of the
standard mode can be edited with a personal computer (including changing, adding and
deleting locations as well as changing the order in which they are called up).
* Refer to the section on " Data Communication Functions" in this manual along with the "CAPgm"
instruction manual contained on the CD-ROM provided for further details.
Locations Pre-registered in this Watch
The following locations are registered in the watch when using the watch for the first time
(default status) or after having formatted flash memory. The following locations are
displayed in alphabetical order (except for UTC which is the first location shown) in the
correction state of each mode.
Location "IrWW"
In the case the time difference (time difference from UTC) of a location of the time mode of
the transmitting watch is not present in the receiving watch during transfer of time setting
data between watches using the infrared communication function, "IrWW" is temporarily
displayed in the location display of the receiving watch.
* Refer to section "4. Data Communication Between Watches" of " Data Communication Functions"
in this manual.
C. Flash Memory Status Display
This display provides a general indication of the amount of flash memory available. In
addition, garbage collection can also be performed during this display by pressing one of
the buttons.
<Reading the Bar Graph>
a: Black segment: Area in which data has been written
and then deleted.
The area corresponding to this segment is transformed
into available memory by performing garbage collection.
b: Gray segment: Area currently used by files.
This segment becomes larger the greater the amount of
diving data, daily graphic data and so forth.
c: White segment: Area of available memory.
D. Garbage Collection Operating Procedure
Garbage collection begins when button (C) is pressed for at least 2 seconds during the
flash memory status display.
• During the garbage collection operation, an alarm sounds and "G.C." is displayed on the
display. When garbage collection is completed, "Done" is displayed on the display.
• Garbage collection cannot be performed when "G.C." has changed to "NG" on the
battery charge indicator or when the water sensor has been activated. "Fail" is displayed
on the display at this time.
<General Reference for Performing Garbage Collection>
Try to perform garbage collection when the black segment on the flash memory status display is
larger than the white segment (available memory). Garbage collection consumes considerable
power. For this reason as well, in order to ensure that flash memory is used efficiently, it is
recommended to perform garbage collection whenever the watch is charged (fully charged).
* In the case "Error" is displayed during the garbage collection operation, there may be an error in
the flash memory. After formatting flash memory by referring to the section on " Formatting
Flash Memory", try repeating the garbage collection operation. If "Error" is still displayed, this
indicates that the watch has malfunctioned. Please contact a Citizen Consumer help desk or
your nearest Customer Support Center to request repairs.
* Garbage collection is only performed to organize the contents of flash memory. There is no
risk of deleting watch settings or diving logs as a result of performing garbage collection.
106 107
a
bc
16 KUWAIT +3
17 LONDON ±0
18 LA
-
8
19 MEXICO
-
6
20 MONTREAL
-
5
21 MOSCOW +3
22 NEW DELHI +5.5
23 NEW YORK
-
5
24 NOUMEA +11
25 PARIS +1
26 RIO
-
3
27 ROME +1
28 SINGAPORE +8
29 SYDNEY +10
30 TOKYO +9
-
UTC ±0
1 ANCHORAGE
-
9
2 AUCKLAND +12
3 BANGKOK +7
4 BEIJING +8
5 BUENOS
-
3
6 CAIRO +2
7 CARACAS
-
4
8 CHICAGO
-
6
9 DENVER
-
7
10 DHAKA +6
11 DUBAI +4
12 HONG KONG +8
13 HONOLULU
-
10
14 ISTANBUL +2
15 KARACHI +5
No.
Watch display
Location
Time
difference
No.
Watch display
Location
Time
difference
Coordinated Universal Time
Anchorage
Auckland
Bangkok
Beijing
Buenos Aires
Cairo
Caracas
Chicago
Denver
Dhaka
Dubai
Hong Kong
Honolulu
Istanbul
Karachi
Kuwait
London
Los Angeles
Mexico City
Montreal
Moscow
New Delhi
New York
Noumea
Paris
Rio de Janeiro
Rome
Singapore
Sydney
Tokyo

When the watch has switched to the file error warning display, perform the garbage collection
procedure in the system monitor mode of the standard mode. The display returns to normal
following completion of garbage collection.
Abnormal Pressure Detection Error Warning
When abnormal atmosphere pressure is detected during use on land, or
when ascending to high locations more than 4000 m above sea level,
"ERR" (Error) flashes in the lower left corner of the display. The watch
does not switch to the dive mode even if the water sensor gets wet
while this warning function is activated.
If "ERR" does not disappear from the display even after a long period of time, there may be a
problem with the pressure sensor. When this happens, discontinue using the watch and consult
a Citizen Consumer help desk or your nearest Customer Support Center.
Water Sensor Check Warning
If the preliminary dive display continues to be displayed for more than 1
hour after the water sensor has gotten wet and the watch has switched
to the preliminary dive display in the dive mode, "CHK" (Check) flashes
in the lower left corner of the display to inform the wearer that the water
sensor should be checked.
* "CHK" also flashes when the watch returns to the normal display from any of
the correction states, when the watch is returned to the time mode of the
standard mode from the infrared communication mode, and when the water
sensor is operating during the all reset procedure.
The watch does not switch to the dive mode (water depth measurement display) when "CHK" is
flashing.
To check the sensor, remove any debris or moisture from the water sensor with a dry cloth. The
display returns to normal when the water sensor is canceled.
Ascent Rate Warning
When the ascent rate during scuba diving exceeds 18 m/min, the
ascent rate warning alarm sounds for 5 seconds and "SLOW" and an
illustration of a turtle are displayed at the bottom of the display.
The ascent rate warning alarm stops sounding when a proper ascent
rate is resumed.
* The ascent rate warning alarm does not sound during skin diving (continuous
diving for less than 3 minutes at a depth of 1 m or more).
Abnormal Depth Warning
When a sudden change in depth of more than 4 m/sec is detected
during diving, the watch assumes that the watch has reached an
abnormal depth. At this time, "ERR" and the diver mark are alternately
displayed in the lower left corner of the display.
Once "ERR" has been displayed during diving, it continues to be
displayed until the dive mode is terminated.
CAUTION
Avoid using the watch in environments where sea bottom drilling equipment or similar
machinery is in use. The vibrations from such equipment may cause a change in water
pressure of "4 m or more per second" to be locally and momentarily applied to the pressure
sensor of the watch, causing "ERR" to be displayed and preventing water depth from being
displayed correctly.
W
Wa
ar
rn
ni
in
ng
gF
Fu
un
nc
ct
ti
io
on
ns
s
This watch is equipped with various warning functions for the purpose of avoiding risks and
problems when diving as much as possible.
WARNING
* Do not dive in a manner that activates any of the warning functions. Since the degree of
risk varies according to experience, physical condition and diving conditions, do not
assume that diving is completely safe just because none of the warning functions are
activated. Please use the warning functions as a general indicator of diving safety.
Insufficient Charge Warning
When the watch becomes insufficiently charged, "BATT" flashes in the
lower left corner of the display in all of the sub-modes of the standard
mode. Operation of the following functions is limited while this warning
function is activated.
• The watch does not switch to the dive mode even if the water sensor
gets wet. (The watch automatically switches to the battery charge
indicator display of the system monitor mode when the water sensor
gets wet.)
• None of the alarms sound.
• Data cannot be transferred by infrared communication. (However, data can be transmitted to
a personal computer by USB communication.)
• The EL light is not illuminated.
When this warning function is activated, charge the watch by attaching to the communication
unit as soon as possible. The display will return to normal once the watch is sufficiently
charged.
* None of the dive alarms sound when the insufficient charge warning function is activated during
diving. Although the dive computer will function normally for about 30 minutes after "BATT" starts to
flash, the log data for that dive is not recorded. Promptly begin to ascend it this warning function is
activated during diving.
* If the watch remains insufficiently charged after the insufficient charge warning function has been
activated, it switches to the low power mode after about 2 days. Please note that if the watch
continues to be left uncharged in the low power mode, all functions stop and all watch settings return
to the initial (default) settings.
File Error Warning
When the amount of available memory in flash memory becomes low,
"FILE" flashes in the lower left corner of the display in all of the sub-
modes of the standard mode as well as in the dive mode. The watch
automatically switches to the flash memory status display of the system
monitor mode when the water sensor gets wet while this warning function
is activated. Please note that although it is possible to use the watch for
diving in this state, log data may not be recorded in flash memory during
diving.
The file error warning function is also activated and additional log data is not recorded if the
duration of a single dive exceeds 2 hours or if more than 15 dives are made in a single day. The
file error warning function may also be activated when the water temperature during diving is low.
It may not be possible to receive watch settings by data communication while the file error warning
function is activated.
108 109
Flashing
Flashing
Flashing
Flashing
Flashing

D
Di
iv
vi
in
ng
gT
Te
er
rm
ms
sU
Us
se
ed
db
by
yt
th
hi
is
sW
Wa
at
tc
ch
h
The following provides an explanation of the diving terms displayed by this watch along
with their basic meanings.
<Algorithm>
This watch employs the calculation formula of the Canadian Defense and Civil Institute of
Environmental Medicine (DCIEM).
<Scuba Diving and Skin Diving>
This watch automatically distinguishes between skin diving and scuba diving according to
the following conditions, and records log data separately for each type of diving.
• Scuba diving: Continuously diving for 3 minutes or more to a depth of 1 m or more
• Skin diving: Continuously diving for less than 3 minutes to a depth of 1 m or more
<One Dive>
In this watch, one dive constitutes the time from initially diving to a depth of 1 m (start of
dive) from the preliminary dive mode state to the time the dive mode is terminated (end of
dive).
<No-Decompression Diving and No-Decompression Limit (NDL) Time>
No-decompression diving refers to diving that allows the diver to ascend to the surface
without stopping for decompression during the course of ascending following completion
of a dive. The limit time during which this no-decompression diving is allowed is referred
to as the no-decompression limit time. No-decompression limit time varies according to
the diving depth and diving time of the previous dives.
<Safety Stop>
Safety stop refers to a temporary stop made during ascending for safety reasons in order
to promote expulsion of nitrogen in the body, and is performed even if the no-
decompression limit time has not been exceeded. In the case of having dove to a depth of
18 m or more, a safety stop should always be made at 5 m of depth to ensure safety.
<Decompression Diving>
This refers to diving beyond the no-decompression limit time. Decompression diving is
extremely dangerous since nitrogen accumulates in the body beyond allowable levels.
Never dive in this manner.
<Decompression Stop>
This refers to a stop that must be made to ensure the necessary decompression in the
case of having performed decompression diving. It is necessary to make a
decompression stop at a predetermined depth (decompression stop instructed depth) and
predetermined time (decompression stop instructed time) when ascending.
<Total Ascending Time>
This refers to the minimum time required to ascend to the surface from the current depth in
the case of ascending at the rate of 18 m/min or less while making a decompression stop in
accordance with the decompression stop instructions during decompression diving.
Decompression Diving Warning
This alarm sounds for 3 seconds and the decompression stop
indicator (STOP) is displayed on the display when the no-
decompression limit time has been exceeded resulting in
decompression diving during the course of diving.
The display returns to the no-decompression diving display when
decompression stop is performed in accordance the decompression
stop instructions.
Exceed Maximum Depth Warning
When the limit depth of 40 m for recreational diving is surpassed
during the course of diving, an exceed maximum depth error
occurs, the current depth flashes and the alarm sounds for 15
seconds. During diving at a depth greater than 40 m, the warning
alarm sounds for 15 seconds every minute.
This warning function is canceled when the depth returns to 40 m or
less.
Permanent Error Warning
The instructed depth flashes and an alarm sounds continuously
when either of conditions 1 or 2 below are met. If hazardous diving
or ascending is continued while ignoring this warning, a permanent
error (ERROR) occurs:
1. When not ascending to the instructed depth and continuing to
dive at an excessively low depth (diving at which the instructed
decompression stop depth exceeds 9 m.) even though having
been instructed to make a decompression stop (Permanent Error
Warning 1).
The warning stops when the diver begins to ascend immediately and the
decompression stop instructed depth reaches 9 m or less.
2. When having ascended to a depth 1 m or more less than the instructed depth after
having been instructed to make a decompression stop (Permanent Error Warning 2).
In this case, the warning is canceled when the diver returns to the instructed depth.
<Permanent Error>
If hazardous diving or ascending is continued even after the
permanent error warning function has been activated, a permanent
error results, "ERROR" appears on the display and the entire
display flashes.
When a permanent error has occurred, the next dive cannot be
made for 24 hours. (The water depth measurement function does
not operate for 24 hours. In addition, "ERROR" is displayed when
the watch is switched to the dive plan mode, and the no-
decompression limit time is not displayed.)
110 111
Flashing
Flashing
Flashing

U
Us
si
in
ng
gt
th
he
eD
Di
iv
ve
eP
Pl
la
an
nM
Mo
od
de
e
This mode is used to plan the next dive. In this mode, the no-decompression limit time
according to the first dive and repetitive dives can be displayed, and dive alarms can be
set.
1. Switching the Display
The display switches between the "Dive Plan Display" and "Dive Alarm Display" each time
button (A) is pressed in the dive plan mode.
* The watch automatically returns to the time mode of the standard mode when none of the
buttons are pressed for about 3 minutes in the dive plan mode.
2. Calling Up No-Decompression Limit Time
(1) The no-decompression limit time corresponding to a depth of 12
m is displayed when button (B) is pressed during the dive plan
display.
(2) No-decompression limit times can be called up in order for every
3 m of depth each time button (B) is pressed. Repeatedly press
button (B) until the depth corresponding to the depth you plan
on diving at is displayed.
* No-decompression limit time varies according to the dive depth, dive
time of the previous dive and surface interval time from previons
dives.
Indicated Depth
This watch displays no-decompression limit time for the following 12 depths:
12 m, 15 m, 18 m, 21 m, 24 m, 27 m, 30 m, 33 m, 36 m, 39 m, 42 m, 45 m
WARNING
In order to ensure safe diving, dive while allowing an adequate margin of safety
relative to the displayed no-decompression limit time.
<Body Nitrogen Level>
This refers to the amount of nitrogen dissolved in the body as a result of diving. This
watch displays a general indicator of the amount of nitrogen dissolved in the body in the
form of a bar graph. The higher the level of the black portion of the graph, the greater the
body nitrogen level.
<Total number of Dives (Log Count)>
This indicates the total number of dives for scuba diving.
* Arbitrarily resetting the number of past dives with the “CAPgm” software provided before using the
watch for diving enables this to display the total number of scuba dives made throughout your life.
<Dive Date>
This is the date (year, month and date) on which a dive was made.
<Dive Number>
This is the number of dives made in one day. A maximum of 15 dives are counted per day
for skin diving and scuba diving, respectively.
* This indicates the number of a dive for a particular dive date.
The counter is reset to 1 when the day changes.
<Surface Interval Time (S.I. Time)>
This refers to the elapsed time following completion of scuba diving (surface interval time
(S.I. Time)). This watch measures surface interval time up to a maximum of 24 hours.
* S.I. Time as referred to in the scuba log mode represents the elapsed time from completion of the
dive of the previous log until the start of the dive of the current log.
<Dive Time>
This is the total time at a depth of 1 m or more during a single dive.
* Measurement of dive time starts when first going below a depth of 1 m, and stops when depth
reaches less than 1 m. However, if a dive is resumed to a depth of more than 1 m within 10
minutes from the time measurement of dive time stopped, dive time is continued to be measured
from the time measurement stopped.
<Time In>
This is the time when the depth exceeds 1 m for the first time during the dive.
<Minimum Water Temperature (Min.w.temp)>
This is the minimum water temperature encountered during the course of a single dive.
<Maximum Depth (Max. Depth)>
This is the depth when having dove the deepest during the course of a single dive.
<Average Depth (Ave. Depth)>
This is the average depth during the course of a single dive.
* This refers to the average value of depth measured for every 5 seconds of dive time.
<Profile Log>
The watch displays a simple graph of the changes in depth during a dive.
* Data relating to depths measured every 5 seconds and water temperature measured every 5
minutes can be confirmed on a personal computer.
112 113
(
C
)(
B
)
(
D
)(
A
)
(
C
)(
B
)
(
D
)(
A
)
[Dive Alarm Display]
Dive time alarm
Depth alarm
(A)
No-decompression
limit time
Depth
(
C
)(
B
)
(
D
)(
A
)
(
C
)(
B
)
(
D
)(
A
)
Body nitrogen level graph
Number of next dive
during repetitive
dives
[Dive Plan Display]
Table of contents
Other Citizen Watch manuals

Citizen
Citizen h950 User manual

Citizen
Citizen Quartz 5500 Manual

Citizen
Citizen 0S62 User manual

Citizen
Citizen C45 User manual

Citizen
Citizen 0S21 User manual

Citizen
Citizen E650 User manual

Citizen
Citizen 6SA2 User manual

Citizen
Citizen OS20 User manual

Citizen
Citizen 677 User manual

Citizen
Citizen 9039 User manual

Citizen
Citizen 9015 User manual

Citizen
Citizen Eco-Drive b740 User manual

Citizen
Citizen 9100 User manual

Citizen
Citizen 9015 User manual

Citizen
Citizen F900 User manual

Citizen
Citizen J250 User manual

Citizen
Citizen 0S11 User manual

Citizen
Citizen GP50 User manual

Citizen
Citizen MOVEMENT CAL GP00 User manual

Citizen
Citizen Eco-Drive E310 User manual