manuals.online logo
Brands
  1. Home
  2. •
  3. Brands
  4. •
  5. Clarion
  6. •
  7. Car Receiver
  8. •
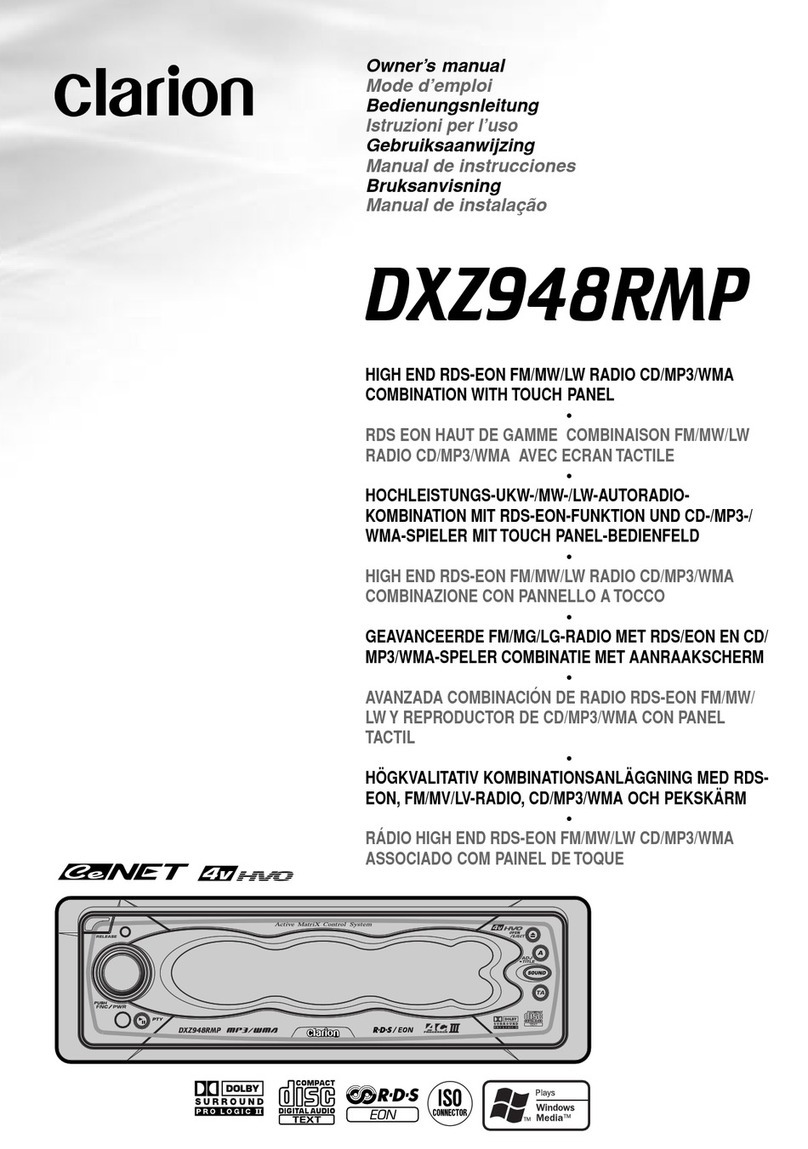
  9. Clarion DRX7375R User manual

Clarion DRX7375R User manual

This manual suits for next models

1

Other Clarion Car Receiver manuals

Clarion DXZ938R User manual

Clarion

Clarion DXZ938R User manual

Clarion ProAudio DXZ745MP User manual

Clarion

Clarion ProAudio DXZ745MP User manual

Clarion CZ102 User manual

Clarion

Clarion CZ102 User manual

Clarion CZ505 Repair manual

Clarion

Clarion CZ505 Repair manual

Clarion DXZ945MP User manual

Clarion

Clarion DXZ945MP User manual

Clarion CZ302E Repair manual

Clarion

Clarion CZ302E Repair manual

Clarion FZ709 User manual

Clarion

Clarion FZ709 User manual

Clarion DXZ735MP User manual

Clarion

Clarion DXZ735MP User manual

Clarion VRX575USB User manual

Clarion

Clarion VRX575USB User manual

Clarion WXZ468RMP User manual

Clarion

Clarion WXZ468RMP User manual

Clarion CZ102A User manual

Clarion

Clarion CZ102A User manual

Clarion VRX6570Rz User manual

Clarion

Clarion VRX6570Rz User manual

Clarion DRX9255EXL User manual

Clarion

Clarion DRX9255EXL User manual

Clarion DFZ675MC Assembly instructions

Clarion

Clarion DFZ675MC Assembly instructions

Clarion VZ509A User manual

Clarion

Clarion VZ509A User manual

Clarion DB188RMP User manual

Clarion

Clarion DB188RMP User manual

Clarion DB188RMP User manual

Clarion

Clarion DB188RMP User manual

Clarion VZ300 Repair manual

Clarion

Clarion VZ300 Repair manual

Clarion ARX5370R User manual

Clarion

Clarion ARX5370R User manual

Clarion DB315 User manual

Clarion

Clarion DB315 User manual

Clarion DXZ538R User manual

Clarion

Clarion DXZ538R User manual

Clarion CZ703E Repair manual

Clarion

Clarion CZ703E Repair manual

Clarion ProAudio DXZ63SMP User manual

Clarion

Clarion ProAudio DXZ63SMP User manual

Clarion DB175MP User manual

Clarion

Clarion DB175MP User manual

Popular Car Receiver manuals by other brands

Linear Series LS5050 Operation and installation manual

Linear Series

Linear Series LS5050 Operation and installation manual

Kenwood KRC-160 instruction manual

Kenwood

Kenwood KRC-160 instruction manual

Sony XR-CA430X Service manual

Sony

Sony XR-CA430X Service manual

T+A Elektroakustik K1 CD-RECEIVER operating instructions

T+A Elektroakustik

T+A Elektroakustik K1 CD-RECEIVER operating instructions

SoundMax SM-CDM1052 instruction manual

SoundMax

SoundMax SM-CDM1052 instruction manual

Xtrons HD107HD user manual

Xtrons

Xtrons HD107HD user manual

Mopar RB3 manual

Mopar

Mopar RB3 manual

Sony XAV-601BT Specifications

Sony

Sony XAV-601BT Specifications

PIE GM12-POD/S Operation manual

PIE

PIE GM12-POD/S Operation manual

Hyundai H-910H instruction manual

Hyundai

Hyundai H-910H instruction manual

Sony XR-C6100 Service manual

Sony

Sony XR-C6100 Service manual

Sony CDX-L600X - Fm/am Compact Disc Player Installation/connections

Sony

Sony CDX-L600X - Fm/am Compact Disc Player Installation/connections

Motorola VWA63 Service manual

Motorola

Motorola VWA63 Service manual

Sound Storm STM93R user manual

Sound Storm

Sound Storm STM93R user manual

Nextar D3201 instruction manual

Nextar

Nextar D3201 instruction manual

Alpine CDE-163BT owner's manual

Alpine

Alpine CDE-163BT owner's manual

Kenwood KDC-X303 quick start guide

Kenwood

Kenwood KDC-X303 quick start guide

Axxera XDMA7600 Installation & owner's manual

Axxera

Axxera XDMA7600 Installation & owner's manual

manuals.online logo
manuals.online logoBrands
  • About & Mission
  • Contact us
  • Privacy Policy
  • Terms and Conditions

Copyright 2025 Manuals.Online. All Rights Reserved.

Owner’s
manual
/
Mode
d’emploi
:
e
C
la
[
1O
Nn
Bedienungsanleitung
/Istruzioni
per!’uso
-
Gebruiksaanwijzing
/
Manual
de
instrucciones-
Bruksanvisning
/
Manual
de_instrugoes
_
DRX7375R
—
DRX7375RW
RDS-EON/FM-MPX/MW/LW
RADIO
CD
COMBINATION
WITH
CD
CHANGER
CONTROL
e
COMBINE
RADIO
RDS-EON/FM-MPX/P0/GO
LECTEUR
DE
CD
AVEC
CONTROLEUR
DE
CHANGEUR
DE
CD
UKW-MPX/MW/LW-RADIO-CD-KOMBINATION
MIT
CD-WECHSLER-STEUERUNG
MIT
RDS-EON
e
SINTOLETTORE
CD
RDS-EON/FM-MPX/MW/LW
CON
CONTROLLO
DEL
CARICATORE
CD
RDS-EON/FM-MPX/MW/LW
TUNER
MET
CD-SPELER
EN
BEDIENINGSEENHEID
VOOR
CD-WISSELAAR
e
COMBINACION
DE
RADIO
DE
RDS-EON/FM-MPX/MW/LW
Y
REPRODUCTOR
DE
DISCOS
COMPACTOS
CON
CONTROL
DE
CAMBIADOR
DE
DISCOS
COMPACTOS
KOMBINERAD
RDS-EON/FM-MPX/MV/LV-RADIO
OCH
CD-SPELARE
MED
CD-VAXLARKONTROLL
~
4
ALPHA
(C%__
CARDS
COMBINACAO
DE
AUTO-RADIO
DE
RDS-EON/
FM-MPX/OM/OL
DE
LEITOR
DE
CDs
COM
CONTROLO
DE
CAMBIADOR
DE
CDs
CAUTIONS:
This
appliance
contains
a
laser
system
and
is
classified
as
a
“CLASS
1
LASER
PROD-
UCT”.
To
use
this
model
properly,
read
this
Owner’s
Manual
carefully
and
keep
this
manual
for
your
future
reference.
In
case
of
any
trouble
with
this
player,
please
contact
your
nearest
“AUTHORIZED
service
station”.
’
To
prevent
direct
exposure
to
the
laser
beam,
do
not
try
to
open
the
enclosure.
USE
OF
CONTROLS
OR
ADJUSTMENTS
OR
PERFORMANCE
OF
PROCEDURES
OTHER
THAN
THOSE
SPECIFIED
IN
THE
OWNER’S
MANUAL
MAY
RESULT
IN
HAZARDOUS
RADIA-
TION
EXPOSURE.
ADVARSEL
Denne
merking
er
anbragt
udvendigt
pa
apparatet
og
indikerer,
at
apparatet
arbejder
med
laserstraler
af
klasse
1,
hvilket
betyder,
at
der
anvendes
laserstraler
af
svageste
klasse,
og
at
man
ikke
pa
apparatets
yderside
kan
blive
udsat
for
utilladelig
kraftig
straling.
APPARATET
BOR
KUN
ABNES
AF
FAGFOLK
MED
S/ERLIGT
KENDSKAB
TIL
APPARATER
MED
LASERSTRALER!
Indvendigt
i
apparatet
er
anbragt
den
her
gengivne
advarselsmakning,
som
advarer
imod
at
foretage
sadanne
indgreb
i
apparatet,
at
man
kan
komme
til
at
udsazette
sig
for
laserstraling.
Apparaten
innehaller
laserkomponenten
som
avger
laserstralning
6verstigande
gransen
for
laserklass
1.
Suojakoteloa
si
saa
avata.
Laite
sisaltaa
laserdiodin,
joka
lahettaa
nakymaténta
silmille
vaarallista
lasersateilya.
2
ORX7375R/DRX7375RW
Clarion
12V
©
GROUND
LW
MW
FM
(UKW)
153-279kHz
531-1602kHz
87.5-108MHz
C€
CLASS
1
LASER
PRODUCT
(EN-60825.
1991)
Buttom
View
of
Main
Unit
Clarion
Co.,Ltd.
<a)
MADE
IN:
Top
View
of
Main
Unit
CAUTION
~
VORSICHT!
VARNING
~
ADVARSEL
—
INVISIBLE
LASER
RADIATION
WHEN
OPEN
AND.
INTERLOCKS
DEFEATED.
AVOID
EXPOSURE
TO
BEAM.
UNSICHTBARE
LASERSTRAHLUNG
TRITT
AUS.
WENN
DECKEL
GEOFFNET
UND
WENN
SICHERHEITSVERAIEGELUNG
UBERBRUCKT
IST.
NICHT
DEM
STRAHL
AUSSETZEN!
OSYNLIG
LASERSTRALNING
NAR
DENNA
DEL
AR
OPPNAD
OCH
SPAAR
AR
URKOPPLAD.
STRALEN
AR
FARLIG.
USYNLIG
LASERSTRALING
VED
ASNING.
NAR
SIKKERHEDSAFBRYDERE
ER
UDE
AF
FUNKTION.
UNDGA
UDSTTELSE
FOR
STRALING.
Thank
you
for
purchasing
the
Clarion
DRX7375R/DRX7375RW.
*
This
owner’s
manual
is
for
both
the
DRX7375R
and
the
DRX7375RW.
The
only
difference
between
these
models
is
the
colour
of
the
front
panel.
The
operating
methods
are
the
same.
*
Please
read
this
owner’s
manual
in
its
entirety
before
operating
this
equipment.
*
After
reading
this
manual,
be
sure
to
keep
it
in
a
handy
place
(e.g.,
glove
compartment).
*
Check
the
contents
of
the
enclosed
warranty
card
and
keep
it
carefully
with
this
manual.
*
This
manual
includes
the
operating
procedures
of
the
CD
changer
that
is
connected
via
the
C-BUS
cable,
of
the
Digital
Sound
Processor
(DSP)
and
of
the
Equalizer
(EQ).
The
CD
changer,
DSP
or
Equalizer
has
its
own
owner’s
manual,
but
no
explanations
for
operating
it
are
described.
Contents
Tis
SPPRECAU
TIONS
ic5.Siceceiccstecicaccsvc
od
dace
cadekeevs
fase
aacocave
des
cov
avesee
ons
cova
bv
AGEN
esa
on
eT
ahs
casuaaa
3
2.
HANDLING
COMPACT
DISCS
...............cccccsceeseeeeeeeees
wi
4
8:
-
CONTROLS
ic.
scs3hcaciverntivesieeiset
lav
icaoeenene
oes
5
Qe.
DOP
asc:
esses
senses
seecriebeeses
6
52
REIP
DOWN
PANEL
occsvsssves
ccvesesadaseacictavecsvedeasteis
cieaaedsgeadsredtenvee
Geass
eetasestedenaee's
7
6.
BUTTON
TERMINOLOGY
0.0.0...
cccccceccscessseceeesseeeesssesesseeensaeecsesesseeescasees
8
Names.
of
Buttons
i.
cisccascedscedads
poe
ec
seh
saaiisiuvcenenta
cast
dives
lecvdae
at
dadesasin
Satsacenanedac
8
G-SOlSCtOr
Operation
.csiivc
sce
tics
se
cesaseacedas
che
ah
Sais
oanaa
ck
catadea
acc
NETO
aaa
soa
edi
ae
adeede
ge
Sabena
tagatetenendeadeioes
9
7.~
REMOTE:
CONTROL
..::
ecstsecseseeseuseics
divadeccausuavuensduabeddvstsavvesevesdad
eat
eadaaeils
sadvaeescadstdbeteeacobeaaedens
10
Inserting
the:
Batte
hy:
svi.
Soi
veseotecbvevseseccdiveouevesewcd
se
ceuca
de
ates
deter
usgoverseadscvenevte
FA
catoedeutedes
a
10
Functions
of
Remote
Control!
Unit
Buttons
.
ve
A
8.
OPERATION
.............ccsceeeseeseeseeeneesceteretoeee
12
Basic:@perations
ria
ceiss
sag
ces
tabs
Sacs
ees
eettesa
geen
adh
pee
eeehd
foc
tt
cp
tevaeibentaelays
ceniod
noesanvadieaetenierentands
12
Radio:
Operation
is.
ciscsccccisstscsccasces
cogeysy
seuss
eicucduteds
vies
steshbesobialiacanechsnasesiedasaraienelencheenechsapunstaens
Suttees
14
RDS
Operations
0...
eececsseeseceteeeseeeseeeeseeneeenee
wn
16
CD
Operations
s:.sicc...ciccccidecesseepeecineeieneeectnesertaee
1
20
CD
Changer
Operations
........c
ee
ceseeseeeeeeeeeeees
wns
22
Other
Handy
Functions
...............
os
DSP
and
Equalizer
Operations
...
aie
9.
IN
CASE
OF
DIFFICULTY
..........
1
80
10:
ERROR
DISPLAYS
®..ciccccticsscssedvectessiteccbovesesheltvesgudedeserebied
ca
fatestvaruseish.acteneecvicdaiddsadesteensgnteanesl
seve
31
TT.
SPECIFICATIONS
.c60:
csi
ech
co
iotevck
Soe
sietceda
te
Adages
eves
eatiad
lata
ea
dda
de
acanet
adead
oes
caps
coaciabve
228
1.
PRECAUTIONS
1.
When
the
inside
of
the
car
is
very
cold
and
2.
Driving
on
bumpy
roads
which
cause
severe
the
player
is
used
soon
after
switching
on
the
vibration
may
cause
the
sound
skip.
heater,
dew
may
form
on
the
disc
or
the
opti-
cal
parts
of
the
player
and
proper
playback
may
not
be
possible.
If
dew
forms
on
the
disc,
wipe
it
with
a
soft
cloth.
If
dew
forms
on
the
optical
parts
of
the
player,
do
not
use
the
player
for
about
one
hour
and
the
condensa-
tion
will
disappear
naturally
to
allow
normal
operation.
DRX7375R/DRX7375RW
3
This
unit
has
been
designed
specifically
for
play-
back
of
compact
discs
bearing
the
gj@@S
mark.
No
other
discs
can
be
played.
ae
To
remove
the
compact
disc
from
its
storage
Case,
press
down
on
the
centre
of
the
case
and
lift
the
disc
out,
holding
it
carefully
by
the
edges.
Proper
way
to
hold
the
compact
disc
Removing
the
disc
Always
handle
the
compact
disc
by
the
edges.
Never
touch
the
surface.
To
remove
fingermarks
and
dust,
use
a
soft
cloth,
and
wipe
in
a
straight
line
from
the
centre
of
the
compact
disc
to
the
circumference.
ives,
No
New
discs
may
have
some
roughness
around
the
edges.
The
unit
may
not
work
or
the
sound
may
skip
if
such
discs
are
used.
Use
a
ball-point
pen,
etc.
to
remove
roughness
from
the
edge
of
the
disc.
Ball-point
pen
Note:
¢
Do
not
use
commercially
available
CD
protection
sh
get
caught
in
the
internal
mechanism
and
damage
Note
on
Compact
Discs
Never
stick
labels
on
the
surface
of
the
compact
disc
or
mark
the
surface
with
a
pencil
or
pen.
No
Do
not
use
any
solvents
such
as
commercially
available
cleaners,
anti-static
spray,
or
thinner
to
clean
compact
discs.
Do
not
use
compact
discs
that
have
large
scratches,
are
misshapen,
or
cracked,
etc.
Use
of
such
discs
will
cause
misoperation
or
damage.
No
gs
Do
not
expose
compact
discs
to
direct
sunlight
or
any
heat
source.
eets
or
discs
equipped
with
stabilizers,
etc.
These
may
the
disc.
Be
sure
to
untold
and
read
the
next
page.
/
Veuillez
déplier
et
vous
référer
a
la
page
suivante.
Bitte
ausbreiten
und
die
nachste
Seite
lesen.
/
Assicurarsi
di
aprire
e
leggere
ta
pagina
successiva,
Volgende
pagina
uitvouwen
en
doorlezen
a.u.b.
/
Cerciérese
de
desplegar
y
de
leer
la
pagina
siguiente.
Glém
inte
att
vika
ut
och
lasa
nasta
sida.
/
Nao
deixe
de
abrir
e
ler
a
préxima
pagina.
DRX7375R/DAX7375RW
4
3.
CONTROLS/_.
=
/
REGLER/
REGELAARS/.
.-—=—~-
/KONTROLLER/
Main
unit
/
Appareil
principal
/
Hauptgerat
/
Apparecchio
principale
Hoofdtoestel
/
Unidad
principal
/
Huvudenhet
/
Aparelho
principal
DRX7375R
Ba
eeosten"
sate
1
HG
Su
DPR
EC
UMBEHE
commmoa
DUT
a
VEN
HEME
VEO TAN
WANT
NAANE
Neat
beat
beat
beat
ST
ALDI)
acsity
DISC/GCN)(RET)
EDM
Clarion
Zs
<2eS
Se
———————EE——EEEE
SS
SS
SS
ee
————eeeEEeEee
el
With
the
FLIP
DOWN
PANEL
opened
/
Ouvrez
le
PANNEAU
RABATTABLE
OFFNUNG
DER
KLAPPSCHALTTAFEL
/
Apertura
del
PANNELLO
APRIBILE
Met
het
NEERKLAPBARE
PANEEL
geopend
/
Apertura
del
PANEL
ABATIBLE
DEN
NEDFALLBARA
PANELEN
6ppen
/
Abrindo
o
PAINEL
RECLINAVEL
Note:
Be
sure
to
unfold
this
page
and
refer
to
the
front
diagrams
as
you
read
each
chapter.
Remarque:
Veuillez
déplier
cette
page
et
vous
référer
aux
schémas
quand
vous
lisez
chaque
chapitre.
Hinweis:
Bitte
diese
Seite
ausfalten
und
beim
Lesen
der
einzeinen
Kapitel
die
Frontdiagramme
beachten.
Nota:
Assicurarsi
di
aprire
questa
pagina
e
fare
riferimento
a
questi
diagrammi
quando
si
legge
ciascun
capitolo.
Opmerking:
Vouw
deze
pagina
uit
en
zie
tevens
de
afbeeldingen
van
het
voorpaneel
tiidens
het
doorlezen
van
de
volgende
hoofdstukken.
Nota:
Cuando
lea
los
capituios,
despliegue
esta
pagina
y
consulte
los
diagramas.
Observera:
Vik
ut
denna
sida
for
att
kunna
se
figurerna
6ver
bilstereons
framsida
medan
du
laser
de
olika
kapitien.
Nota:
Lembre-se
de
abrir
esta
pagina
e
consultar
os
diagramas
frontais
durante
a
leitura
de
cada
capitulo.
5
DRX7375R/DRX7375RW
The
control
panel
can
be
detached
to
prevent
Attaching
the
DCP
theft.
When
detaching
the
control
panel,
store
it
1.
Insert
the
right
side
of
the
DCP
into
the
main
in
the
DCP
(DETACHABLE
CONTROL
PANEL)
unit.
case
to
prevent
scratches.
2.
Insert
the
left
side
of
the
DCP
into
the
main
We
recommend
taking
the
DCP
with
you
when
unit.
leaving
the
car.
Removing
the
DCP
1.
Turn
the
power
off.
2.
Deeply
push
in
the
OPEN
button
and
open
the
FLIP
DOWN
PANEL.
OPEN
button
place.
*
The
DCP
can
easily
be
damaged
by
shocks.
After
removing
it,
be
careful
not
to
drop
it
or
subject
it
to
strong
shocks.
¢
If
the
FLIP
DOWN
PANEL
is
kept
open,
the
DCP
may
drop
due
to
vibration
of
the
car.
This
results
in
damage
to
the
DCP.
So
close
the
FLIP
DOWN
PANEL
or
remove
the
DCP
to
store
into
the
case.
(See
figure
below.)
HOLD
FLAP
Gre
DCP
case
*
The
connector
connecting
the
main
unit
and
the
DCP
is
an
extremely
important
part.
Be
careful
not
to
damage
it
by
pressing
on
it
with
fingernails,
screwdrivers,
etc.
|
Note:
¢
If
the
DCP
is
dirty,
wipe
off
the
dirt
with
a
soft,
dry
clothonly.
Be
sure
to
close
the
HOLD
FLAP
for
safety
when
removing
the
DCP.
6
DRX7375R/DRX7375RW
5.
FLIP
DOWN
PANEL
The
DRX7375R
and
the
DRX7375RW
use
a
flip-down
structure
that
makes
possible
large-size
dis-
plays.
When
opening
and
closing
the
FLIP
DOWN
PANEL,
be
careful
not
to
catch
your
fingers.
They
could
be
injured.
1.
Always
use
the
DRX7375R
and
the
DRX7375RW
with
the
FLIP
DOWN
PANEL
closed.
2.
Do
not
force
operations
or
use
this
device
ab-
normally
when
opening
or
closing
the
FLIP
DOWN
PANEL.
3.
Do
not
use
the
FLIP
DOWN
PANEL
as
a
tray
to
place
objects
on
when
it
is
open.
4.
When
closing
the
FLIP
DOWN
PANEL,
do
not
press
the
OPEN
button.
5.
Strong
impacts
to
the
operating
or
display
sec-
tion
can
cause
damage
or
deformation.
DRX7375R/DRX7375RW
7
6.
BUTTON
TERMINOLOGY
|
Note:
*
Be
sure
to
read
this
chapter
referring
to
the
front
diagrams
of
chapter
“3.
CONTROLS”
on
page
5
(unfold).
Names
of
Buttons
[1]
POWER
button
FUNC
(function)
button
a
-selector
(ALPHA-TOUCH
CONTROLLER)
OPEN
button
DCP/FLIP
DOWN
PANEL
Display
DISP
(display)
button
PS/AS
(preset
scan/auto
Store)
DUTON
0.0...
eee
eteeeees
[m3]
SON
fscan)
BUON
aiccinranccaseeniceninwatnceare
IS),
[S)
AF
(alternative
frequencies)
DUtION
.........
cscs
eter
teees
[Ga]
GPT
(repeat)
bUNON
dee
ncn
atekarate
IS),
SQ)
PTY
(programme
type)
DULtON
.......sesceesssesssseeeseeesneeeneeentenes
(Car)
]
RDM
(random)
DUtON
.....cescecceesstesesseesseesseeesecsensenne
[S).
QB)
TA
(traffic
announcement)
DUttOM
.......
eee
eeeeeteteeteees
(Ca?
}
BAND.
DUttON
ecciccoie.ccecessresh
sbeersaneyeotinr
tered
detadtee
ties:
TOP
DUTON
...c.cccccssiedececel
cavsrceatenecteevsinsesesensseeels
Secdoetevereeeetee
MAG
(magazine)
button
12)
Preset
buttons
(1
tO
6)
oo...
cescseeseeeseeeeeecetertetestsetsereeseenes
Direct
buttons
(1
tO
6)...
eee
ceseeseneeeeeeeretteerereseteeteeeteeens
13}
A-M
(audio
mode)
button
LOUD
(loudness)
button
TPETES
BUtOM
ictscoe
dee
Seevscceroes
La
oteantaateictn
ed
tastts
[2],
(WI
ADJ
(adjust)
button
DSP
(digital
sound
processor)
button
§}
[2]
[}
[4]
[e]
|
[S|
=]
i
EQ
(equalizer)
button
EjJOCt
DUTION
oo.
cceceeeseesecseeeeteereeestenteessesseaesenterssneaeeaetnetitens
IS]
CD:-inS@rtionsSlOtics
sccsicstersvzacvecatabche
dhecegontca
deiernntates
coerced,
[
S]
Bl
fl
Sl
el
a
&
[Gm)]:
In
the
radio
(RDS)
mode
[<=]:
In
the
CD
mode
[{@I:
In
the
CD
changer
mode
8
DRX7375R/DRX7375RW
@@-Selector
Operation
(ALPHA-TOUCH
CONTROLLER)
*
The
ALPHA-TOUCH
CONTROLLER
is
called
“o-selector’
in
this
owner’s
manual.
The
a-selector
enables
you
to
operate
main
func-
3.
To
select
the
centre
(ENT):
push
in
the
a-se-
tions
of
each
mode
with
a
single
finger.
lector
to
the
centre.
Read
through
the
operating
procedures
of
the
a-
This
a-selector’s
operation
is
mainly
used
when
selector
first
and
then
read
the
operating
expla-
operating
the
below.
nations
for
each
mode.
*
Mute
operation
in
radio
mode
1.
Put
your
index
finger
on
the
a-selector.
*
Play/pause
operation
of
a
CD
or
CD
changer
*
Decision
operation
of
each
setting
item
2.
To
select
the
up/down
direction
(A,
W)
or
Note:
the
left/right
direction
(<q,
b>),
move
the
a-
¢
/f
you
try
to
rotate
the
a-selector
forcibly
or
apply
selector
to
the
corresponding
direction.
more
than
needed
strength
to
it,
this
results
in
:
Peer
F
damage
or
breakdown.
This
a-selector’s
operation
is
mainly
used
when
operating
the
below.
*
Adjusting
the
volume
*
Selection
of
radio
stations
*
Tune
selection
of
a
CD
or
CD
changer
Item
selection
of
each
setting
DRX7375R/DRX7375RW
9
7.
REMOTE
CONTROL
Receiver
for
remote
control
unit
ee
Ee
Tr
tok
DERIEEE
oi
geneeaag
Operating
range:
30’
in
all
directions
Remote
control
unit
Signal
transmitter
Inserting
the
Battery
Remote
control
unit
1.
Turn
the
remote
control
unit
upside
down,
push
the
lock
in
the
direction
of
the
arrow,
and
pull
out
the
battery
holder.
2.
insert
the
enclosed
battery
(CR2025)
with
the
“+”
side
facing
up.
3.
Push
the
battery
holder
back
in
securely
until
a
click
is
heard.
Rear
side
Enclosed
battery
(CR2025)
Notes:
Using
batteries
improperly
can
cause
them
to
ex-
plode.
Take
note
of
the
following
points:
*
When
replacing
the
battery,
be
sure
to
set
the
new
battery
with
the
“+”
side
facing
up.
*
Do
not
short-circuit,
disassemble
or
heat
batter-
ies.
;
*
Do
not
dispose
of
batteries
in
flames.
*
Dispose
of
spent
batteries
in
the
proper
place.
Battery
holder
10
DRX7375R/DRX7375RW