manuals.online logo
Brands
  1. Home
  2. •
  3. Brands
  4. •
  5. Clarion
  6. •
  7. Subwoofer
  8. •
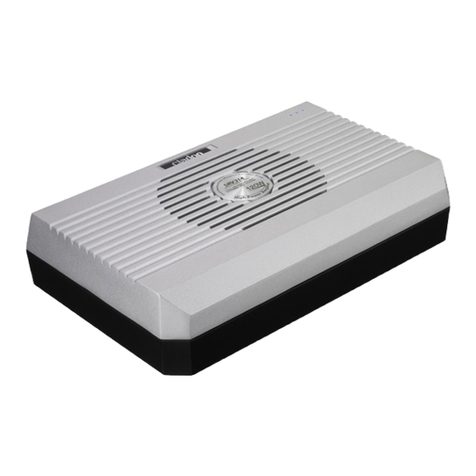
  9. Clarion SRV314 Instruction Manual

Clarion SRV314 Instruction Manual

Printed in Malaysia / Imprimé à Malaisie / Gedruckt in Malaysia / Stampato in Malaysia / Impreso en Malasia 2007/12 SE-305A
Installation/Wire Connection Guide
Guide d’installatio/câblage
Installation-/Anschluß-Anleitung
Installazione/Guida al Collegamento dei fili
Guia de instalación/Conexión
1Power supply lead (5 m) ............................................... 1
2Speaker input lead (0.3 m) ............................................ 1
3Remote control unit ....................................................... 1
4Mounting bracket........................................................... 2
5Tapping screw (dia.5 ✕16) ........................................... 8
6Speed nut...................................................................... 4
7Hook-and-Loop fastener (male) .................................... 1
8Hook-and-Loop fastener (female) ................................. 1
9Installation Manual ........................................................ 1
0Warranty Card ............................................................... 1
!User Registration Card ................................................. 1
ACCESSORIES / ACCESSOIRES / ZUBEHÖR / ACCESSORI / ACCESORIOS
1.
NAMES AND FUNCTIONS OF PARTS / NOMENCLATURE ET FONCTION DES PIècES / BEZEICHNUNGEN UND FUNKTIONEN DER TEILE / NOME E FUNZIONE DELLE PARTI / NOMBRES Y FUNCIONES DE LAS PARTES
2.
SRV314
17 cm COUNTER DRIVE POWERED SUB WOOFER
SUBWOOFER ALIMENTÉ DE 17 cm À ENTRAÎNEMENT INVERSÉ
17 cm ANGETRIEBENER COUNTER-DRIVE-SUBWOOFER
SUBWOOFER A CONTROPILOTAGGIO ALIMENTATO DA 17 cm
ALTAVOZ DE SUBGRAVES ALIMENTADO CON EXCITACIÓN INVERSA DE 17 cm
EspañolItalianoDeutschFrançaisEnglish
1Cordon d’alimentation (5 m).......................................... 1
2Cordon d’entrée d’enceinte (0.3 m) .............................. 1
3Télécommande ............................................................. 1
4Support de montage ..................................................... 2
5Vis autotaraudeuse (dia. 5 ✕16) .................................. 8
6Écrou à ressort ............................................................. 4
7Fermeture velcro (mâle) ................................................ 1
8Fermeture velcro (femelle) ............................................ 1
9Manuel d’installation ..................................................... 1
0Carte de garantie ......................................................... 1
!Carte d’finscription utilisateur ...................................... 1
1Netzversorgungskabel (5 m) ......................................... 1
2Lautsprechereingangskabel ( 0.3 m ) ........................... 1
3Fernbedienung .............................................................. 1
4Montagebügel ............................................................... 2
5Schneidschrauben (Durchmesser 5 ✕16) .................... 8
6Klemmmutter................................................................. 4
7Klettbandstreifen (Haken) ............................................. 1
8Klettbandstreifen (Ösen) ............................................... 1
9Montageanleitung ......................................................... 1
0Garantieschein ............................................................. 1
!Benutzerregistrierungskarte ......................................... 1
1Cavo di alimentazione (5 m) ......................................... 1
2Cavo di ingresso diffusore (0.3 m) ................................ 1
3Telecomando................................................................. 1
4Staffa di installazione .................................................... 2
5Viti autofilettanti (dia. 5 ✕16) ........................................ 8
6Piastrina per viti autofilettanti ........................................ 4
7Elemento di fissaggio (maschio) ................................... 1
8Elemento di fissaggio (femmina)................................... 1
9Manuale di installazione................................................ 1
0Scheda di garanzia....................................................... 1
!Scheda di registrazione dell’futente ............................. 1
1Conductor de alimentación (5 m) .................................. 1
2Conductor de entrada de altavoz (0.3 m)...................... 1
3Unidad de control remoto.............................................. 1
4Ménsula de montaje...................................................... 2
5Tor nillos autorroscantes (diá. 5 x 16) ............................ 8
6Tuerca rápida ................................................................ 4
7Fijador de gancho y bucle (macho)............................... 1
8Fijador de gancho y bucle (hembra) ............................. 1
9Manual de instalación ................................................... 1
0Tarjeta de Garantía....................................................... 1
!Tarjeta de registro del usuario ..................................... 1
●Input-A (speaker input) wiring method / ●Méthode de câblage d’entrée-A (entrée de haut-parleur) /●Kabelverbindung für Eingang A (Lautsprechereingang) / ●Metodo di collegamento Input-A (ingresso diffusore) /●Método para conectar la entrada A (entrada de altavoz)
WIRE CONNECTIONS / CARACTÉRISTIQUES / KABELVERBINGUNGEN / COLLEGAMENTO DEI FILI / CONEXIONES
4.
●Input-B (RCA input) wiring method / ●Méthode de câblage d’entrée-B (entrée RCA) /●Kabelverbindung für Eingang B (RCA-eingang) / ●Metodo di collegamento Input-B (ingresso RCA) /●Método para conectar la entrada B (entrada de RCA)
Main power supply (yellow)
Alimentation principale (jaune)
Hauptstromversorgung (gelb)
Alimentazione principale (giallo)
Alimentación principal (amarillo)
Center unit
Unité centrale
Zentrale Einheit
Unità centrale
Unidad central
Amplifier control (blue/white)
Commande d’amplificateur (bleu/blanc)
Verstärkersteuerung (blau/weiß)
Controllo amplificatore (blu/bianco)
Control del amplificador (azul/blanco)
White
Blanc
Weiß
Bianco
Blanco
White/black
Blanco/negro
Weiß/schwarz
Bianco/nero
Blanco/negro
Gray
Gris
Grau
Grigio
Gris
Gray/black
Gris/noir
Grau/schwarz
Grigio/nero
Gris/negro
Left speaker
Haut-parleur gauche
Linker Lautsprecher
Diffusore sinistro
Altavoz izquierdo
Fuse (10 A)
Fusible (10 A)
Sicherung (10 A)
Fusibile (10 A)
Fusible (10 A)
Right speaker
Haut-parleur droit
Rechter Lautsprecher
Diffusore destro
Altavoz derecho
Ground (black) Connect to metal portion of vehicle chassis.
Masse (noir) Connectez ce fil à une partie métallique du châssis du véhicule.
Erdung (schwarz) An ein Metallteil des Fahrzeugchassis anschließen.
Massa (nero) Collegare alla parte metallica del telaio del veicolo.
Masa (negro) Conéctelo a la parte metálica del chasis del vehículo.
RCA pin cord (sold separately)
Cordon à fiches RCA (vendu séparément)
RCA nadel schnur (getrennt erhältlich)
La corda di spillo di RCA (in vendita a parte)
Cable de clavija RCA (vendido por separado)
Main power supply (yellow)
Alimentation principale (jaune)
Hauptstromversorgung (gelb)
Alimentazione principale (giallo)
Alimentación principal (amarillo)
Center unit
Unité centrale
Zentrale Einheit
Unità centrale
Unidad central
Amplifier control (blue/white)
Commande d’amplificateur (bleu/blanc)
Verstärkersteuerung (blau/weiß)
Controllo amplificatore (blu/bianco)
Control del amplificador (azul/blanco)
Fuse (10 A)
Fusible (10 A)
Sicherung (10 A)
Fusibile (10 A)
Fusible (10 A)
Ground (black) Connect to metal portion of vehicle chassis.
Masse (noir) Connectez ce fil à une partie métallique du châssis du véhicule.
Erdung (schwarz) An ein Metallteil des Fahrzeugchassis anschließen.
Massa (nero) Collegare alla parte metallica del telaio del veicolo.
Masa (negro) Conéctelo a la parte metálica del chasis del vehículo.
1. Before mounting or making connections, do not fail to
disconnect the cable from the -side of the battery. Do
not reconnect the cable until all steps have been
completed.
2. Avoid the vicinity of objects that produce heat (especially
heating ducts) and select a location that is well ventilated
and where the unit is not likely to be splashed with water.
3. When making connections, avoid running the harness
near parts that can become hot. Also, keep cables with
connectors away from the vehicle's wiring and secure
them well in order to avoid the introduction of noise from
the vehicle.
NOTES ON MOUNTING AND MAKING CONNECTIONS / REMARQUES SUR L’INSTALLATION ET LES RACCORDEMENTS / HINWEISE Für ANBRINGUNG UND ANSCHLüsSE / NOTE SUL MONTAGGIO E I COLLEGAMENTI / NOTAS SOBRE EL MONTAJE Y LAS CONEXIONES
3.
1. Avant de commencer l’installation ou les raccordements,
débranchez impérativement le câble du côté -de la
batterie. Ne le rebranchez pas avant d’avoir terminé
toutes les opérations.
2. Évitez la proximité des sources de chaleur (et en
particulier celle des conduits de chaleur). Choisissez un
emplacement bien aéré et où le haut-parleur ne risque
pas d’être éclaboussé par l’eau.
3. Lors des raccordements, veillez à ce que le faisceau de
fils ne passe pas près de pièces qui peuvent devenir
chaudes. Gardez les câbles munis de connecteurs à
l’écart du câblage du véhicule et fixez-les bien afin
d’éviter les parasites depuis le véhicule.
1. Vor Anbringung oder Anschließungen unbedingt zuerst
das Kabel von der --Seite der Batterie abtrennen. Das
Kabel erst wieder anschließen,wenn alle Arbeitsschritte
ausgeführt worden sind.
2. Anbringung in Nähe von Teilen (besonders Heizkanäle)
vermeiden, die Wärme erzeugen, sowie einen gut
belüfteten Ort wählen, an dem das Gerät ebenfalls nicht
Wasser ausgesetzt ist.
3. Beim Ausführen von Anschlüssen, den Kabelsatz nicht
in Nähe von Teilen verlegen, die sich erwärmen können.
Ebenfalls Kabel und Stecker nicht in der Nähe der
Fahrzeugverdrahtung anbringen und diese gut sichern,
um Störungsrauschen vom Fahrzeug zu vermeiden.
1. Prima di montare o collegare, non dimenticare di
scollegare il cavo dal lato -della batteria. Non
ricollegare il cavo finché non si sono completate tutte le
operazioni.
2. Evitare la vicinanza di oggetti che producono calore
(particolarmente condotti di riscaldamento) e seleziona-
re un punto ben ventilato e dove l’unità non possa subire
schizzi d’acqua.
3. Quando si collega, evitare di far passare il cablaggio
vicino a parti che possono diventare calde. Inoltre tenere
i cavi con connettori lontani dai cavi del veicolo e fissarli
bene per evitare l’introduzione di disturbi dal veicolo.
1. Antes de montar el aparato o hacer ningún tipo de
conexiones, no se olvide de desconectar el cable
negativo -de la batería. No conecte de nuevo el cable
hasta haber completado todos los pasos.
2. Evite la proximidad de aparatos que produzcan calor
(especialmente las salidas de aire caliente de las
calefacciones) y seleccione un lugar que esté bien
ventilado, y en el que no haya peligro de que el aparato
pueda ser salpicado con agua.
3. Cuando haga las conexiones, evite tender el mazo de
cables cerca de partes que puedan calentarse. Además,
mantenga alejados del cableado del vehículo los cables
con conectores y sujételos bien para evitar la captación
de ruido eléctrico procedente del vehículo.
●Remote control unit lead wiring method
∗Connect the lead (5 m) between the main unit and remote
control unit.
●Méthode de câblage du cordon de télécommande
∗Raccordez le cordon (5m) entre l’appareil principal et la
télécommande.
●Verdrahtung für Fernbedienungskabel
∗Das Kabel (5 m) zwischen dem Hauptgerät und der
Fernmbedienung verbinden.
●Metodo di collegamento via filo del telecomando
∗Collegare il cavo (5 m) tra l’unità principale e l’unità
telecomando.
●Método de conexión del conductor de la unidad de
control remoto
∗Conecte el conductor (5 m) entre la unidad principal y la
unidad de control remoto.
INPUT-A
Speaker input
Entrée de haut-parleur
Lautsprechereingang
Ingresso diffusore
Entrada de altavoz
INPUT-B
RCA input
Entrée RCA
RCA-Eingang
Ingresso RCA
Entrada de RCA
PHASE
Phase switch
Commutateur de phase
Phasenschalter
Interruttore di fase
Interruptor de fase
GAIN
Gain control
Commande de gain
Verstärkungsregler
Comando di guadagno
Control de ganancia
FREQ
Variable low-pass filter
Filtre passe-bas variable
Variabler Tiefpaßfilter
Filtro passabasso variabile
Filtro pasabajos variable
POWER
Power supply coupler input
Entrée de coupleur d'alimentation
Netzkopplungeingang
Ingresso accoppiatore alimentazione
Entrada del acoplador de alimentación
REMOTE CONTROL
Remote control input
Entrée de la télécommande
Fernbedienungseingang
Ingresso del telecomando
Entrada de control remoto
■
SIDE PANEL / PANNEAU LATÉRAL / SEITENWAND /
PANNELLO LATERALE / PANEL LATERAL
■
REMOTE CONTROL UNIT / TÉLÉCOMMANDE / FERNBEDIENUNG /
TELECOMANDO / UNIDAD DE CONTROL REMOTO
All manuals and user guides at all-guides.com
all-guides.com
MOUNTING METHOD / MétHODE D’INST ALLATION / ANBRINGVERFAHREN / METODO DI MONTAGGIO / Mét ODO DE MONTAJE
5.
Clarion Co., Ltd.
Maximum Output: 120W (60W+60W)
Rated Output Power: 60W (30W+30W)
Frequency Response: 30Hz~200Hz
Harmonic Distortion: 0.05%
S/N Ratio: 80dB
Low-Pass Filter Cut-off Frequency:
50/75/100/120Hz (4 Port Switching)
Power Source Voltage: 14.4V
Ground: Negative
Power Consumption: 7.0A
Auto-fuse capacity: 10A ✕1
External dimensions:
Main unit: 12-1/4” (310 mm) Width ✕2-9/16”
(65 mm) Height ✕8-1/4” (210 mm)
Depth
Remote Control unit: 3-15/16” (100 mm) Width ✕1-1/8”
(29 mm) Height ✕1” (25 mm)
Depth
Weight:
Main unit: 2,000 g (70.5 oz)
Remote Control unit: 220 g (7.8 oz)
∗This unit is equipped with [MaxxBass] virtual bass
enhancer circuitry.
■
Regarding intellectual property rights
•[MaxxBass] is patented by KS-Waves Company, Ltd.
•[MaxxBass] is a registered trademark of KS-Waves
Company, Ltd.
∗For improvement purposes, specifications and design are
subject to change without prior notice.
SPECIFICATIONS / CARACTÉRISTIQUES / SPEZIFIKATIONEN / DATI TECNICI / ESPECIFICACIONES
6.
Puissance de sortie maximum: 120W (60W+60W)
Puissance de sortie nominale: 60W (30W+30W)
Réponse en fréquence: 30Hz~200Hz
Distorsion harmonique: 0,05%
Rapport signal/bruit: 80dB
Fréquence de coupure du filtre passe-bas:
50/75/100/120Hz (commu-
tateur à 4 positions)
Tension d´alimentation: 14,4V
Masse: Négative
Consommation: 7,0A
Capacité d´auto-fusible: 10A ✕1
Dimensions extérieures:
Unité principale : 310 ✕65 ✕210 mm
(Largeur ✕Hauteur ✕
Profondeur)
Télécommande : 100 ✕29 ✕25 mm
(Largeur ✕Hauteur ✕
Profondeur)
Poids:
Unité principale : 2.000 g
Télécommande : 220 g
∗Cet appareil est équipé du circuit de renforcement virtuel
des gravess [MaxxBass].
■
Droits sur la propriété intellectuelle
•[MaxxBass] est breveté par KS-Waves Company, Ltd.
•[MaxxBass] est une marque déposée de KS-Waves
Company, Ltd.
∗Les caractéristiques et la conception sont susceptibles
d´être modifiées sans préavis à des fins d´amélioration.
Maximale Ausgangsleistung: 120W (60W+60W)
Nennausgangsleitung: 60W (30W+30W)
Frequenzgang: 30Hz~200Hz
Klirrfaktor: 0,05%
Rauschabstand: 80dB
Tiefpaßfilter-Grenzfrequenz: 50/75/100/120 Hz
(4-Kanal-Schaltung)
Stromquellenspannung: 14,4V
Erdung: Negativ
Leistungsaufnahme: 7,0 A
Sicherungsautomat-Kapazität:
10A ✕1
Außenabmessungen:
Hauptgerät: 310 (Breite) ✕65 (Höhe) ✕
210 (Tiefe) mm
Fernbedienung: 100 (Breite) ✕29 (Höhe) ✕25
(Tiefe) mm
Gewicht:
Hauptgerät: 2.000 g
Fernbedienung: 220 g
∗Dieses Gerät ist mit der virtuellen Bassverbesserungs-
Schaltung [MaxxBass] bestückt.
■
Hinweise zu geistigen Eigentumsrechten
•[MaxxBass] ist von KS-Waves Company, Ltd. patentiert.
•[MaxxBass] ist eine eingetragene Marke von KS-Waves
Company, Ltd.
∗Änderungen der technischen Daten und des Designs
bleiben zur Produktverbesserung ohne Ankündigung
vorbehalten.
Uscita massima: 120 W (60 W + 60 W)
Uscita di potenza nominale: 60 W (30 W + 30 W)
Risposta in frequenza: 30 Hz~200 Hz
Distorsione armonica: 0,05%
Rapporto segnale/rumore: 80 dB
Frequenza di taglio del filtro passabasso:
50/75/100/120 Hz
(commutazione a 4 porte)
Tensione fonte di
alimentazione: 14,4 V
Massa: Negativa
Consumo di corrente: 7,0 A
Capacità fusibile automatico: 10 A ✕1
Dimensioni esterne:
Unità principale: 310 mm Larghezza ✕65 mm
Altezza ✕210 mm Profondità
Telecomando: 100 mm Larghezza ✕29 mm
Altezza ✕25 mm Profondità
Peso:
Unità principale: 2.000 g
Telecomando: 220 g
∗Quest’unità possiede un circuito di potenziamento dei
bassi virtuali [MaxxBass].
■
Diritti di proprietà intellettuale
•[MaxxBass] è un brevetto della KS-Waves Company, Ltd.
•[MaxxBass] è un marchio di fabbrica depositato della KS-
Waves Company, Ltd.
∗A fini di miglioramento, i dati tecnici e il design sono
soggetti a modifiche senza preavviso.
Potencia máxima de salida: 120W (60W+60W)
Potencia nominal de salida: 60W (30W+30W)
Respuesta de frecuencia: 30Hz~200Hz
Distorsión armónica: 0,05%
Relación señal/ruido: 80dB
Frecuencia de corte del filtro pasabajos variable:
50/75/100/120 Hz (conmu-
tación de 4 puertos)
Voltaje de la fuente de alimentación:
14,4V
Masa: Negativo
Consumo eléctrico: 7,0A
Capacidad auto-fusible: 10A ✕1
Dimensiones externas:
Unidad principal: 310 mm de anchura ✕65 mm
de altura ✕210 mm de
profundidad
Unidad de control remoto: 100 mm de anchura x 29 mm
de altura x 25 mm de
profundidad
Peso:
Unidad principal: 2.000 g
Unidad de control remoto: 220 g
∗Esta unidad está equipada del circuito de mejora de
graves virtual [MaxxBass].
■
Acerca de los derechos de propiedad
intelectual
•[MaxxBass] está patentado por KS-Waves Company, Ltd.
•[MaxxBass] es una marca comercial registrada de KS-
Waves Company, Ltd.
∗Por motivos de mejora, las especificaciones y el diseño
están sujetos a cambios sin previo aviso.
Horizontal mounting
Montage horizontal
Horizontale Anbringung
Montaggio orizzontale
Montaje horizontal
■
Main unit mounting methods
1. Attach the mounting bracket to the bottom surface of the
main unit.
2. Cut slits in the carpet and insert speed nuts behind
carpet.
3. Fix the mounting bracket to the carpet using the self-
tapping screws.
∗The mounting bracket can be attached one of two
ways, vertically or horizontally.
■
Méthode de fixation de l’unité principale
1. Fixez le support de montage sur le fond de l’unité
principale.
2. Découpez des encoches dans le tapis et insérez les
écrous à ressort derrière le tapis.
3. Fixez le support de montage sur le tapis au moyen des
vis autotaraudeuses.
∗Le support de montage peut être fixé verticalement ou
horizontalement.
■
Montageverfahren für Hauptgerät
1. Den Montagebügel an der Bodenplatte des
Hauptgerätes befestigen.
2. Schlitze in die Bodenmatte schneiden und die
Klemmmuttern unter der Bodenmatte einführen.
3. Den Montagebügel mit den Schneidschrauben an der
Bodenmatte befestigen.
∗Der Montagebügel kann wahlweise in vertikaler oder
horizontaler Lage befestigt werden.
■
Metodi di montaggio dell’unità principale
1. Fissare la staffa di installazione al fondo dell’unità
principale.
2. Tagliare delle fessure nel tappetino ed inserire le
piastrine per viti autofilettanti sotto di esso.
3. Fissare la staffa di installazione al tappeto con delle viti
autofilettanti.
∗La staffa di installazione può venire applicata in uno di
due modi, verticalmente o orizzontalmente.
■
Métodos de montaje de la unidad principal
1. Monte la ménsula de montaje en la superficie inferior de
la unidad principal.
2. Corte rendijas en la esterilla e inserte las tuercas
rápidas detrás de la esterilla.
3. Fije la ménsula de montaje en la esterilla empleando los
tornillos autorroscantes.
∗La ménsula de montaje puede montarse de dos
formas, vertical u horizontalmente.
EspañolItalianoDeutschFrançaisEnglish
Mounting bracket
Écrou à ressort
Klemmmutter
Piastrina per viti autofilettanti
Tuerca rápida
Tapping screws
Vis autotaraudeuses
Schneidschrauben
Viti autofilettanti
Tornillos autorroscantes
Tapping screws
Vis autotaraudeuses
Schneidschrauben
Viti autofilettanti
Tornillos autorroscantes
Speed nuts
Vis à ressort
Klemmmuttern
Piastrine per viti autofilettanti
Tuercas rápidas
■
Remote control unit mounting methods
1. Apply hook-and-loop fastener (female) to automobile.
2. Apply hook-and-loop fastener (male) to the bottom
surface of the remote control unit, and press onto the
hook-and-loop fastener applied to the automobile.
∗Clean surfaces of any dust or oil before applying
fastener.
■
Méthode de fixation de la télécommande
1. Fixez la fermeture velcro (femelle) sur le véhicule.
2. Fixez la fermeture velcro (mâle) sur le fond de la
télécommande et pressez-la sur la fermeture velcro,
fixée sur le véhicule.
∗Enlevez toute trace de poussière ou d’huile à l’endroit
où vous fixerez la fermeture velcro.
■
Montageverfahren für Fernbedienung
1. Den Klettbandstreifen (Ösen) am Fahrzeug befestigen.
2. Den Klettbandstreifen (Haken) an der Unterseite der
Fernbedienung befestigen und gegen den am Fahrzeug
befestigten Klettbandstreifen drücken, um die
Fernbedienung anzubringen.
∗Vor dem Anbringen der Klettbandstreifen Staub oder
Öl von den Oberflächen entfernen.
■
Metodi di installazione del telecomando
1. Applicare l’elemento di fissaggio (femmina) alla vettura.
2. Applicare l’elemento di fissaggio (maschio) al fondo del
telecomando e premere sull’elemento di fissaggio stesso
fissandolo alla vettura.
∗Prima di applicare l’elemento di fissaggio, pulire le
superfici di applicazione da polvere ed olio.
■
Métodos de montaje de la unidad de control
remoto
1. Aplique el fijador de gancho y bucle (hembra) al
automóvil.
2. Aplique el fijador de gancho y bucle (macho) a la
superficie inferior de la unidad de control remoto, y
empújelo al fijador de gancho y bucle aplicado al
automóvil.
∗Limpie las superficies y el polvo y grasa antes de
aplicar el fijador.
Remote control unit
Télécommande
Fernbedienung
Telecomando
Unidad de control remoto Hook-and-loop fastener (male)
Fermeture velcro (mâle)
Klettbandstreifen (Haken)
Elemento di fissaggio (maschio)
Fijador de gancho y bucle (macho)
Hook-and-loop fastener (female)
Fermeture velcro (femelle)
Klettbandstreifen (Ösen)
Elemento di fissaggio (femmina)
Fijador de gancho y bucle (hembra)
Vertical mounting
Montage vertical
Vertikale Anbringung
Montaggio verticale
Montaje vertical
All manuals and user guides at all-guides.com

Other Clarion Subwoofer manuals

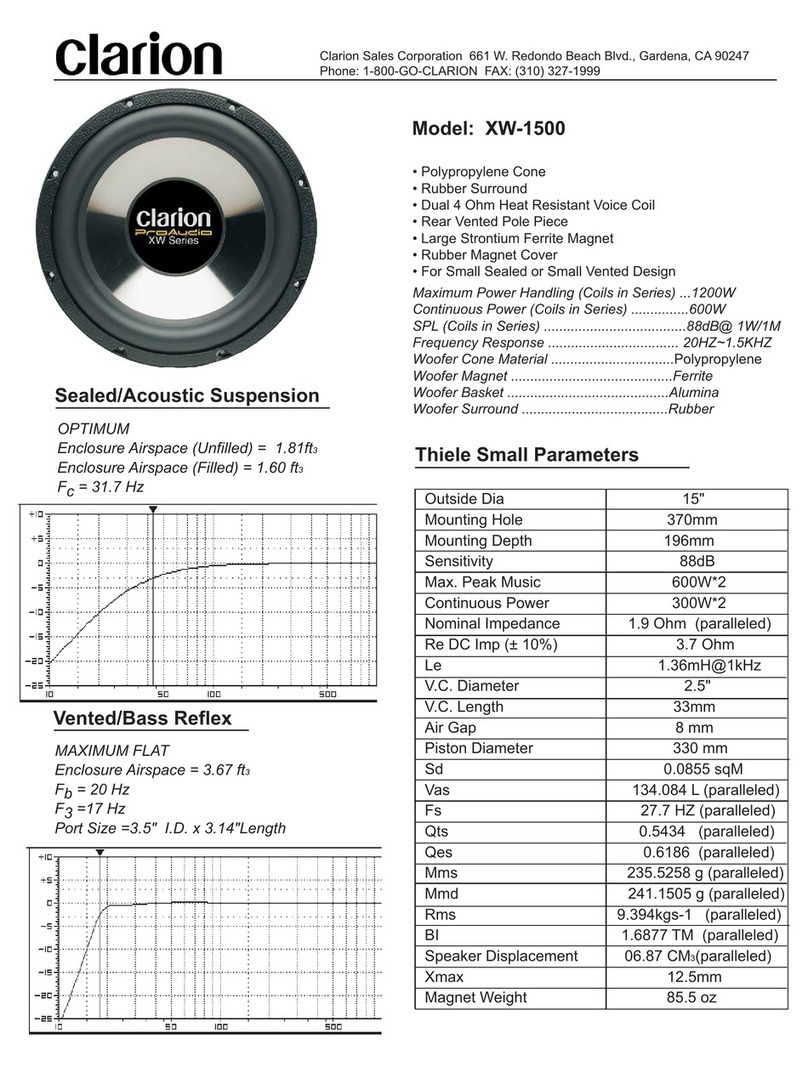
Clarion XW1500 User manual

Clarion

Clarion XW1500 User manual

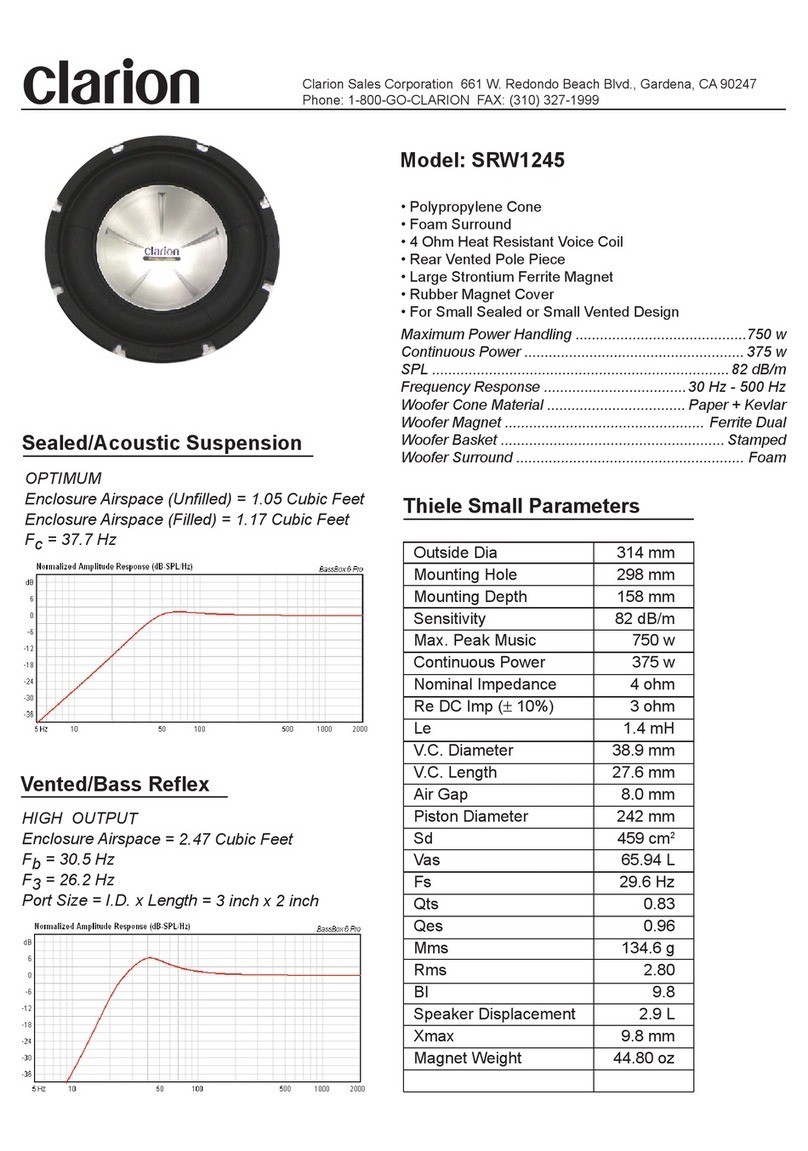
Clarion SRW1245 User manual

Clarion

Clarion SRW1245 User manual

Clarion SRV250 User manual

Clarion

Clarion SRV250 User manual

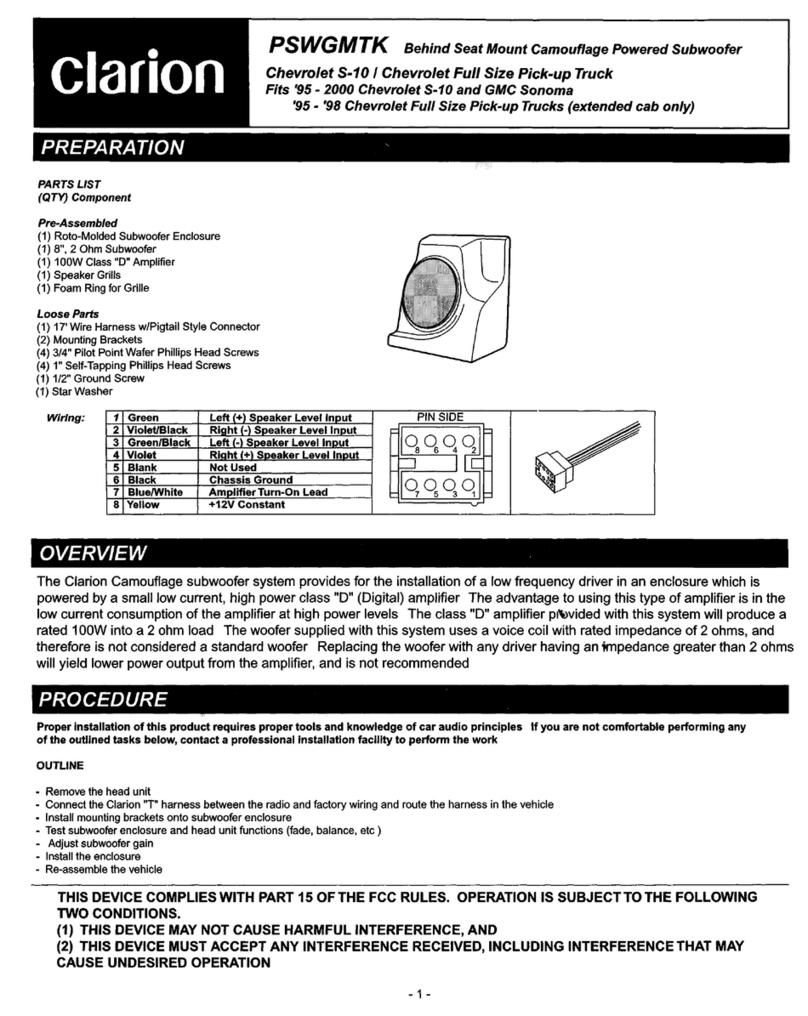
Clarion PSWGMTK User manual

Clarion

Clarion PSWGMTK User manual

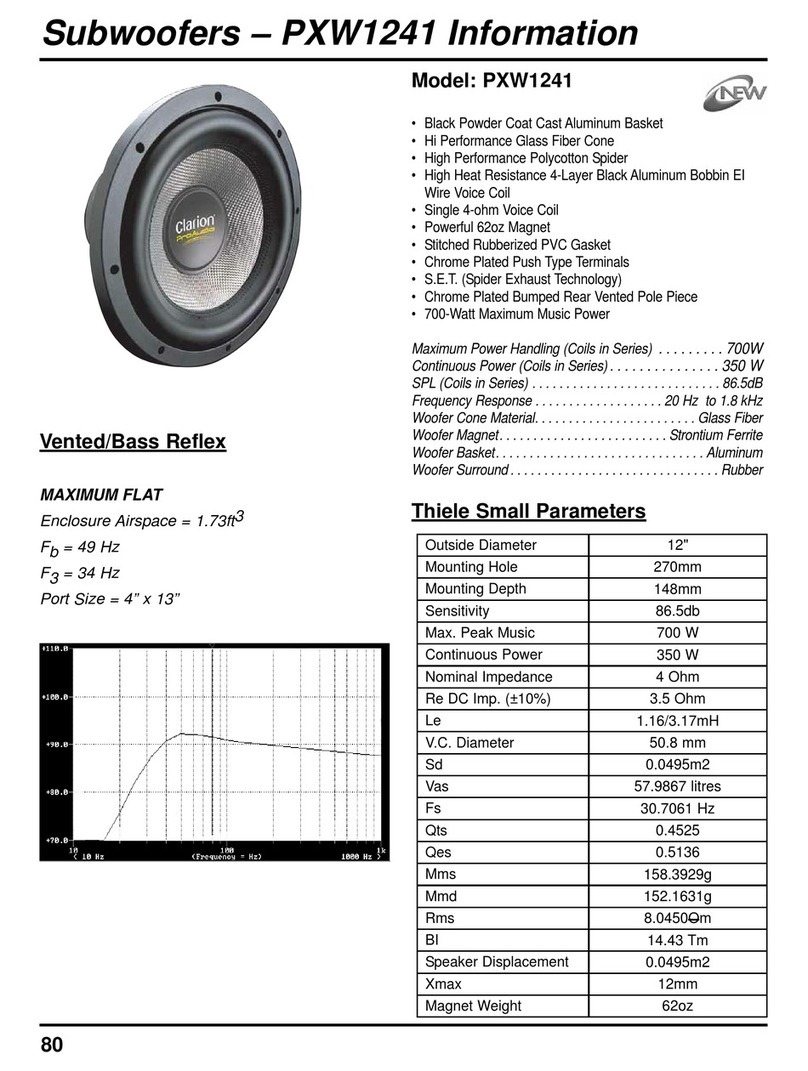
Clarion PXW1241 User manual

Clarion

Clarion PXW1241 User manual

Clarion SFW User manual

Clarion

Clarion SFW User manual

Clarion SRW1243 User manual

Clarion

Clarion SRW1243 User manual

Clarion SRW3881 User manual

Clarion

Clarion SRW3881 User manual

Clarion SRV314 Instruction Manual

Clarion

Clarion SRV314 Instruction Manual

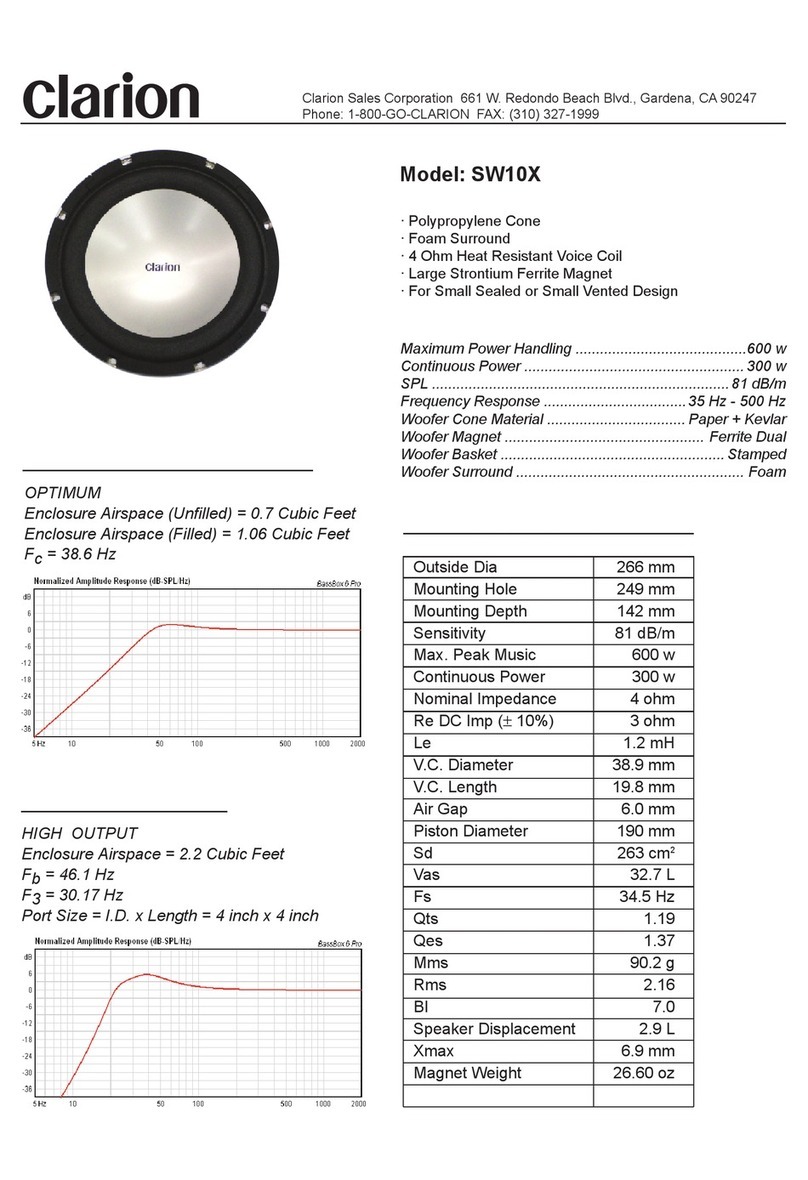
Clarion SW10X User manual

Clarion

Clarion SW10X User manual

Clarion PSWDRAM User manual

Clarion

Clarion PSWDRAM User manual

Clarion SRW1285 User manual

Clarion

Clarion SRW1285 User manual

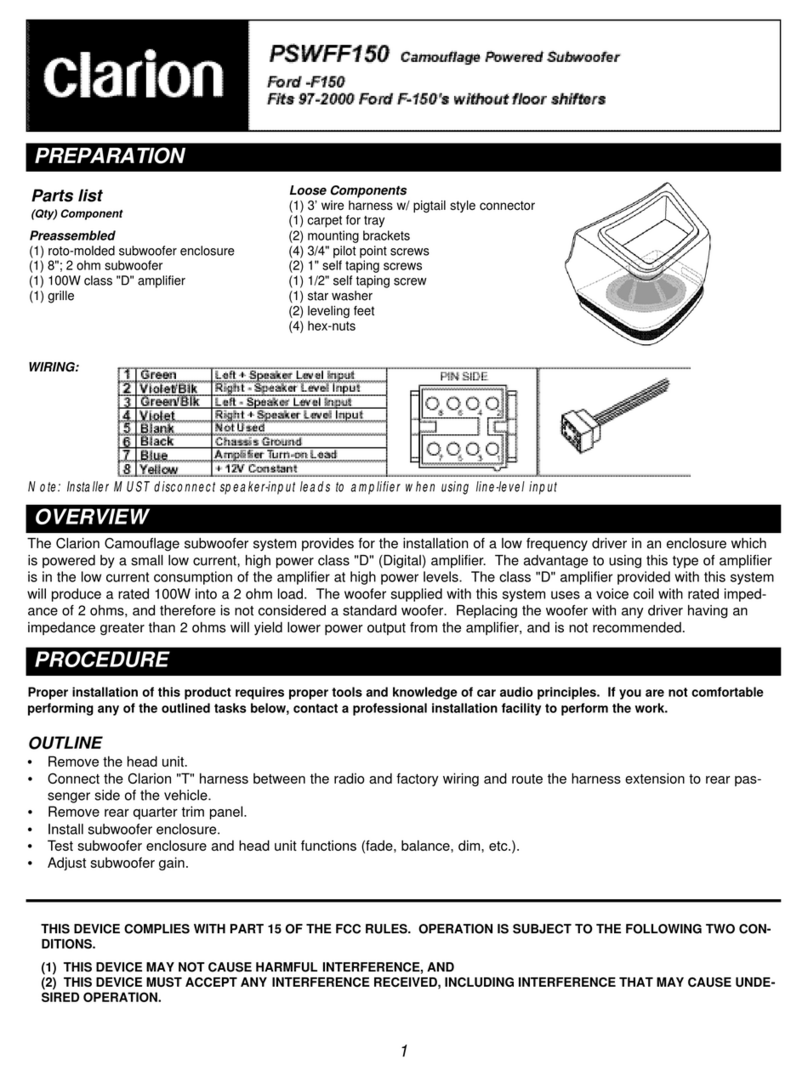
Clarion PSWFF150 User manual

Clarion

Clarion PSWFF150 User manual

Clarion SRW8000 User manual

Clarion

Clarion SRW8000 User manual

Clarion PSW-D-DGIG User manual

Clarion

Clarion PSW-D-DGIG User manual

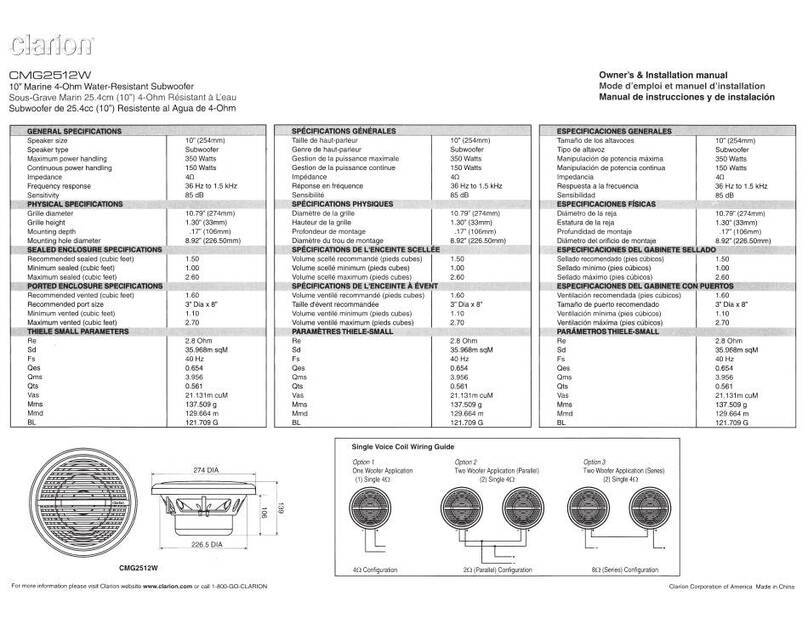
Clarion CMG2512W Quick start guide

Clarion

Clarion CMG2512W Quick start guide

Clarion WG2520 Quick start guide

Clarion

Clarion WG2520 Quick start guide

Clarion Full Digital Sound Z25W User manual

Clarion

Clarion Full Digital Sound Z25W User manual

Clarion GRAND CHEROKEE PSWJPGC User manual

Clarion

Clarion GRAND CHEROKEE PSWJPGC User manual

Clarion PFW1051 User manual

Clarion

Clarion PFW1051 User manual

Clarion WF2520 Service manual

Clarion

Clarion WF2520 Service manual

Clarion SRV303 Instruction Manual

Clarion

Clarion SRV303 Instruction Manual

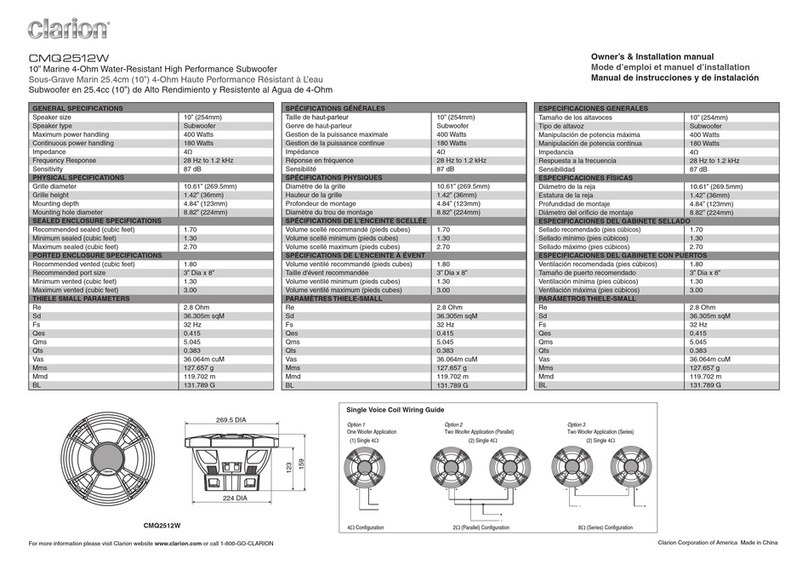
Clarion CMQ2512W Quick start guide

Clarion

Clarion CMQ2512W Quick start guide

Clarion PFW User manual

Clarion

Clarion PFW User manual

Popular Subwoofer manuals by other brands

Panasonic SB-WA880 Service manual

Panasonic

Panasonic SB-WA880 Service manual

Kicker PSON13MY manual

Kicker

Kicker PSON13MY manual

REVELL CONCERTA 2 B10 owner's manual

REVELL

REVELL CONCERTA 2 B10 owner's manual

Audio Pro B2-50 Service manual

Audio Pro

Audio Pro B2-50 Service manual

Proficient High Resolution Series user manual

Proficient

Proficient High Resolution Series user manual

Monitor Audio CW8 owner's manual

Monitor Audio

Monitor Audio CW8 owner's manual

Velodyne SMS -1 user manual

Velodyne

Velodyne SMS -1 user manual

P.Audio 2LINE-SUB user manual

P.Audio

P.Audio 2LINE-SUB user manual

Klipsch SW-350 owner's manual

Klipsch

Klipsch SW-350 owner's manual

Energy Connoisseur ESW-C10 owner's manual

Energy

Energy Connoisseur ESW-C10 owner's manual

Boss Audio Systems RIP-210 Specifications

Boss Audio Systems

Boss Audio Systems RIP-210 Specifications

Infinity BU-2 Technical manual

Infinity

Infinity BU-2 Technical manual

Bogen NEAR IGS212 Quick start installation and setup guide

Bogen

Bogen NEAR IGS212 Quick start installation and setup guide

Indiana Line MIO SUB owner's manual

Indiana Line

Indiana Line MIO SUB owner's manual

EAW subwoofer DC1 Specifications

EAW

EAW subwoofer DC1 Specifications

AEB SUB 18H user manual

AEB

AEB SUB 18H user manual

Rockford Fosgate PS300-12 Installation reference sheet

Rockford Fosgate

Rockford Fosgate PS300-12 Installation reference sheet

Manta SB-1600A user manual

Manta

Manta SB-1600A user manual

manuals.online logo
manuals.online logoBrands
  • About & Mission
  • Contact us
  • Privacy Policy
  • Terms and Conditions

Copyright 2025 Manuals.Online. All Rights Reserved.