Thank you for purchasing this CLARKE Tow Bar, which is available with or without a
Spring Damper and is designed for use with vehicles equipped with towing eyes
only.. Assembly is the same for both versions, and is carried out as follows:
1. Remove the clevis pins from either end of the main centre tube, and insert a
connecting tube into each end, securing each with a clevis pin ensuring the
retaining clips are correctly in place.
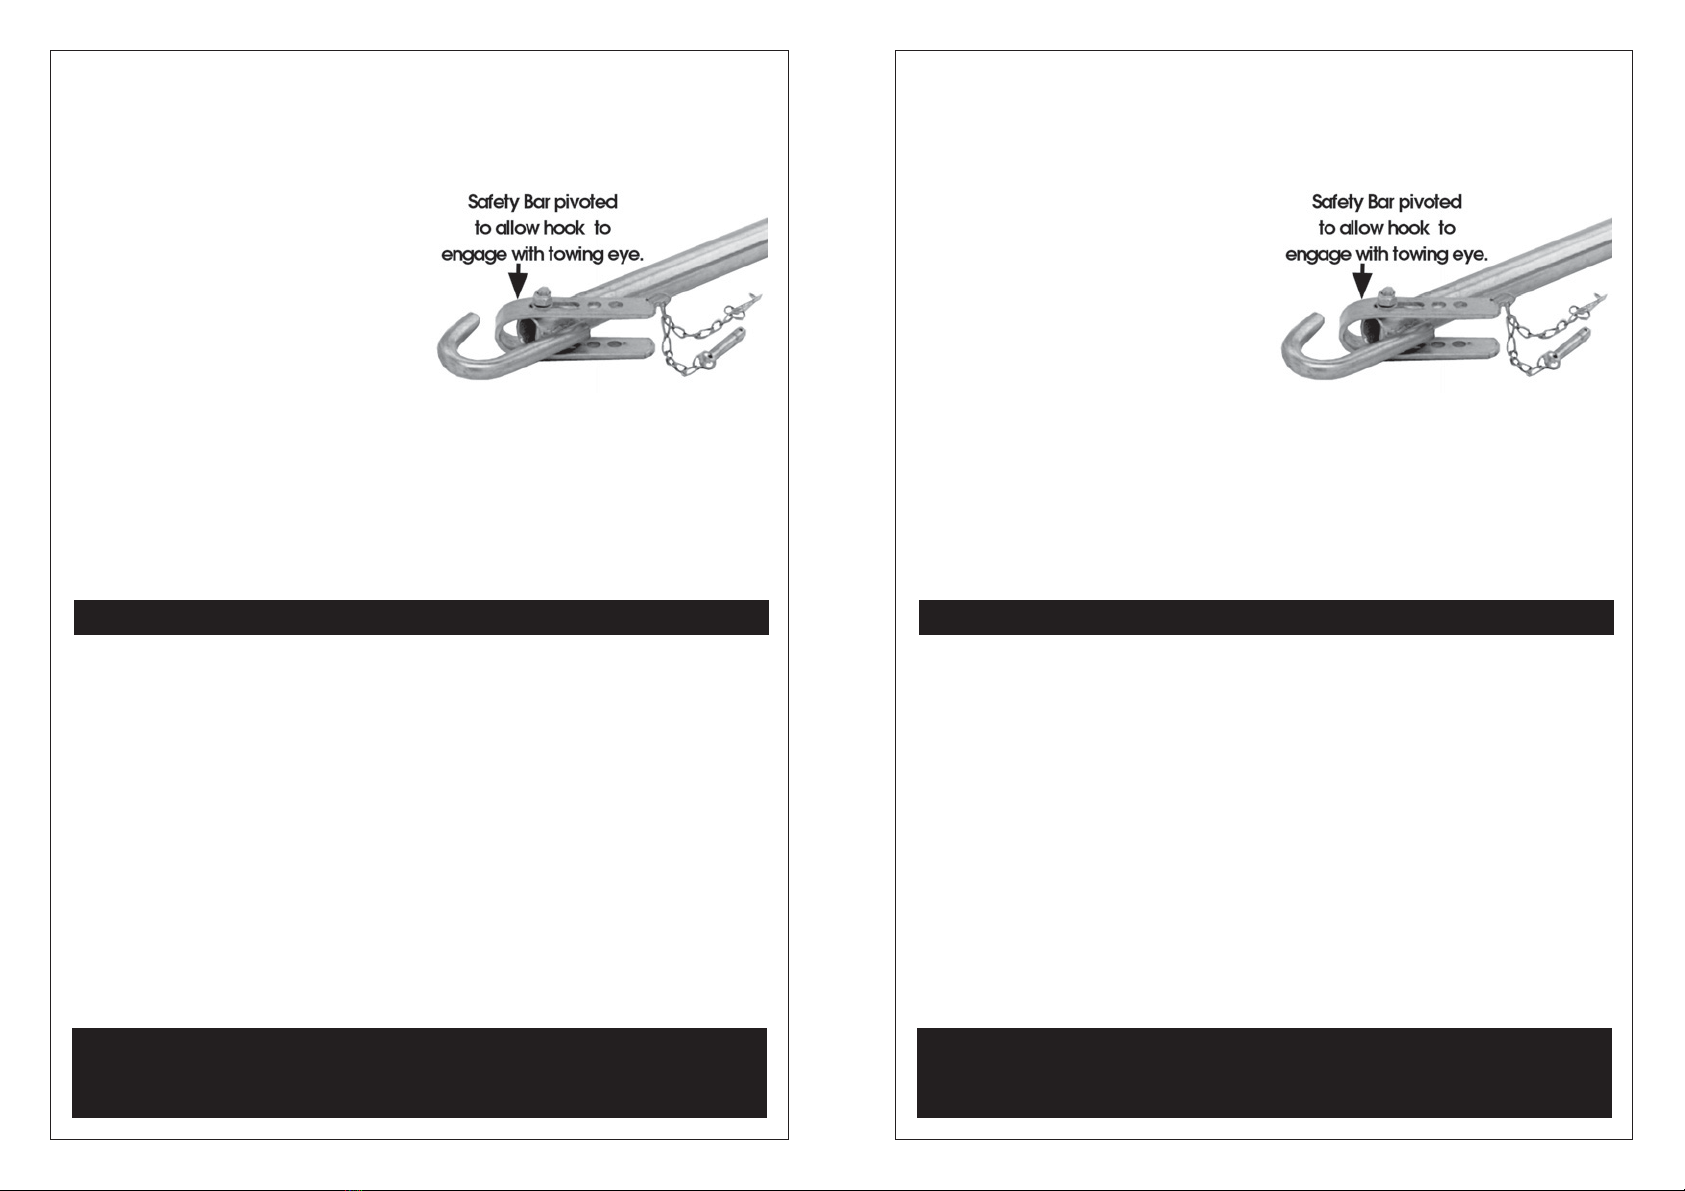
2. Remove the clevis pin from the safety
bar at one end of the tow bar. This allows
the safety bar to pivot sufficiently for the
hook to engage with a towing eye of
the towing vehicle.
3. With the hook engaged, replace
the clevis pin in one of the two holes
provided, ensuring the bar is up
against the towing eye as tightly as possible. i.e. There is as little room for
movement as possible between towing eye and hook.
4. Repeat the process at the other end of the tow bar, connecting the hook
to the towing eye on the SAME SIDE of the towed vehicle.
It will be necessary to push the vehicle to be towed in order the hook engage with the
towing eye. If this is not possible, attach the tow bar to the vehicle to be towed first,
and VERY CAREFULLY maneouvre the towing vehicle, with thetow bar being held up,
until the hook can engage with the towing eye of the towing vehicle.
GENERAL SAFETY PRECAUTIONS
•NEVER attempt to tow a vehicle of an overall weight greater than 2,000kg
(1.9tons). Be aware that on initial startup, the load will greatly exceed the
weight of the vehicle momentarily. If acceleration is too fast, and the load is
heavy, there could be a risk of failure of the tow bar.
•NEVER tow a vehicle at high speeds. Exercise great care and common sense,
bearing in mind that the vehicle being towed must also negotiate bends in the
road and steering assistance may not be available if the engine is not running.
•ALWAYS brake and accelerate gently and with great care.
•ALWAYS read and abide by Highway Code rules and recommendations for
towing vehicles.
•ALWAYS have the red flag in place on the Standard tow bar (Model TB-2).
• The vehicle being towed must ALWAYS use its own brakes to slow down and stop.
•NEVER replace damaged or lost components with any part other than that
supplied by CLARKE International. (Contact your Clarke dealer)
DISCLAIMER
These precautions are meant as a guide only. The towing of vehicles is the sole
responsibility of those concerned. CLARKE International accepts no responsibility for
any damage or injury which may be incurred as a result of the use of this tow bar.
Thank you for purchasing this CLARKE Tow Bar, which is available with or without a
Spring Damper and is designed for use with vehicles equipped with towing eyes
only.. Assembly is the same for both versions, and is carried out as follows:
1. Remove the clevis pins from either end of the main centre tube, and insert a
connecting tube into each end, securing each with a clevis pin ensuring the
retaining clips are correctly in place.
2. Remove the clevis pin from the safety
bar at one end of the tow bar. This allows
the safety bar to pivot sufficiently for the
hook to engage with a towing eye of
the towing vehicle.
3. With the hook engaged, replace
the clevis pin in one of the two holes
provided, ensuring the bar is up
against the towing eye as tightly as possible. i.e. There is as little room for
movement as possible between towing eye and hook.
4. Repeat the process at the other end of the tow bar, connecting the hook
to the towing eye on the SAME SIDE of the towed vehicle.
It will be necessary to push the vehicle to be towed in order the hook engage with the
towing eye. If this is not possible, attach the tow bar to the vehicle to be towed first,
and VERY CAREFULLY maneouvre the towing vehicle, with thetow bar being held up,
until the hook can engage with the towing eye of the towing vehicle.
GENERAL SAFETY PRECAUTIONS
•NEVER attempt to tow a vehicle of an overall weight greater than 2,000kg
(1.9tons). Be aware that on initial startup, the load will greatly exceed the
weight of the vehicle momentarily. If acceleration is too fast, and the load is
heavy, there could be a risk of failure of the tow bar.
•NEVER tow a vehicle at high speeds. Exercise great care and common sense,
bearing in mind that the vehicle being towed must also negotiate bends in the
road and steering assistance may not be available if the engine is not running.
•ALWAYS brake and accelerate gently and with great care.
•ALWAYS read and abide by Highway Code rules and recommendations for
towing vehicles.
•ALWAYS have the red flag in place on the Standard tow bar (Model TB-2).
• The vehicle being towed must ALWAYS use its own brakes to slow down and stop.
•NEVER replace damaged or lost components with any part other than that
supplied by CLARKE International. (Contact your Clarke dealer)
DISCLAIMER
These precautions are meant as a guide only. The towing of vehicles is the sole
responsibility of those concerned. CLARKE International accepts no responsibility for
any damage or injury which may be incurred as a result of the use of this tow bar.


