Clas Ohlson GigaAir 3451 User manual
ENGLISH SVENSKA NORSK SUOMI
18-2060 / 32-8518
Surveillance Camera
Övervakningskamera
Overvåkningskamera
Valvontakamera
Model/Modell/Malli: GigaAir 3451
Ver. 200712
www.clasohlson.com


3
ENGLISH
Läs igenom hela bruksanvisningen före användning och spar den sedan som referensmaterial.
Vi reserverar oss för ev. text- och bildfel samt ändringar av tekniska data.
Vid tekniska problem eller andra frågor kan Du kontakta oss (se adresserna på baksidan).
Surveillance camera, model: GigaAir 3451
• Wirelesssurveillancecamerawitha5.5"monitorwithacamerawhichcanbe
usedindoorsoroutdoors.
• Cameraforxedinstallation,2extracamerascanbeconnected.
• Themonitorswitchesautomaticallybetweentheconnectedcameras(max3).
4
ENGLISH
fig. 1
5
6
4
3
21
7
1. The package includes
Camera
Screen
Mainsadaptors(2x)
Instructionsforuse
Warning!Themainsadaptorwhichismarked“Output9VDC”mustbeconnectedto
thecameraandthatwhichismarked“Output:13.5VDC”tothemonitor(screen).
Donotconfusethetwo!
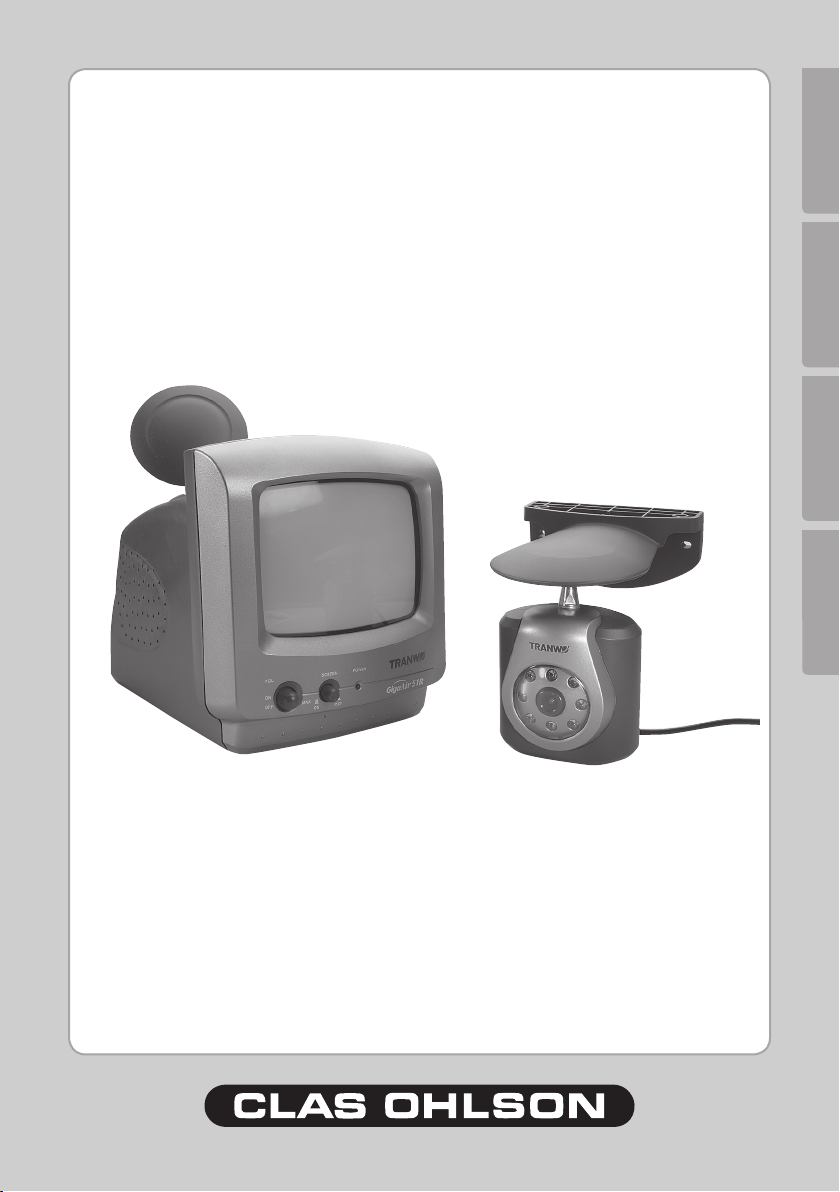
2. Description
1. Mountingbrackets
2. Lockscrews
3. Knucklejoint
4. IRlightdiode(usedfornightvision)
5. Microphone
6. Camerabody
7. Channelselectors
Camera TX: TTA-33T (34T)

5
ENGLISH
fig. 2
12
123
4
5 6 7 8 9
10
11
Framsidan Baksidan
Screen RX: TTA-51R
1. [VOL]Powerswitchwithvolumecontrol
2. [SCREEN]PictureOff/On
3. [POWER]Lightdiode(lightsupredwhenthescreenison).
4. [DCIN]Connectionformainsadaptor(13.5)
5. [CHANNEL]Channelselector(Choosewhichcamerasareshownon
thescreen).Besurethatthecameraandmonitoraretunedtothesame
channel.
6. [AUDIO]Noiseoutput(white)
7. [VIDEO]Videooutput(yellow)
8. [V-HOLD]Picturescroll,tuningpicturesettings.
9. [BRIGHT]Lightstrength
10.[CONT]
11.Aerial(NB!Theaerialcannotberotatedbymorethanonerevolution.)
12.Batterycompartment

6
ENGLISH
fig. 4
fig. 3
Channel4
ON DIP
Channel3
Channel2
Channel1
3. Select the channel
Screenandcameramustbetunedtothesamechannel.
Camera:Selectthechannelwiththechannelselectoratthebackofthecamera.
Removetherubberpluganduseasmallscrewdrivertotuneinthedesiredchannel
(seeFigure3).
Screen:SettheDIPleverto“On”forthechannelswhicharetobeused(onefor
eachcamera)
Channels1-4arechannelsforcamerasand5isintendedforsettingthetimefor
switchingbetweenthecameras(seeFig.4).
ENGLISH
fig. 5
fig. 6
4. Connection, use
4.1 Screen
Checkthatthepowerswitchonthefrontofthescreenisswitchedoffbeforeyou
beginwiththeconnection.
Power supply
Mainsadaptor(Output:13.5VDC)orbatteries(10xR14).
NB!Removebatteriesifyoudonotintendtousetheequipmentforalongperiodof
time,donotmixoldandnewbatteries.
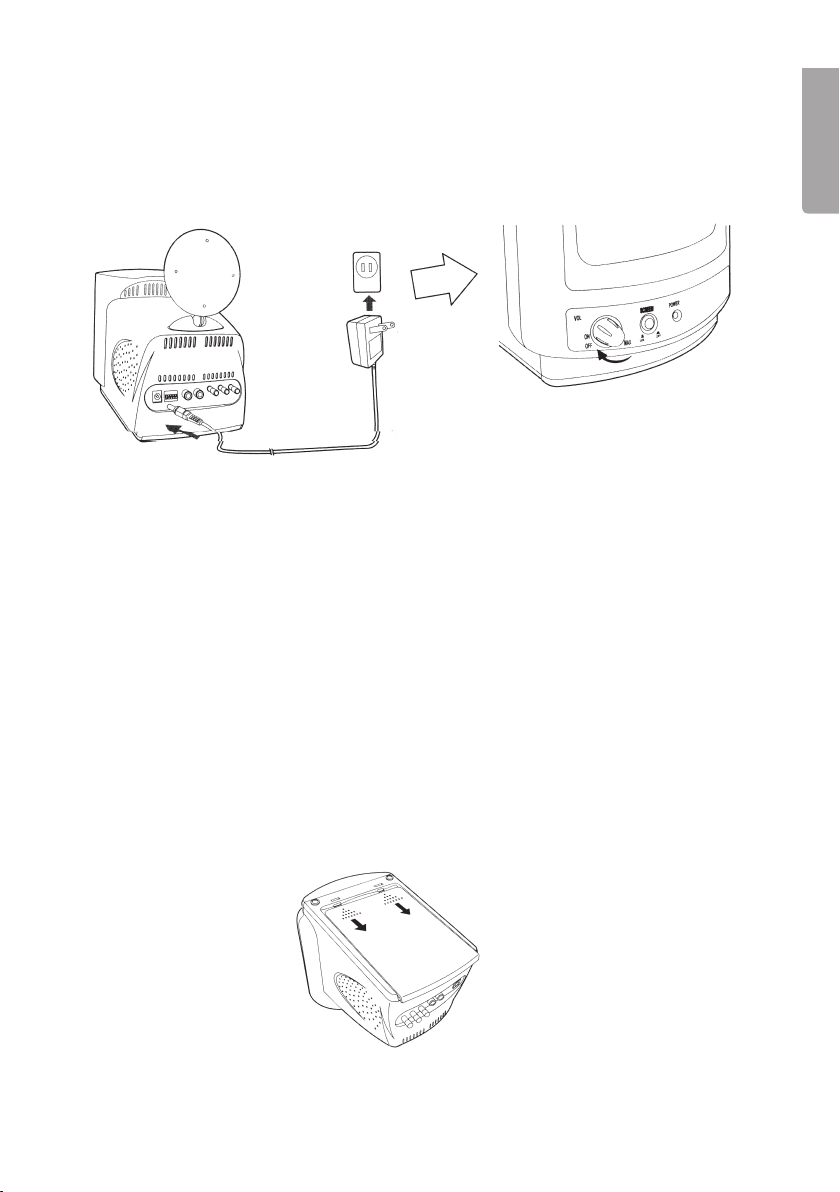
Batteries
OpenthebatterylidandinsertthebatteriesasshowninFigure6.Closethebattery
lid(Checkthatitisclosedsecurely).
8
ENGLISH
fig. 7
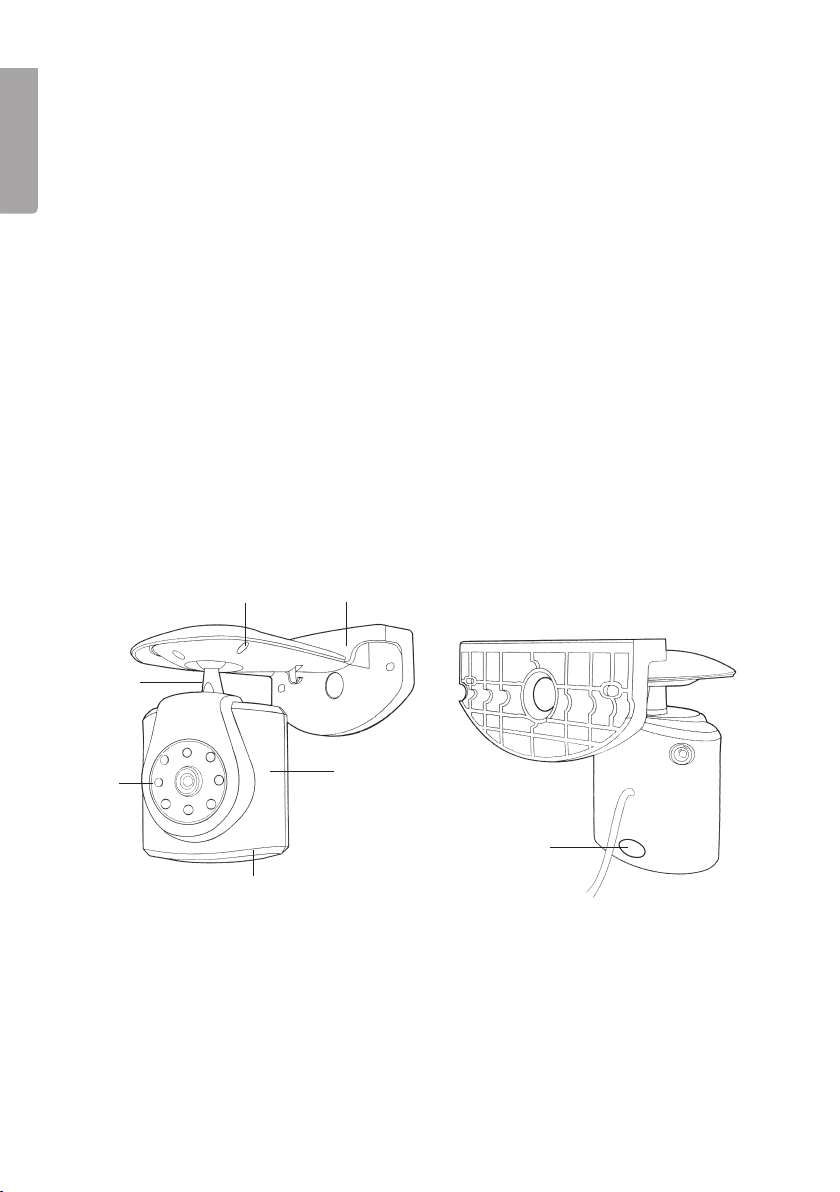
Mains adaptor
Connectthemainsadaptormarked“Output:13.5VDC”toanelectricalsocketand
theDCplugtothe[DCIN]connectiononthebackofthescreen.
Placing
Placethescreenonasuitablesurfacewithadarkbackgroundanddirecttheaerial
towardsthecamera.
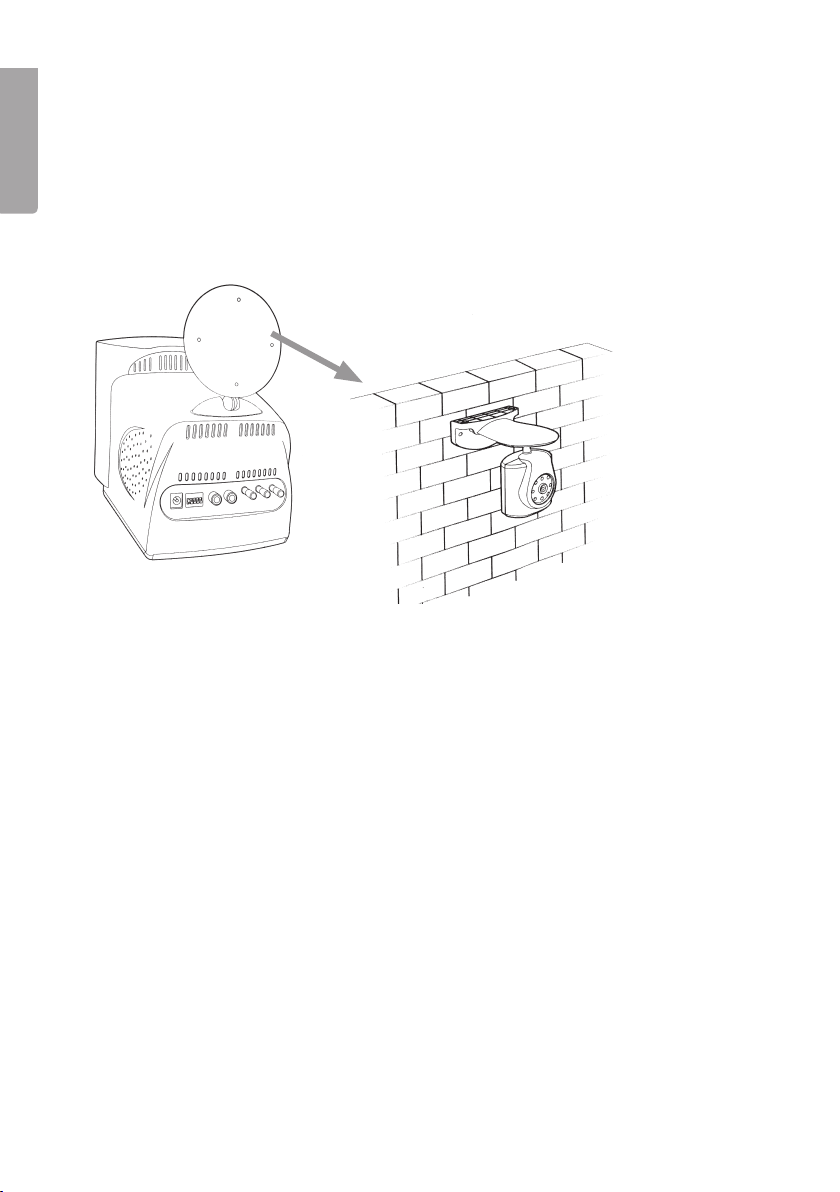
4.2 Camera
Assembly
Thecameracanbeassembledonawalloraceiling.Testtheradiotransferenceso
thatyouhaveapictureonthescreenbeforeyouassemblethecamerapermanent-
ly.Ifthereisinterferenceyoumayneedtochangetoanalternativecameraposition
(seethesectiononfaultnding).Thecameracanbeusedbothinsideandoutside
butshouldbeweather-proofedforuseoutdoorssothatthecameraisnotdirectly
exposedtorain.
Power supply
Mainsadaptor9VDC,500mA(plus(+)inthecentre)withlongcables.
ENGLISH
Tape,insulationtapeetc.
g. 9
fig. 8
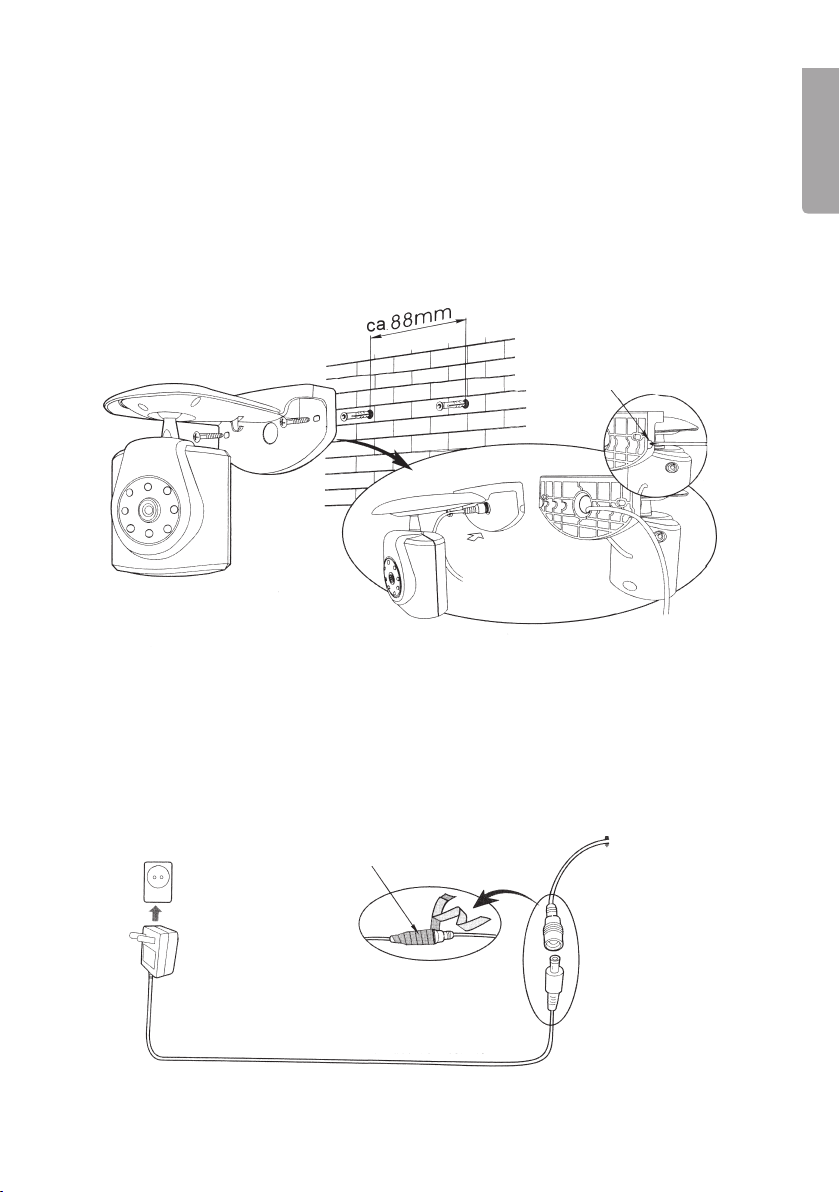
Positioning
a) Usethecamera’swallmountsasatemplateandmarkouttwoboreholes
(86mmbetweenholes)wherethecameraistobeassembled.Considerwhere
thecameracableshouldbeassembled.
b) Assemblethecamerawiththescrewssupplied,drillholesforthecable(min
Ø13mm)(thehandlehasaholewhichismeantforpassingcablethrough)
c) Pullthecablethroughthehole,sealtheholewhererequired.
d) Connectthecameracablewiththemainsadaptorcable,xandsealthe
connectionwithtape,insulationtapeetc.(seeg.9).
e) Connectthemainsadaptortoanelectricalsocket.
10
ENGLISH
AUDIO VIDEO
Vit
Gul
Gul
Vit
VCR
fig. 10a
fig. 11
fig. 10b
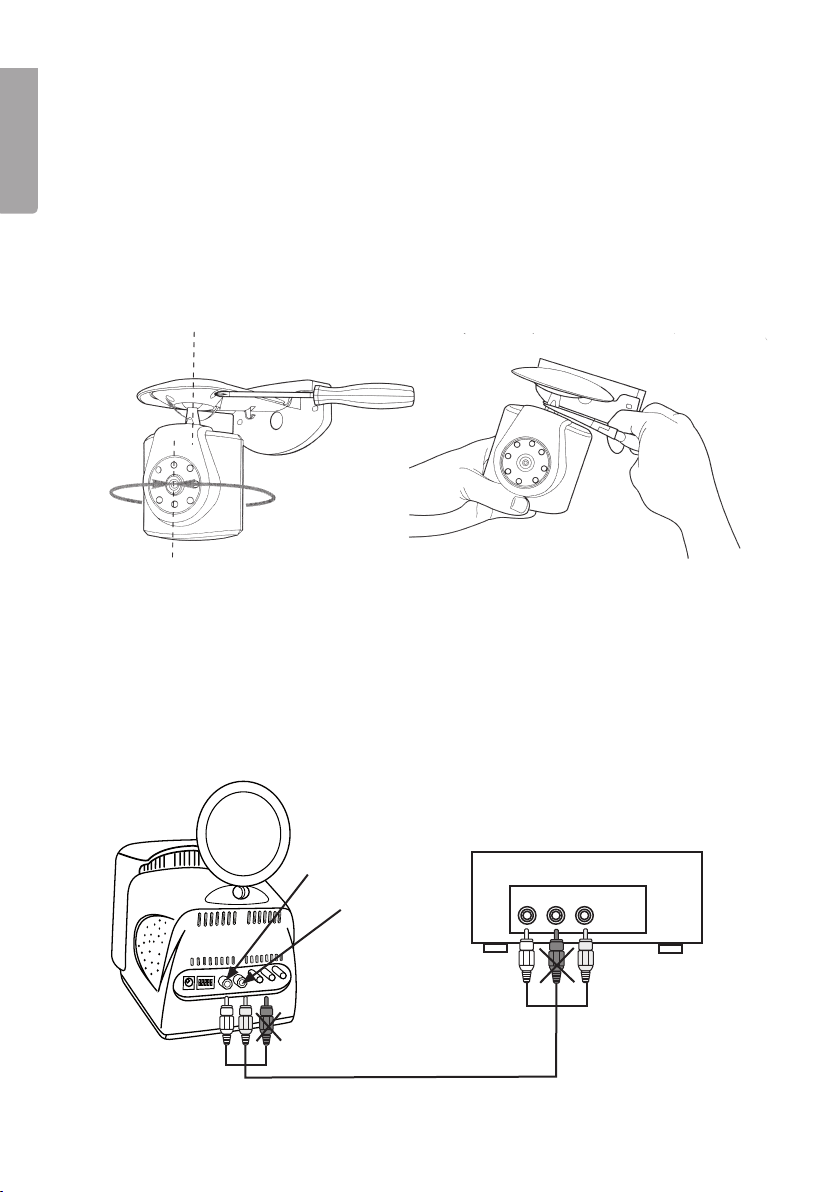
Final installation
a) Loosenthelockscrewsonthesamesideofthewallmountuponwhichthe
camerarests.
b) Adjustthecameraangle(seegure10a).
c) Tightenthelockscrewswhenthesettingisright.
d) Checkthatthecameraissecurelyattachedandthatitspositiondoesnot
changeduetovibrations(seegure10b).
5. Use
• Thescreenhasoutletsforaudio[AUDIO]andvideo[VIDEO](RCAcontacts).
ConnecttheRCAcable(notincluded)between[AUDIO]and[VIDEO]andtheinlets
ontheconnectedunit(seeFigure11).Readtheunitmanualbeforeconnecting.
Table of contents
Languages:
Other Clas Ohlson Security Camera manuals


