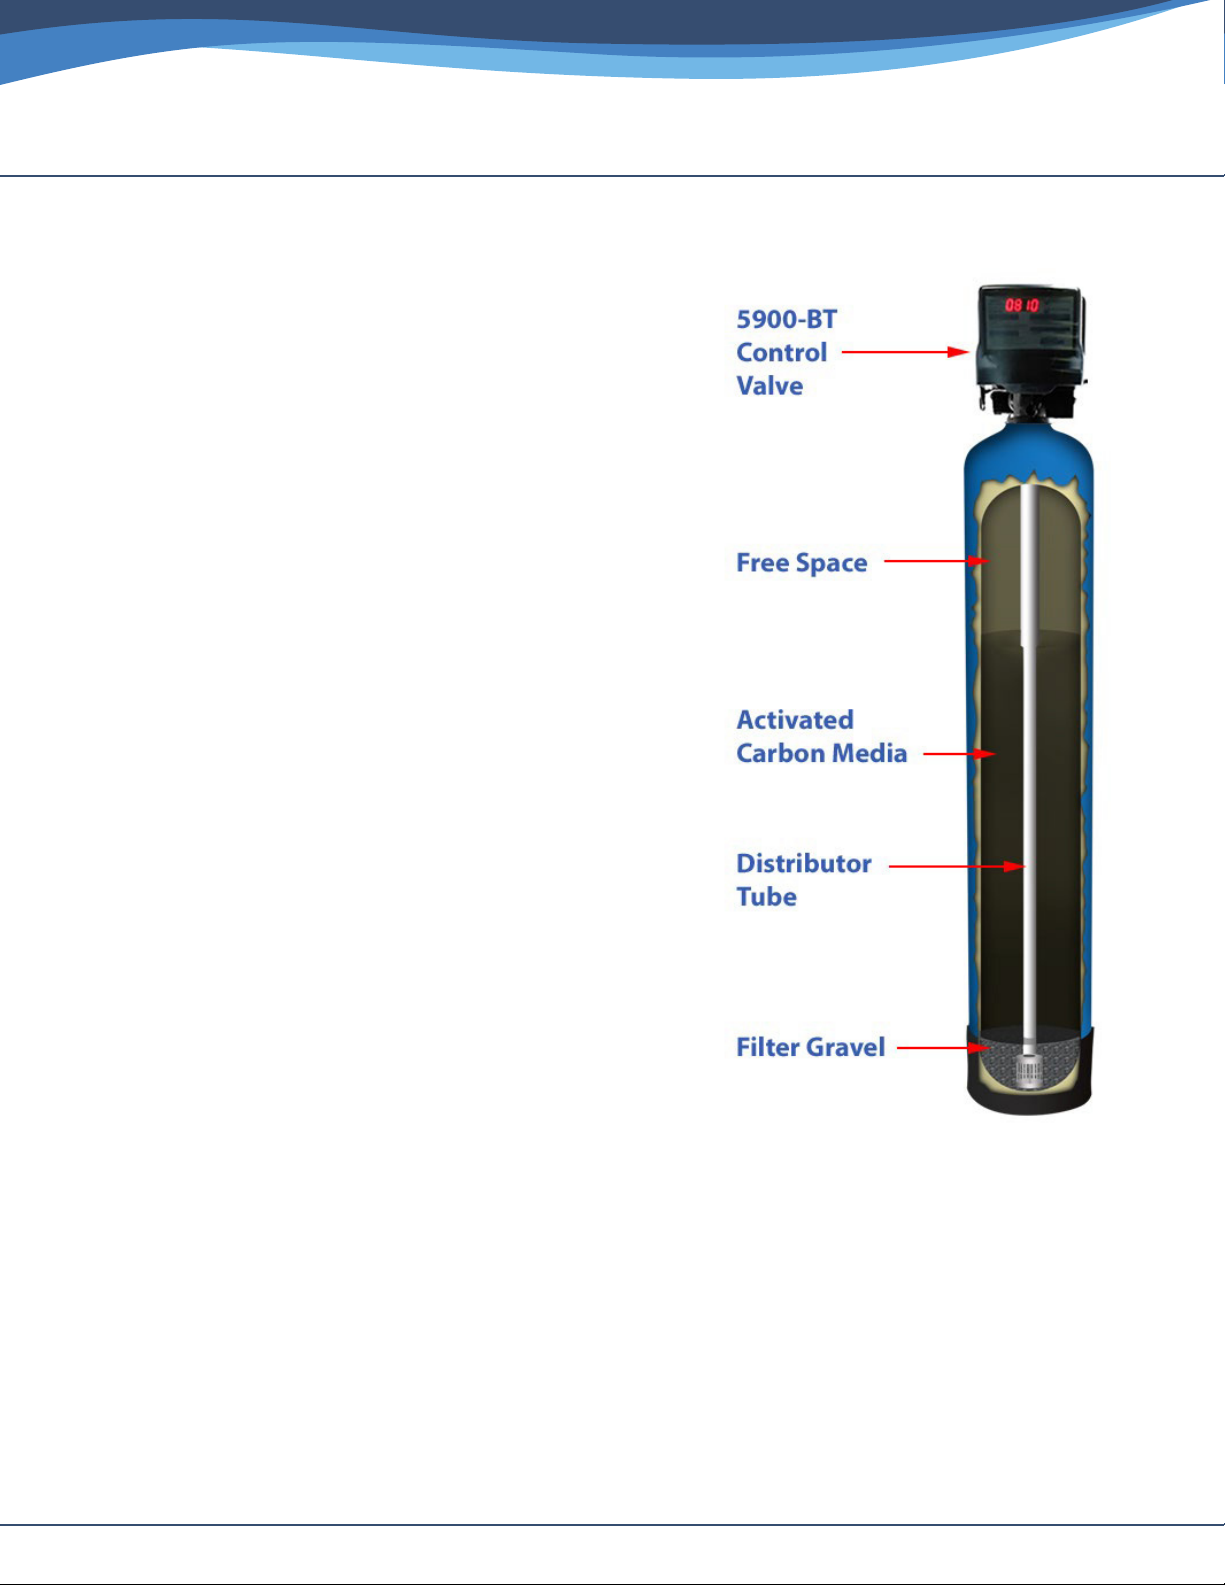
Clean Water 5900BT-AIR Operating and safety instructions


Other Clean Water Water Filtration System manuals

Clean Water
Clean Water 7500-REV2.5 User manual

Clean Water
Clean Water 7500-REV4 User manual

Clean Water
Clean Water 7500-REV2.5 User manual

Clean Water
Clean Water Living Water VORTEXer User manual

Clean Water
Clean Water 7500-REV2.5 User manual

Clean Water
Clean Water 7500-REV4 User manual

Clean Water
Clean Water Living Water VORTEXer User manual

Clean Water
Clean Water 5900-BT Carbon Backwash Filter Operating and safety instructions
Popular Water Filtration System manuals by other brands

Vertex
Vertex Puratek Installation and maintenance manual

Philips
Philips AUT3234 user manual

Dustcontrol
Dustcontrol DC 50-W Original instructions

Ispring
Ispring UVF55FS Installation and maintenance manual

Automated Pure Water
Automated Pure Water 400 Installation & operation

Machinery World
Machinery World Tetra Centri A 614HGV-14C Service & Maintenance

WilTec
WilTec 52367 user manual

Laica
Laica MikroPLASTIK-STOP Instructions and guarantee

Apec Water
Apec Water SOFTENER Series Installation instructions & owner's manual

Anetsberger Brothers
Anetsberger Brothers GoldenFRY FFM-150 Installation, user operation & maintenance manual

Sterilight
Sterilight S1Q-DWS Installation instructions & owner's manual

Aquascape Pro
Aquascape Pro Signature Series 1000 Instruction and maintenance manual

Oase
Oase Filtral UVC 1500 Commissioning

Theiling
Theiling ROLLERMAT XC Operation manual

Tetra
Tetra Tetratec EasyCrystal FilterBox 300 manual

OMOIKIRI
OMOIKIRI PURE DROP 1.0 manual

Premier
Premier RO-TFM-4SV/W50 Installation, operation and maintenance manual

Aquatec
Aquatec AquaPro All in One 2000 instruction manual