Clear Water clearspa User manual

Clearwater Clearspa Instructions 09/06
Installation Instructions

Clearwater Clearspa Instructions 09/06
Thank you for purchasing a Clearwater Clearspa bath tub
The following instructions will take you step by step through the installation process.
Index
1. Items provided and useful tools
2. Connection of the air pipes
3. Connection to the motor
4. System operation and maintenance
Clearwater Clearspa Instructions 09/06
Section 1 - Items provided and useful tools
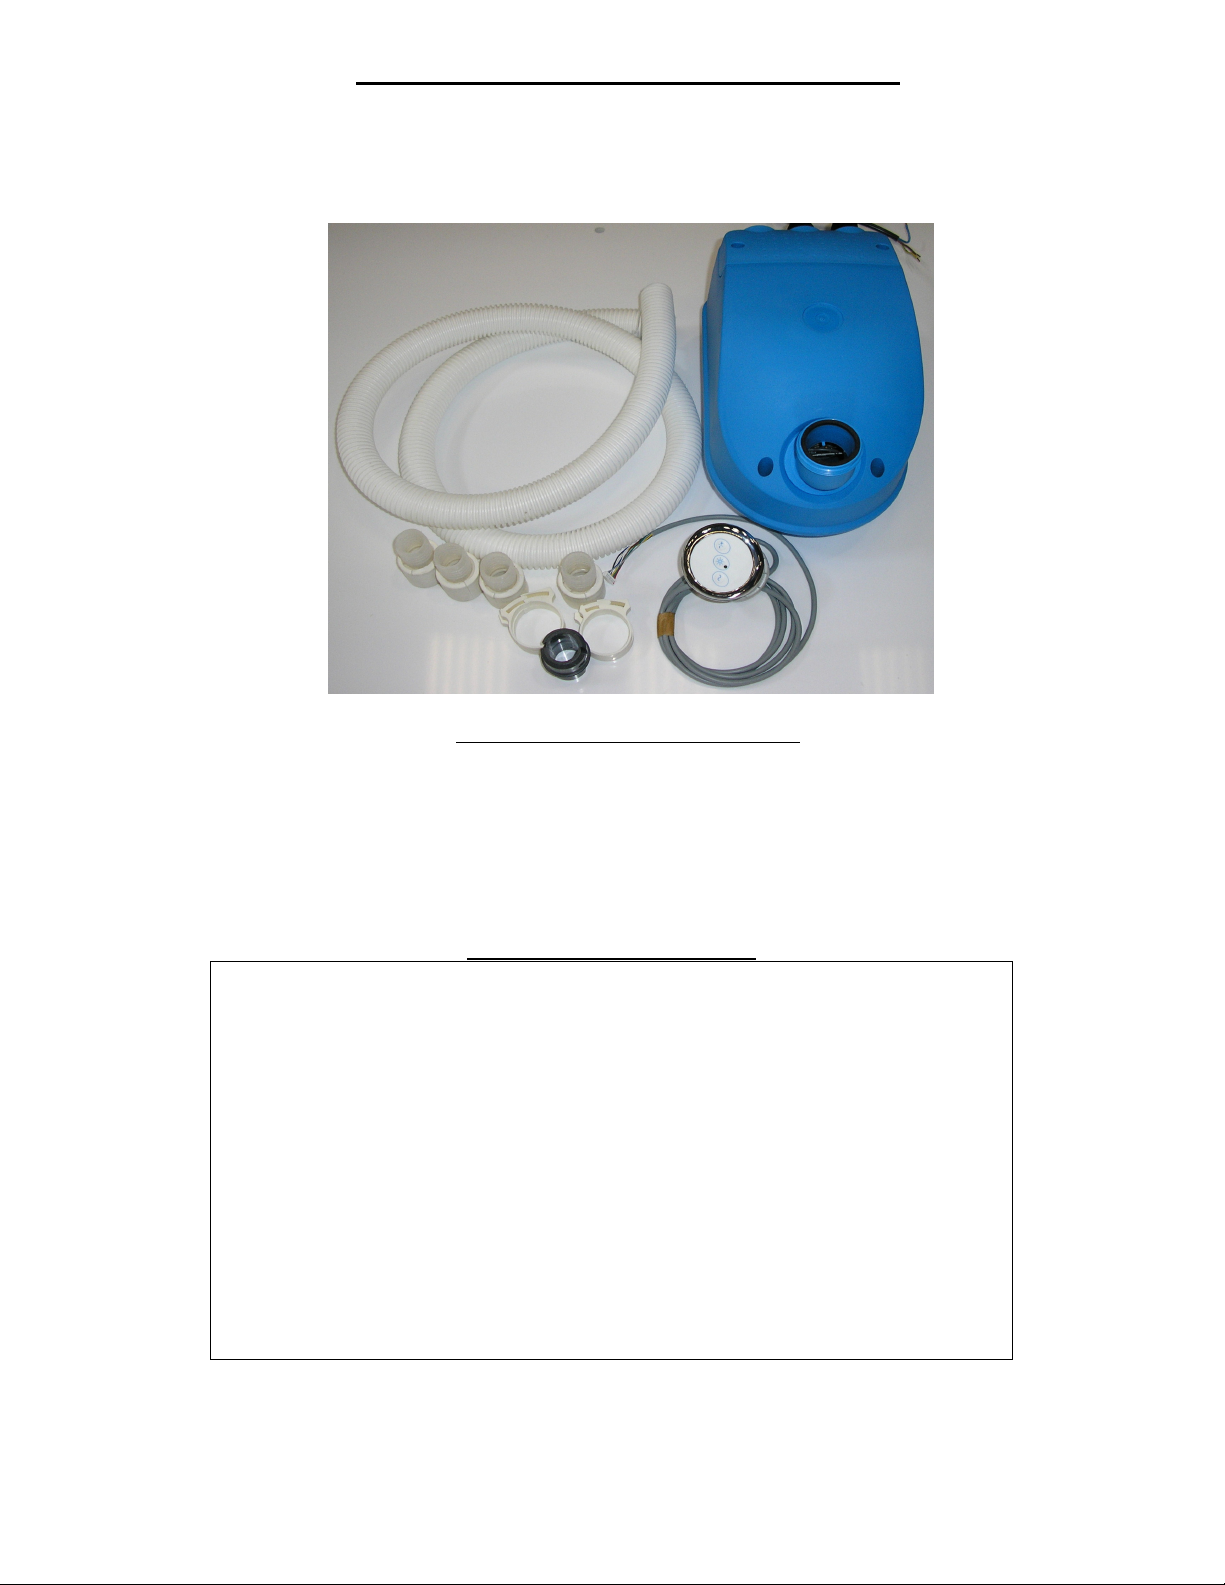
The Clearspa system is already factory fitted to your bath. The additional
equipment you receive is 1) the motor, 2) the air pipe, two separate lengths, 3) 4 x
hose cuffs, 4) 4 x hose clips, 5) a non return valve and 6) touch pad. These are all
seen in the picture below.
Useful tools for the job (not supplied)
• PTFE tape
• Pliers
• Screw driver (straight and posi drive)
• Sharp knife
• Silicone sealant
Important wiring information
The spa system comes complete with at least
4m of air tubing pipe. The pipe connects the motor to the bath. It is
essential you plan firstly where the bath will be situated and secondly
where the motor will be situated. A qualified electrician must make
all electrical connections. It is essential that the electrical contractor
installs all equipment in strict compliance with I.E.E regulations 16th
Edition, 1991 or update. All electrical wiring must conform to British
Standards. We recommend that all Clearspa systems are fitted with
an (ELCB) Earth Leakage Circuit Breaker (not supplied). This
should be wired in line to the fuse box or alternatively may be wired
into a 30A ring main via a junction box. We recommend that a
appropriately fused 1amp switch spur (not supplied) be provided to
isolate the system for servicing. A 5 amp may be necessary.
Clearwater Clearspa Instructions 09/06
Section 2 - Connection of the air pipes
• The Clearspa is already factory fitted inside the bath.
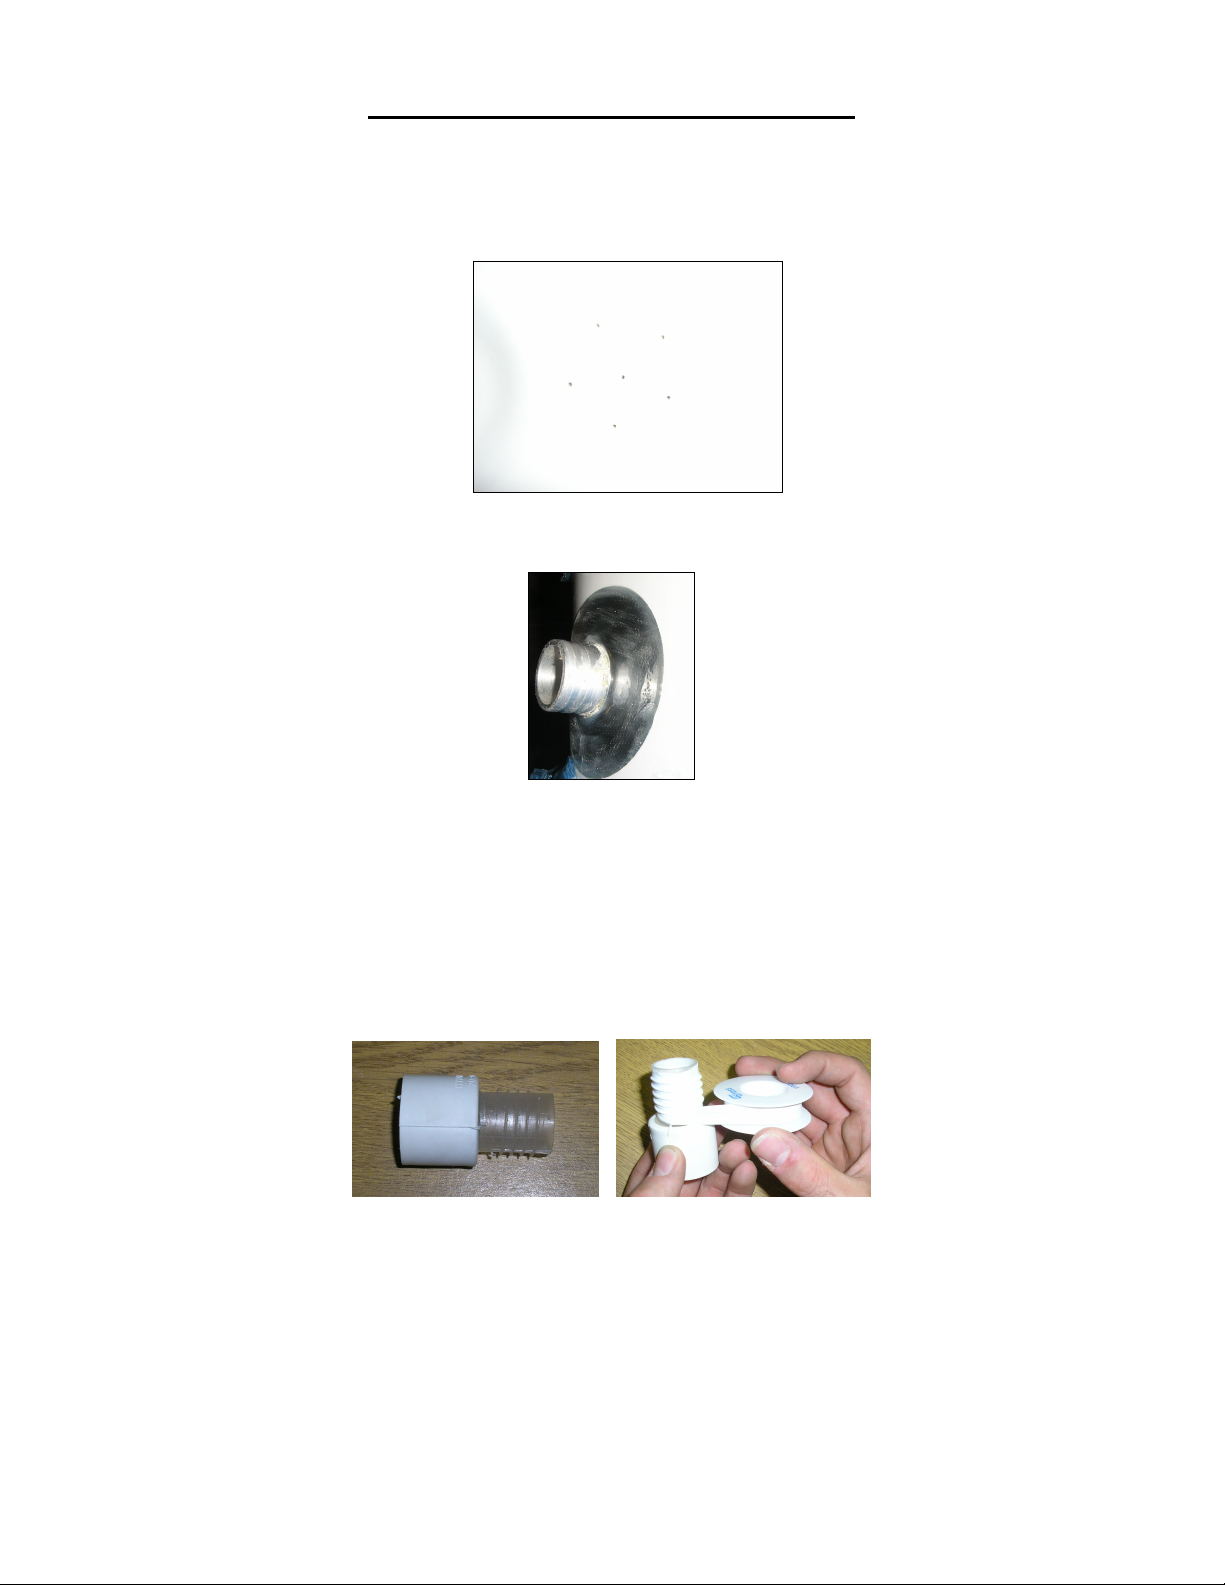
• All that is seen on the base of the bath is clusters of small holes which allow
the air to be released into the bath. A cluster of holes is shown in the picture
below
• These holes are safely encased and are independently fed to the manifold
which protrudes from the waste end of the bath, as seen in the picture
below.
1. Firstly position your bath in the desired area.
2. Once the bath has been plumbed in and the motor has been electrically
connect by a qualified tradesman you can start connecting the air pipe work
for the spa.
3. The pipe work connects the bath to the blower.
4. Start by taking the 4 x hose cuffs, shown below and placing PTFE tape (not
supplied) around the thread, ensuring enough tape is placed around the thread
to make sure a water and air tight seal is formed.
5. The air pipe needs to be cut into 2 parts. The first length goes from the bath to
the non return valve, we suggest this length is no longer than 1.5m.
6. Once you have cut your first desired length of air pipe you can fit 2 hose cuffs
to it, one at either end of the pipe as shown in the picture. The thread on the
cuff is left handed so the screw movement will be anti clock wise.

Clearwater Clearspa Instructions 09/06
7. One end of the pipe will fit over the manifold and the other end will connect to
the non return valve. Both connections are secured by the Hose clips.
8. The non return valve is a safety feature. It stops any water travelling through
the remainder of the pipe and getting into the motor. For this reason the valve
must be fitted the correct way. The air is allowed to travel through one end of
the valve and the non return is at the other end. The best way to test which end
is which is to blow through both ends. The valve has a spring end which lets
the air travel through this end must be fitted into the pipe that comes from the
motor. The picture below shows the connection between the manifold and the
non return valve.
Section 3
9. You can now cut the required length which runs from your motor to the non
return valve. Once the length is cut place the remaining hose cuffs on the two ends
of the pipe. One end is fitted over the non return valve and secured by the hose
clip, the other end is fitted to the motor as shown below. We recommend that a
double loop is created in the hose to prevent water return. Please note that the pipe
from the motor to the valve in the picture is shorter for photography purposes.
Clearwater Clearspa Instructions 09/06
10. Once the air pipe has all been connected you can wire the touch pad into the
blower. Certain baths have room for the touch pad to be fitted on the bath rim.
If the touch pad is separate to the bath a place must be found else where to
fit/attach the touch pad.
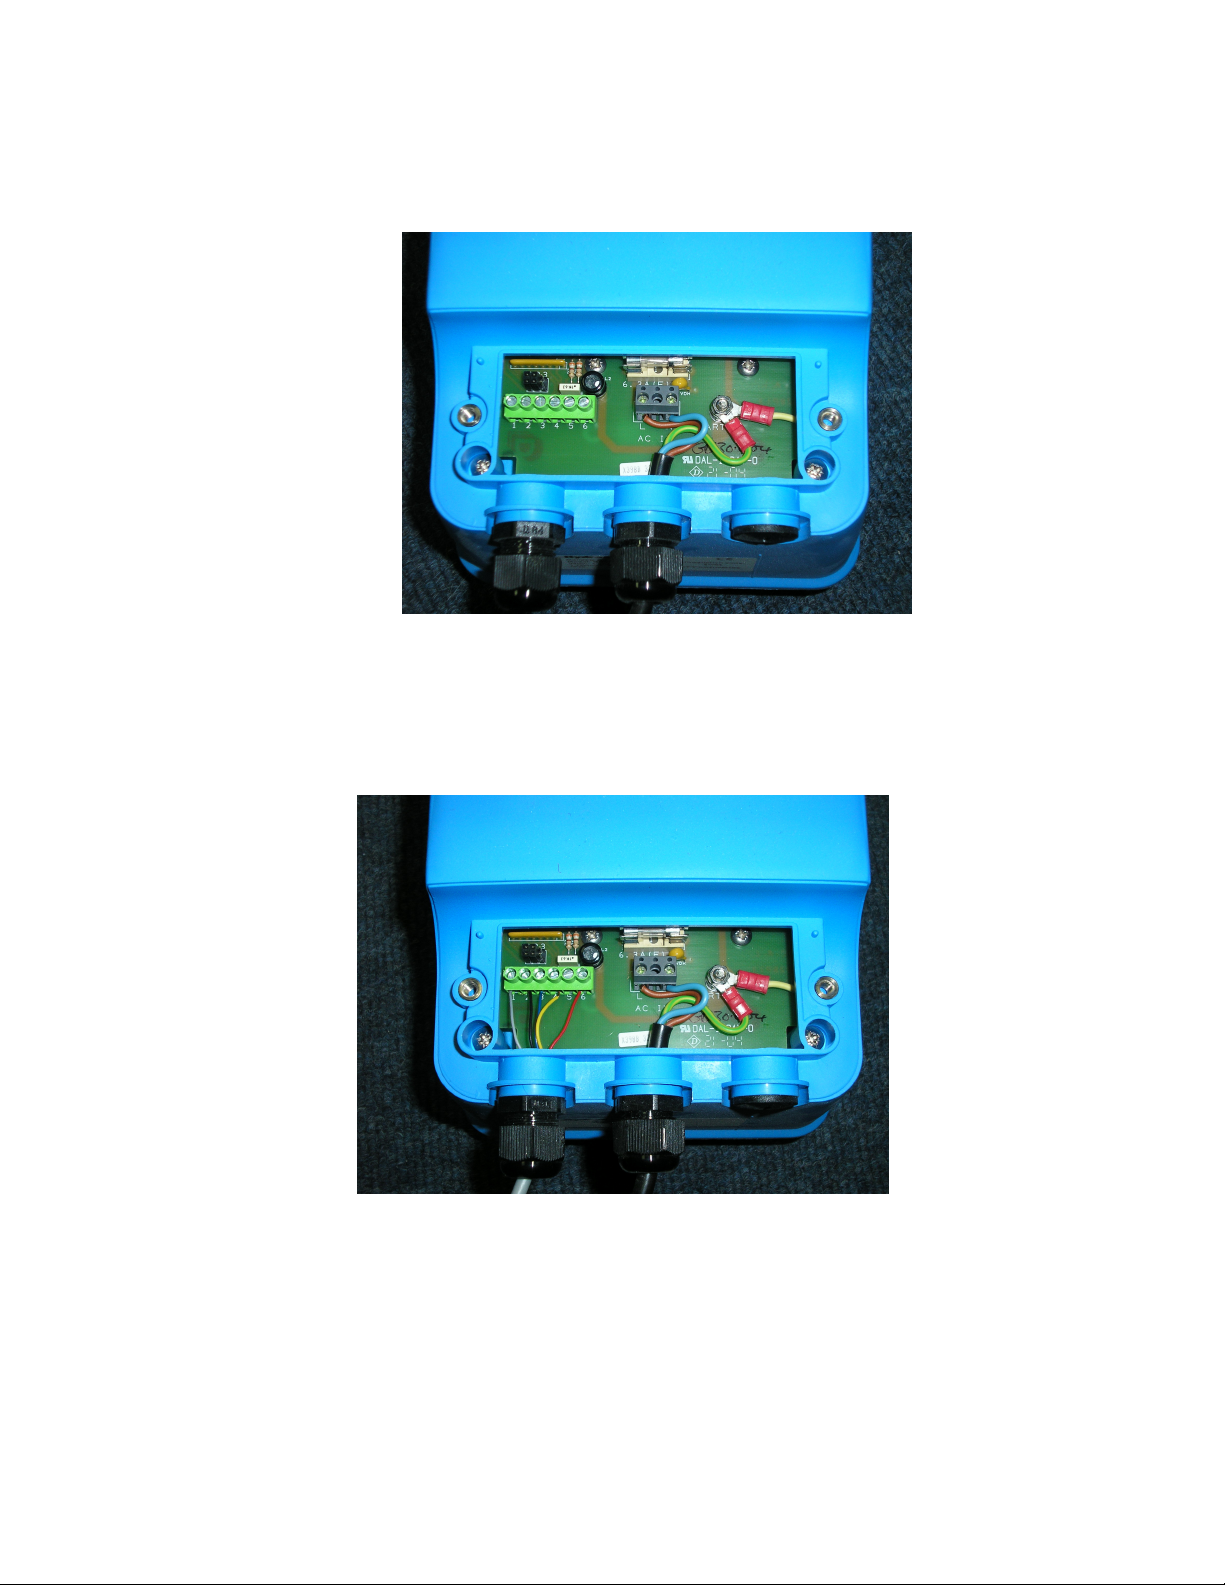
11. The touch pad is wired into the back of the blower. Unscrew the two screws
at the back of the blower to unveil the connecting block as shown below.
12. The wires of the blower go into the connector block on the left hand side. If your
touch pad is fitted with a white jack you must cut it off. You are left with eight wires.
To wire the touch pad into the blower you only need five of the eight wires. The wires
that you need are grey, black, blue, yellow and red. The other remaining three wires
can be either cut down to the core or taped up.
The order the wires connect in are as follows. 1. - grey, 2. – black, 3. – blue, 4. –
yellow, 5. – N/A and 6. – red. This is shown in the picture below
To extend the touch pad wire, you will need to purchase a 5 core alarm wire. The
extended connections must be made by a qualified person.
Place the cover back on the blower.
Clearwater Clearspa Instructions 09/06
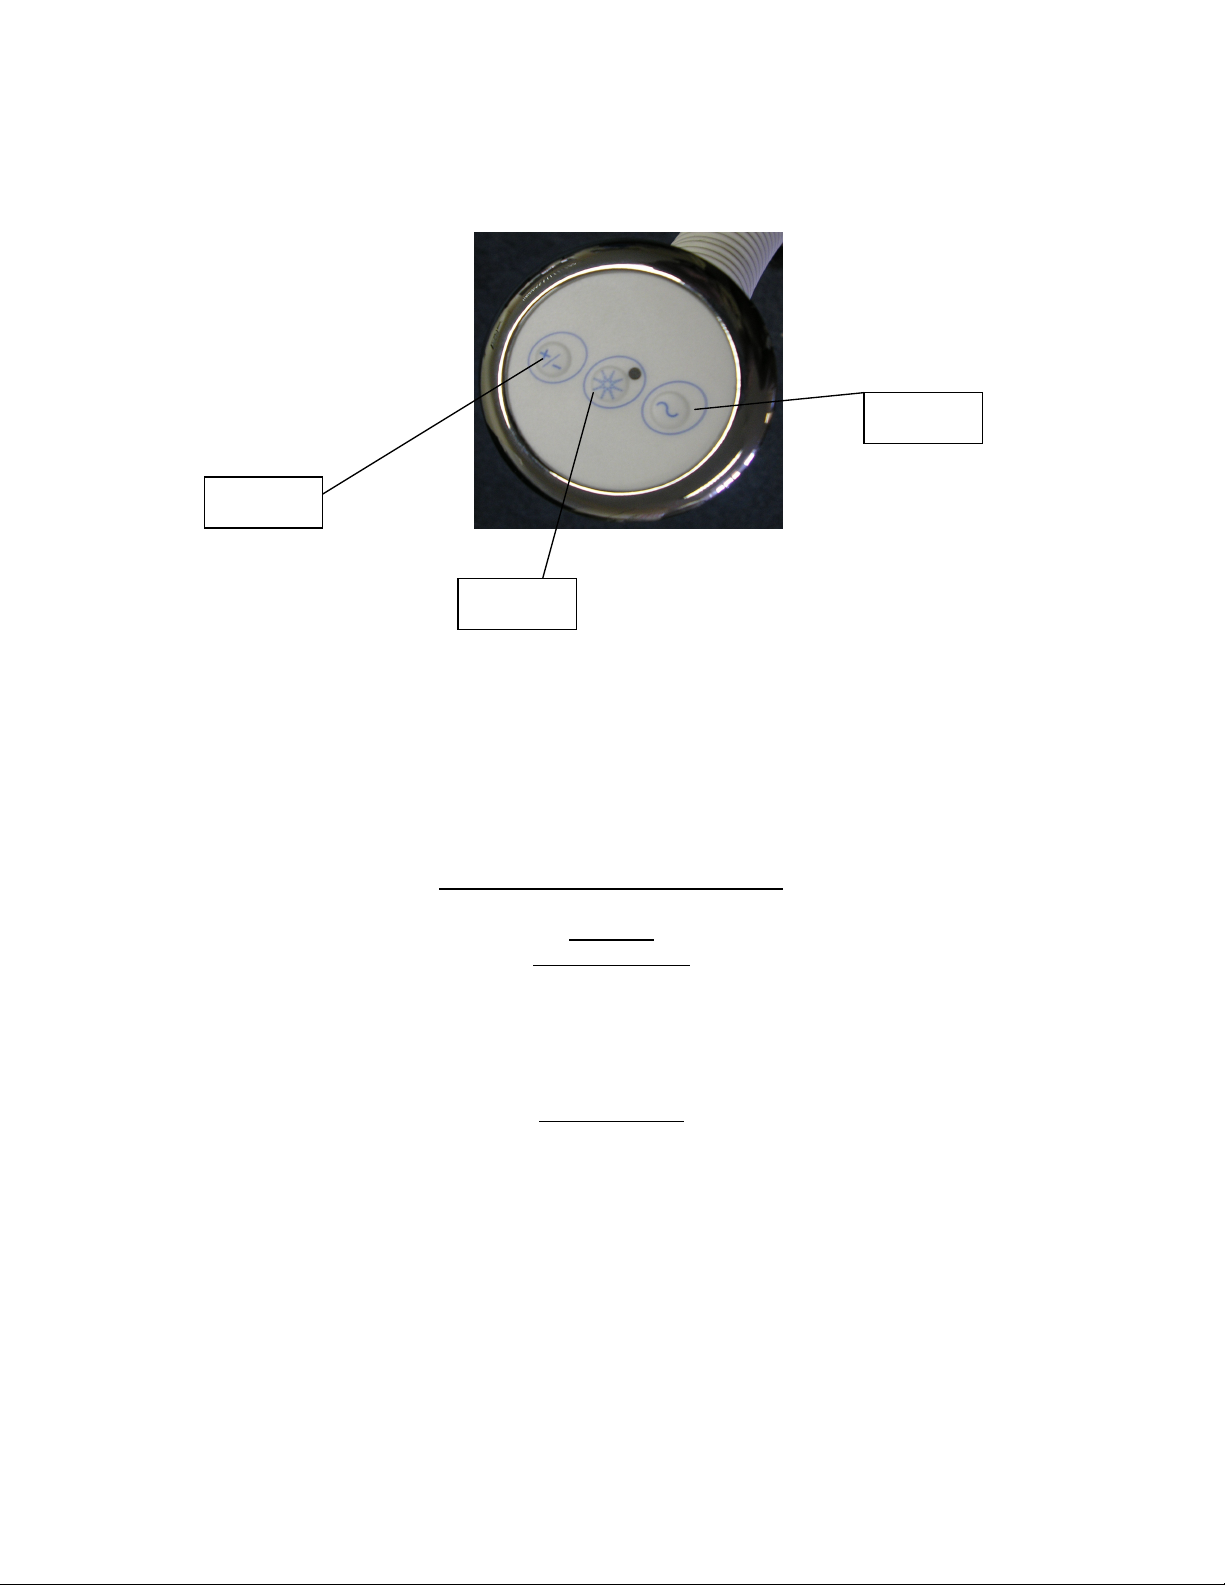
13. Operating the touch pad. – The touch pad has three operating buttons.
Button A – Starts and stops the motor. As seen in the picture above, an LED indicates
when the blower is on or off, this light also indicates whether the hygiene system is
on.
Button B – This is the variable speed button, press and hold to decrease and increase
the speed of the blower, release the button at your required pressure.
Button C – This is the massage button, once pressed the speed varies from the high
speed to slow speed continuously over a period of time. If the button is pressed again
the speed of the motor will carry on at that speed.
Check all sealed areas for any leaks
Section 4
System operation
The blower will last approximately 30 minutes; after the 30 minutes have elapsed the
blower will turn itself off. This is a safety feature ensuring the blower does not over
heat. If the blower does not have sufficient room to breath the running time of the
blower will be less.
Hygiene system
Once the bath has been emptied and the Clearspa system has been turned off, the LED
on the stop start button (A) will flash to indicate the hygiene system is active. The
hygiene system is programmed into the blower. The blower will start up again in
approximately 15 minutes after it has been turned off at the touch pad. The objective
of the hygiene system is to purge the remaining water out of the system and into the
base of the bath where it can drain away. The hygiene system should last for
approximately five minutes. After the five minutes have elapsed the motor will turn
itself off. We suggest that you run the system even if the Clearspa has not been used,
this can be done by turning the system on and off again engaging the Hygiene system.
Button B
Button A
Button C

Clearwater Clearspa Instructions 09/06
Suggested blower information
The blower can be situated anywhere as long as it has “room to breath”. The blower
can be boxed in but air holes must be drilled in the boxed area to let air in and out. It
can be placed anywhere in the bathroom or even in an adjacent room. The blower has
a specially designed mounting frame to be attached to the floor or wall. If the blower
can be installed in another room is it advisable due to the acoustic noise. If extra air
hose is needed please contact the Clearspa manufacturer.
Cleaning liquid
Sanitise your spa with Clearwater’s own Clearspa cleaning solution. The specially
formulated solution hygienically cleans both the bath and spa system. This is
available from our head office, please call 01274 738140.
For Technical Advice/Spare parts please contact our Customer Service Department,
Tel 01274 738140, Fax 01274 732461
To the installer
Please leave the instructions with the customer
Clearwater Collection Ltd
Enterprise House, Ironworks Park
Bowling Back Lane
Bradford W. Yorkshire
England
BD4 8SX
Table of contents
Other Clear Water Bathtub manuals

Popular Bathtub manuals by other brands

Kohler
Kohler STERLING Whirlpool 7626 Series installation guide

Kohler
Kohler Hourglass 30 K-1201 installation instructions

Kohler
Kohler Bancroft K-1158-GCR installation guide

Kohler
Kohler K-1201-CB Roughing-In Guide

Altair
Altair 52863-BAT-WH-FB MAINTENANCE INSTRUCTIONS MANUAL

REVELL
REVELL GLACIER DUO user manual


Kohler
Kohler Jacob Delafon E6D034-00 installation guide

RIHO
RIHO Carmen BZ29005 Installation and operation manual

Gainsborough
Gainsborough MALVERN manual

American Standard
American Standard System I Operating and maintenance instruction manual

Therabath
Therabath TB6 Operator's manual

Kohler
Kohler K-1112 Homeowner's guide