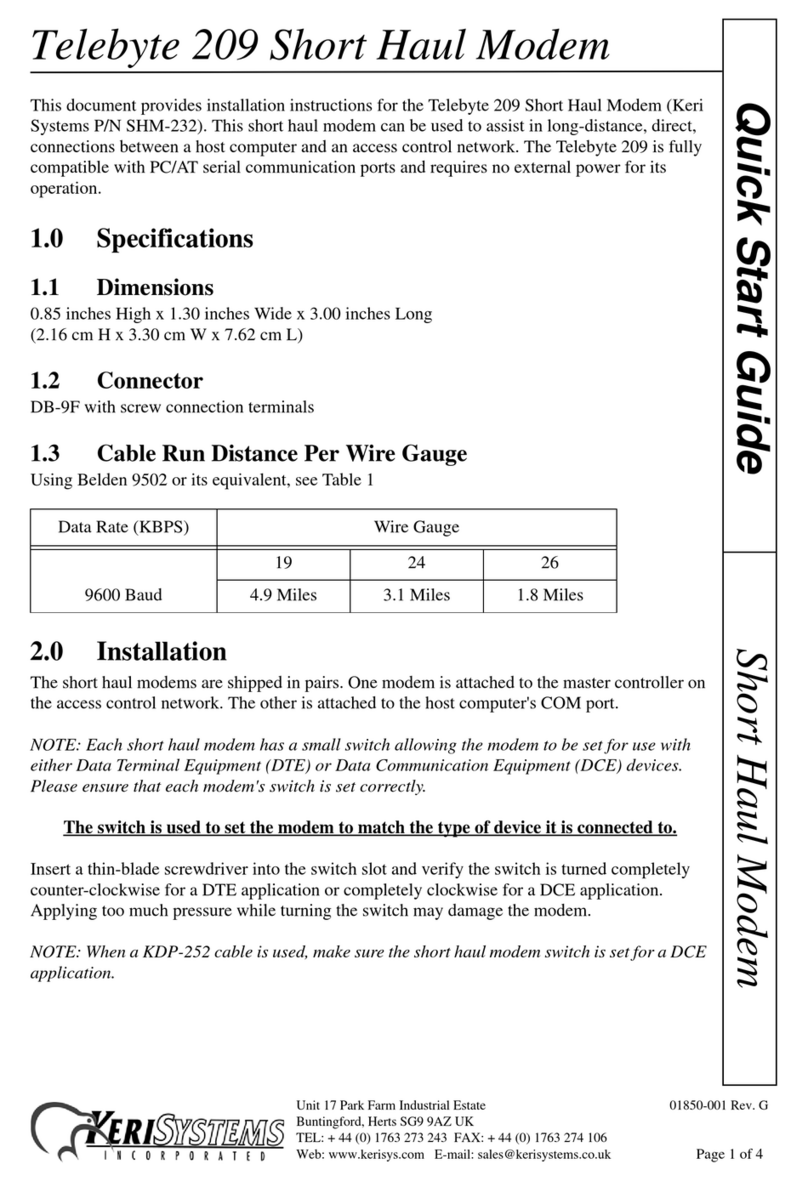
Clear G SERIES User manual

CLEAR MODEM
(SERIES G)
USER GUIDE

1
GET TO KNOW YOUR CLEAR MODEM (SERIES G) 3
WHAT’S IN THE BOX? 3
INFORMATIVE LED INDICATORS 3
USE WITH CARE 3
SET UP THE MODEM 4
PLACE THE MODEM ON A FLAT, STABLE SURFACE 4
PLUG IN THE CABLES 4
CONNECT TO CLEAR 4G 5
CONNECT TO THE INTERNET 6
MANAGE YOUR MODEM 7
CLEAR MODEM HOME PAGE OVERVIEW 7
CLEAR MODEM HOME PAGE / HOME TAB 8
CLEAR MODEM HOME PAGE / DEVICE STATUS TAB 9
CLEAR MODEM HOME PAGE / DEVICE STATUS TAB (CONTINUED) 10
CLEAR MODEM HOME PAGE / BASIC / PASSWORD TAB 11
CLEAR MODEM HOME PAGE / BASIC / TIME ZONE TAB 12
CLEAR MODEM HOME PAGE / BASIC / DEVICE NAME TAB 13
CLEAR MODEM HOME PAGE / BASIC / RESET FACTORY SETTINGS TAB 14
CLEAR MODEM HOME PAGE / BASIC / LANGUAGE TAB 15
CLEAR MODEM HOME PAGE / ADVANCED / FIREWALL TAB 16
CLEAR MODEM HOME PAGE / ADVANCED / INTERNET PROTOCOL TAB 17
CLEAR MODEM HOME PAGE / ADVANCED / DYNAMIC DNS TAB 18
CLEAR MODEM HOME PAGE / ADVANCED / PORT FORWARDING / BASIC TAB 19
CLEAR MODEM HOME PAGE / ADVANCED / PORT FORWARDING / FORWARDING TAB 20
CLEAR MODEM HOME PAGE / ADVANCED / LOCAL ADDRESS / DHCP SERVER TAB 21
CLEAR MODEM HOME PAGE / ADVANCED / LOCAL ADDRESS / LEASE STATUS TAB 22
CLEAR MODEM HOME PAGE / ADVANCED / LOCAL ADDRESS / LEASE RESERVATION TAB 23
QUICK TIPS 24
UNDERSTANDING THE LED LIGHTS 24
TO MAXIMIZE SIGNAL STRENGTH 24
UNABLE TO BROWSE THE INTERNET? 25
CONNECT TO YOUR HOME WIRELESS NETWORK 25
RESET THE MODEM TO THE FACTORY SETTINGS 25
IMPORTANT MESSAGE FROM CLEAR 25
IMPORTANT INFORMATION 26
TECHNICAL SPECIFICATIONS 26

2
STILL NEED HELP? 27
FAQS AND LIVE CHAT SUPPORT 27
TELEPHONE SUPPORT 27
QUESTIONS ABOUT YOUR BILL? 27
IMPORTANT INFORMATION DOCUMENT 27
WARRANTY INFORMATION 27
LEGAL DISCLOSURES 27

3
Get to Know Your CLEAR Modem (Series G)
What’s in the Box?
CLEAR Modem - Series G Ethernet Cable Power Adapter Quick Start Guide
Informative LED Indicators
The LED indicators are located on the side of the CLEAR Modem – Series G (Modem).
The Signal Strength LEDs indicate the strength of the CLEAR 4G signal (five LEDS lit indicates
an excellent signal).
The Network LED indicates the status of the Modem connection to a computer.
The Power LED indicates the Modem is turned on.
Use with Care
Do not throw, drop, or dismantle the Modem.
Keep the Modem out of direct sunlight.
Keep pets and children from playing with the Modem.
Do not immerse the Modem in water or other liquid.
Make sure your hands are dry before handling the Modem.
Signal Strength
Network LED
Power LED

4
Set up the Modem
Place the Modem on a Flat, Stable Surface
Rotate the foot of the Modem and place it upright on a flat, stable surface.
Do not place the Modem on its side or block the top air vents. The preferred location is near a
window and away from obstructions.
Plug in the Cables
1) Plug one end of the Ethernet Cable into the ethernet port on your computer and plug the other end
into the Modem.
2) Plug one end of the Power Adapter into the AC Power Port on the Modem and plug the other end
into a power outlet.

5
Set up the Modem (continued)
Connect to CLEAR 4G
After you’ve plugged in the cables, the Modem automatically will search for a CLEAR 4G signal.
It’s best to position the Modem near an outside wall or window, and away from onstructions.
If at least two LED lights are not lit, try moving the Modem to another room.
As the Modem is searching for the
CLEAR 4G signal, five LED lights,
located on the side of the Modem, will
blink sequentially and then in unison.
When the Modem is connected to the
CLEAR 4G signal, the LED lights will
stop blinking and remain lit.
Note: The number of lights indicates the
CLEAR 4G signal strength. For optimal
signal strength, you should try different
locations for the Modem in order to
ensure a minimum of two lights are lit.
Move the Modem (not your computer) to another room,
and wait 15 – 20 seconds after the LED lights are solid
green, in order to obtain the most accurate reading of
the CLEAR 4G signal.
To optimize the signal strength in the Modem’s current
location, try turning the Modem by small ¼”
increments.
When you find the strongest CLEAR 4G signal,
reconnect the Modem to your computer.
If, for some reason, the room with the strongest
CLEAR 4G signal is not where you want to put the
Modem, consider using a longer Ethernet Cable or
ordering a wireless router by logging into your CLEAR
online account.

6
Set up the Modem (continued)
Connect to the Internet
The first time you connect to the internet with your Modem, you’ll be directed to a page to review your
rate plan information, complete your CLEAR online account, and read / accept the CLEAR Terms of
Service.
Congratulations!
You’re ready for INTERNET AWESOMENESS!

7
Manage Your Modem
CLEAR Modem Home Page Overview
It’s easy to manage your Modem with the CLEAR Modem Home Page.
Set up your Modem.
Change security settings.
View signal strength.
View and upgrade the Modem firmware.
And more!
With your computer connected to the Modem, enter http://192.168.15.1 in your web browser in order
to open the Modem Home Page.
It is not required to log in to the Modem Home Page to access the internet. Logging in to the Modem
Home Page is required to manage the settings of your Modem.
Note: Making any changes to the settings may adversely affect the performance of the connection to
the internet. The Modem works without any additional configuration changes and the information is
provided for advanced users.
To log in to the Modem Home Page, you’ll need to enter a password. The default password is
“CLEAR123”.
We recommend bookmarking the Modem Home Page for easy reference.
If you’re using your Modem
and are connected to the
internet, click here to open
the Modem Home Page.

8
Manage Your Modem (continued)
CLEAR Modem Home Page / Home Tab
After you’ve logged in to the CLEAR Modem Home Page, you’ll see the Home Tab, which displays
helpful information about the Modem.
Signal Meter: Shows the Modem’s signal strength in its current location. Five LEDs lit indicates
an excellent signal.
Current Device Settings:
o Device Software Version: Shows the software version of the Modem, which cannot be
changed.
o WiMAX MAC ID: Shows the MAC ID of the Modem. A Mac ID is a unique serial number
burned into network adaptors that identifies them on a network. The Modem has the ability
to specify what MAC IDs are allowed to connect the Modem. The MAC ID can be found on
the label on the bottom of the Modem. The MAC ID can’t be changed.
o CINR: Displays a measurement of signal effectiveness, or CINR, for the active connection.
o WAN IP Address: Displays the Internet Protocol (IP) Address used to locate and access
your Modem.
o Firewall ON/OFF: A firewall can be used to help to protect your home network from
unauthorized access. A firewall also helps to manage authorized access from the internet
to your Modem.
o Device Up Time: Displays the length of time the Modem has been on.
o Port Forwarding ON/OFF: Port forwarding enables you to direct incoming traffic to
specific LAN hosts (computers on your network) based on the protocol and port number.
Port Forwarding is used to play Internet games or provide local services (such as web
hosting) for a LAN group.
The other tabs (Device Status, Basic, and Advanced) appear on all screens of the CLEAR Modem
Home Page.
At the bottom of every tab of the Modem Home Page, you can click:
Logout: To log out of the Modem.
Reboot: To turn the Modem off and turn it back on.
Reconnect: To reconnect to the Modem, if you’ve lost your connection.
If you’re using your Modem
and are connected to the
internet, click here to open
the Modem Home Page.

9
Manage Your Modem (continued)
CLEAR Modem Home Page / Device Status Tab
This tab shows the status of the Modem.
WiMAX Radio Interface: Displays the type of network to which the Modem is connected.
Device Overheat: Indicates if the Modem is overheated.
Device Temperature: Displays the current temperate of the Modem.
WiMAX Service Provider: Displays the service provider with whom the Modem is activated.
WiMAX Network State: Displays the operational state of the Modem.
WiMAX Network Status: Displays the status of the Modem on the CLEAR 4G network.
WiMAX Provisioning State: Displays the provisioning state of the Modem.
WiMAX RSSI: Displays the power present in the radio signal (RSSI) of the active connection.
WiMAX CINR: Displays a measurement of signal effectiveness, or CINR, for the active
connection.
WiMAX Downlink Throughput: Displays the downlink bandwidth.
WiMAX Uplink Throughput: Displays the uplink bandwidth.
WiMAX Packets Received: Shows the number of WiMAX data packets received by the Modem.
WiMAX Packets Sent: Shows the number of WiMAX data packets sent by the Modem.
WiMAX Connection Up Time: Shows the length of time the Modem has been connected to the
CLEAR 4G network.
WiMAX Disconnect Reason: Describes the reason a computer was disconnected from the
Modem.
Gateway Mode: Displays the status of the Gateway Mode.
IP Address: Displays the Internet Protocol (IP) Address used to locate and access your Modem.
IP Subnet Mask: The subnet mask can be used to subdivide the network.
IP Default Gateway: Displays the IP Default Gateway value.
IP Connection: Displays the IP Connection status (ON or OFF).
Firewall: A firewall can be used to help to protect your home network from unauthorized access.
A firewall also helps to manage authorized access from the internet to your Modem.
If you’re using your Modem
and are connected to the
internet, click here to open
the Modem Home Page.

10
Manage Your Modem (continued)
CLEAR Modem Home Page / Device Status Tab (continued)
Lease Obtained: Displays the time your Modem obtained an Internet Address from the CLEAR
4G network.
Lease Expires: Displays the time your Modem's Internet Address from CLEAR 4G network will
expire and be renewed.
DNS Servers: Displays the server(s) your Modem will query about Internet domain names (e.g.,
www.clear.com).
Time Server: Displays the server(s) your Modem will query to get the current time.
EMS Server (Electronic Management Systems): Displays if the Modem is connected to the
system.
EMS Bootstrap: Displays confirmation if the Modem is bootstrapped.
Device Up Time: Displays the amount of time your Modem has been powered up and running.
Refresh: Click to manually refresh the data presented on the tab.
Auto-Refresh: Click so the data automatically refreshes every three seconds.
The other tabs (Home, Basic, and Advanced) appear on all screens of the CLEAR Modem Home
Page.
At the bottom of every tab of the Modem Home Page, you can click:
Logout: To log out of the Modem.
Reboot: To turn the Modem off and turn it back on.
Reconnect: To reconnect to the Modem, if you’ve lost your connection.

11
Manage Your Modem (continued)
CLEAR Modem Home Page / Basic / Password Tab
Using a password may help prevent unauthorized access to your Modem. CLEAR recommends
enabling password protection.
Use this tab to set password security settings for your Modem.
Also use this tab to change the default password required to login and manage your Modem. The
default password to log in is “CLEAR123”.
Click “APPLY” when you’re ready to change the password required to log in and manage your
Modem.
If you don’t want to make any changes to the password security settings, click “CANCEL”.
The other tabs (Home, Device Status, and Advanced) appear on all screens of the CLEAR Modem
Home Page.
At the bottom of every tab of the Modem Home Page, you can click:
Logout: To log out of the Modem.
Reboot: To turn the Modem off and turn it back on.
Reconnect: To reconnect to the Modem, if you’ve lost your connection.
If you’re using your Modem
and are connected to the
internet, click here to open
the Modem Home Page.

12
Manage Your Modem (continued)
CLEAR Modem Home Page / Basic / Time Zone Tab
Set the time zone for your current location, and enable or disable “Auto Adjust” for Daylight Savings
Time.
Click “APPLY” when you’re ready to change the time zone settings for your Modem.
If you don’t want to make any changes to the time zone settings, click “CANCEL”.
The other tabs (Home, Device Status, and Advanced) appear on all screens of the CLEAR Modem
Home Page.
At the bottom of every tab of the Modem Home Page, you can click:
Logout: To log out of the Modem.
Reboot: To turn the Modem off and turn it back on.
Reconnect: To reconnect to the Modem, if you’ve lost your connection.
If you’re using your Modem
and are connected to the
internet, click here to open
the Modem Home Page.

13
Manage Your Modem (continued)
CLEAR Modem Home Page / Basic / Device Name Tab
Change the name of the Modem. The default name is “WiMaxCPE”. The device name is the name
you enter in an internet browser address bar in order to access your Modem.
Click “APPLY” when you’re ready to change the Modem device name.
If you don’t want to make any changes to the Modem device name, click “CANCEL”.
The other tabs (Home, Device Status, and Advanced) appear on all screens of the CLEAR Modem
Home Page.
At the bottom of every tab of the Modem Home Page, you can click:
Logout: To log out of the Modem.
Reboot: To turn the Modem off and turn it back on.
Reconnect: To reconnect to the Modem, if you’ve lost your connection.
If you’re using your Modem
and are connected to the
internet, click here to open
the Modem Home Page.

14
Manage Your Modem (continued)
CLEAR Modem Home Page / Basic / Reset Factory Settings Tab
Use this tab to reset the Modem to the factory default settings.
Note: It is important to note that many device settings will be reset to the factory default settings. For
example, the password required to log in and manage your Modem will be reset to “CLEAR123”, the
factory default setting.
Restore Factory Settings: Check the box to restore the Modem to the factory settings.
Check for Updates Now: Check to see if updates are available for the Modem.
Click “APPLY” when you’re ready to restore the Modem to the factory settings and / or check for
updates.
If you don’t want to restore the factory default settings or check for updates, click “CANCEL”.
The other tabs (Home, Device Status, and Advanced) appear on all screens of the CLEAR Modem
Home Page.
At the bottom of every tab of the Modem Home Page, you can click:
Logout: To log out of the Modem.
Reboot: To turn the Modem off and turn it back on.
Reconnect: To reconnect to the Modem, if you’ve lost your connection.
You also can press the Reset button, on the side of the Modem, to reset the Modem to the factory
settings. Please refer to the Quick Tips / Reset the Modem to the Factory Settings section or click
here for more information.
If you’re using your Modem
and are connected to the
internet, click here to open
the Modem Home Page.

15
Manage Your Modem (continued)
CLEAR Modem Home Page / Basic / Language Tab
Set the language (English or Spanish) that is used in your CLEAR Modem Home page.
Click “APPLY” when you’re ready to change the language setting.
If you don’t want to make any changes to the language setting, click “CANCEL”.
The other tabs (Home, Device Status, and Advanced) appear on all screens of the CLEAR Modem
Home Page.
At the bottom of every tab of the Modem Home Page, you can click:
Logout: To log out of the Modem.
Reboot: To turn the Modem off and turn it back on.
Reconnect: To reconnect to the Modem, if you’ve lost your connection.
If you’re using your Modem
and are connected to the
internet, click here to open
the Modem Home Page.

16
Manage Your Modem (continued)
CLEAR Modem Home Page / Advanced / Firewall Tab
Warning: This tab includes settings that could negatively impact the performance of the Modem, if
set incorrectly. These settings should be modified only by advanced users or if directed by CLEAR
Customer Care.
A firewall can be used to help to protect your home network from unauthorized access. A firewall
also helps to manage authorized access from the internet to your Modem.
Operation Mode: The default Gateway Mode setting, which can’t be changed.
Enable Firewall: Check the box to enable the firewall setting.
Enable Web Login from Internet: Check the box to enable you to access your Modem from a
network other than your own network.
Web Login Port from Internet: Choose a port number with which to connect when logging in
from a network other than your own. The default is 8080.
Enable ping from Internet: Check the box to enable your Modem to respond to a ping from the
internet. This option should be enabled to allow testing only.
Click “APPLY” when you’re ready to change the firewall settings.
If you don’t want to make any changes to the firewall settings, click “CANCEL”.
The other tabs (Home, Device Status, and Basic) appear on all screens of the CLEAR Modem Home
Page.
At the bottom of every tab of the Modem Home Page, you can click:
Logout: To log out of the Modem.
Reboot: To turn the Modem off and turn it back on.
Reconnect: To reconnect to the Modem, if you’ve lost your connection.
If you’re using your Modem
and are connected to the
internet, click here to open
the Modem Home Page.

17
Manage Your Modem (continued)
CLEAR Modem Home Page / Advanced / Internet Protocol Tab
Warning: This tab includes settings that could negatively impact the performance of the Modem, if
set incorrectly. These settings should be modified only by advanced users or if directed by CLEAR
Customer Care.
Connection Mode: DHCP (Dynamic Host Configuration Protocol) is used to automatically assign
IP Addresses and configuration information to wi-fi clients, thereby greatly simplifying network set
up. If you desire, you may configure the range of IP Addresses that the Modem will allow to
recognize the Modem.
Host Name: Enter the host name to be used.
Click “APPLY” when you’re ready to change the Internet Protocol settings.
If you don’t want to make any changes to the Internet Protocol settings, click “CANCEL”.
The other tabs (Home, Device Status, and Basic) appear on all screens of the CLEAR Modem Home
Page.
At the bottom of every tab of the Modem Home Page, you can click:
Logout: To log out of the Modem.
Reboot: To turn the Modem off and turn it back on.
Reconnect: To reconnect to the Modem, if you’ve lost your connection.
If you’re using your Modem
and are connected to the
internet, click here to open
the Modem Home Page.

18
Manage Your Modem (continued)
CLEAR Modem Home Page / Advanced / Dynamic DNS Tab
Warning: This tab includes settings that could negatively impact the performance of the Modem, if
set incorrectly. These settings should be modified only by advanced users or if directed by CLEAR
Customer Care.
Enable DDNS: (Dynamic Domain Name Service) allows a user with a non-static IP address to
keep his / her domain name associated with an ever-changing IP address. An example is when
you are hosting your own website.
DDNS Service Provider: Select the service provider from the drop-down box.
Click “APPLY” when you’re ready to change the Dynamic DNS settings.
If you don’t want to make any changes to the Dynamic DNS settings, click “CANCEL”.
The other tabs (Home, Device Status, and Basic) appear on all screens of the CLEAR Modem Home
Page.
At the bottom of every tab of the Modem Home Page, you can click:
Logout: To log out of the Modem.
Reboot: To turn the Modem off and turn it back on.
Reconnect: To reconnect to the Modem, if you’ve lost your connection.
If you’re using your Modem
and are connected to the
internet, click here to open
the Modem Home Page.

19
Manage Your Modem (continued)
CLEAR Modem Home Page / Advanced / Port Forwarding / Basic Tab
Warning: This tab includes settings that could negatively impact the performance of the Modem, if
set incorrectly. These settings should be modified only by advanced users or if directed by CLEAR
Customer Care.
Port Forwarding enables you to direct incoming traffic to specific LAN hosts (computers on your
network) based on the protocol and port number. Port Forwarding is used to play Internet games or
provide local services (such as web hosting) for a LAN group.
Use this tab to enable Universal Plug and Play and set the DMZ IP Addresses:
Enable UPnP IGD: Enable the Universal Plug and Play (UPnP) Internet Gateway Device (IGD)
profile to allow certain Windows® applications to set up the “Port Forwarding” rule dynamically.
This is used when NAT is enabled on the Modem.
DMZ IP Address: A DMZ is a “Demilitarized Zone” between a secure internal network and an
unsecured network, such as the internet. Usually devices or computers that need less restrictive
settings are placed in a DMZ. Enter the DMZ IP Address here.
Click “APPLY” when you’re ready to save the setting for the IP address to be used with Port
Forwarding.
If you don’t want to make any changes to the basic Port Forwarding settings, click “CANCEL”.
The other tabs (Home, Device Status, and Basic) appear on all screens of the CLEAR Modem Home
Page.
At the bottom of every tab of the Modem Home Page, you can click:
Logout: To log out of the Modem.
Reboot: To turn the Modem off and turn it back on.
Reconnect: To reconnect to the Modem, if you’ve lost your connection.
If you’re using your Modem
and are connected to the
internet, click here to open
the Modem Home Page.
Other manuals for G SERIES
1
This manual suits for next models
1
Table of contents
Other Clear Modem manuals
Clear
Clear Spot 4G+ Specification sheet

Clear
Clear Spot 4G+ User manual
Clear
Clear G SERIES Specification sheet
Clear
Clear WIXFBR-117 Specification sheet
Clear
Clear WIXB-175 User manual
Clear
Clear Spot 4G User manual

Clear
Clear Spot 4G User manual
Clear
Clear Stick Atlas PXU1960 User manual
Clear
Clear MODEM with Wi-Fi User manual
Popular Modem manuals by other brands
Multitech
Multitech MultiModem ZPX MT5634ZPX-PCI Series owner's manual
Multitech
Multitech MultiModem MT5634ZPX-PCI-U user guide
Multitech
Multitech MultiModem MT9234ZPX-UPCI user guide

Multitech
Multitech MTC-MAT1-B01 user guide
Multitech
Multitech MTCBA-G-EN-F1 reference guide
Black Box
Black Box MWU2000-G703 user manual

