Clearaudio Weight Watcher User manual

Technische Daten - Technical Data:
Anzeigegenauigkeit 0,05 g
Accuracy:
Meßbereich: 0 - 20 g
Measuring area:
Spannungsversorgung: 2 x AAA Batterien
Power supply: 2 x AAA batteries
Automatische Ausschaltung: nach 30 sec
Battery Protection: switch off after 30 sec
Besonderheit: Automatische Selbstkalibrierung
beim Einschalten
Specialty: Automtic calibration after switch
on
Gewicht: 90 g (inkl. Batterien)
Weight: 90 gr. (incl. Batteries)
Abmessungen ( b x t x h ): 120 mm x 84 mm x 154 mm
Dimensions ( l x h x d ): 4,72 inch x 3,30 inch x 6,06 inch
(Technische Änderungen vorbehalten -
Technical changes are subject without notification)
Stand: 01/07
© clearaudio electronic GmbH 2007
W
W
e
e
i
i
g
g
h
h
t
t
W
W
a
a
t
t
c
c
h
h
e
e
r
r
Bedienungsanleitung
User Manual

D
Die digitale clearaudio WEIGHT WATCHER -Tonabnehmerwaage erfüllt die
höchsten Ansprüche an die exakte Einstellung der Tonabnehmer-Auflagekraft.
Die optimalen Abtasteigenschaften Ihres Tonabnehmers können nur mit einer exakt
nach Herstellerangabe justierten Auflagekraft erreicht werden.
Mit dem WEIGHT WATCHER steht Ihnen dazu ein Präzisionsinstrument zur
Verfügung, mit dem Sie die benötigte Auflagekraft schnell, einfach und Präzise
einstellen und überprüfen können.
Ein besonderes Merkmal ist die automatische Selbstkalibrierung nach jeder
Inbetriebnahme.
Bei häufiger Benutzung des WEIGHT WATCHER ist es ratsam, alle drei Monate eine
Komplettkalibrierung mit folgendem Ablauf durchzuführen:
-Komplettkalibrierung- (etwa alle drei Monate empfohlen)
1. Schalten Sie die Waage aus.
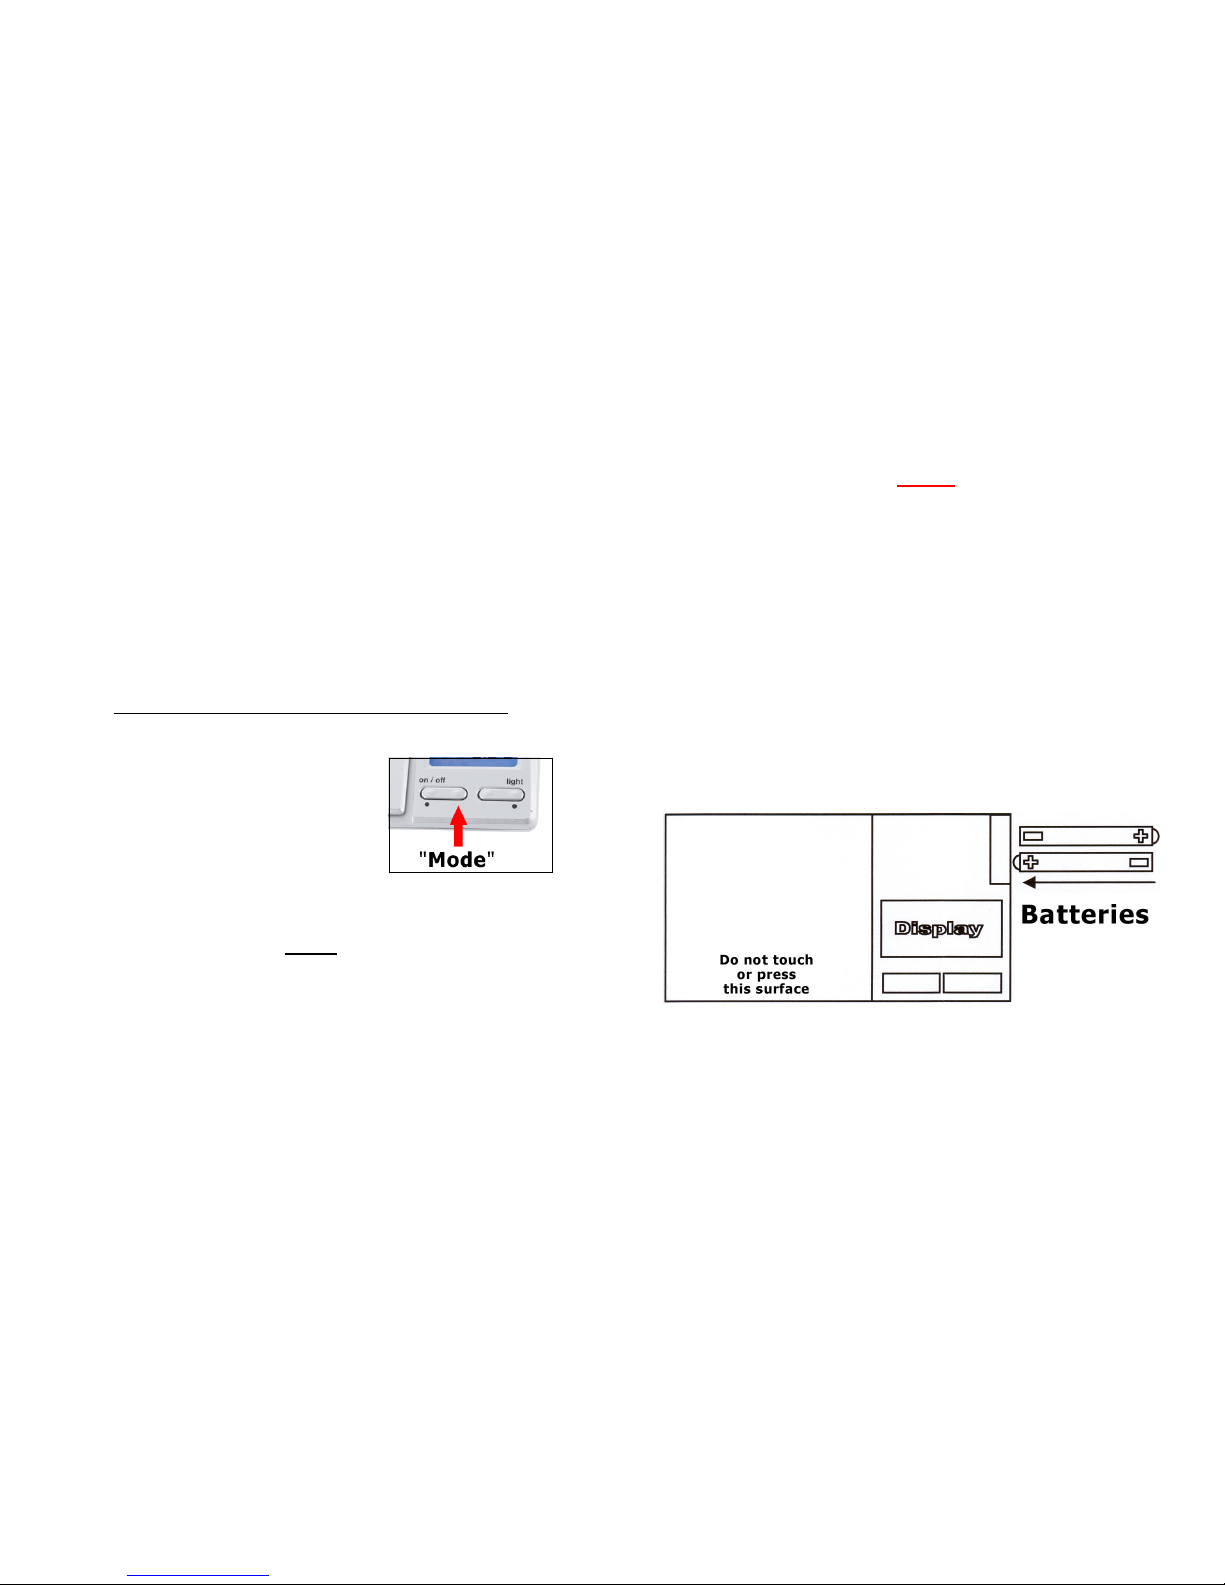
2. Schalten Sie die Waage durch kurzes Drücken auf die Taste „ON“ ein. Im
Anschluss daran betätigen und halten Sie
die „MODE“-Taste solange gedrückt, bis
„CAL“ im Display erscheint.
3. Drücken Sie noch einmal kurz „MODE“ und
warten bis im Display der Wert „100.00“
blinkend angezeigt wird. Legen Sie jetzt das
mitgelieferte 100 gr. Eichgewicht auf die
Mitte der Wiegefläche, die mit „Do not touch
or press this surface“ beschriftet ist.
4. Nach 5 Sekunden zeigt die Waage kurz PASS an und ist somit fertig
kalibriert und wieder für genaueste Messungen bereit.
- Inbetriebnahme -
Vor der ersten Inbetriebnahme legen Sie bitte die Batterien gemäß Abbildung auf der
Folgeseite.
Legen Sie Ihre WEIGHT WATCHER Waage vorsichtig auf die Plattentelleroberfläche.
Achten Sie dabei bitte darauf, dass alle 4 kleinen Noppen auf der Unterseite der
WEIGHT WATCHER Waage tatsächlich auf dem Plattenteller aufliegen, um exakte
Messergebnisse zu erzielen. Erst jetzt schalten Sie das Gerät mit dem Drücken der
„on / off“ - Taste ein. Nach etwa 3 Sekunden ist die Waage automatisch kalibriert und
im Display erscheint dann die Anzeige „0.0“. Die WEIGHT WATCHER ist hiermit
betriebsbereit. Bringen Sie den Tonabnehmer mit der Abtastnadel in eine Position
oberhalb des Bereiches mit der Bezeichnung „measuring area“. Senken Sie dann den
Tonarm langsam ab, so dass der Tonabnehmer mit der Abtastnadel sicher und direkt
auf dieser „measuring area“-Fläche landet. Im Display wird Ihnen nun der
Auflagedruck in Gramm angezeigt. Heben Sie den Tonarm ab und verstellen Sie die
Auflagekraft in den vom Tonabnehmerhersteller empfohlenen Bereich. Kontrollieren
Sie Ihre endgültige Einstellung der Auflagekraft nochmals mit Ihrer WEIGHT
WATCHER -Waage.
- Unbedingt beachten –
Voraussetzung für die exakte Messung der Auflagekraft ist die waagerechte
Platzierung Ihrer WEIGHT WATCHER -Waage.
Die Oberseiten-Fläche mit der Bezeichnung „do not touch or press this surface“
während des Messvorganges nicht berühren, damit Ihre WEIGHT WATCHER -
Waage Ihnen immer exakte Anzeigen liefern kann!
- Tipp -
Ermitteln Sie die richtige Lage Ihrer WEIGHT WATCHER auf dem Plattenteller bzw.
Schallplatte dadurch, in dem Sie vorsichtig Ihren Tonarm mit Tonabnehmer im letzten
Drittel der Schallplatte positionieren. Danach die WEIGHT WATCHER -Waage mit
dem Bereich „measuring area“ unterhalb des Tonabnehmers so platzieren, dass beim
Absenken des Tonarmes nur der Abtastdiamant mit der Messfläche in Berührung
kommt. Auf keinen Fall darf dabei der Tonabnehmerkörper selbst die „WEIGHT
WATCHER“ Waage berühren, sonst könnte die Messung der Auflagekraft verfälscht
werden!
Ersetzen Sie die Batterien, wenn sich die WEIGHT WATCHER – Waage nicht
einschalten lässt, oder die Messergebnisse stark abweichen (Überprüfung mit dem im
Lieferumfang enthaltenem Eichgewicht möglich).
Einlegen der Batterien:

E
Clearaudio has developed this digital stylus pressure gauge WEIGHT WATCHER for
accurate stylus pressure adjustment of nearly all phono cartridges. Proper tracking
force is important for keeping the stylus in the groove and creating the optimal
relationsship between the coils attached to the catilever and the magnets in the
cartridge. Today’s best phono cartridges demand a specific tracking force
recomended by cartridge manufacturer to optimize trackability and maximize the
sound performance.
Special features of the WEIGHT WATCHER stylus pressure gauge are the automatic
calibration when switched on as well as the and battery protection through automatic
switch off after 30sec.
If the WEIGHT WATCHER is in often use, we recommend to practise a full calibration
as follows:
-Full-calibration - (recommended to be done every three month)
5. Switch off the WEIGHT WATCHER.
6. Switch the WEIGHT WATCHER on while pressing the „on / off“ Button
once. Immediately after that push the
“Mode” – button until the display shows
“CAL”.
7. Then push the „Mode“-button once again
and the display shows „100.00“
8. Place the calibrated weight (included in
delivery) in the middle of the surface marked
with „Do not touch or press this surface“.
9. After 5 seconds the display shows „PASS“
and the full calibration is completed.
- Setup -
Please insert the two batteries (type: AAA) as shown in the drawing on the right.
Then you can place the „WEIGHT WATCHER“ on the turntable platter surface.
Please proof, that all four small nobs on the bottom of the gauge have contact to the
platter surface. This way it is guaranted that the WEIGHT WATCHER stylus pressure
gauge gives you exact measuring results.
Then press the bottom “on / off” and the WEIGHT WATCHER is starting the
automatic calibration procedure and after 3 sec the Display shows the value “0.0”.
Now you can start with the measurement of your stylus presure. Therefore place your
tonarm/cartridge above the „measuring area“ marked surface and lower the tonarm
slowly down, so that only the diamond tip touches the measuring area, the cartridge
body should not touch the WEIGHT WATCHER at any point.
Now the WEIGHT WATCHER indicates the absolute stylus pressure stated in
gramms on the display. Follow the manufacturer´s advise to set the correct stylus
pressure for your cartridge.
- Attention -
Precise measurements requires that surface is levelled horizontal, when the WEIGHT
WATCHER – gauge is in use.
Never touch, cover or put anything on the surface marked „do not touch or press
this surface“ while using the WEIGHT WATCHER to avoid mismeasurements.
Replace the batteries when the WEIGHT WATCHER – gauge cannot be switched
on, or if the measurements results are out of normal range. Can be proofed with the
100gr. calibration weight, included in the delivery.
Inserting the batteries:
clearaudio
electronic GmbH
Spardorfer Str 150
91054 Erlangen
Germany
Tel: +49-(0)9131/57702 & 59595 - Fax: +49-(0)9131/51683
© clearaudio 2007
Table of contents
Languages:
Other Clearaudio Scale manuals
Popular Scale manuals by other brands

mybeo
mybeo 303248 user manual

Cardinal
Cardinal ARMOR SMARTCELL troubleshooting guide

SR Instruments
SR Instruments SR Scales SRV715 Operating and service manual

Giropes
Giropes Baxtran BAR manual

Clatronic
Clatronic PW 3203 Instruction manual & guarantee

Adam Equipment
Adam Equipment ACBplus Series Service manual