ClearClick Present+Share Mini User manual


2
Additional Transmitters Available
This system supports up to 20 transmitters. To purchase
additional transmitters, please visit:
www.ClearClick.tech
Extend Your Warranty for FREE!
Extend your warranty by one year for free simply by
registering your product at:
www.ClearClick.tech
Safety Precautions –Important, Please Read:
1. Do not disassemble the units.
2. Do not permit children to use or play with this device.
3. Please note that the devices may become very warm during
use.
4. Do not operate the unit around water or rain. Do not operate
the unit around any unnecessary machines or appliances.
5. Unplug the units when not in use.
6. Use only the included accessories with the device.
3-Year Warranty
Your purchase comes with a 3-year warranty. This means
that if anything goes wrong with the unit (other than accidental
damage) within the first 3 years of ownership, we will replace
the unit for free, 100% at our cost. Contact us at

3
What’s In The Box?
Transmitter (TX) Diagram/Explanation
1. HDMI IN: Connect to your video source such as a computer or
other HDMI device. NOTE: Some devices might not provide
enough power from the HDMI port. Therefore, you may also need
to connect the USB power cable to the transmitter’s microUSB port
to get enough power to the transmitter.
2. MicroUSB: Some devices might not provide enough power from
the HDMI port. Therefore, you may also need to connect the USB
power cable to this port to get enough power to the transmitter.

4
3. Button/LED: Press to start broadcasting to the receiver or to
switch to other users. The LED displays various statuses.
4. Antenna: Unfold the antenna for best range.
Transmitter (TX) LED Light Status
What does it mean?
Steady red
Transmitter (TX) is booting up
Flashing red
Transmitter (TX) is searching for receiver (RX)
Flashing blue
Ready –press the button to make a
connection to the receiver (RX).
Steady blue
Connected and broadcasting signal to receiver
(RX).
Purple
No HDMI signal detected.
Receiver (RX) Diagram/Explanation
1. HDMI OUT: Connect to a TV or monitor. NOTE: For the receiver
(RX), external power is always required. You will need to
connect the USB power cable to the receiver’s microUSB port to
provide enough power to the receiver.
2. MicroUSB: For the receiver (RX), external power is always
required. You will need to connect the USB power cable to the

5
receiver’s microUSB port to provide enough power to the receiver.
3. Button/LED: Press to switch between receiver (RX) modes:
TX/Airplay/DLNA mode or Miracast mode.
4. Antenna: Unfold the antenna for best range.
Receiver (RX) LED Light Status
What does it mean?
Flashing blue
Waiting for connection. Press the button on a
transmitter (TX) to start.
Steady blue
Connected and receiving a signal.
6
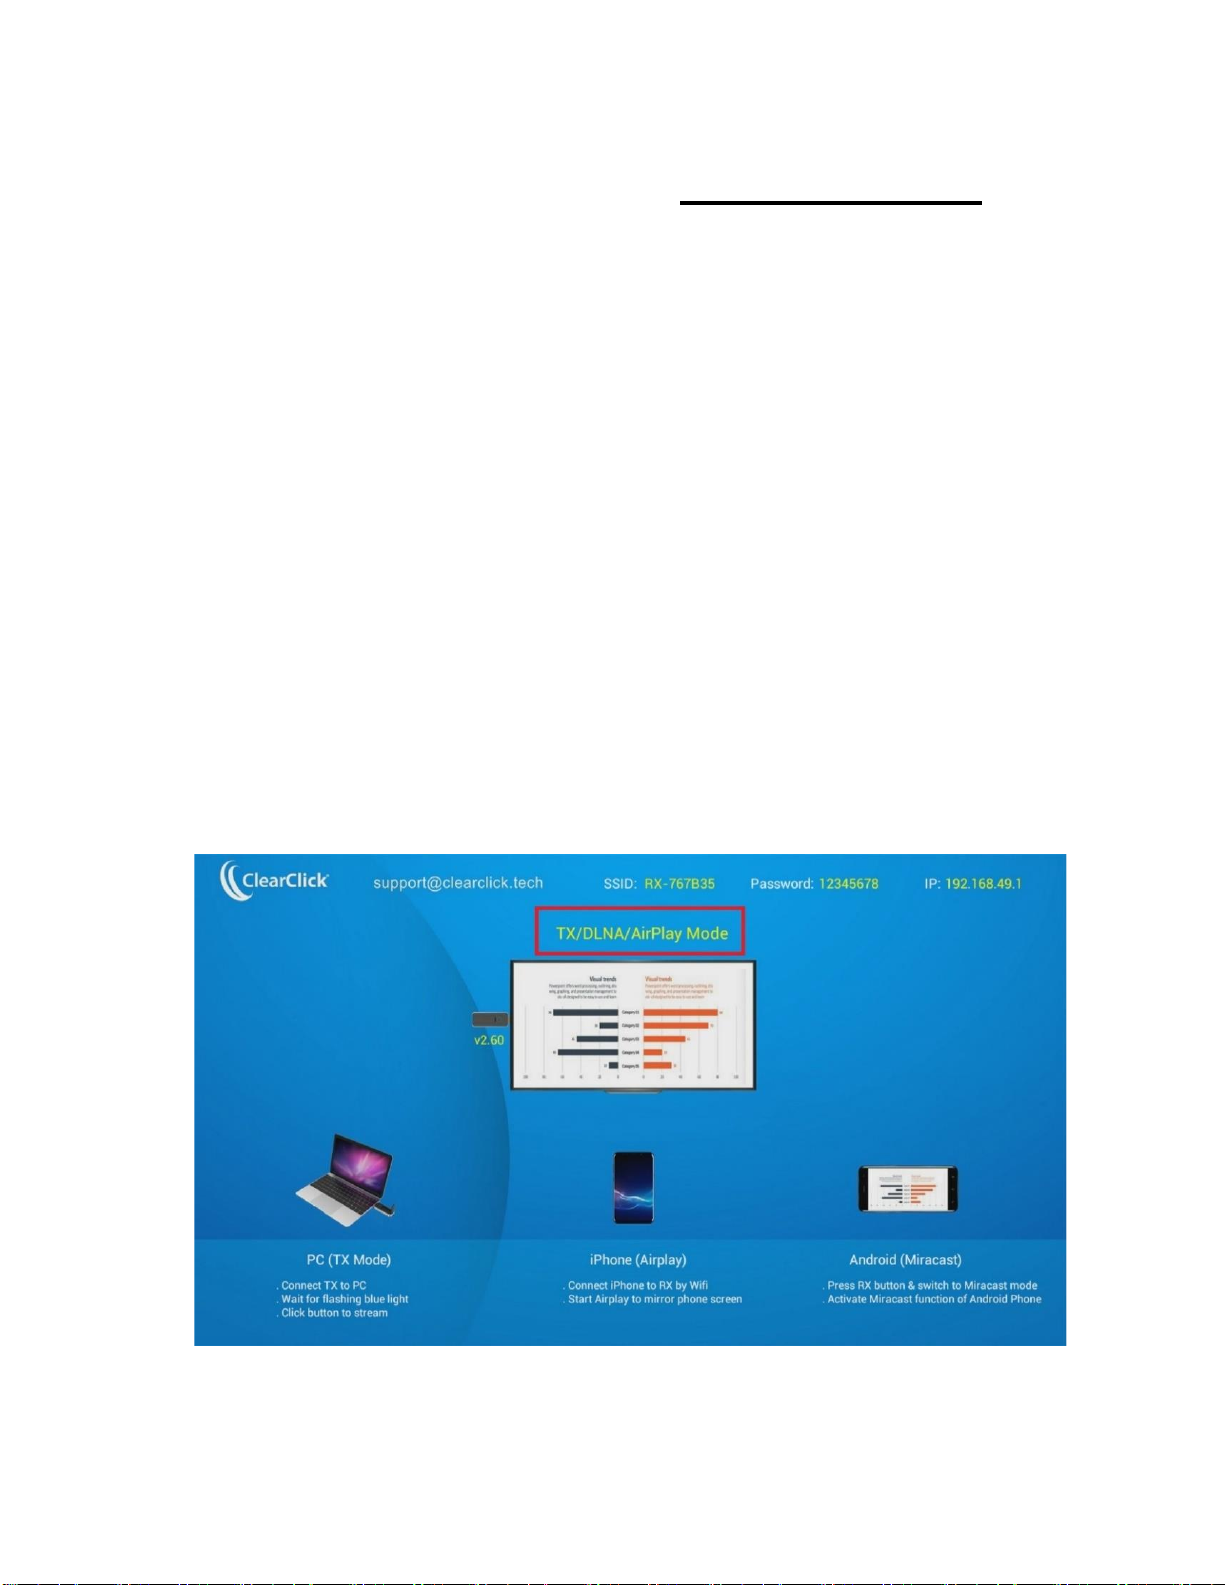
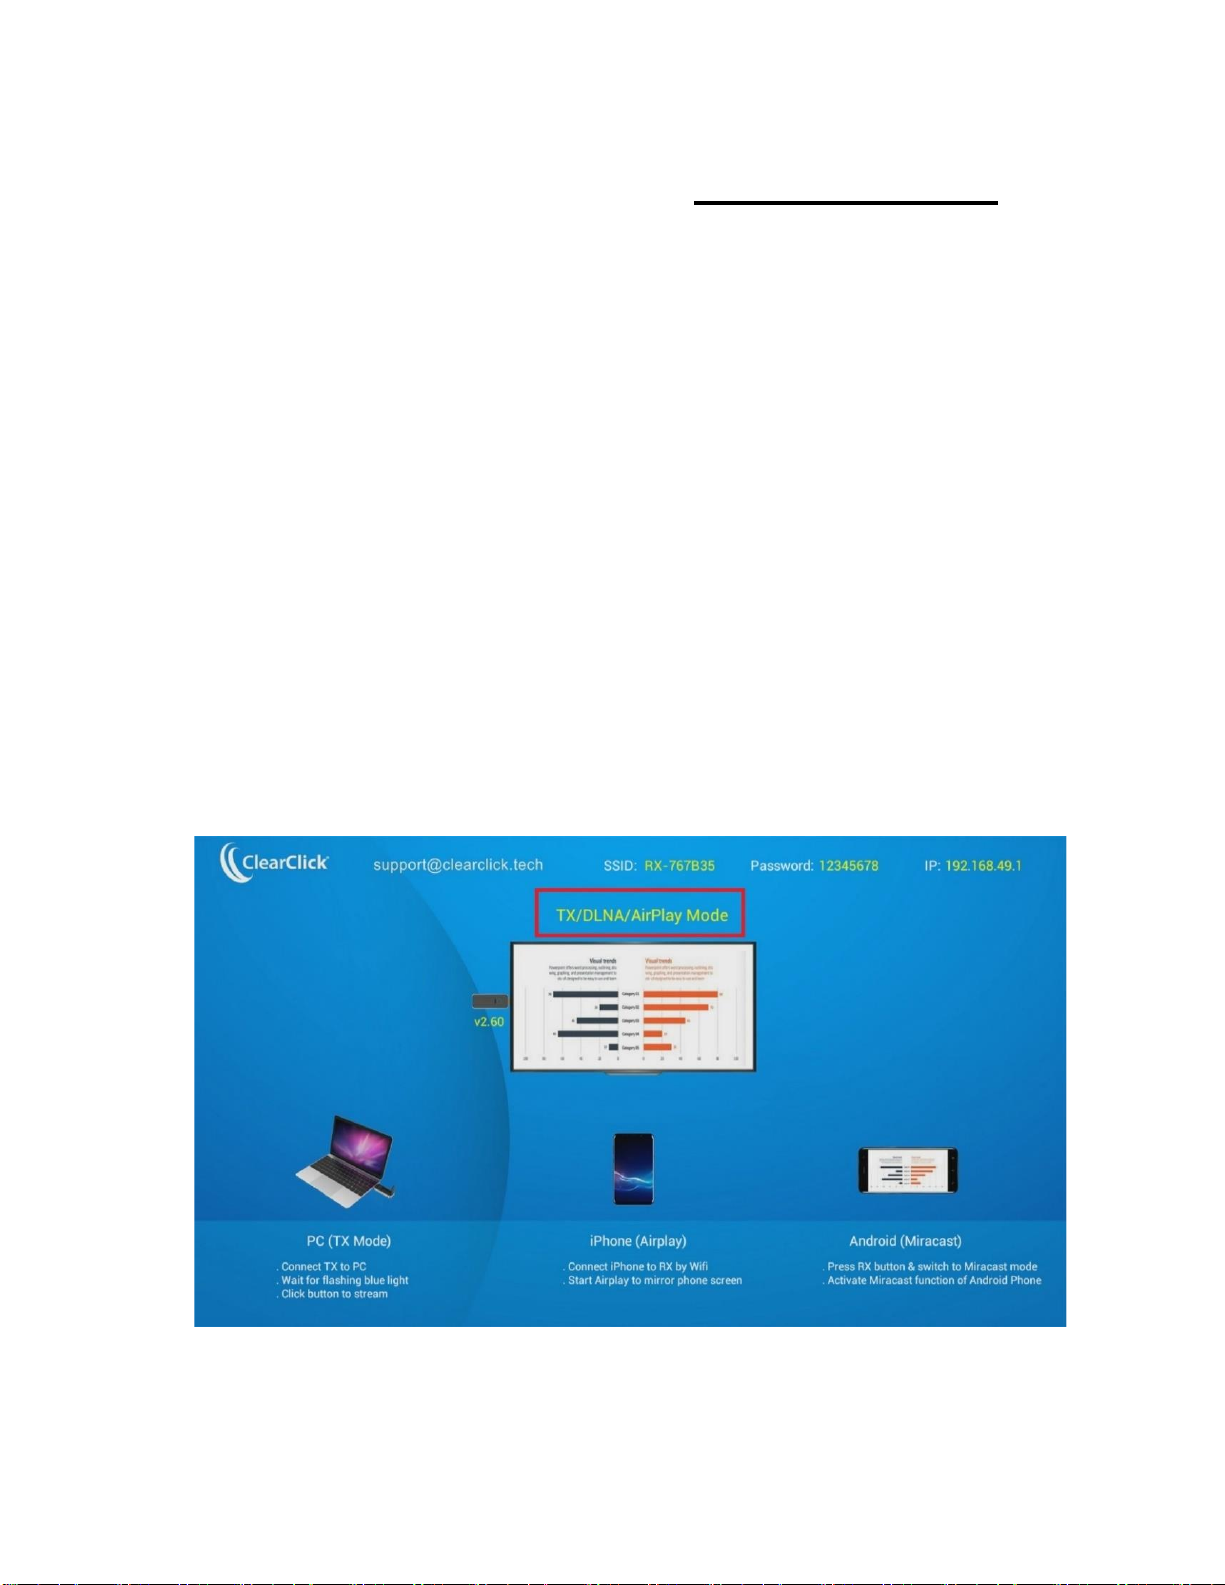
Quick Start Guide –For PC and Mac
1. Plug in the receiver (RX) to your TV, monitor, or
projector via HDMI.
2. Connect the micro USB port of the receiver (RX)
to a USB port or power supply for power (required).
3. Make sure the receiver (RX) is set to
“TX/DLNA/Airplay”mode. If not, press the button
on the receiver (RX) to switch to
“TX/DLNA/Airplay” mode.

7
4.Connect a transmitter (TX) to your PC or Mac’s
HDMI port.
5.IMPORTANT NOTE: Your PC or Mac may or
may not provide enough power via the HDMI port
to power the transmitter (TX). You may also need
to use one of the included USB power cables to
provide enough power to the transmitter (TX) via
its microUSB port.
6.The transmitter (TX) will show a red light while it’s
booting up.
7.Once the transmitter (TX) light has turned blue,
press the button to start transmitting video to your
TV/monitor/projector.
8.Within a few seconds, your TV/monitor/projector
will show the video signal that it is receiving from
your computer.
9.To use another transmitter (TX) with another
computer, just repeat steps 4-7 with that device.
8
Quick Start Guide –For iPhone/iPad
1.Plug the receiver (RX) to your TV, monitor, or
projector via HDMI.
2.Connect the micro USB port of the receiver (RX)
to a USB power supply for power (required).
3. Make sure the receiver (RX) is set to
“TX/DLNA/Airplay”mode. If not, press the button
on the receiver (RX) to switch to
“TX/DLNA/Airplay” mode.

9
4.Connect your iPhone/iPad to the WiFi network
shown on the top of your TV screen.(For
example, SSID: RXxxxxx, Password: 12345678).
5.Open the Control Center / System Preferences on
your iPhone/iPad to enable AirPlay / Screen
Mirroring. You may also need to press the
and/or icons within the app that you want to
“cast” from.
6.For more information/instructions on Apple
Airplay, please visit: https://support.apple.com/en-
us/HT204289

10
Quick Start Guide –For Android
Phones/Tablets
1.Plug the receiver (RX) to your TV, monitor, or
projector via HDMI.
2.Connect the micro USB port of the receiver (RX)
to a USB power supply for power (required).
3. Press the button on the receiver (RX) to switch to
“Miracast” mode.
4.On your Android phone or tablet, you may need
to activate the Miracast function. The Miracast
Table of contents


