INSTALLATION INSTRUCTIONS
Milestone AV Technologies, and its affiliated corporations and subsidiaries (collectively, "Milestone"), intend to make this manual accurate and complete. However, Milestone makes
no claim that the information contained herein covers all details, conditions or variations, nor does it provide for every possible contingency in connection with the installation or use
of this product. The information contained in this document is subject to change without notice or obligation of any kind. Milestone makes no representation of warranty, expressed or
implied, regarding the information contained herein. Milestone assumes no responsibility for accuracy, completeness or sufficiency of the information contained in this document.
Chief Manufacturing, a products division
of Milestone AV Technologies
8401 Eagle Creek Parkway, Savage, MN 55378
• P: 800.582.6480 / 952.894.6280 • F: 877.894.6918 / 952.894.6918
8803-002003 Rev00
©2009 Milestone AV Technologies,
a Duchossois Group Company
www.chiefmfg.com
04/09
MODEL: HB-43E Custom Projector Bracket
Unpack carton and verify contents. If any listed parts are missing, immediately contact a Chief Customer Service representative.
PARTS
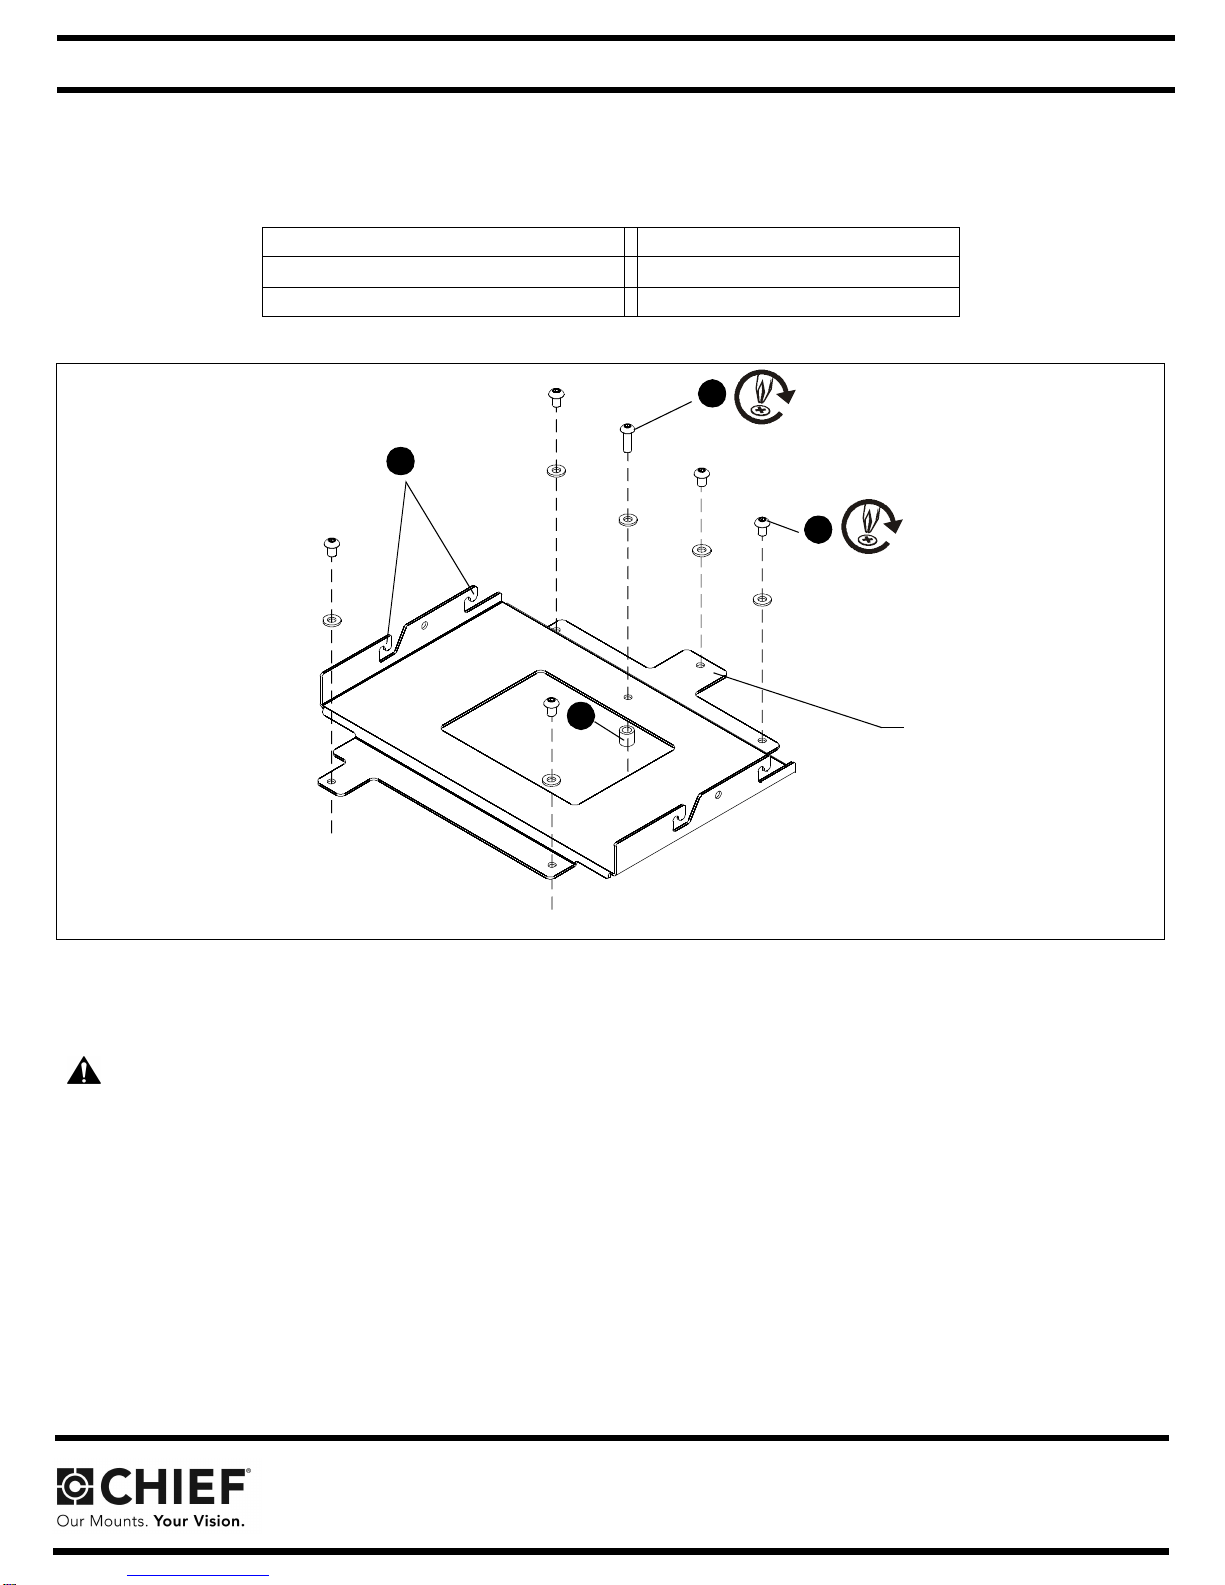
Figure 1:
INSTALLATION
WARNING: IMPROPER INSTALLATION MAY RESULT IN SERIOUS PERSONAL INJURY! All components must be securely fastened
to each other and to the ceiling, and the ceiling must be capable of supporting five times the total weight of the installation.
1. Place one nylon spacer on top of projector.
2. Lower custom HB bracket onto spacer on top of projector. Ensure that the side hooks open towards front of the projector. (See Figure 1)
3. Attach HB bracket to projector using one M8 x 25mm Phillips button head screw through one M8 flatwasher and through the nylon spacer.
4. Insert five M8 x 12mm Phillips button head screws through M8 flat washers and into bracket. (See Figure 1)
5. Tighten all fasteners. (See Figure 1)
Continued...
(1) BRACKET, Custom HB (4) NUT, Flange, Hex, 5/16-18
(5) SCREW, Phillips Button Head, M8 x 12mm (1) SPACER, Nylon .500 x .316 x .500
(1) SCREW, Phillips Button Head, M8 x 25mm (6) WASHER, Flat, M8
x 4
x
1
2
Toward front
of projector
x 1
3
4
x 5


