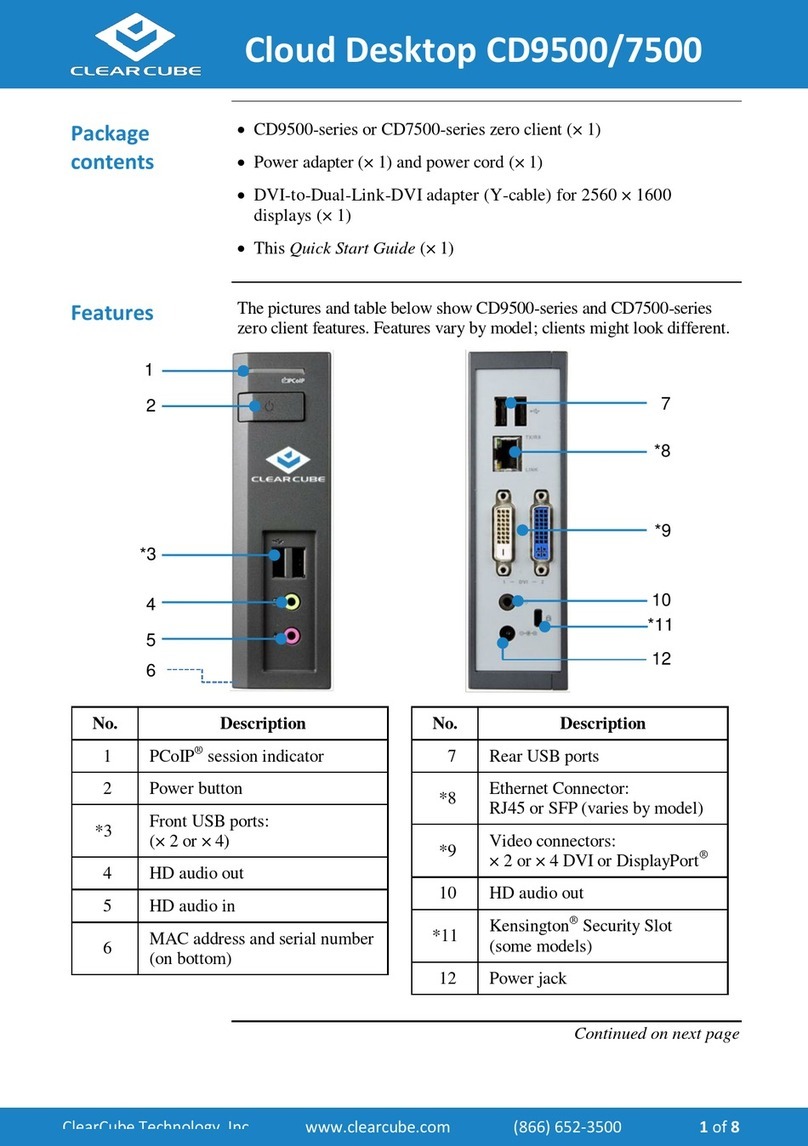
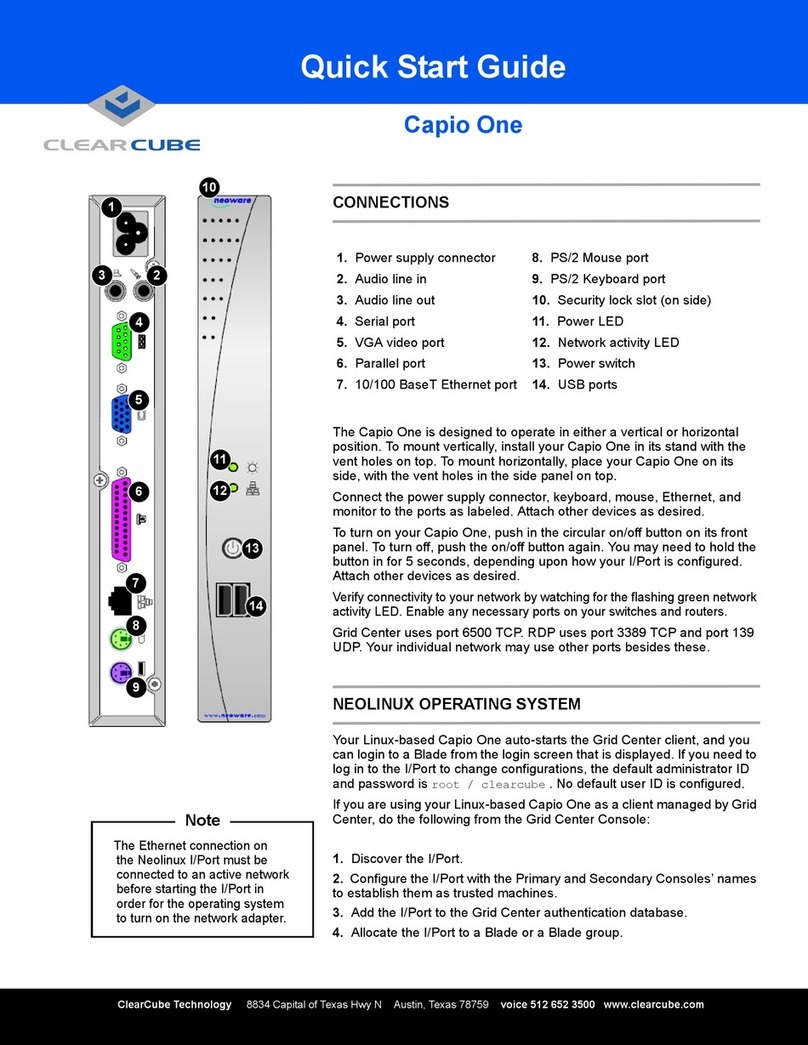
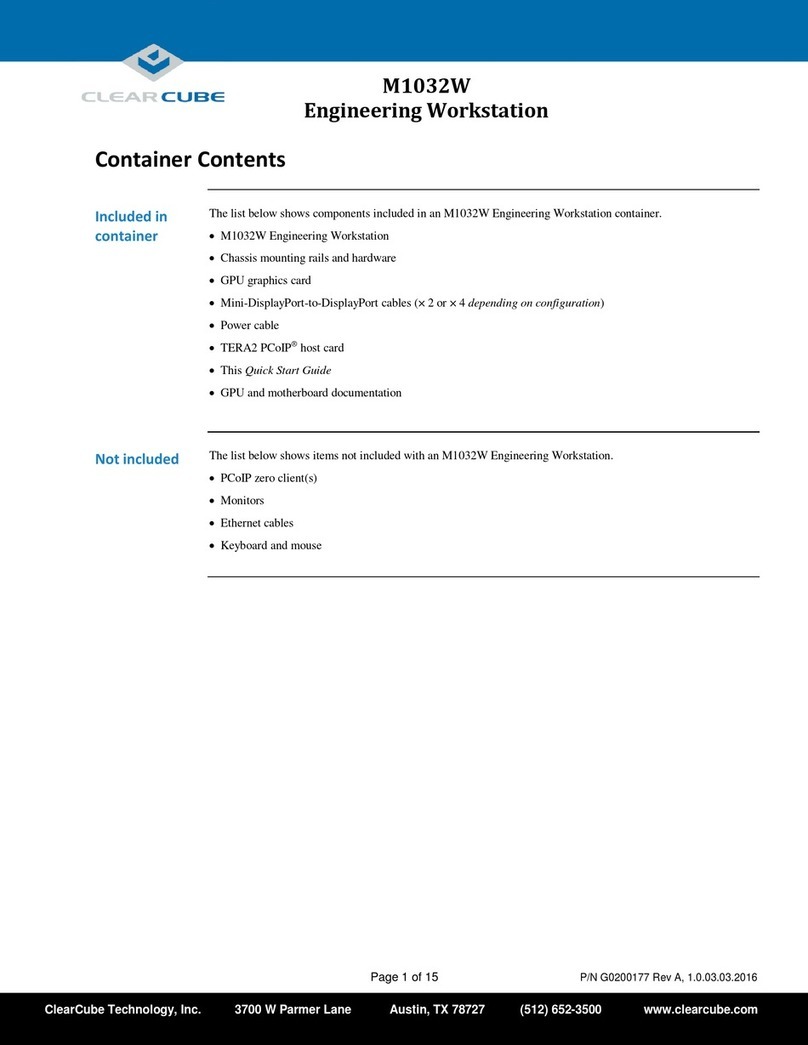
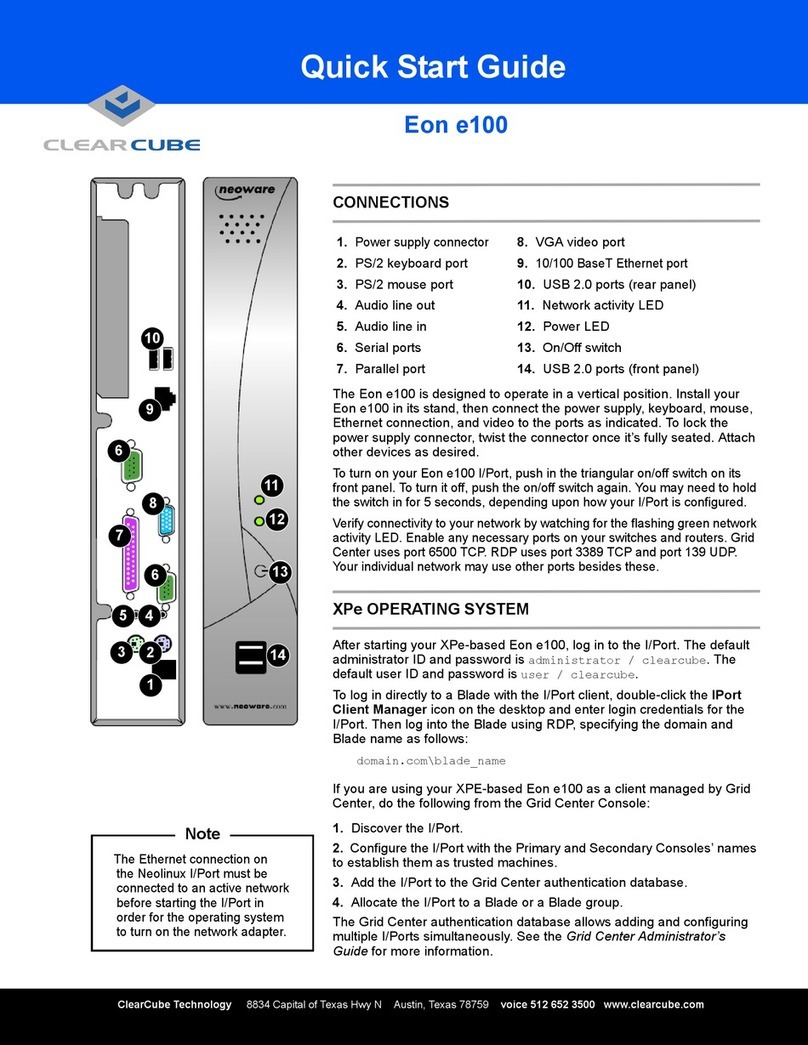
manuals.online logo
Brands
  1. Home
  2. •
  3. Brands
  4. •
  5. ClearCube
  6. •
  7. Desktop
  8. •
  9. ClearCube Thin Client I8520 User manual

ClearCube Thin Client I8520 User manual

Quick Start Guide
ClearCube Technology, Inc. 3700 W Parmer Lane Austin, Texas 78727 (512) 652-3500 www.clearcube.com
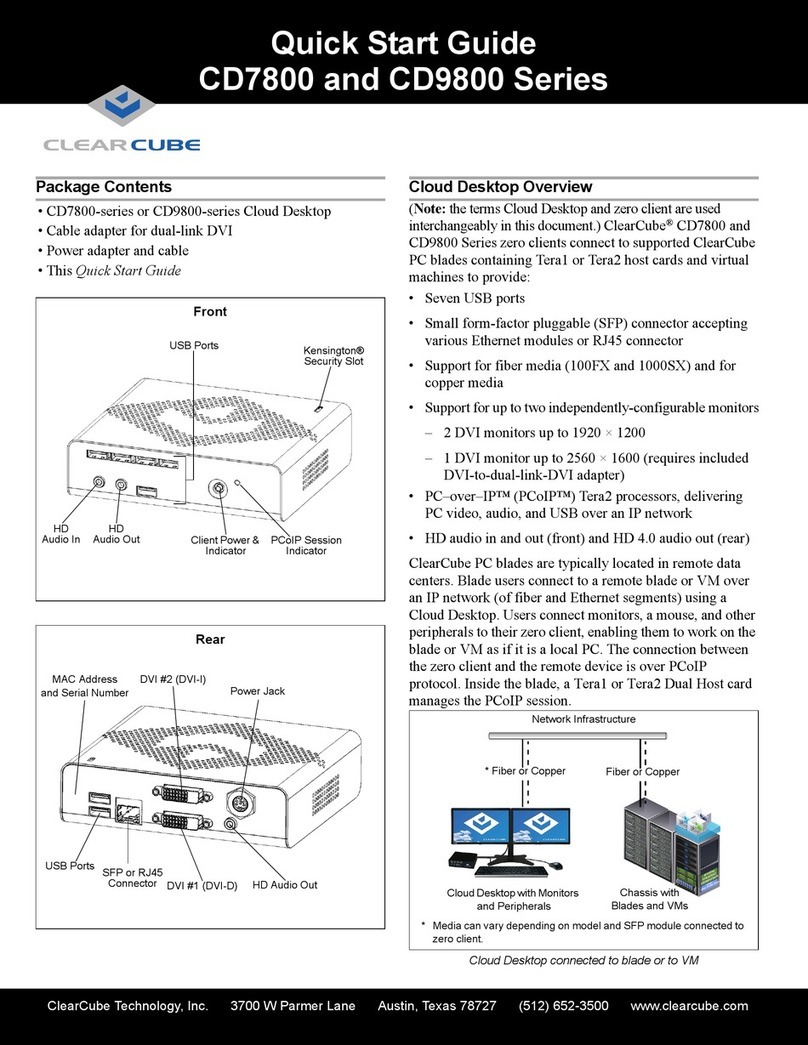
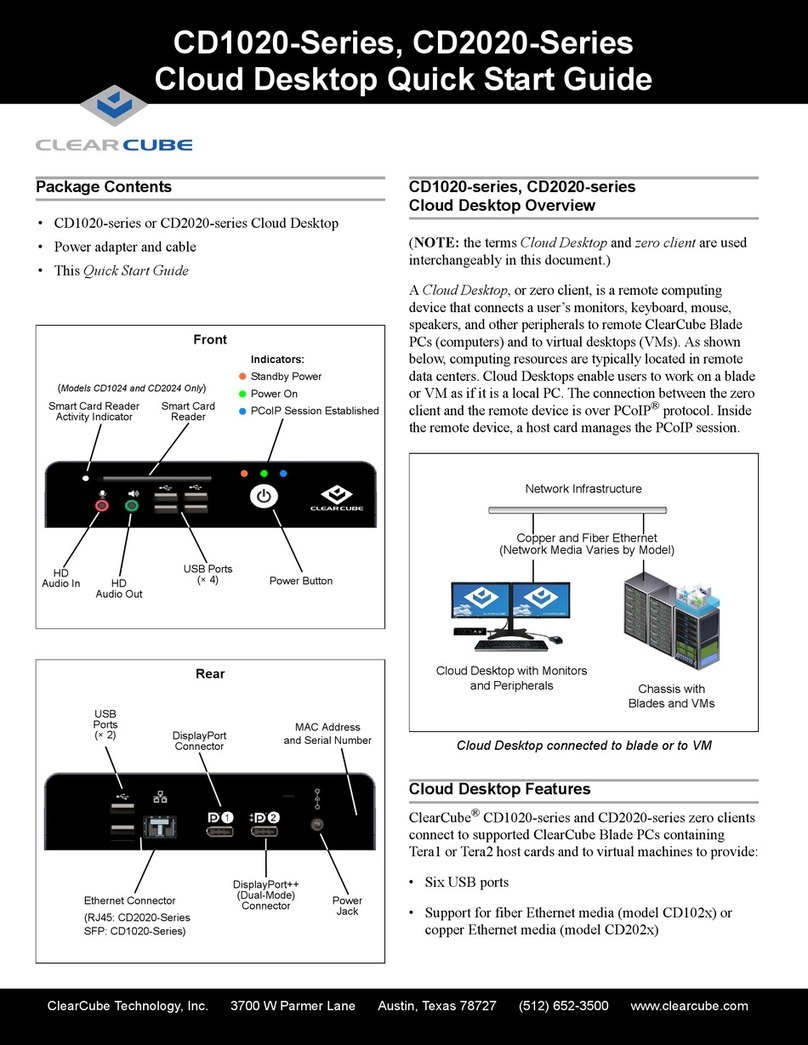
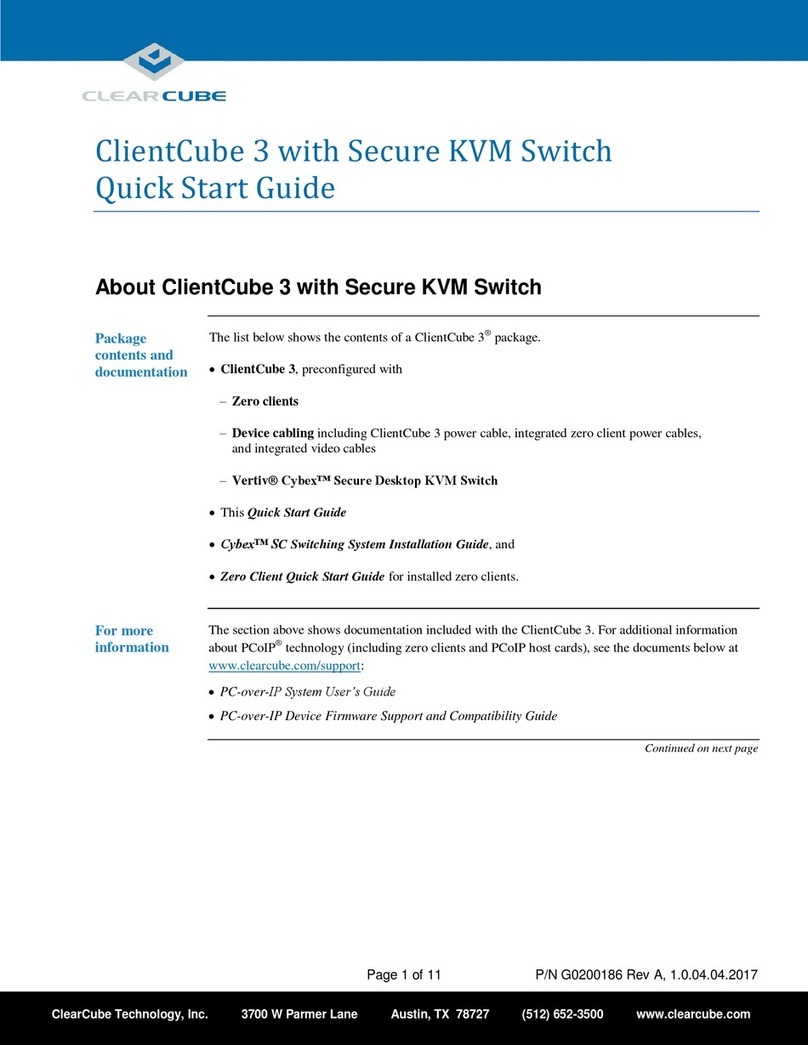
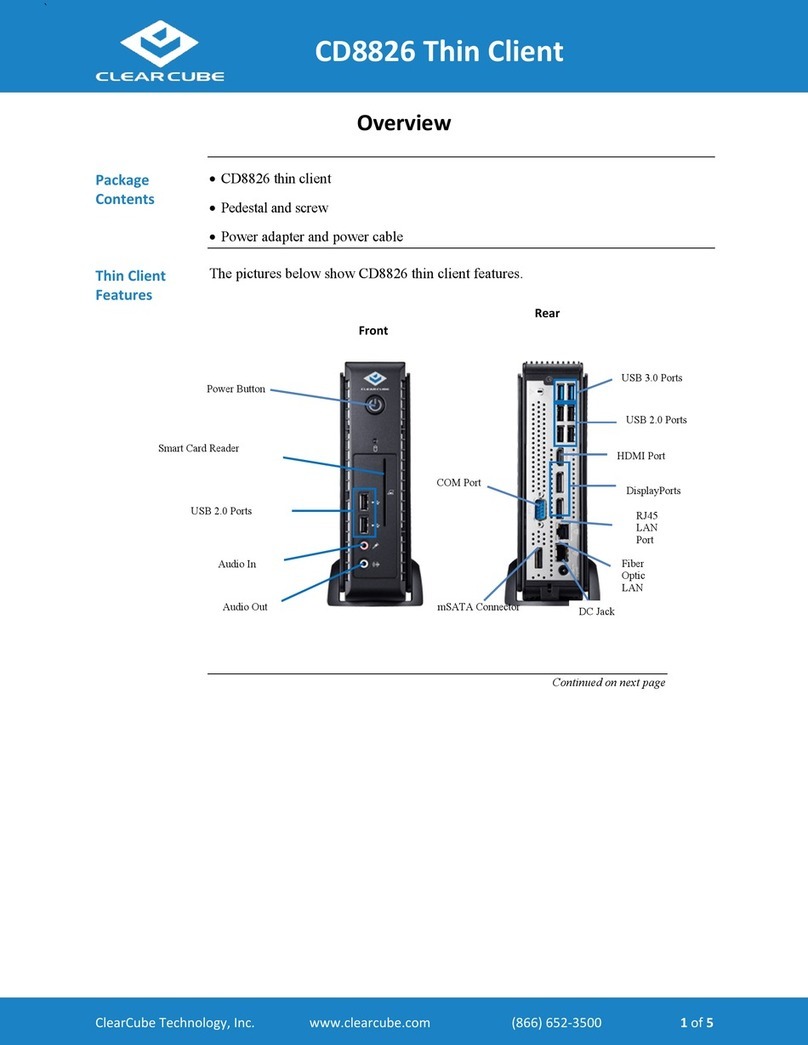
The ClearCube®I8520 thin client enables users to access remote
computing devices, such as ClearCube blades or other computing
resources. The I8520 package contains: I8520 thin client, an I8520
pedestal, this Quick Start Guide, and a power cord appropriate for your
country.
This guide describes how to set up the I8520 thin client. See
www.clearcube.com/support/ for the following additional information:
• I/Port User Guide describes how to use ClearCube I/Ports, clients, and
thin clients.
• ClearCube PCoE™Administrator’s Guide describes how to install,
configure, and use ClearCube PC-over-Ethernet™(PCoE) remote
connection software. (PCoE is not required to use an I8520 thin client.)
•ClearCube Sentral™Administrator’s Guide describes how to use
ClearCube Sentral to manage thin clients, chassis, and related devices;
perform connection brokering; and more. (Sentral is not required to use
an I8520 thin client.)
Safety and Precautions
Prevent ESD (electrostatic discharge) damage to smart card readers by
always discharging your body and smart card before using a
reader (for example, by touching a grounded, unpainted, metal
object). ESD can vary depending on many environmental
conditions, including clothing that users wear and how they
handle smart cards. ESD damage can potentially cause
unsupported card reader behavior including failure. Always
perform ESD prevention steps before using the card reader.
• Do not install the thin client in areas where it can become wet or be
exposed to water.
• Only use the power cord shipped with the thin client.
• Ensure there is four inches of space surrounding the thin client.
Inadequate ventilation can damage the device.
Setting up Your I8520 Thin Client
1. Carefully unpack the I8520 and components. Ensure that you have
the following items:
• Power cord (included with the thin client)
• USB mouse to connect to the I8520
• USB keyboard to connect to the I8520
• VGA or DVI-I monitor to connect to the I8520
2. Place the I8520 on a desktop. You can mount the thin client vertically
(inserted in the included pedestal) or horizontally.
3. Connect a USB keyboard and mouse to the thin client. As shown in
the adjacent figures, USB ports are located on the front and rear of
the I8520.
4. Establish a network connection between the thin client and a remote
computing device by connecting an Ethernet cable to the Ethernet
port on the rear of the thin client and to the Ethernet port on the
remote device. If you are using ClearCube PCoE remote connection
software, see PCoE Administrator’s Guide, included with PCoE
software, for information about installing, configuring, and using
PCoE.
I8520 Thin Client
Smart Card
Reader
(Optional Feature)
Power Button
USB 2.0
Ports
Speaker
Pedestal
Audio In
Audio Out
Disk
Activity
NIC
Activity
Four
USB 2.0
Ports
COM Port DVI-I
VGA
AC Power In
10/100/1000
Mbps Ethernet
—Continued on Reverse—
ClearCube Technology, Inc. 3700 W Parmer Lane Austin, Texas 78727 (512) 652-3500 www.clearcube.com
G0200117 Rev C, 1.2.09.27.2012
5. Optionally, connect a printer to the I8520 using a USB port on
the thin client.
6. The I8520 supports one or two monitors with one VGA port
and one DVI-I port on the rear of the device. Connect a
monitor to either port (VGA or DVI-I). Optionally, connect a
second monitor to the unpopulated port and then specify
monitor settings in your operating system’s display
preferences after performing these steps.
NOTE: If you configure two monitors and then start the
I8520 with the primary monitor disconnected, the
I8520 does not change settings automatically.
You must reconnect the primary monitor and
then specify a single-monitor configuration.
7. Connect the power cord (included with the I8520) to the AC
input on the rear of the thin client, and then plug the power
cord into an AC power outlet.
8. Power on the thin client by gently pressing the power button
on the front of the I8520.
User Accounts
The I8520 contains the Windows Embedded®Standard user
accounts detailed in the following table for each operating system
(case-sensitive). Use the account credentials appropriate for the
operating system on your I8520.
NOTE: Change administrator password immediately after
logging in for increased security.
Making OS-Level Changes
I8520 thin clients provide an Enhanced Write Filter (EWF) to
enable administrators to easily apply and remove OS-level
changes to the thin client.
NOTE: The EWF is enabled by default.
Write Filter States
•Enabled—When the EWF is enabled, all OS-level changes
are written to volatile memory and are discarded when a user
restarts or shuts down the thin client. No OS-level changes
are written to nonvolatile memory when the EWF is enabled.
•Disabled—When the EWF is disabled, OS-level changes are
written (saved) to nonvolatile memory.
The following sections describe how to commit OS-level changes
when the EWF is enabled (the default behavior), and how to
disable the EWF.
Committing Changes When EWF is Enabled
1. Log in as administrator.
2. From the Windows Embedded Standard desktop, click
Start > Control Panel > Administrative Tools to display the
Administrative Tools dialog box.
3. Double-click the EWF icon, typically located in the upper-
left portion of the window. The following icons are displayed:
Check Status, Commit, Commit and Disable, and Enable.
NOTE: The I8520 must reboot to commit changes.
Ensure all work is saved before performing the
subsequent steps.
4. From the EWF window, double-click the Commit icon.
5. A window is displayed showing the status of the write filter,
followed by a message indicating that changes will be
committed to memory and the I8520 will reboot after you
press any key. Press any key on your keyboard to commit
changes and reboot.
The I8520 restarts and boots to the user account.
Committing Changes by Default (Disabling EWF)
You can disable the EWF so that all changes you make while
logged in to a user account are written to memory and not
discarded. To disable the EWF:
1. Perform steps 1 through 3 as described in the previous
section.
2. From the EWF window, double-click the Commit and
Disable icon.
3. A message is displayed indicating that the EWF will be disabled
after reboot. Press any key on your keyboard to reboot. (EWF will
remain disabled until you enable it again.)
The I8520 restarts and boots to the user account. See
www.clearcube.com/support for more information and for product
documentation.
Email: [email protected]
Web site: www.clearcube.com/support
Toll-free: (866) 652-3400
Phone: (512) 652-3400
User Name Password Notes
Windows Embedded Standard 7 (WES 7)
User user I8520 automatically boots to this
account.
Admin clearcube Change password promptly.
Windows Embedded Standard (Formerly XPe)
user user I8520 automatically boots to this
account.
administrator clearcube Change password promptly.
RoHS
WEEE Disposal Guidelines
In the European Union, this electronic product falls under the European Directive (2002/96/EC) WEEE. When it reaches the end of its useful
life or is no longer wanted, dispose of it at an approved, designated recycling or treatment facility. Check with your local authorities for proper
disposal instructions. For assistance, contact ClearCube at [email protected].

Other ClearCube Desktop manuals

ClearCube ClientCube 3 User manual

ClearCube

ClearCube ClientCube 3 User manual

ClearCube A6106HL User manual

ClearCube

ClearCube A6106HL User manual

ClearCube Thin Client CD8826 User manual

ClearCube

ClearCube Thin Client CD8826 User manual

ClearCube CD1020 Series User manual

ClearCube

ClearCube CD1020 Series User manual

ClearCube Eon e100 Technical manual

ClearCube

ClearCube Eon e100 Technical manual

ClearCube Cloud Desktop CD9500 series User manual

ClearCube

ClearCube Cloud Desktop CD9500 series User manual

ClearCube CD7800 Series User manual

ClearCube

ClearCube CD7800 Series User manual

ClearCube CD10 Series User manual

ClearCube

ClearCube CD10 Series User manual

ClearCube Eon e100 User manual

ClearCube

ClearCube Eon e100 User manual

ClearCube Eon e100 Technical manual

ClearCube

ClearCube Eon e100 Technical manual

ClearCube Capio One User manual

ClearCube

ClearCube Capio One User manual

ClearCube M1032W User manual

ClearCube

ClearCube M1032W User manual

Popular Desktop manuals by other brands

Lenovo ThinkCentre M75e user guide

Lenovo

Lenovo ThinkCentre M75e user guide

Nexcom XPPC 16-100 user manual

Nexcom

Nexcom XPPC 16-100 user manual

MSI Nightblade MI Series manual

MSI

MSI Nightblade MI Series manual

Dell Precision Workstation 390 Quick reference guide

Dell

Dell Precision Workstation 390 Quick reference guide

HP Compaq d538 MT Hardware reference guide

HP

HP Compaq d538 MT Hardware reference guide

HP Net PC 20 quick start

HP

HP Net PC 20 quick start

Lenovo ThinkStation E20 user guide

Lenovo

Lenovo ThinkStation E20 user guide

Compaq Deskpro 4000S - Desktop PC reference guide

Compaq

Compaq Deskpro 4000S - Desktop PC reference guide

HP Vectra VL410 Upgrade guide

HP

HP Vectra VL410 Upgrade guide

Sun Microsystems 2 Service manual

Sun Microsystems

Sun Microsystems 2 Service manual

Morrow Decision I Guide to installation & operations

Morrow

Morrow Decision I Guide to installation & operations

IBM ThinkCentre 8127 Hardware Maintenance Manual

IBM

IBM ThinkCentre 8127 Hardware Maintenance Manual

EDA CM4MEDIA user manual

EDA

EDA CM4MEDIA user manual

HP ProDesk 400 G5 Disassembly instructions

HP

HP ProDesk 400 G5 Disassembly instructions

Asus Essentio CM1630 user manual

Asus

Asus Essentio CM1630 user manual

IBM IntelliStation POWER 285 Technical overview and introduction

IBM

IBM IntelliStation POWER 285 Technical overview and introduction

NEC PowerMate 2000 Series Using

NEC

NEC PowerMate 2000 Series Using

Lenovo ThinkCentre 3425 Hardware Maintenance Manual

Lenovo

Lenovo ThinkCentre 3425 Hardware Maintenance Manual

manuals.online logo
manuals.online logoBrands
  • About & Mission
  • Contact us
  • Privacy Policy
  • Terms and Conditions

Copyright 2025 Manuals.Online. All Rights Reserved.