CleverMade S100 Series User manual

PARCEL LOCKBOX S100 SERIES
INSTRUCTION MANUAL

THANK YOU FOR PURCHASING
Thank you for purchasing a CleverMade® Parcel LockBox. Our LockBox is one of the very rst delivery
package lockers to come to market. In a world of accelerating e-commerce and residential deliveries,
there has become a need to protect deliveries from theft and weather. CleverMade designed our LockBox
with this in mind by using a sturdy gauge steel protected by a durable weather resistant powder coating.
Our LockBox features a lock that can be opened with a personal programmable digital code or a steel
key. As an additional theft deterrent, the LockBox itself can be anchored to masonry or wood ooring
using the supplied drill bit and anchor screws.
Since package lockers are still relatively new in the market, we suggest you follow our "belt and
suspenders" approach to communicate with delivery carriers that you desire to have your packages
placed and secured in your LockBox. This entails setting your delivery preferences and supplying your
personal LockBox code to all of your delivery carries and if needed displaying provided instruction
placards on your LockBox or front door.
We want you to have the best experience possible with your new LockBox. Parcel LockBoxes are new to
the market so to get the best performance from your new LockBox it is important to follow all the steps
outlined in this manual, especially the points listed below:
Important:
– Anchor the LockBox into the location selected using the 4 concrete/wood screws supplied
– Program your lock to your custom 4 digit code

THANK YOU FOR PURCHASING
– Use the carrier website or app to enter your lockbox location and share your code. Go to
clevermade.com/lockbox for detailed instructions for each carrier or call us at 760-814-3577 or
800-761-9602 for CleverMade customer support
– When entering your address for deliveries, always provide your code in the open second address line:
Ex: John Smith
Use LockBox Code 1234#
555 Maple Lane
Orchard, NC 27006
– Train and inform your carrier drivers. Use the LockBox Magnet provided to catch drivers attention.
Also use the front door hanger to direct the driver to the LockBox.
– When possible talk to your driver, share your code and let them know that all packages are to be put
into your LockBox. Every driver carries a smart phone/device capable of entering specic delivery
instructions that automatically go into your prole.
Please note all safes and lockers are meant to deter theft. Given enough time and/or the right tools
all safes and lockers can be compromised. Hence our 10 year warranty is limited to manufacturing
defects and parts up to the cost of the LockBox.
Should you experience any problem or concern regarding your LockBox we are available to help
Monday through Friday from 9 am - 5 pm PST. Just call us at 760-814-3577 or 800-761-9602 or
assembly videos and guidance on supplying your personal code to delivery carries.
www.CleverMade.com

TABLE OF CONTENTS
Warnings & Cautions..........................................................................Page 2
LockBox Assembly.............................................................................Page 4
Keypad Instructions..........................................................................Page 11
Anchoring Instructions......................................................................Page 13
Warranty........................................................................................Page 15
1

WARNINGS
– Before shutting the lid be sure that all hands, ngers and objects are clear to avoid serious injury or
damage to product.
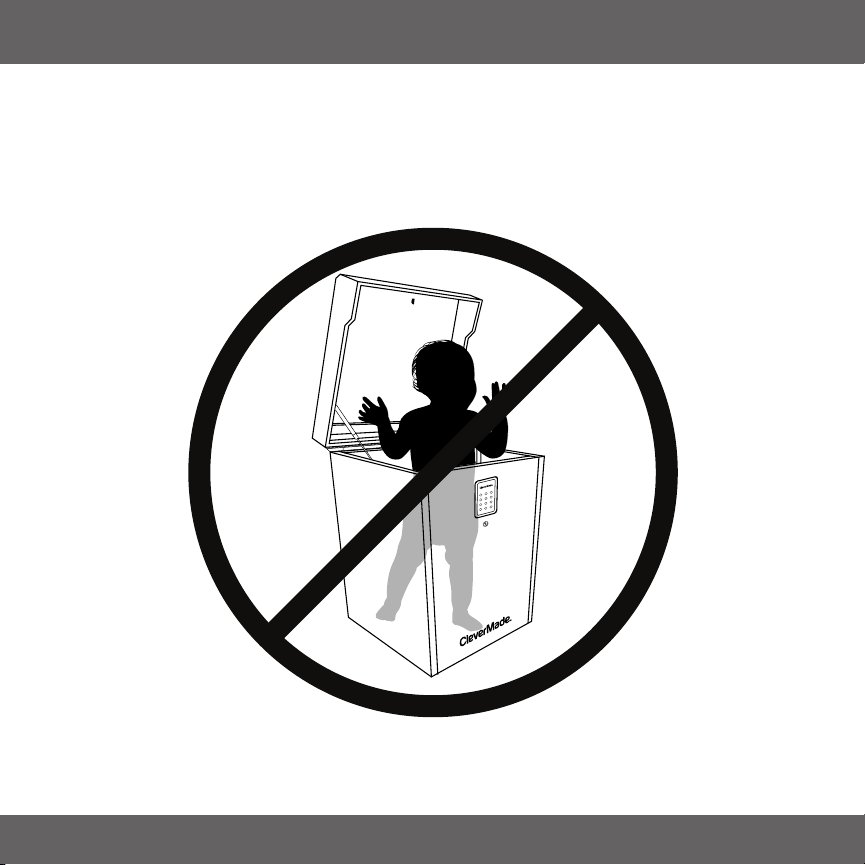
– Under NO circumstance should anyone ever climb into the LockBox.
In the event that someone is shut in the
LockBox there is a glow-in-the-dark
EMERGENCY LATCH on the inside of
the LockBox at the top behind the key pad.
CAUTIONS
– Do not sit, stand or place objects on the LockBox. Doing this could compromise the structure of the
LockBox.
– Hitting or impacting the digital lock or LockBox could compromise the structure and performance.
– The LockBox is meant to deter theft. Given enough time and/or the right tools it can be compro-
mised. Please note our warranty is limited to manufacturing defects and parts up to the cost of the
LockBox.
– During assembly, rest the metal parts on a soft surface to avoid scratching LockBox or damaging
the oor.
– Two or more people should be used to assemble, move or install the LockBox.
– Remove all parts from the packaging and lay them out in an open space.
WARNINGS & CAUTIONS
www.CleverMade.com 2
3
WARNING: Under NO circumstance should
anyone ever climb into the LockBox.

BEFORE YOU BEGIN
– Make sure you have all the parts before beginning assembly. For
ease of assembly, we recommend laying the parts out in the same
order as the next page.
– Is reading instructions not your thing? Watch the assembly video
at www.CleverMade.com/LockBox
www.CleverMade.com 4

PARTS FOR ASSEMBLY
TOOLS NEEDED:
PHILLIPS HEAD SCREWDRIVER
OR:
2 PEOPLE RECOMMENDED
FOR THIS STEP
G-LID STRUTS (2) SCREWS (27)
(includes 1 extra screw)
AAA BATTERIES (4)
4 ANCHORING SCREWS
POWER DRILL
ANCHOR TOOLS:
MASONRY
BIT
(NOT INCLUDED)
(NOT INCLUDED)
PHILLIPS
HEAD BIT
E-FRONT PANEL
F-BOTTOM PANEL
C-BACK PANELB-LEFT SIDE PANEL D-RIGHT SIDE PANEL
A-TOP LID
5
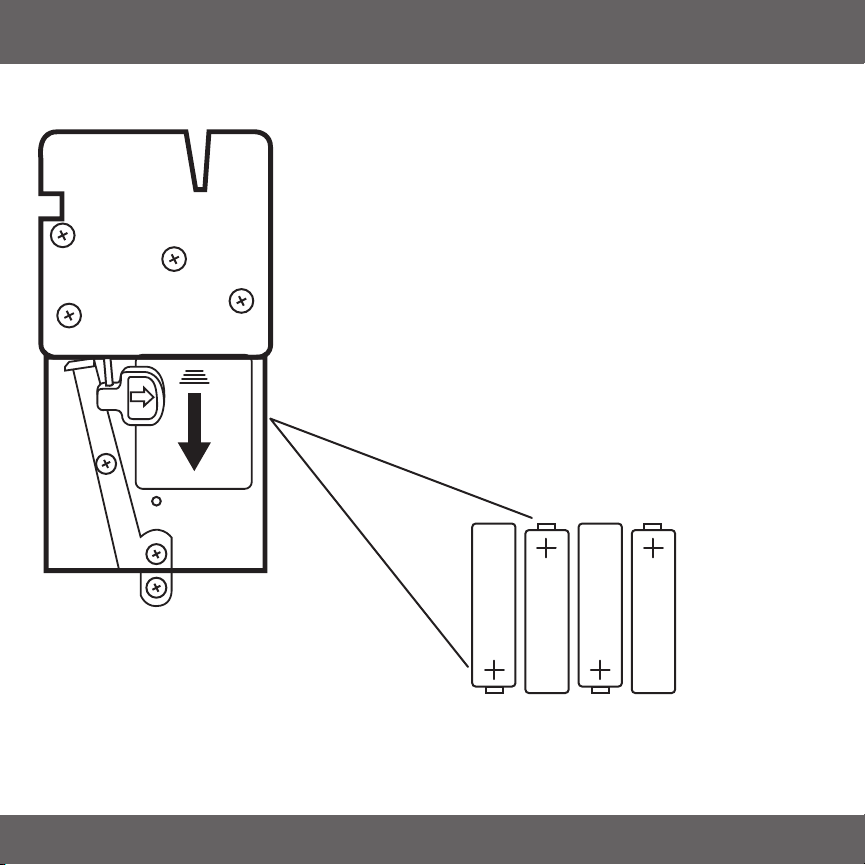
INSTALL THE BATTERIES
ASSEMBLY INSTRUCTIONS
-Slide off the back of the battery case and install the
provided AAA batteries.
NOTE: For use in temperatures below 0˚ Fahrenheit we
suggest using Energizer Lithium batteries that are
designed to be used in temperature as low as -40˚
Fahrenheit.
LOW BATTERY WARNING: The lock will emit a repetitive
beep every 3-4 seconds when the batteries are running
low. When this occurs new batteries should be installed.
AAA
AAA
AAA
AAA
KeyPad Back
(Access from inside the LockBox)
www.CleverMade.com 6

ASSEMBLY INSTRUCTIONS
STEP 1-ATTACH WALL PANELS
1a-Attach Left Side Panel (B) to Back Panel (C) and secure with screws.
1b-Attach Right Side Panel (D) and secure with screws.
1c-Attach Front Panel (E) and secure with screws.
1a
1c
1b
12x
B
D
E
C
C
7

STEP 2-ATTACH BOTTOM PANEL
2a- Flip LockBox upside down.
2b- Place bottom Panel (F) onto box and secure with screws.
F
2a 2b
10x
www.CleverMade.com 8
ASSEMBLY INSTRUCTIONS
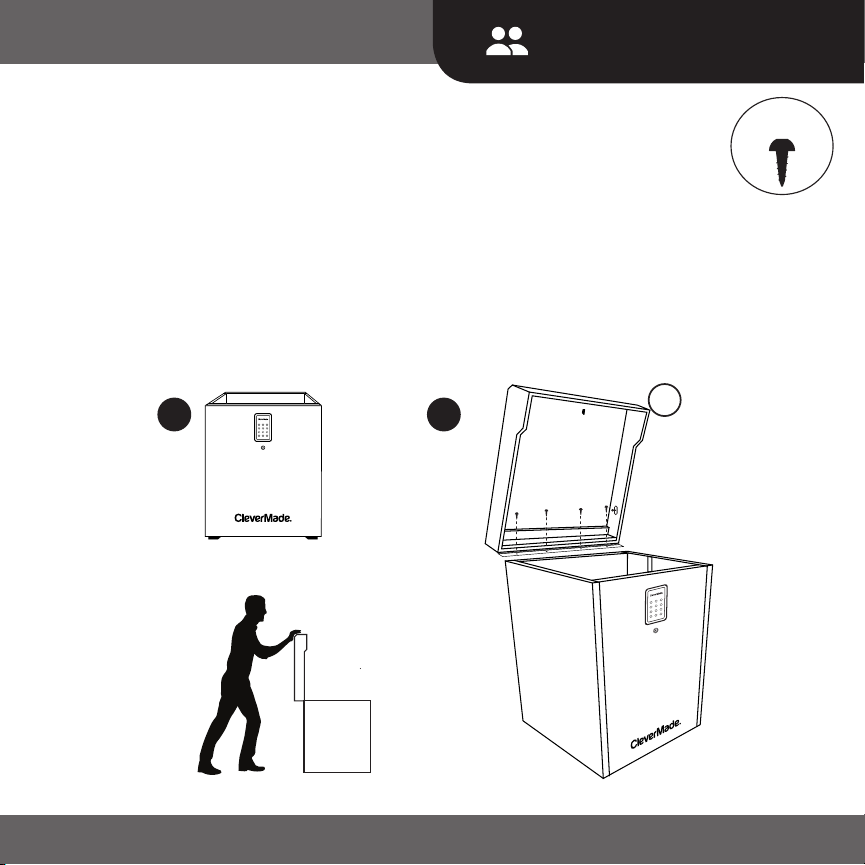
STEP 3-ATTACH LID
3a- Flip LockBox upright.
3b- Attach Lid (A) to Back Panel (C) and secure with screws.
NOTE: Lid hinge should not go past 90˚. Your partner should hold the lid in
place through step 4.
2 PEOPLE RECOMMENDED FOR THIS STEP
4x
3a 3b
DO NOT LET LID
GO PAST 90
A
9

STEP 4-ATTACH LID STRUTS
4- Attach the Lid Struts (G) to the Side Panels and Back Panel. The Lid Struts will
click into the connectors.
NOTE: Keep Lid open for ease of setting your personal code.
G
4
www.CleverMade.com 10
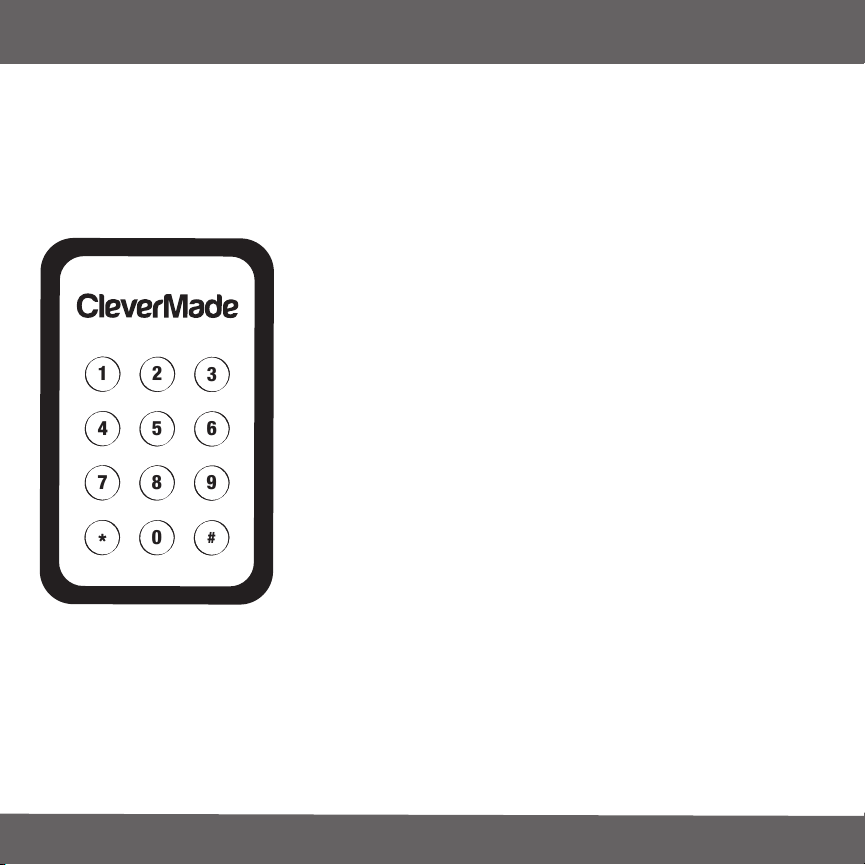
SET UP YOUR PERSONAL CODE
1. Press the “#” to activate the screen
(NOTE: lock won’t beep or light up)
2. Press the “#” button two additional times
3. Enter the preset factory four digit passcode (0000)
4. Press the “#” button twice again
5. Now enter your desired four digit passcode
6. Press the “#” button twice-you should hear two beeps
7. Once the lock beeps twice, your personal code is set
To open the box, simply enter your four digit code and
then press the “#” button. The lid will pop open.
KEYPAD INSTRUCTIONS
1
4
7
2
5
8
0
3
6
9
*
#
11
NOTE: If the light on the LockBox screen turns off while setting up your code you
will need to start over.

CHANGING YOUR PERSONAL CODE
Option 1: With the lid closed
1. Press the “#” to activate the screen
(NOTE: lock won’t beep or light up)
2. Press the “#” button two additional times
3. Enter your current four digit passcode
4. Press the “#” button twice again
5. Now enter your desired four digit passcode
6. Press the “#” button twice-you should hear two beeps
7. Once the lock beeps twice, your personal code is set
Option 2: With the Key
1. Use the key to manually open the box
2. Hold reset button inside the box for ve seconds
3. Once the lock beeps you are ready for new passcode
4. Press the “#” button twice
5. Enter desired four digit passcode
6. Press the “#” button twice-you should hear two beeps
7. Once the lock beeps, your new personal code is set
Visit www.CleverMade.com/LockBox
for guidance on creating or updating a delivery profile
to provide your delivery carriers with your LockBox code.
Reset Button
www.CleverMade.com 12

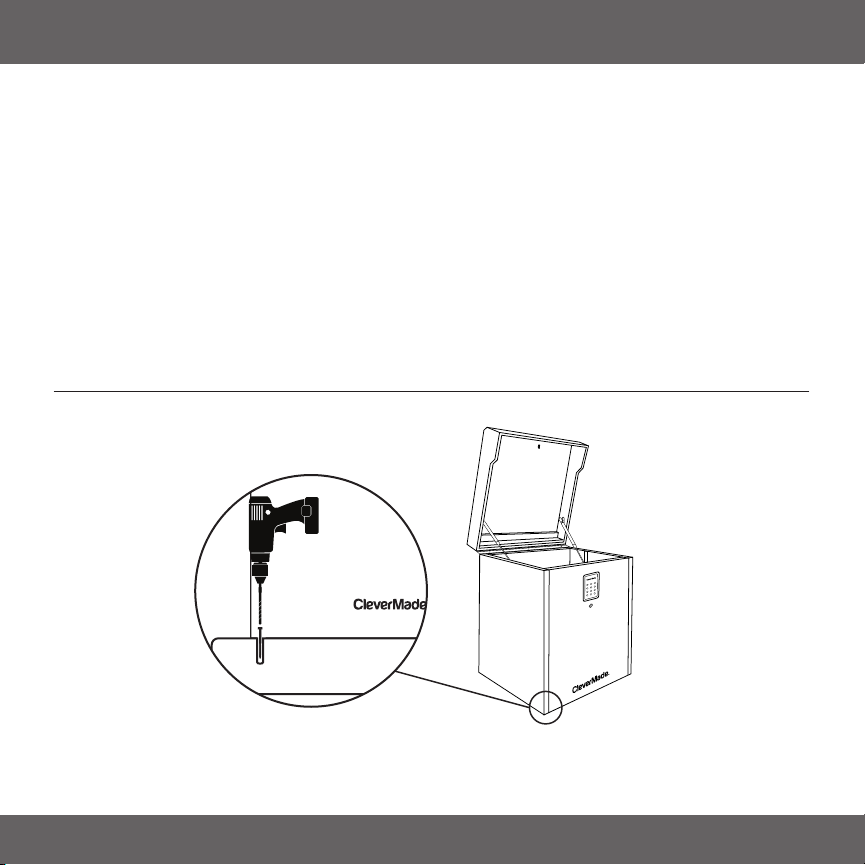
ANCHORING INSTRUCTIONS
4 ANCHORING SCREWS
ANCHORING PARTS
POWER DRILL (NOT INCLUDED) , MASONRY DRILL BIT,
AND PHILLIPS DRILL BIT (BITS INCLUDED)
TOOLS NEEDED
STEP 1-DRILLING ANCHORING HOLES
Before you begin: Place the LockBox in desired location. The back of the
LockBox needs to be at least 2 inches away from any wall or other surface
before you begin to anchor. This will allow the lid to open properly without
interference.
-Using your power drill with the masonry bit (included), insert the bit into the
open hole in one of the four bottom corners and drill into the ground. (Please
note: this drill bit will work on wood or concrete).
-Repeat drilling in all four corners.
13
STEP 2-ANCHORING LOCKBOX TO GROUND
Remove the masonry drill bit from the drill and insert the Phillips driver bit.
-Using the power drill, insert one of the screws provided into the open hole in one
of the four bottom corners and secure it to the ground.
-Repeat fastening screws in all four corners.
www.CleverMade.com 14

WARRANTY INFORMATION
CleverMade takes pride in the quality and craftsmanship of our products. This is why we
offer a free Limited 10 Year Warranty on our LockBox product with proof of purchase by the
original owner. The 10 Year Warranty covers manufacturing defects and failure of moving
parts under normal use. We will repair or replace, at our option, any product or component
that is defective in material or workmanship for 10 years. If your product or part is
determined to be defective, contact our Customer Service Department at 760-814-3577 or
800-761-9602 (9-5 PST) and we will assist you in settling the defective issue. Any defective
parts will be replaced free of charge. The 10 Year Warranty excludes deliberate or accidental
damage and does not extend to misuse, nishes, rust, or improper installation. However, we
evaluate each Warranty claim on a case by case basis, so please contact us should you have
any questions or concerns about your CleverMade LockBox product.
Protect your warranty by registering your LockBox at:
CleverMade.com/LockBox/register
15

CALL US FIRST! DO NOT RETURN LOCKBOX TO STORE.
For immediate help with assembly or product information call our toll free number
Our staff is ready to provide assistance M-F 9-5 PST.
LOST YOUR KEYS?
For key replacement, please call 1-800-761-9602 or email us at info@clevermade.com
Please note that we will require additional information upon contacting us, to ensure
security through the replacement process.
STOP
www.CleverMade.com 16

2556 Gateway Road Carlsbad, California 92009
760.814.3577 or 800.761.9602
www.CleverMade.com
Other CleverMade Indoor Furnishing manuals

Popular Indoor Furnishing manuals by other brands

SAFAVIEH COUTURE
SAFAVIEH COUTURE SFV4818 manual

fantastic furniture
fantastic furniture HAYMAN Assembly instructions

OSP Designs
OSP Designs 101 operating instructions

ROOMS TO GO
ROOMS TO GO KIDS IVY LEAGUE 2.0 3502360P quick start guide

System Build
System Build 7363414COM Instruction booklet

Costway
Costway JV11226 manual

New Classic Furniture
New Classic Furniture RICHLAND COUNTER CHAIR D7522-22 Assembly instructions

TRICA
TRICA Q-ALY-200 Assembly instructions

Next
Next JACKSON N00788 Assembly instructions

Next
Next ALIX C39125 Assembly instructions

Manhattan Comfort
Manhattan Comfort Bradley Assembly instructions

Philips
Philips EnergyLight HF3308 user manual


