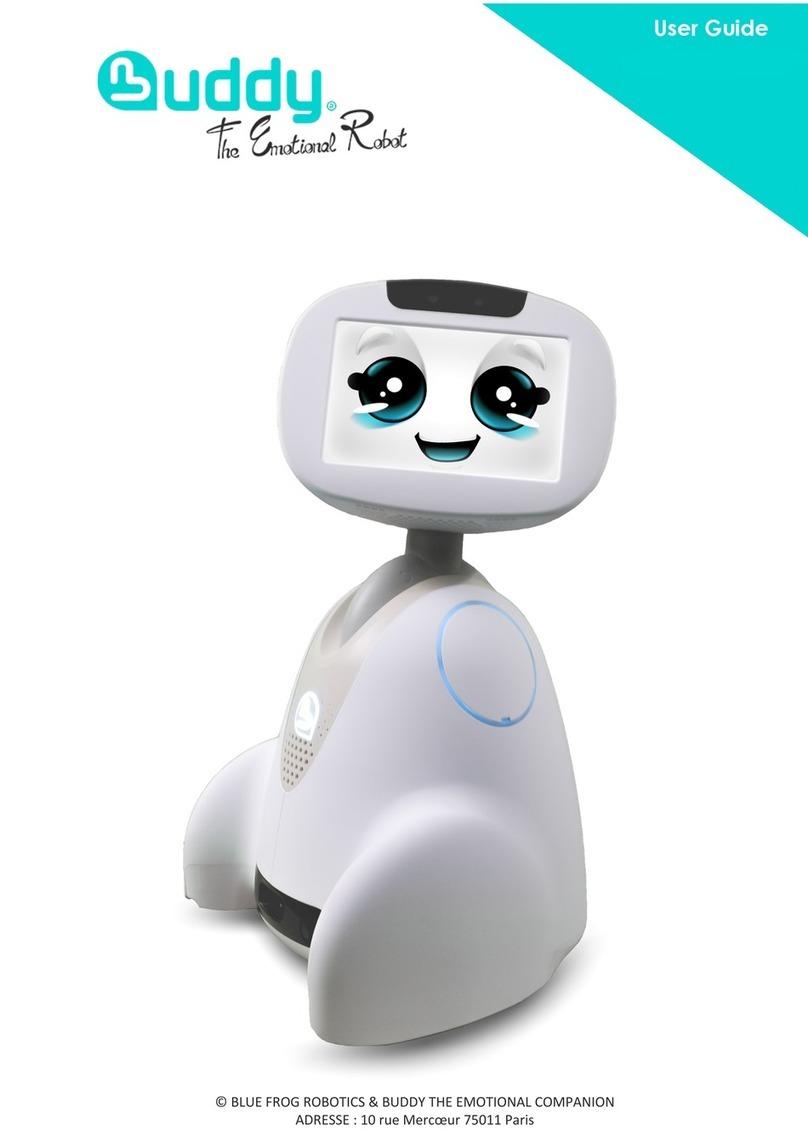
ClicBot KY002CK10 User manual

entertaining and educational toy

1
English
简体中文
日本語
русский
Deutsche
Français
Español
002
026
050
074
098
124
150
Product Model:KY002CK10
V1.2

English
You can find and download the
ClicBot App on the App Store/
Android app markets, or scan the
QR code below to download.
The ClicBot App supports
system versions of iOS 10.0,
Android 5.0 and above.
The Quick Start Guide gives basic
instructions on how to control your
ClicBot. Please refer to the User’s
Manual for detailed information
on the product, including module
specifications, assembly, usage,
connection settings, battery recharging,
security & privacy, after-sale services,
and FAQs. Please see the Module
Function Card for information on the
operational applications and function
usage for modules.
ClicBot App Installation Using Advices
Usage Instructions
Contains small parts, not suitable for children
under 3 years old;
Contains precision parts, prevent dropping from
height; keep away from flammable objects;
The product is not waterproof; keep your ClicBot
dry; keep the product away from splashing or
soaking;
Keep the golden module “po-go” pins away from
metal;
Do not directly or indirectly connect two or more
brain modules together;
Do not remove or replace the built-in battery;
please contact our after-sales service team for
repairs in the case of damage;
The charger is not a toy, only use the
charger recommended (the output voltage
recommended: DC 5V/2A);
Do not use while charging;
Do not rotate your ClicBot by force, when the
movement function is locked;
Do not touch the ClicBot while in movement;
When finished with the ClicBot, please recycle
it; do not discard it arbitrarily otherwise it might
pollute the environment;
This package contains important information,
please keep it.
Precautions
32

Contents 1. Introduction
ClicBot is an intelligent robot designed for
kids with built-in functions for education and
entertainment.
ClicBot is of unique modular design that is
easy to assemble and disassemble; it allows
the children to create all sorts of imaginative
robots as building bricks. ClicBot is more than
just a robot, a toy, or even a companion, but
additionally as a means of creative expression,
learning, and experiment. ClicBot is also
capable of over 200+ unique interactions.
With its big, blinking eyes, and sound module,
ClicBot is able to interact with you in a very
lively way. ClicBot can see, feel, hear, think,
communicate, and perform lots of actions.
Reaching out to pet its head, the ClicBot will
play cute towards you; when it is programmed
to recognize your face, it will greet you warmly.
If you block its way, it will take detours out of
curiosity. You can also program ClicBot to react
in specific ways, so you can be very creative with
your imaginations.
Through the ClicBot App there are a variety of
easy-to-use programmable tools, robotic design
setups, and features that allow you to share your
creations with the community. Build a racing
robot, a cute animal companion, a wall climbing
adventurer, a bionic explorer, and many other
exciting possibilities.
ClicBot is designed to help children shape the
future with STEAM learning. Through the app,
there are two creative functions that allows for
scripting programs in ClicBot, motion or ‘demo’
script, and drag & drop graphical programming.
Motion script means users only need to make&
save adjustments to ClicBot in order to play
back the entire routine in an easy and smooth
manner. For more intermediate and advanced
actions, users can use the drag & drop graphical
programming feature to create a wider variety of
amazing programs and actions.
To help guide children in reaching the full
potential of their ideas and creativity, the
makers of ClicBot will produce a series of
STEAM videos to better guide children on
how to build, program, and play with different
robotic creations. Additionally, you can share
your magical creations or search for inspiration
through the ClicBot App Community. Simply
upload your artworks, photos, code programs,
or robotic designs for others to download and try
for themselves! 54
5 Introduction
6Specification of Modules
6 Brain
7 Joint
8 Skeleton
9 Wheel
10 Mount
10 Locker
11 Holder
12 Smart Foot
13 Suction Cup
14 Distance Sensor
15 Grasper
16 Assembly
18 Battery Capacity and Charging
19 Connection
19 Internet Connection
19 Device Connection
21 Security and Privacy
21 Security Information
22 User Privacy
23 After-sales Service
24 FAQs
Contents Introduction

Dimension
Net Weight
Rated Motor Power
Max. Rotation Speed
Connector Light
55 mm (diameter)
73 g
2.64 W
216°/s
2 in each hemisphere
Specification of Modules Specification of Modules
Brain
The Brain is the master control and power supply unit of the ClicBot. It uses
an ARM-A7 processor and includes a rechargeable polymer lithium battery
with a capacity of 1550mAh. The eye of the ClicBot is a 2.1-inch rotational,
circular touch screen. It contains a camera & facial recognition software,
gesture sensors and camera optics can be found within the upper-left area
of the screen. There are three touch sensors located on the upper, left,
and right side of the Brain respectively, and two connectors are located
on the upper and bottom rear side. The Brain is integrated with a number
of the functional modules, and it includes an accelerometer, gyroscope,
microphone, loudspeaker, and
Wi-Fi
.
Joint
The Joint, which is the “joint” of the ClicBot, is used for integrated motion. It
functions with a high-precision servo system and uses a built-in DC geared
motor, and build-in angular rate/angle position sensors. There are four
connectors in total, two in each hemisphere. Each connector has a status
indicator which shows the connection and update status in relation to other
module pieces.
Status of Joint’s indicator
Connection Status
·Light On→Connected correctly
·Light flashing→Waiting for module
connection
·Light flashing quickly→Connection is
wrong
Update Status
·Light On→Successfully updated
·Light flashing→Currently updating
76
ON/OFF
BATTERY LIGHT
GESTURE
SENSOR
CAMERA &
FACE RECOGNITION
CAMERA LIGHT
TOUCH SENSORS
ON CASING
SCREEN
TYPE-C
MICROPHONE

Diameter of wheel
Net Weight
Rated Motor Power
Max. Rotation Speed
Connector
83.8 mm
140g
2.4 W
4.5 rounds per second
1
Dimension
Net Weight
Connector
37.8*37*120 mm
57 g
Top and bottom
Specification of Modules Specification of Modules
Skeleton
The Skeleton is the “bone” of the ClicBot, and is primarily used for building
limbs. There are two connectors at the top and bottom of the Skeleton, and
two strip status indicators located on the front, which show the connection
and update status in relation to other module pieces.
Wheel
The Wheel is a functional module used for vehicle setups. The Wheels
include a DC geared motor and a magnetic speed sensor, with a maximum
rotation speed of 4.5 rounds-per-second. There is a status indicator near
the main connector which shows the connection and update status in
relation to other module pieces.
Status of Skeleton’s indicator Status of Wheel’s indicator
Connection Status
·Light On→Connected correctly
·Light flashing→Waiting for module
connection
·Light flashing quickly→Connection is
wrong
Update Status
·Light On→Successfully updated
·Light flashing→Currently updating
The color of Skeleton’s indicator can
be changed in Drag & Drop program.
The color of Wheel’s indicator can be
changed in Drag & Drop program.
Connection Status
·Light On→Connected correctly
·Light flashing→Waiting for module
connection
·Light flashing quickly→Connection is
wrong
Update Status
·Light On→Successfully updated
·Light flashing→Currently updating
WheelSet Light strip colorNO.X
98
SkeletonSet Light strip colorNO.X

40*40*86.6 mm
55 g
Cardan joint on the bottom: 0° - 180°
Horizontal knob of the main part1:
-90° - 90°
bottom
Diameter
Net Weight
Adjustment of DOF
Connector
Dimension
Net Weight
47*36*14.4 mm
10g
Dimension
Net Weight
75.1*75.1*45.2 mm
61 g
Specification of Modules Specification of Modules
Mount
The Mount can be used to fix your ClicBot to a table with Mount Stickers.
Locker
The Locker is used to reinforce connections between two modules.
- Holder
The Holder can be used to connect a cellphone or sports camera to your
ClicBot with standard 1/4 screws.
Please use the Mount stickers provided by KEYi Tech to ensure the
product is fixed properly.
It can be used for connecting modules when additional reinforcements
are required.
1110
Connect Locker
between modules.
Rotate Locker. Rotate until
baseline is aligned
Step1 Step2 Step3

83.5*83.5*82.8 mm
145 g
In vertical direction: max.~20kg
In horizontal direction: max.~5kg
Top
Diameter
Net Weight
Adsorption
Capacity
Buckle Position
Diameter
Net Weight
Pressure Range
Connector
39.3*41.8*69.4 mm
41g
top
Specification of Modules Specification of Modules
Smart Foot
The Smart Foot is a functional sensor module that primarily serves as the
‘feet’ of the ClicBot. The Smart Foot includes a highly-sensitive pressure
sensor and a micro-processor to control and measure terminal pressure.
Suction Cup
The Suction Cup is a functional actuator module. The Suction Cup includes
a negative pressure pump and a solenoid valve. By utilizing a micro-
processor, it can control the air current and turn on/off the value, allowing
the ClicBot to perform climbing functions. It also uses the air pressure
sensor to proactively check the stability of the ClicBot’s movement.
Smart foot has an orange indicator. After connecting onto ClicBot, the
luminance of the indicator will automatically brighten when pressure
is increasing. The indicator can also indicate the connection status and
update status.
Suction Cup has a green strip indicator. The indicator light keeps breathing
when Suction Cup is functioning and stays on if the suction is successful.
The indicator can also indicate the connection status and update status.
Connection Status
·Light On→Connected correctly
·Light flashing→Waiting for module
connection
·Light flashing quickly→Connection is
wrong
Update Status
·Light On→Successfully updated
·Light flashing→Currently updating
Connection Status
·Light On→Connected correctly
·Light flashing→Waiting for module
connection
·Light flashing quickly→Connection is
wrong
Update Status
·Light On→Successfully updated
·Light flashing→Currently updating
1312
≤ 20 N

Dimension
Net Weight
Max. Grasping Weight
Max. Grasping Size
Buckle Position
75*57*165 mm
98 g
250 g
6 cm
Bottom
40*40*82 mm
53 g
2 - 100 cm
Cardan joint on the bottom: 0° - 180°
Horizontal knob of the main part:
-90° - 90°
Bottom
Diameter
Net Weight
Distance Dection
Range
Adjustment of DOF
Connector
Specification of Modules Specification of Modules
Distance Sensor
The Distance Sensor is a functional sensor module. It uses a high-precision
infrared probe and built-in micro-processor to control and measure the
distance from an obstacle.
Grasper
The Grasper is a functional actuator module. It is of a flexible bionic design
and is controlled by a built-in micro-processor. It is able to grasp objects of
various shapes and sizes.
Distance sensor has a red indicator. After connecting onto the ClicBot,
the luminance of indicator will automatically brighten when the distance
is shortening. The indicator can also indicate the connection status and
update status.
Grasper
has a yellow indicator which can also indicate the connection status
and update status.
Connection Status
·Light On→Connected correctly
·Light flashing→Waiting for module
connection
·Light flashing quickly→Connection is
wrong
Update Status
·Light On→Successfully updated
·Light flashing→Currently updating
Connection Status
·Light On→Connected correctly
·Light flashing→Waiting for module
connection
·Light flashing quickly→Connection is
wrong
Update Status
·Light On→Successfully updated
·Light flashing→Currently updating
1514

Assembly How to connect modules
All ClicBot modules can be connected to each other by connectors. A
connector contains an A-conn, a B-conn and golden “po-go” pins. You can
connect two modules by interlacing the A-conn and B-conn, and the golden
“po-go” pins transfer instruction and supply power.
Note:Align the A-conn of one module with the
B-conn of the other to connect two modules
Any two modules can be connected parallelly or non-parallelly.
Parallel Connection Non-Parallel Connection
A-conn
B-conn
Golden “po-go” pins
1716

Battery Capacity and Charging Connection
The battery status of the ClicBot is indicated by different colors on the Brain
Module power light. It can also be checked on the system menu.
When the power is low, an alert will be displayed on the screen. Please
charge the battery to ensure normal operations and to maintain battery
life.
QR code generated in ClicBot App Scan the QR code with Brain module Brain module in ClicBot App
Green→Full Power
Orange→Charging
Red→No Power
Battery Status
Internet Connection
The Brain module can connect to the internet via Wi-Fi, and you can find
updates for functions on the cloud server.
How to connect to the internet:
1. Open the ClicBot App, select “ Connect to Brain”.Then click “Set up
Brain’s Wi-Fi” and enter your Wi-Fi password. A QR code will be generated
after you click “Generate QR Code”;
2. Swipe upwards on the screen of the Brain to view the system menu, then
select the Network “ ” icon to start scanning;
3. Using the Brain to scan the QR code generated by the ClicBot App to
connect to the internet.
Device Connection
Brain can be connected to ClicBot App via router or hotspot.
It is suitable for remotely controlling setup by connecting to ClicBot App via
router via Wi-Fi.
How to connect to ClicBot App via router:
1. Connect Brain module and a device installed ClicBot App to the same
Wi-Fi;
2. Open the ClicBot App, select the “ Connect to Brain”. Then Select
“Connect” and select “Connect Brain via Wi-Fi”. The App will automatically
search for the Brain connected to the Wi-Fi Network. Choose Brain ID on
the screen, and click to connect between Brain and App.
1918

Connection Security and Privacy
Connection via hotspot is suitable when Wi-Fi is not available or the signal
is weak.
How to connect to ClicBot App via hotspot:
1. Swipe upwards on the screen of the Brain Module to view the system
menu, then select the Device icon , and click “Other connection methods”
to generate a QR code.
2. Open the ClicBot App, select “ Connect to Brain”. Click “Connect ” and
then select “Connect to Brain via hotspot” to start scanning.
3. Scan the QR code with your device to set up the connection.
Security Information
This device complies with part 15 of the
FCC Rules. Operation is subject to the
condition that this device does not cause
harmful interference (1) this device may
not cause harmful interference, and (2)
this device must accept any interference
received, including interference that may
cause undesired operation.
Any changes or modifications not
expressly approved by the party
responsible for compliance could void the
user's authority to operate the equipment.
NOTE:This equipment has been tested
and found to comply with the limits for
a Class B digital device, pursuant to
Part 15 of the FCC Rules. These limits
are designed to provide reasonable
protection against harmful interference in
a residential installation. This equipment
generates, uses and can radiate radio
frequency energy and, if not installed and
used in accordance with the instructions,
may cause harmful interference to radio
communications. However, there is no
guarantee that interference will not occur
in a particular installation
If this equipment does cause harmful
interference to radio or television
reception,which can be determined by
turning the equipment off and on, the
user is encouraged to try to correct
the interference by one or more of the
following measures:
--Reorient or relocate the receiving
antenna.
--Increase the separation between the
equipment and receiver.
--Connect the equipment into an outlet on
a circuit different from that to which the
receiver is connected.
--Consult the dealer or an experienced
radio/TV technician for help.
The device has been evaluated to meet
general RF exposure requirement. The
device can be used in portable exposure
condition without restriction.
FCC ID: 2AWR5-KY002
RSS-Gen Issue 4 December 2014"&"CNR-Gen 4e
Décembre 2014:
--English:
This device complies with Industry Canada licence-
exempt RSS standard(s).
Operation is subject to the following two conditions:
(1) This device may not cause interference, and (2)
This device must accept any interference, including
interference that may cause undesired operation of
the device.
--French:
Le présentappareilestconforme aux CNR d'Industrie
Canada applicables aux appareils radio exempts
de licence. L'exploitationestautorisée aux deux
conditions suivantes:
(1) l'appareil ne doit pas produire de brouillage, et
(2) l'utilisateur de l'appareildoit accepter tout
brouillageradioélectriquesubi, mêmesi le
brouillageest susceptible d'encompromettre le
fonctionnement.
IC : 26344-KY002
GB19865-2005、GB6675.1-2014、GB6675.2-2014、
GB6675.3-2014、GB6675.4-2014
The QR Code Generated
by Brain module
Scan the QR code to Set up the Connection
2120

Safety and Privacy After-Sales Service
User Privacy
We understand the importance of personal information security, and will
make every effort to protect the personal information of our users. We will
take all reasonable and practicable means to avoid collecting irrelevant
personal information. If it is necessary for us to do so, we will first obtain
your authorization to use your personal information and store this on a
local hard drive in accordance with relevant professional standards. Unless
absolutely necessary, we will only process your personal information on the
local hard drive, to avoid any unauthorized access, disclosure to the public,
usage, modification, damage or loss.
For specific privacy policies, please refer to the ClicBot App or visit www.
keyirobot.com.
In the event of any defect to your ClicBot modular robot product or its
accessories during use, we are committed to ensuring a 12-month
maintenance service free of charge for any electronic components from
the date of purchase, and a 6-month service for any materials or motors
from the date of purchase. This is in accordance with the User Manual, and
provided that any faulty workmanship can be confirmed by a test technician.
for after- sales services.
Please keep your receipt secure for after-sales services.
2322
Manufacturer's Name: Beijing Ke Yi Technology Co., Ltd.
Address: 8th Floor, Dimeng Building, Huayuan Road, Haidian District, Beijing
Product Name: ClicBot modular entertaining and educational toy
Trade Mark: ClicBot
Model number: KY002CK10
Operating Temperature: -10° C to 40° C
This device is in compliance with the essential requirements and other relevant provisions of Directive
2014/53/EU. All essential radio test suites have been carried out.
Detailed DOC file please visit our website: www.keyirobot.com.
The device complies with RF specifications when the device used at 20cm from your body.
Care for the environment! Must not be discarded with household waste.
RF Secification:
Function Operation Frequency Max RF output power: Limit
2.4G Wi-Fi 802.11b/g/
n(HT20,HT40)
802.11b/g/n(20MHz):
2412~2472MHz;802.11n(40MH
z):2422~2462MHz
11.96 dBm 20 dBm.

FAQs FAQs
How to turn on/off ClicBot?
Press and hold the power button on the rear side
of Brain for 3 seconds to turn on ClicBot.
Press the power button on the rear side of Brain
and then choose the shutdown option to turn off
ClicBot, or press and hold the power button for 7
seconds to get a force shutdown.
Does the ClicBot have to be connected to the
Internet, while operating?
No, but it needs to be connected to the Internet to
check for update.
Can ClicBot’s functions be updated ?
The ClicBot modules can be upgraded online.
Connect the Brain to Wi-Fi, swipe upwards to
enter the system menue and select update
functions to check/download new functions.
Connect other modules to Brain to automatically
start the update, follow the instructions on the
screen to upgrade modules.
What is the face recognition distance of the
Brain?
The camera for face detection & recognition is
located in the upper-left triangle area of the
screen on the Brain, and it can identify faces at a
distance of 1 m.
What is the rotation range of the screen on the
Brain?
The rotation range of the screen is up to 24
degree in the horizontal direction which can be
set up in the ClicBot App. Please do not rotate the
screen manually.
Why do the indicator lights of a module flash?
The indicator lights are used for indicating the
status of a module, mainly including:
Constant on - Operation normally
Flashing - Module assembly required
Blinking quickly - Assembly error
What is the programming language applicable
to the ClicBot?
Currently, ClicBot supports graphic
programming.
What are the editable modules applicable to
the ClicBot?
The ClicBot supports over 20 editable modules,
including the screen of the Brain, loudspeaker,
Joint, Wheel, and the color of the strip lights of
Skeleton.
How is a ClicBot Robot assembled?
The ClicBot is installed with a smart assembling
guidance system. After choosing which robot is
to be assembled, there will be a step-by-step
instruction shown on the screen of the Brain,
and the indicator light will flash as indication.
The system will automatically check whether all
the modules have been assembled correctly and
show alert message on the screen in case of any
error while the indicator light is blinking quickly.
And the system will automatically adjust the
angle of connection as long as the two modules
are correctly assembled.
What is the motion detection distance of the
Brain?
The camera for motion detection is located in
the upper-left triangle of the screen on the
Brain, and it can detect the movement at a
distance range between 1 and 5 m.
What is the purpose of the camera on the
Brain?
The Brain is equipped with a 2-megapixel
camera which is capable for controlling the
robot from the first-person point of view(under
development), face detection & recognition and
motion detection.
What is the recognition distance of gestures
like blocking, waving and etc. on the Brain?
The gesture sensor is located in the upper-left
triangle area of the screen of the Brain. Please
keep your hand at a distance of 5-20 cm for
blocking and waving, etc.
What is the obstacle detection distance range
of the Brain?
The gesture sensor is located in the upper-left
triangle area of the screen of Brain Module, and
it can detect the obstacle at a distance between 5
and 20 cm in front of the robots.
Does the ClicBot Robot have to be used with
the ClicBot App?
No, it can be controlled manually with the screen
on the Brain.
What is the maximum distance of remote
control with ClicBot App
It depends on the connection mode of the robot to
the ClicBot App:
·Via router, it is up to 10m which may be different
due to the performance of router.
·Via hotspot, it is up to 5m.
Why is the ClicBot shut down automatically?
To maintain the battery and motor performance,
ClicBot will be shut down automatically in the
following situation:
1.It hasn’t been operated for over 20 minutes;
2.Battery capacity is below 10%.
How long does it take for the ClicBot to be fully
charged and how long can it run continuously?
It takes 3 hours with a 5V/2A charger to have it
fully charged, and it can run continuously up to 4
hours.
2524

简体中文
ClicBot App 安装
在 App Store 或安卓应用商店搜索 ClicBot 下载安装,
或扫描二维码下载安装 ClicBot App。
ClicBot App 支持 iOS 10.0,安卓5.0 及以上系统
版本。
使用建议
你可以从《快速入门》了解 ClicBot的快速使用,并认
识ClicBot 星球中的3个机器人角色。《用户手册》中
详细介绍ClicBot 的产品信息,包括模块规格、拼接使
用、连接设置、电池充电、安全隐私、售后服务与常见
问题解答。
使用注意
1.内含小零件,不适合3岁以下儿童使用;
2.玩具包含精密零件,请避免从高处摔落;
3.玩具不防火,请勿靠近火源;
4.玩具不防水,请保持干燥避免淋湿或放入水中;
5.请勿用金属直接接触玩具的金色连接触点;
6.请勿将多个主脑模块直接或间接拼接在一起;
7.内置电池,不可拆卸或更换,如损坏应联系售后
进行维修;
8.充电器不是玩具,玩具只能使用推荐的充电器
(推荐使用规格:输出DC 5V/2A);
9.充电时不建议继续使用玩具;
10.玩具运动锁定时请勿强行用力转动;
11.玩具运动过程中请勿用手触碰;
12.随意丢弃此玩具,可能会对环境造成影响,请
妥善回收处理;
13.此包装内含重要信息,请保留。
注意事项
2726

29 产品简介
30 模块规格
30 主脑模块Brain
31 驱动球模块Joint
32 延长杆模块Skeleton
33 车轮模块Wheel
34 基座配件Mount
34 加固配件Locker
35 固定配件Holder
36 行走足底Smart Foot
37 吸盘Suction Cup
38 测距模块Distance Sensor
39 机械手Grasper
40 模块拼接
42 电量与充电
43 连接
43 网络连接
43 设备连接
45 安全隐私
45 安全信息
46 用户隐私
47 售后维修
48 常见问题
目录 产品简介
目录 产品简介
ClicBot 是一款为孩子设计的具有娱乐与教育功能的智能机器人玩具。
ClicBot 采用易拼拆的模块化设计,让孩子能够像使用拼接积木一样简单地
去创造各种有趣的机器人。ClicBot 机器人像是孩子们的小伙伴,它眨巴着
大眼睛,好奇地观察着周围。它还能和你互动,如果发现认出了你,它会热
情地打招呼 ;你伸手抚摸它的头,它会对你撒娇卖萌 ;当你挡在它面前,它
会好奇地左右躲闪 ...... 在 ClicBot App 中还提供了各种功能和应用的机器
人,有疾驰的赛车机器人、可爱的动物机器人、炫酷的攀爬机器人、仿生的
行走机器人等等,满足孩子对机器人的所有想象。
ClicBot 更能带孩子动手去创造未来。ClicBot App 有运动脚本编辑和图形
化编程两种创造工具。借助运动脚本编程,孩子只需要动手调整保存机器人
姿态,就能实现流畅的机器人动作 ;结合图形化编程,孩子按照指令顺序拖
拽图形化程序模块,就能完成机器人的智能程序应用。为帮助孩子更好地
实现想法和创造,ClicBot 还将制作 STEAM 课程系列视频,引导孩子学习
了解机器人运动、AI 编程等知识。孩子还可以把自己创造的机器人上传到
ClicBot App 的社区,和更多人分享,收获满足和成就感。
2928

主脑模块 Brain
主脑模块Brain是ClicBot机器人的控制与供电中心。主脑模块采用
ARM-A7 架构处理器,内置有 1550mAh 可充电锂聚合物电池。正面 2.1”
可转动的圆形触控屏幕正是 ClicBot 机器人的大眼睛。屏幕的左上区域包含视
觉传感器、手势传感器以及摄像头工作指示灯。主脑模块有 3 个表面电容触
控区,分别位于上侧、左侧及右侧;2 个拼接卡扣分位于背面上、下侧。主脑
模块同时还集成了加速度传感器与陀螺仪、麦克风、扬声器、Wi-Fi 模组等功
能单元。
模块规格
开关机键
电源指示灯
手势传感
摄像头
摄像头指示灯
触摸传感
屏幕
TYPE-C
麦克风
驱动球模块 Joint
驱动球模块 Joint 是 ClicBot 机器人的“关节”,用于驱动机器人驱动。
驱动球模块是一个高精度的伺服系统,内置直流减速电机、角速度传感器与角
位置等传感器。驱动球模块共有 4 个拼接卡扣,每个半球各 2 个,每个拼接
卡扣设计有环形指示灯,可以通过不同灯效提示拼接引导与更新功能的状态。
模块规格
拼接状态功能
·常亮→拼接正常
·闪烁→待拼接模块
·快速闪烁→拼接错误
更新功能
·常亮→更新完成
·闪烁→待更新模块
驱动球模块的环形指示灯状态说明
3130

拼接状态功能
·常亮→拼接正常
·闪烁→待拼接模块
·快速闪烁→拼接错误
更新功能
·常亮→更新完成
·闪烁→待更新模块
模块规格
延长杆模块 Skeleton
延长杆模块 Skeleton 是 ClicBot 机器人的“骨骼”,用于拼接机器人的身体
四肢。延长杆模块有 2 个拼接卡扣,位于上、下两端。延长杆模块正面有两
端条形指示灯,通过不同灯效提示两端卡扣拼接引导和模块更新功能的状态。
延长杆模块的条形指示灯状态说明
车轮模块 Wheel
车轮模块 Wheel 是 ClicBot 机器人的执行功能模块。用于车类机器人的拼接。
车轮模块内置直流减速电机与磁角速度位置传感器,最大转速 4.5 圈每秒。车
轮模块的卡扣附近设计有条形指示灯,可以通过不同灯效提示拼接引导与更新
功能的状态。
模块规格
拼接状态功能
·常亮→拼接正常
·闪烁→待拼接模块
·快速闪烁→拼接错误
更新功能
·常亮→更新完成
·闪烁→待更新模块
车轮模块的条形指示灯状态说明
图形化编程可以设置 Wheel 的条形
指示灯的颜色。
图形化编程可以设置 Skeleton 的
条形指示灯的颜色。
Wheel 灯带颜色编号
Skeleton 灯带颜色编号
3332

模块规格
基座配件 Mount
基座配件用于将 ClicBot 机器人通过基座胶粘贴固定在桌面上。
为确保粘贴固定效果,请使用官方提供的基座胶。
加固配件 Locker
加固配件可用于加强模块间的拼接强度。
固定配件 Holder
固定配件顶部有 1/4 标准螺丝,可以将手机、运动相机等拼接在 ClicBot 机器
人上。
模块规格
当机器人某一拼接位置处受力较大容易断开时,可使用加固配件加固。
将加固配件拼接在
模块中间
旋转加固配件 旋转至锁定基准线
对齐
第1步 第2步 第3步
3534

模块规格
行走足底 Smart Foot
行走足底是 ClicBot 的感知功能模块,可以作为机器人的足底。行走足底内置
高灵敏度的压力传感器,并采用微运算处理器控制检测末端的压力大小。
* 行走足底可以感知到压力信息,作为仿生类形态的末端模块,可以让
ClicBot 走得更稳,适应各种地形。
吸盘 Suction Cup
吸盘是 ClicBot 的执行功能模块。吸盘内置负压气泵与电磁阀,通过位运算
处理器控制气泵吸气放气与电磁阀开关状态,让 ClicBot 机器人实现攀爬等
应用。吸盘内部还嵌入气压传感器,能够主动检测是否吸附牢固。
模块规格
行走足底上部有橙色的条形指示灯。拼接在 ClicBot 机器人上,行走足底的指
示灯亮度默认会根据检测压力变大而变亮。行走足底的条形指示灯还可以通过
不同灯效提示拼接引导和更新功能的状态。
拼接状态功能
·常亮→拼接正常
·闪烁→待拼接模块
·快速闪烁→拼接错误
更新功能
·常亮→更新完成
·闪烁→待更新模块
拼接状态功能
·常亮→拼接正常
·闪烁→待拼接模块
·快速闪烁→拼接错误
更新功能
·常亮→更新完成
·闪烁→待更新模块
吸盘模块有绿色的条形指示灯。当吸盘开始吸附时,指示灯会显示呼吸灯效;
当吸盘吸附牢固,指示灯会显示常亮灯效。吸盘模块的条形指示灯还可以通
过不同灯效变化提示拼接引导与更新功能的状态。
3736
* 请避免对施加超过检测范围的
压力,否则可能损坏模块的压力
检测功能。
20
Table of contents
Languages:
