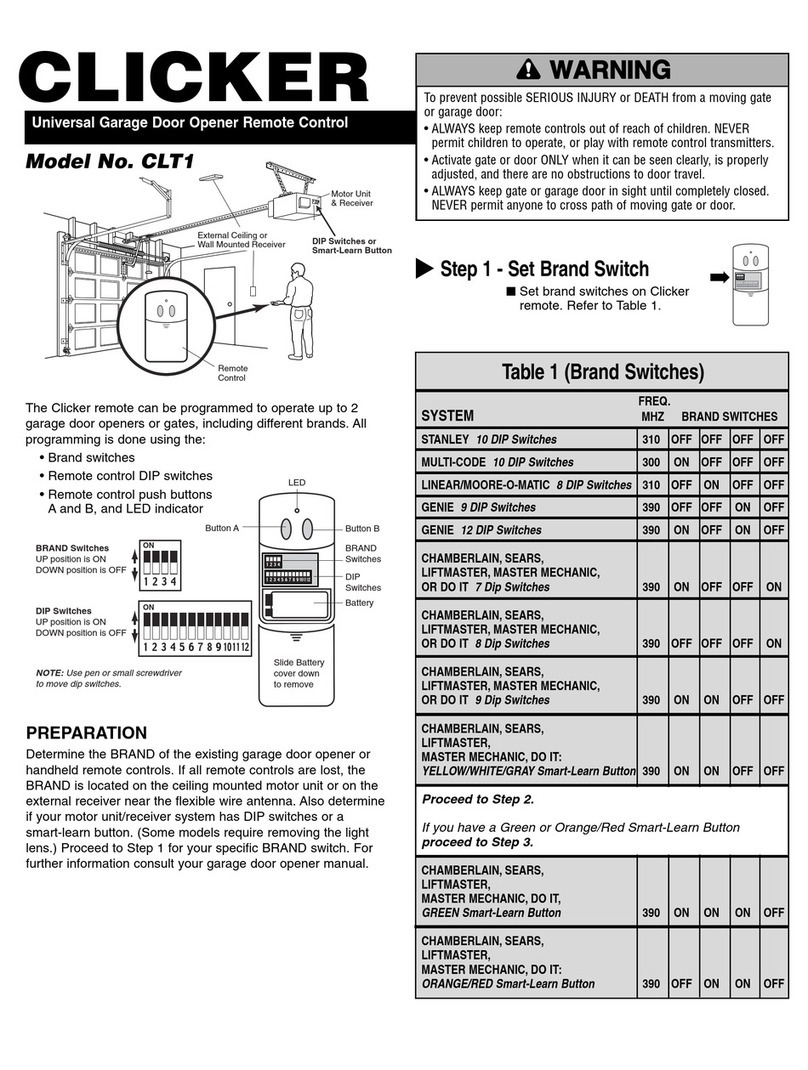
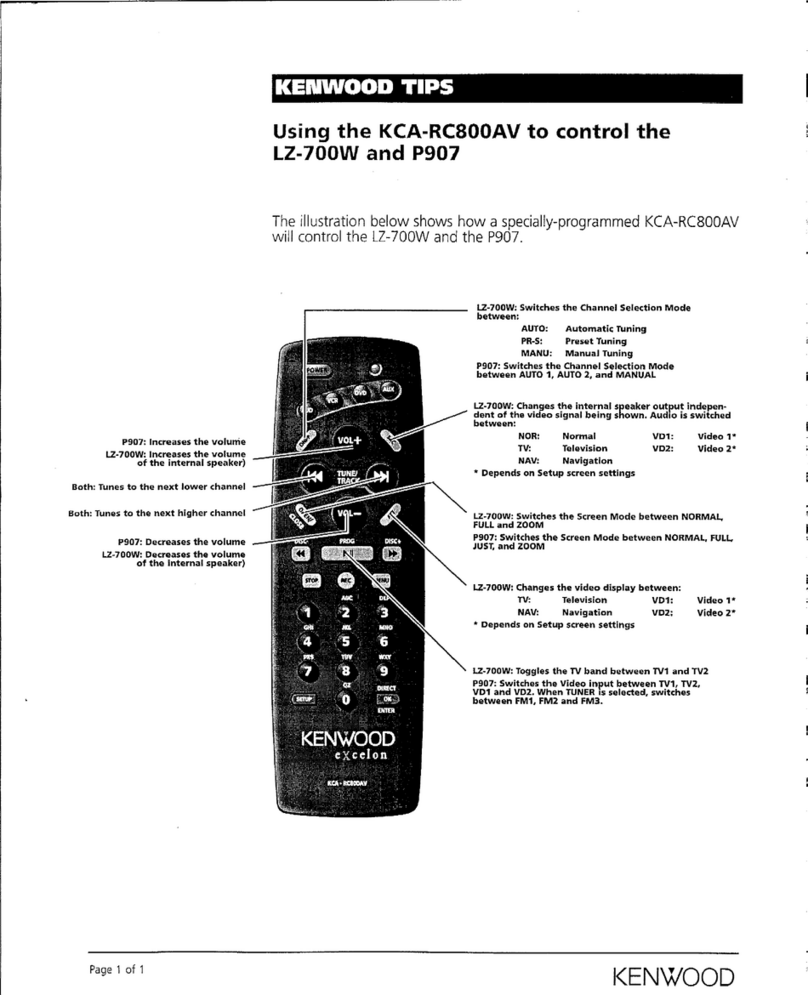
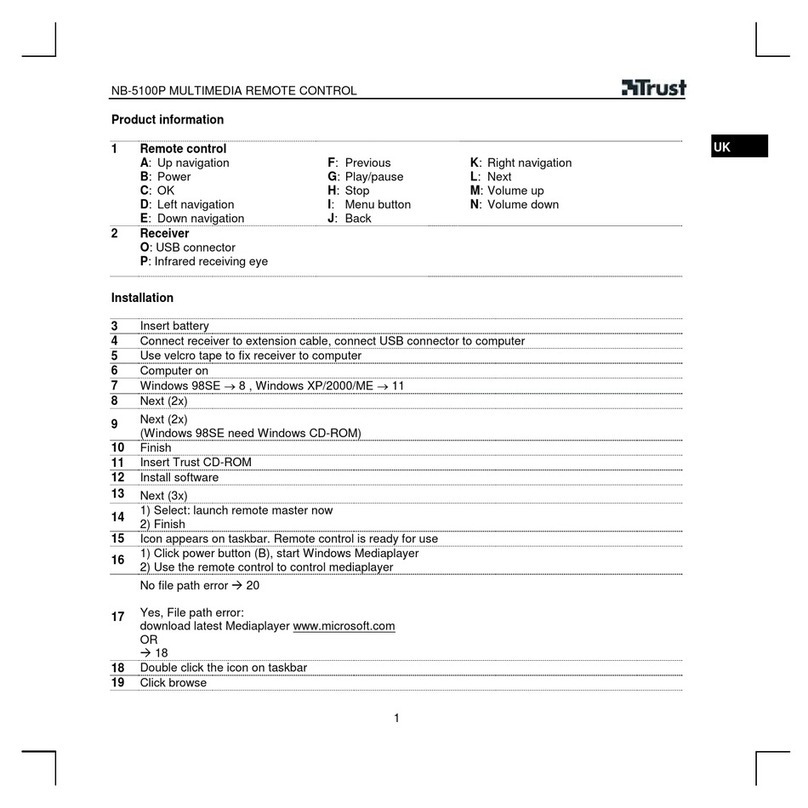
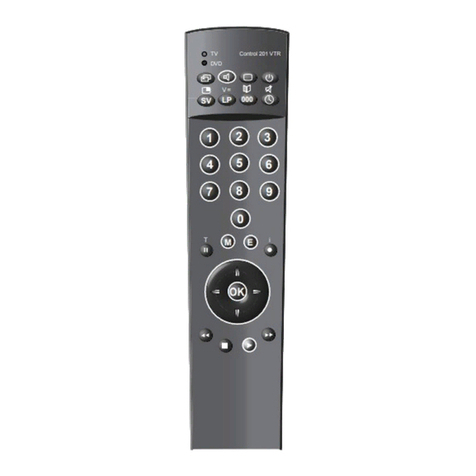
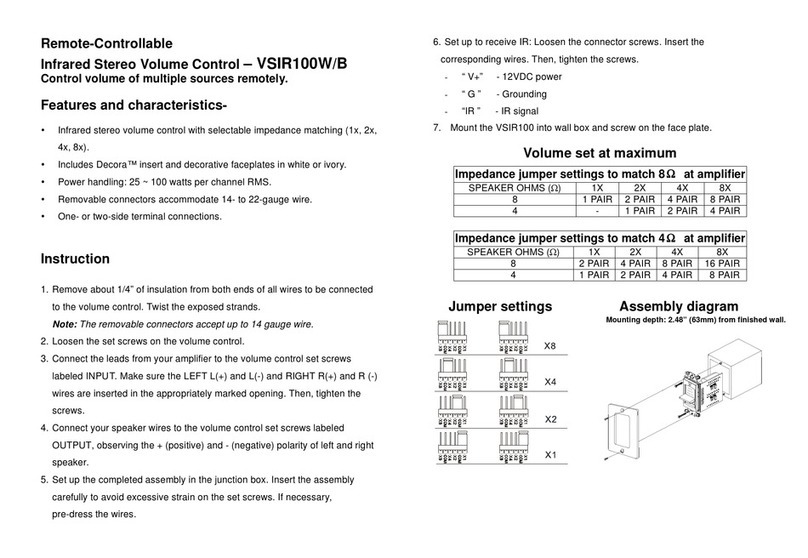
Clicker 321 User manual

3 Linear, Moore-O-Matic
Locate your systems code switch positions from an original hand held remote or the motor unit receiver. If the
switch is "on" or "up", place a 1 in the corresponding box in the TABLE below.If the switch is "off" or "down",
place a 3 in the corresponding box in the TABLE below.
PROGRAMMING
Before you begin to program the Clicker, select which button you want to use to operate
your garage door opener. After completing a step, you have 15 seconds to proceed to the
next step.
Step 1: Press the 1st and 3rd buttons down simultaneously and hold until the red indicator
starts to blink. Release both buttons. Wait for the red indicator to stop blinking.
Step 2: Press the button you want to operate your garage door opener 3 times. Wait for the red indicator to
blink the same number of times.
Step 3: Using the code switch sequence from the table above, press and release the button that corresponds
with the number in each column until the entire code has been entered into the Clicker. Immediately after the
code is entered, the indicator light will blink 3 times.
Programming is complete. To test press the button you selected to activate the garage door.
If programming is unsuccessful, reverse code from TABLE above.(Change 1 to 3; 3 to 1) Repeat Steps 1-3 above.
Note: To program additional doors, proceed to appropriate section using another button in step 2.
4 Chamberlain, LiftMaster, Sears,
Master Mechanic, and DoIt
Determine if your system has code switches or a smart-learn button. If your system has code switches they
can be found in an original hand held remote or on the receiver. The receiver can be mounted on the back
panel of the motor unit or could be mounted on the wall. If you have code switches proceed to Section A.
Note: Systems that have a yellow, white, or gray smart-learn button will have code switches in the original
hand held remote. If original hand held remotes are not available, proceed to Section B.
If your hand held remotes do not contain codes switches your system will have a smart-learn button.
Proceed to Section B. (Remember, the receiver has a flexible wire antenna attached to it).
SECTION A –CODE SWITCH SYSTEMS
If the switch is in the plus (+) position place a 1, neutral (0) position place a 2, negative (-) position place a 3 in
the corresponding box in the table below.
Exception: If your original hand held remote has 3 buttons and you are using the small button on left, place a
1; center button, place a 2; large button place a 3 in box 1 in the table below. Boxes 2 through 9, place number
that corresponds with switch position.
PROGRAMMING
Before you begin programming the Clicker, select which button you want to use to operate
your garage door opener. After completing a step, you have 15 seconds to proceed to the
next step.
Step 1: Press the 1st and 3rd buttons down simultaneously and hold until the red indicator
starts to blink. Release both buttons. Wait for the red indicator to stop blinking.
Step 2: Press the button you want to use to operate your garage door opener 4 times. Wait for the red
indicator to blink the same number of times.
Step 3: Using the code switch sequence from the table above, press and release the button that corresponds
with the number in each column until the entire code has been entered into the Clicker. Immediately after the
code is entered, the indicator light will blink 4 times.
Programming is complete. To test press the button you selected to activate the garage door.
If programming is unsuccessful, check to be sure the code from TABLE match’s switch positions from
your system. Repeat Steps 1-3 above.
Note: To program additional doors, proceed to appropriate section using another button in step 2.
CLICKER 321
©2001, Clicker Corporation
114A2356C All Rights Reserved Printed in Mexico
SECTION B - SYSTEMS WITH SMART-LEARN BUTTON
Locate your SMART-LEARN BUTTON on your system. It will be located on the side or
back panel of the motor unit.
Note: If your SMART-LEARN BUTTON is RED your system is NOT COMPATIBLE
with the Clicker 321. You have a system with rotating codes.
Choose a random 9-digit code. Your code may only consist of numbers
1,2 or 3. Example: 122313213. Fill in the TABLE below entering any combination
of 1,2 and 3.
PROGRAMMING
Before you begin programming the Clicker, select which button you
want to operate your garage door opener. After
completing a step, you have 15 seconds to proceed
to the next step.
Step 1: Press the 1st and 3rd buttons down simultaneously and hold until the red
indicator starts to blink. Release both buttons. Wait for the red indicator to stop
blinking.
Step 2: Press the button you want to use to operate your garage door opener 4 times.
Wait for the red indicator to blink the same number of times.
Step 3: Using the random 9-digit code from table above, press and release the button that
corresponds with the number in each column until the entire code has been entered into
the Clicker. Immediately after the code is entered, the indicator light will
blink 4 times.
Step 4: Press and release smart-learn button on motor unit. (Indicator light next to the smart-learn button
should turn on.) Press and hold the Clicker button you selected until the motor unit lights blink. Iflight bulbs
are not installed, two clicks will be heard.
Programming is complete. To test press the button you selected to activate the garage door. If programming is
unsuccessful, repeat Steps 1 – 4 above.
Note: To program additional doors, proceed to the appropriate section using another button in step 2.
5 Genie (9 Code Switches) • 6 Genie (12 Code Switches)
Locate your systems code switch positions from an original hand held remote or the motor unit receiver.
If the switch is "on" or "up", place a 1 in the corresponding box in the TABLE below. If the switch is "off"
or "down", place a 3 in the corresponding box in the TABLE below.
PROGRAMMING
Before you begin programming the Clicker, select which button you want to
operate your garage door opener. After completing a step, you have 15 seconds
to proceed to the next step.
Step 1: Press the 1st and 3rd buttons down simultaneously and hold until the red indicator
starts to blink. Release both buttons. Wait for the red indicator to stop blinking.
Step 2: Press the button you want to operate your garage door opener: Genie (9 code
switches) press the button 5 times; Genie (12 code switches) press the button 6 times. Wait
for the red indicator to blink the same number of times.
Step 3: Using the code switch sequence from the table above, press and release the button that corresponds
with the number in each column until the entire code has been entered into the Clicker. Immediately after the
code is entered, the indicator light will blink (five times for Genie 9 code switches; six times for Genie 12 code
switches).
Programming is complete. To test press the button you selected to activate the garage door.
If programming is unsuccessful, reverse code from TABLE above. (Change 1 to 3; 3 to 1).
Repeat Steps 1-3 above.
Note: To program additional doors, proceed to appropriate section using another button in step 2.
BATTERY REPLACEMENT
The lithium batteries supplied with your Clicker should last 3 to 5 years under normal use of 6 operations per
day. If you experience continued short range, intermittent operation, or a reduced glow of the red indicator
light, replace the batteries. To Replace batteries: Pry open the Clicker using a flat head screwdriver. Remove
the screw from the center of the circuit board and carefully lift out board. Remove plastic battery shield and
batteries. Insert new batteries, replace battery shield and circuit board and close the Clicker case.
Note: Be sure to position the metal strip underneath the batteries.
Your Clicker remote can be programmed to operate
with different brands of garage door openers.
Compatible with most garage door opener systems
manufactured by Chamberlain, Genie, LiftMaster,
Linear, Master Mechanic, Moore-O-Matic, Multi-
Code, Sears, Stanley, and DoIt.
THE CLICKER IS NOT COMPATIBLE WITH GENIE
INTELLICODE, STANLEY SECURE CODE, OR
SECURITY✚GARAGE DOOR OPENER SYSTEMS.
The Clicker remote can be programmed to operate
up to 3 garage door openers or gates, including
different brands. All programming is done using the
3 buttons on the Clicker.
IDENTIFY YOUR GARAGE DOOR OPENER BRAND
Determine your brand from an original hand held remote or locate the motor unit receiver.
The receiver can be mounted on the back panel of the motor unit or could be mounted on the wall.
SECTION BRAND
1 Stanley
2 Multi-Code
3 Linear, Moore-O-Matic
4 Chamberlain, LiftMaster, Sears,
Master Mechanic, DoIt
5 Genie (9 Code Switches)
6 Genie (12 Code Switches)
1 Stanley • 2 Multi-Code
Locate your systems code switch positions from an original hand held remote or the motor unit receiver.
If the switch is "on" or "up", place a 1 in the corresponding box in the TABLE below. If the switch is "off" or "down",
place a 3 in the corresponding box in the TABLE below.
PROGRAMMING
Before you begin programming the Clicker, select which button you want to operate
your garage door opener. After completing a step, you have 15 seconds to proceed
to the next step.
Step 1: Press the 1st and 3rd buttons down simultaneously and hold until the red
indicator starts to blink. Release both buttons. Wait for the red indicator to
stop blinking.
Step 2: Press the button you want to operate your garage door opener: Stanley press the button 1 time; Multi-Code
press the button 2 times. Wait for the red indicator to blink the same number of times.
Step 3: Using the code switch sequence from the table above, press and release the button that corresponds with
the number in each column until the entire code has been entered into the Clicker. Immediately after the code is
entered, the indicator light will blink (once for Stanley; twice for Multi-Code).
Programming is complete. To test press the button you selected to activate the garage door.
If programming is unsuccessful, reverse code from TABLE above.
(Change 1 to 3; 3 to 1) Stanley brands – try as Multi-Code.
Multi-Code brands – try as Stanley Repeat Steps 1-3 above.
Note: To program additional doors, proceed to appropriate section using another button in step 2.
LOCK
LIGHT
Motor
Unit &
Receiver
Wall Mounted
Control
Remote Control
Step 1
Step 2
Step 3
12345678910
CODE SWITCH SEQUENCE
ON/UP
OFF/DOWN
Circle your
Brand and
proceed to the
appropriate
section.
Step 1
Step 2
Step 3
12345678
CODE SWITCH SEQUENCE
ON/UP
OFF/DOWN
123456789
CODE SWITCH SEQUENCE
✚
0
–Step 1
Step 2
Step 3
KG KG
1
3
9
7
5
1
3
9
7
5
123
"Smart" (learn)
Button
Indicator Light
123456789101112
CODE SWITCH SEQUENCE
ON/UP
OFF/DOWN
Step 1
Step 2
Step 3
Step 1
Step 2
Step 3
123456789
CODE SWITCH SEQUENCE
WARNING
CAUTION WARNING
WARNING
To prevent possible SERIOUS INJURY or DEATH from a moving gate or garage door:
• ALWAYS keep remote controls out of reach of children. NEVER permit children to operate, or play with
remote control transmitters.
• Activate gate or door ONLY when it can be seen clearly, is properly adjusted, and there are no
obstructions to door travel.
• ALWAYS keep gate or garage door in sight until completely closed. Never permit anyone to cross path of
moving gate or door.
NOTICE: To comply with FCC and or Industry Canada rules, adjustment or modifications of this receiver and/or transmitter are prohibited,
except for changing the code setting or replacing the battery. THERE ARE NO OTHER USER SERVICEABLE PARTS.
Tested to Comply with FCC Standards FOR HOME OR OFFICE USE. Operation is subject to the following two conditions: (1) this device
may not cause harmful interference, and (2) this device must accept any interference received, including interference that may cause
undesired operation.
TECHNICAL SUPPORT: 800-442-1255 (MONDAY-FRIDAY 6AM-7PM CST; SATURDAY 8AM-6PM)
Chamberlain, LiftMaster and Moore-O-Matic are Trademarks of Chamberlain Group. Genie is a Trademark of Overhead Door
Corporation. Linear and Multi-Code are Trademarks of Linear Corporation. Master Mechanic is a Trademark of TruServ. Sears is
a Trademark of Sears & Roebuck. Stanley is a Trademark of The Stanley Works. DoIt is a trademark of DoIt Best Corporation.

3 Linear, Moore-O-Matic
Locate your systems code switch positions from an original hand held remote or the motor unit receiver. If the
switch is "on" or "up", place a 1 in the corresponding box in the TABLE below.If the switch is "off" or "down",
place a 3 in the corresponding box in the TABLE below.
PROGRAMMING
Before you begin to program the Clicker, select which button you want to use to operate
your garage door opener. After completing a step, you have 15 seconds to proceed to the
next step.
Step 1: Press the 1st and 3rd buttons down simultaneously and hold until the red indicator
starts to blink. Release both buttons. Wait for the red indicator to stop blinking.
Step 2: Press the button you want to operate your garage door opener 3 times. Wait for the red indicator to
blink the same number of times.
Step 3: Using the code switch sequence from the table above, press and release the button that corresponds
with the number in each column until the entire code has been entered into the Clicker. Immediately after the
code is entered, the indicator light will blink 3 times.
Programming is complete. To test press the button you selected to activate the garage door.
If programming is unsuccessful, reverse code from TABLE above.(Change 1 to 3; 3 to 1) Repeat Steps 1-3 above.
Note: To program additional doors, proceed to appropriate section using another button in step 2.
4 Chamberlain, LiftMaster, Sears,
Master Mechanic, and DoIt
Determine if your system has code switches or a smart-learn button. If your system has code switches they
can be found in an original hand held remote or on the receiver. The receiver can be mounted on the back
panel of the motor unit or could be mounted on the wall. If you have code switches proceed to Section A.
Note: Systems that have a yellow, white, or gray smart-learn button will have code switches in the original
hand held remote. If original hand held remotes are not available, proceed to Section B.
If your hand held remotes do not contain codes switches your system will have a smart-learn button.
Proceed to Section B. (Remember, the receiver has a flexible wire antenna attached to it).
SECTION A –CODE SWITCH SYSTEMS
If the switch is in the plus (+) position place a 1, neutral (0) position place a 2, negative (-) position place a 3 in
the corresponding box in the table below.
Exception: If your original hand held remote has 3 buttons and you are using the small button on left, place a
1; center button, place a 2; large button place a 3 in box 1 in the table below. Boxes 2 through 9, place number
that corresponds with switch position.
PROGRAMMING
Before you begin programming the Clicker, select which button you want to use to operate
your garage door opener. After completing a step, you have 15 seconds to proceed to the
next step.
Step 1: Press the 1st and 3rd buttons down simultaneously and hold until the red indicator
starts to blink. Release both buttons. Wait for the red indicator to stop blinking.
Step 2: Press the button you want to use to operate your garage door opener 4 times. Wait for the red
indicator to blink the same number of times.
Step 3: Using the code switch sequence from the table above, press and release the button that corresponds
with the number in each column until the entire code has been entered into the Clicker. Immediately after the
code is entered, the indicator light will blink 4 times.
Programming is complete. To test press the button you selected to activate the garage door.
If programming is unsuccessful, check to be sure the code from TABLE match’s switch positions from
your system. Repeat Steps 1-3 above.
Note: To program additional doors, proceed to appropriate section using another button in step 2.
CLICKER 321
©2001, Clicker Corporation
114A2356C All Rights Reserved Printed in Mexico
SECTION B - SYSTEMS WITH SMART-LEARN BUTTON
Locate your SMART-LEARN BUTTON on your system. It will be located on the side or
back panel of the motor unit.
Note: If your SMART-LEARN BUTTON is RED your system is NOT COMPATIBLE
with the Clicker 321. You have a system with rotating codes.
Choose a random 9-digit code. Your code may only consist of numbers
1,2 or 3. Example: 122313213. Fill in the TABLE below entering any combination
of 1,2 and 3.
PROGRAMMING
Before you begin programming the Clicker, select which button you
want to operate your garage door opener. After
completing a step, you have 15 seconds to proceed
to the next step.
Step 1: Press the 1st and 3rd buttons down simultaneously and hold until the red
indicator starts to blink. Release both buttons. Wait for the red indicator to stop
blinking.
Step 2: Press the button you want to use to operate your garage door opener 4 times.
Wait for the red indicator to blink the same number of times.
Step 3: Using the random 9-digit code from table above, press and release the button that
corresponds with the number in each column until the entire code has been entered into
the Clicker. Immediately after the code is entered, the indicator light will
blink 4 times.
Step 4: Press and release smart-learn button on motor unit. (Indicator light next to the smart-learn button
should turn on.) Press and hold the Clicker button you selected until the motor unit lights blink. Iflight bulbs
are not installed, two clicks will be heard.
Programming is complete. To test press the button you selected to activate the garage door. If programming is
unsuccessful, repeat Steps 1 – 4 above.
Note: To program additional doors, proceed to the appropriate section using another button in step 2.
5 Genie (9 Code Switches) • 6 Genie (12 Code Switches)
Locate your systems code switch positions from an original hand held remote or the motor unit receiver.
If the switch is "on" or "up", place a 1 in the corresponding box in the TABLE below. If the switch is "off"
or "down", place a 3 in the corresponding box in the TABLE below.
PROGRAMMING
Before you begin programming the Clicker, select which button you want to
operate your garage door opener. After completing a step, you have 15 seconds
to proceed to the next step.
Step 1: Press the 1st and 3rd buttons down simultaneously and hold until the red indicator
starts to blink. Release both buttons. Wait for the red indicator to stop blinking.
Step 2: Press the button you want to operate your garage door opener: Genie (9 code
switches) press the button 5 times; Genie (12 code switches) press the button 6 times. Wait
for the red indicator to blink the same number of times.
Step 3: Using the code switch sequence from the table above, press and release the button that corresponds
with the number in each column until the entire code has been entered into the Clicker. Immediately after the
code is entered, the indicator light will blink (five times for Genie 9 code switches; six times for Genie 12 code
switches).
Programming is complete. To test press the button you selected to activate the garage door.
If programming is unsuccessful, reverse code from TABLE above. (Change 1 to 3; 3 to 1).
Repeat Steps 1-3 above.
Note: To program additional doors, proceed to appropriate section using another button in step 2.
BATTERY REPLACEMENT
The lithium batteries supplied with your Clicker should last 3 to 5 years under normal use of 6 operations per
day. If you experience continued short range, intermittent operation, or a reduced glow of the red indicator
light, replace the batteries. To Replace batteries: Pry open the Clicker using a flat head screwdriver. Remove
the screw from the center of the circuit board and carefully lift out board. Remove plastic battery shield and
batteries. Insert new batteries, replace battery shield and circuit board and close the Clicker case.
Note: Be sure to position the metal strip underneath the batteries.
Your Clicker remote can be programmed to operate
with different brands of garage door openers.
Compatible with most garage door opener systems
manufactured by Chamberlain, Genie, LiftMaster,
Linear, Master Mechanic, Moore-O-Matic, Multi-
Code, Sears, Stanley, and DoIt.
THE CLICKER IS NOT COMPATIBLE WITH GENIE
INTELLICODE, STANLEY SECURE CODE, OR
SECURITY✚GARAGE DOOR OPENER SYSTEMS.
The Clicker remote can be programmed to operate
up to 3 garage door openers or gates, including
different brands. All programming is done using the
3 buttons on the Clicker.
IDENTIFY YOUR GARAGE DOOR OPENER BRAND
Determine your brand from an original hand held remote or locate the motor unit receiver.
The receiver can be mounted on the back panel of the motor unit or could be mounted on the wall.
SECTION BRAND
1 Stanley
2 Multi-Code
3 Linear, Moore-O-Matic
4 Chamberlain, LiftMaster, Sears,
Master Mechanic, DoIt
5 Genie (9 Code Switches)
6 Genie (12 Code Switches)
1 Stanley • 2 Multi-Code
Locate your systems code switch positions from an original hand held remote or the motor unit receiver.
If the switch is "on" or "up", place a 1 in the corresponding box in the TABLE below. If the switch is "off" or "down",
place a 3 in the corresponding box in the TABLE below.
PROGRAMMING
Before you begin programming the Clicker, select which button you want to operate
your garage door opener. After completing a step, you have 15 seconds to proceed
to the next step.
Step 1: Press the 1st and 3rd buttons down simultaneously and hold until the red
indicator starts to blink. Release both buttons. Wait for the red indicator to
stop blinking.
Step 2: Press the button you want to operate your garage door opener: Stanley press the button 1 time; Multi-Code
press the button 2 times. Wait for the red indicator to blink the same number of times.
Step 3: Using the code switch sequence from the table above, press and release the button that corresponds with
the number in each column until the entire code has been entered into the Clicker. Immediately after the code is
entered, the indicator light will blink (once for Stanley; twice for Multi-Code).
Programming is complete. To test press the button you selected to activate the garage door.
If programming is unsuccessful, reverse code from TABLE above.
(Change 1 to 3; 3 to 1) Stanley brands – try as Multi-Code.
Multi-Code brands – try as Stanley Repeat Steps 1-3 above.
Note: To program additional doors, proceed to appropriate section using another button in step 2.
LOCK
LIGHT
Motor
Unit &
Receiver
Wall Mounted
Control
Remote Control
Step 1
Step 2
Step 3
12345678910
CODE SWITCH SEQUENCE
ON/UP
OFF/DOWN
Circle your
Brand and
proceed to the
appropriate
section.
Step 1
Step 2
Step 3
12345678
CODE SWITCH SEQUENCE
ON/UP
OFF/DOWN
123456789
CODE SWITCH SEQUENCE
✚
0
–Step 1
Step 2
Step 3
KG KG
1
3
9
7
5
1
3
9
7
5
123
"Smart" (learn)
Button
Indicator Light
123456789101112
CODE SWITCH SEQUENCE
ON/UP
OFF/DOWN
Step 1
Step 2
Step 3
Step 1
Step 2
Step 3
123456789
CODE SWITCH SEQUENCE
WARNING
CAUTION WARNING
WARNING
To prevent possible SERIOUS INJURY or DEATH from a moving gate or garage door:
• ALWAYS keep remote controls out of reach of children. NEVER permit children to operate, or play with
remote control transmitters.
• Activate gate or door ONLY when it can be seen clearly, is properly adjusted, and there are no
obstructions to door travel.
• ALWAYS keep gate or garage door in sight until completely closed. Never permit anyone to cross path of
moving gate or door.
NOTICE: To comply with FCC and or Industry Canada rules, adjustment or modifications of this receiver and/or transmitter are prohibited,
except for changing the code setting or replacing the battery. THERE ARE NO OTHER USER SERVICEABLE PARTS.
Tested to Comply with FCC Standards FOR HOME OR OFFICE USE. Operation is subject to the following two conditions: (1) this device
may not cause harmful interference, and (2) this device must accept any interference received, including interference that may cause
undesired operation.
TECHNICAL SUPPORT: 800-442-1255 (MONDAY-FRIDAY 6AM-7PM CST; SATURDAY 8AM-6PM)
Chamberlain, LiftMaster and Moore-O-Matic are Trademarks of Chamberlain Group. Genie is a Trademark of Overhead Door
Corporation. Linear and Multi-Code are Trademarks of Linear Corporation. Master Mechanic is a Trademark of TruServ. Sears is
a Trademark of Sears & Roebuck. Stanley is a Trademark of The Stanley Works. DoIt is a trademark of DoIt Best Corporation.

3 Linear, Moore-O-Matic
Locate your systems code switch positions from an original hand held remote or the motor unit receiver. If the
switch is "on" or "up", place a 1 in the corresponding box in the TABLE below.If the switch is "off" or "down",
place a 3 in the corresponding box in the TABLE below.
PROGRAMMING
Before you begin to program the Clicker, select which button you want to use to operate
your garage door opener. After completing a step, you have 15 seconds to proceed to the
next step.
Step 1: Press the 1st and 3rd buttons down simultaneously and hold until the red indicator
starts to blink. Release both buttons. Wait for the red indicator to stop blinking.
Step 2: Press the button you want to operate your garage door opener 3 times. Wait for the red indicator to
blink the same number of times.
Step 3: Using the code switch sequence from the table above, press and release the button that corresponds
with the number in each column until the entire code has been entered into the Clicker. Immediately after the
code is entered, the indicator light will blink 3 times.
Programming is complete. To test press the button you selected to activate the garage door.
If programming is unsuccessful, reverse code from TABLE above.(Change 1 to 3; 3 to 1) Repeat Steps 1-3 above.
Note: To program additional doors, proceed to appropriate section using another button in step 2.
4 Chamberlain, LiftMaster, Sears,
Master Mechanic, and DoIt
Determine if your system has code switches or a smart-learn button. If your system has code switches they
can be found in an original hand held remote or on the receiver. The receiver can be mounted on the back
panel of the motor unit or could be mounted on the wall. If you have code switches proceed to Section A.
Note: Systems that have a yellow, white, or gray smart-learn button will have code switches in the original
hand held remote. If original hand held remotes are not available, proceed to Section B.
If your hand held remotes do not contain codes switches your system will have a smart-learn button.
Proceed to Section B. (Remember, the receiver has a flexible wire antenna attached to it).
SECTION A –CODE SWITCH SYSTEMS
If the switch is in the plus (+) position place a 1, neutral (0) position place a 2, negative (-) position place a 3 in
the corresponding box in the table below.
Exception: If your original hand held remote has 3 buttons and you are using the small button on left, place a
1; center button, place a 2; large button place a 3 in box 1 in the table below. Boxes 2 through 9, place number
that corresponds with switch position.
PROGRAMMING
Before you begin programming the Clicker, select which button you want to use to operate
your garage door opener. After completing a step, you have 15 seconds to proceed to the
next step.
Step 1: Press the 1st and 3rd buttons down simultaneously and hold until the red indicator
starts to blink. Release both buttons. Wait for the red indicator to stop blinking.
Step 2: Press the button you want to use to operate your garage door opener 4 times. Wait for the red
indicator to blink the same number of times.
Step 3: Using the code switch sequence from the table above, press and release the button that corresponds
with the number in each column until the entire code has been entered into the Clicker. Immediately after the
code is entered, the indicator light will blink 4 times.
Programming is complete. To test press the button you selected to activate the garage door.
If programming is unsuccessful, check to be sure the code from TABLE match’s switch positions from
your system. Repeat Steps 1-3 above.
Note: To program additional doors, proceed to appropriate section using another button in step 2.
CLICKER 321
©2001, Clicker Corporation
114A2356C All Rights Reserved Printed in Mexico
SECTION B - SYSTEMS WITH SMART-LEARN BUTTON
Locate your SMART-LEARN BUTTON on your system. It will be located on the side or
back panel of the motor unit.
Note: If your SMART-LEARN BUTTON is RED your system is NOT COMPATIBLE
with the Clicker 321. You have a system with rotating codes.
Choose a random 9-digit code. Your code may only consist of numbers
1,2 or 3. Example: 122313213. Fill in the TABLE below entering any combination
of 1,2 and 3.
PROGRAMMING
Before you begin programming the Clicker, select which button you
want to operate your garage door opener. After
completing a step, you have 15 seconds to proceed
to the next step.
Step 1: Press the 1st and 3rd buttons down simultaneously and hold until the red
indicator starts to blink. Release both buttons. Wait for the red indicator to stop
blinking.
Step 2: Press the button you want to use to operate your garage door opener 4 times.
Wait for the red indicator to blink the same number of times.
Step 3: Using the random 9-digit code from table above, press and release the button that
corresponds with the number in each column until the entire code has been entered into
the Clicker. Immediately after the code is entered, the indicator light will
blink 4 times.
Step 4: Press and release smart-learn button on motor unit. (Indicator light next to the smart-learn button
should turn on.) Press and hold the Clicker button you selected until the motor unit lights blink. Iflight bulbs
are not installed, two clicks will be heard.
Programming is complete. To test press the button you selected to activate the garage door. If programming is
unsuccessful, repeat Steps 1 – 4 above.
Note: To program additional doors, proceed to the appropriate section using another button in step 2.
5 Genie (9 Code Switches) • 6 Genie (12 Code Switches)
Locate your systems code switch positions from an original hand held remote or the motor unit receiver.
If the switch is "on" or "up", place a 1 in the corresponding box in the TABLE below. If the switch is "off"
or "down", place a 3 in the corresponding box in the TABLE below.
PROGRAMMING
Before you begin programming the Clicker, select which button you want to
operate your garage door opener. After completing a step, you have 15 seconds
to proceed to the next step.
Step 1: Press the 1st and 3rd buttons down simultaneously and hold until the red indicator
starts to blink. Release both buttons. Wait for the red indicator to stop blinking.
Step 2: Press the button you want to operate your garage door opener: Genie (9 code
switches) press the button 5 times; Genie (12 code switches) press the button 6 times. Wait
for the red indicator to blink the same number of times.
Step 3: Using the code switch sequence from the table above, press and release the button that corresponds
with the number in each column until the entire code has been entered into the Clicker. Immediately after the
code is entered, the indicator light will blink (five times for Genie 9 code switches; six times for Genie 12 code
switches).
Programming is complete. To test press the button you selected to activate the garage door.
If programming is unsuccessful, reverse code from TABLE above. (Change 1 to 3; 3 to 1).
Repeat Steps 1-3 above.
Note: To program additional doors, proceed to appropriate section using another button in step 2.
BATTERY REPLACEMENT
The lithium batteries supplied with your Clicker should last 3 to 5 years under normal use of 6 operations per
day. If you experience continued short range, intermittent operation, or a reduced glow of the red indicator
light, replace the batteries. To Replace batteries: Pry open the Clicker using a flat head screwdriver. Remove
the screw from the center of the circuit board and carefully lift out board. Remove plastic battery shield and
batteries. Insert new batteries, replace battery shield and circuit board and close the Clicker case.
Note: Be sure to position the metal strip underneath the batteries.
Your Clicker remote can be programmed to operate
with different brands of garage door openers.
Compatible with most garage door opener systems
manufactured by Chamberlain, Genie, LiftMaster,
Linear, Master Mechanic, Moore-O-Matic, Multi-
Code, Sears, Stanley, and DoIt.
THE CLICKER IS NOT COMPATIBLE WITH GENIE
INTELLICODE, STANLEY SECURE CODE, OR
SECURITY✚GARAGE DOOR OPENER SYSTEMS.
The Clicker remote can be programmed to operate
up to 3 garage door openers or gates, including
different brands. All programming is done using the
3 buttons on the Clicker.
IDENTIFY YOUR GARAGE DOOR OPENER BRAND
Determine your brand from an original hand held remote or locate the motor unit receiver.
The receiver can be mounted on the back panel of the motor unit or could be mounted on the wall.
SECTION BRAND
1 Stanley
2 Multi-Code
3 Linear, Moore-O-Matic
4 Chamberlain, LiftMaster, Sears,
Master Mechanic, DoIt
5 Genie (9 Code Switches)
6 Genie (12 Code Switches)
1 Stanley • 2 Multi-Code
Locate your systems code switch positions from an original hand held remote or the motor unit receiver.
If the switch is "on" or "up", place a 1 in the corresponding box in the TABLE below. If the switch is "off" or "down",
place a 3 in the corresponding box in the TABLE below.
PROGRAMMING
Before you begin programming the Clicker, select which button you want to operate
your garage door opener. After completing a step, you have 15 seconds to proceed
to the next step.
Step 1: Press the 1st and 3rd buttons down simultaneously and hold until the red
indicator starts to blink. Release both buttons. Wait for the red indicator to
stop blinking.
Step 2: Press the button you want to operate your garage door opener: Stanley press the button 1 time; Multi-Code
press the button 2 times. Wait for the red indicator to blink the same number of times.
Step 3: Using the code switch sequence from the table above, press and release the button that corresponds with
the number in each column until the entire code has been entered into the Clicker. Immediately after the code is
entered, the indicator light will blink (once for Stanley; twice for Multi-Code).
Programming is complete. To test press the button you selected to activate the garage door.
If programming is unsuccessful, reverse code from TABLE above.
(Change 1 to 3; 3 to 1) Stanley brands – try as Multi-Code.
Multi-Code brands – try as Stanley Repeat Steps 1-3 above.
Note: To program additional doors, proceed to appropriate section using another button in step 2.
LOCK
LIGHT
Motor
Unit &
Receiver
Wall Mounted
Control
Remote Control
Step 1
Step 2
Step 3
12345678910
CODE SWITCH SEQUENCE
ON/UP
OFF/DOWN
Circle your
Brand and
proceed to the
appropriate
section.
Step 1
Step 2
Step 3
12345678
CODE SWITCH SEQUENCE
ON/UP
OFF/DOWN
123456789
CODE SWITCH SEQUENCE
✚
0
–Step 1
Step 2
Step 3
KG KG
1
3
9
7
5
1
3
9
7
5
123
"Smart" (learn)
Button
Indicator Light
123456789101112
CODE SWITCH SEQUENCE
ON/UP
OFF/DOWN
Step 1
Step 2
Step 3
Step 1
Step 2
Step 3
123456789
CODE SWITCH SEQUENCE
WARNING
CAUTION WARNING
WARNING
To prevent possible SERIOUS INJURY or DEATH from a moving gate or garage door:
• ALWAYS keep remote controls out of reach of children. NEVER permit children to operate, or play with
remote control transmitters.
• Activate gate or door ONLY when it can be seen clearly, is properly adjusted, and there are no
obstructions to door travel.
• ALWAYS keep gate or garage door in sight until completely closed. Never permit anyone to cross path of
moving gate or door.
NOTICE: To comply with FCC and or Industry Canada rules, adjustment or modifications of this receiver and/or transmitter are prohibited,
except for changing the code setting or replacing the battery. THERE ARE NO OTHER USER SERVICEABLE PARTS.
Tested to Comply with FCC Standards FOR HOME OR OFFICE USE. Operation is subject to the following two conditions: (1) this device
may not cause harmful interference, and (2) this device must accept any interference received, including interference that may cause
undesired operation.
TECHNICAL SUPPORT: 800-442-1255 (MONDAY-FRIDAY 6AM-7PM CST; SATURDAY 8AM-6PM)
Chamberlain, LiftMaster and Moore-O-Matic are Trademarks of Chamberlain Group. Genie is a Trademark of Overhead Door
Corporation. Linear and Multi-Code are Trademarks of Linear Corporation. Master Mechanic is a Trademark of TruServ. Sears is
a Trademark of Sears & Roebuck. Stanley is a Trademark of The Stanley Works. DoIt is a trademark of DoIt Best Corporation.

CLICKER 321
©2001, Clicker Corporation
114A2356C Todos los derechos reservados Impreso en México
3 Linear, Moore-O-Matic
Localice las posiciones de los códigos del interruptor de su sistema en el control remoto manual original o en el receptor de la
unidad del motor. Si el interruptor está encendido (‘on’ o hacia arriba), anote un 1 en el cuadro correspondiente en la TABLA
que aparece a continuación. Si el interruptor está apagado (‘off’ o hacia abajo), anote un 3 en el cuadro
correspondiente en la TABLA que aparece a continuación.
PROGRAMACIÓN
Antes de empezar a programar el Clicker, seleccione el botón que desee usar para operar su abridor de
puerta de cochera. Una vez terminado cada paso, tiene 15 segundos para proceder al paso siguiente.
Paso 1: Oprima el primer y el tercer botón al mismo tiempo y manténgalos oprimidos hasta que la luz
del indicador rojo empiece a parpadear. Suelte los dos botones. Espere a que la luz del indicador rojo
deje de parpadear.
Paso 2: Oprima 3 veces el botón que desee usar para operar su abridor de puerta de cochera. Espere a que la
luz del indicador rojo parpadee el mismo número de veces.
Paso 3: Utilizando la secuencia del código del interruptor de la tabla que aparece arriba, oprima y suelte el botón que
corresponda al número anotado en cada columna, hasta que haya ingresado todo el código al Clicker. Inmediatamente después
de ingresar el código, la luz del indicador parpadeará 3 veces.
La programación está terminada. Para hacer una prueba, oprima el botón que haya seleccionado para activar la puerta
de cochera.
Si la programación no funciona debidamente, invierta el código de la TABLA que aparece arriba. (Cambie 1 a 3 ó 3 a 1).
Repita los pasos 1 a 3 que aparecen arriba.
Nota: Para programar otras puertas, proceda a la sección respectiva usando un botón distinto para el paso 2.
4 Chamberlain, LiftMaster, Sears,
Master Mechanic y DoIt
Determine si su sistema tiene interruptores de código o un botón inteligente (Smart-learn). Si su sistema tiene interruptores de
código, puede encontrarlos en el control remoto manual original, o bien en el receptor. El receptor puede estar montado en el
panel posterior de la unidad del motor o en la pared. Si tiene interruptores de código proceda a la Sección A.
Nota: Los sistemas que tienen un botón inteligente (Smart-learn) amarillo, blanco o gris tienen interruptores de código en el
control remoto manual original. Si no tiene los controles remotos manuales originales, proceda a la Sección B.
Si sus controles remotos manuales no tienen interruptores de código, su sistema debe tener un botón inteligente (Smart-learn).
Proceda a la Sección B. (Recuerde que el receptor tiene una antena flexible unida a él).
SECCIÓN A - SISTEMAS DE INTERRUPTOR DE CÓDIGO
Si el interruptor está en la posición ‘más’ (+) ponga un 1, si está en la posición neutral (0) ponga un 2, si está en la posición
negativa (-) ponga un 3 en el cuadro correspondiente de la tabla que aparece a continuación.
Excepción: Si su control remoto manual original tiene 3 botones y usted está usando el botón pequeño de la izquierda, ponga
un 1; si está usando el botón central ponga un 2; si estó usando el botón grande ponga un 3 en el cuadro 1 de la tabla que
aparece a continuación. En los cuadros del 2 al 9 ponga el número que corresponda a la posición del interruptor.
PROGRAMACIÓN
Antes de empezar a programar el Clicker, seleccione el botón que desee usar para operar su abridor de
puerta de cochera. Una vez terminado cada paso, tiene 15 segundos para proceder al paso siguiente.
Paso 1: Oprima el primer y el tercer botón al mismo tiempo y manténgalos oprimidos hasta que la luz
del indicador rojo empiece a parpadear. Suelte los dos botones. Espere a que la luz del indicador rojo
deje de parpadear.
Paso 2: Oprima 4 veces el botón que desee usar para operar su abridor de puerta de cochera. Espere a que la
luz del indicador rojo parpadee el mismo número de veces.
Paso 3: Utilizando la secuencia del código del interruptor de la tabla que aparece arriba, oprima y suelte el botón que
corresponda al número anotado en cada columna hasta que haya ingresado todo el código al Clicker. Inmediatamente después
de ingresar el código, la luz del indicador parpadeará 4 veces.
La programación está terminada. Para hacer una prueba, oprima el botón que haya seleccionado para activar la puerta de
cochera.
Si la programación no funciona debidamente, revise para cerciorarse de que el código de la TABLA coincida con las posiciones
del interruptor de su sistema. Repita los pasos 1 a 3 que aparecen arriba.
Nota: Para programar otras puertas, proceda a la sección respectiva usando un botón distinto para el paso 2.
SECCIÓN B - SISTEMAS CON BOTÓN INTELIGENTE (SMART-LEARN)
Localice su Botón inteligente (Smart-Learn) en el sistema. Puede estar ubicado en el panel
lateral o en el panel posterior de la unidad del motor.
Nota: Si su BOTÓN INTELIGENTE SMART-LEARN es ROJO, su sistema NO ES COMPATIBLE
con el Clicker 321. Usted tiene un sistema con códigos rotativos.
Escoja un código de 9 dígitos al azar. Su código puede consistir en los números 1, 2 ó 3
solamente. Por ejemplo: 122313213. Anote en la TABLA que aparece a continuación los
números elegidos en cualquier combinación de 1, 2 y 3.
PROGRAMACIÓN
Antes de empezar a programar el Clicker, seleccione el
botón que desee usar para operar su abridor de puerta de
cochera. Una vez terminado cada paso, tiene 15 segundos
para proceder al paso siguiente.
Paso 1: Oprima el primer y el tercer botón al mismo tiempo y manténgalos oprimidos hasta
que la luz del indicador rojo empiece a parpadear. Suelte los dos botones. Espere a que la luz
del indicador rojo deje de parpadear.
Paso 2: Oprima 4 veces el botón que desee usar para operar su abridor de puerta de cochera.
Espere a que la luz del indicador rojo parpadee el mismo número de veces.
Paso 3: Utilizando el código de 9 dígitos que eligió al azar, oprima y suelte el botón correspondiente al
número que aparezca en cada columna de la tabla, hasta que haya ingresado todo el código al Clicker.
Inmediatamente después de ingresar el código, la luz del indicador parpadea 4 veces.
Paso 4: Oprima y suelte el botón inteligente (Smart-Learn) en la unidad del motor. (La luz del indicador que se
encuentra junto al botón inteligente se deberá encender). Oprima y mantenga oprimido el botón del Clicker que
haya elegido hasta que las luces de la unidad del motor parpadeen. Si aún no ha instalado los focos, va a escuchar dos
chasquidos.
La programación está terminada. Para hacer una prueba, oprima el botón que haya seleccionado para activar la puerta de
cochera.
Si la programación no funciona debidamente, repita los pasos 1 al 4 que aparecen arriba.
Nota: Para programar otras puertas, proceda a la sección respectiva usando un botón distinto para el paso 2.
5 Genie (Interruptores de 9 códigos)
6 Genie (Interruptores de 12 códigos)
Localice las posiciones de los códigos del interruptor de su sistema en el control remoto manual original o en el receptor de la
unidad del motor. Si el interruptor está encendido (‘on’ o hacia arriba), anote un 1 en el cuadro correspondiente en la TABLA
que aparece a continuación. Si el interruptor está apagado (‘off’ o hacia abajo), anote un 3 en el cuadro correspondiente en la
TABLA que aparece a continuación.
PROGRAMACIÓN
Antes de empezar a programar el Clicker, seleccione el botón que desee usar para operar su
abridor de puerta de cochera. Una vez terminado cada paso, tiene 15 segundos para proceder
al paso siguiente.
Paso 1: Oprima el primer y el tercer botón al mismo tiempo y manténgalos oprimidos hasta
que la luz del indicador rojo empiece a parpadear. Suelte los dos botones. Espere a que la luz del
indicador rojo deje de parpadear.
Paso 2: Oprima el botón que desee usar para operar su abridor de puerta de cochera: Para los
interruptores Genie de 9 códigos oprima el botón 5 veces; para los interruptores Genie de 12 códigos
oprima el botón 6 veces. Espere a que la luz del indicador rojo parpadee el mismo número de veces.
Paso 3: Utilizando la secuencia del código del interruptor de la tabla que aparece arriba, oprima y suelte el
botón que corresponda al número anotado en cada columna, hasta que haya ingresado todo el código al Clicker.
Inmediatamente después de ingresar el código, la luz del indicador parpadea (cinco veces para los interruptores Genie de 9
códigos; seis veces para los interruptores Genie de 12 códigos).
La programación está terminada. Para hacer una prueba, oprima el botón que haya seleccionado para activar la puerta de
cochera.
Si la programación no funciona debidamente, invierta el código de la TABLA que aparece arriba. (Cambie 1 a 3 ó 3 a 1). Repita
los pasos 1 al 3 que aparecen arriba.
Nota: Para programar otras puertas, proceda a la sección respectiva usando un botón distinto para el paso 2.
CAMBIO DE PILAS
Las pilas de litio que vienen con el Clicker le deben durar de 3 a 5 años en condiciones de uso normales, usando el abridor 6
veces al día. Si observa con frecuencia que el alcance del control remoto es corto, la operación es intermitente, o bien la luz
del indicador rojo está baja, es el momento de cambiar las pilas. Para cambiar las pilas: Abra el Clicker con la ayuda de un
destornillador de cabeza plana. Saque el tornillo del centro del tablero de circuitos y levante el tablero con cuidado para sacarlo.
Quite el protector plástico de las pilas y saque las pilas. Ponga las pilas nuevas, vuelva a colocar el protector plástico y el
tablero de circuitos, y cierre el Clicker.
Nota: Necessita posición la faja de metal abajo de las pilas.
Es posible programar su control remoto Clicker para que
funcione con distintas marcas de abridores de puertas de
cochera.
Es compatible con la mayoría de los sistemas para abrir
puertas de cochera fabricados por Chamberlain, Genie,
LiftMaster, Linear, Master Mechanic, Moore-O-Matic, Multi-
Code, Sears, Stanley y Dolt.
EL CLICKER NO ES COMPATIBLE CON LOS SIGUENTES
SISTEMAS DE ABRIDORES DE PUERTA DE COCHERA:
GENIE INTELLICODE, STANLEY SECURE CODE Y
SECURITY✚.
El control remoto Clicker se puede programar para que
funcione hasta con 3 abridores de puerta de cochera o con
portones, incluyendo distintas marcas. Toda la programación
se hace utilizando los 3 botones del Clicker.
IDENTIFIQUE LA MARCA DE SU ABRIDOR DE PUERTA DE COCHERA
Determine la marca en el control remoto manual original, o bien localice el receptor de la unidad del motor.
El receptor puede estar montado en el panel posterior de la unidad del motor, o bien podría estar montado en la pared.
SECCIONES MARCAS
1 Stanley
2 Multi-Code
3 Linear, Moore-O-Matic
4 Chamberlain, LiftMaster, Sears,
Master Mechanic, DoIt
5 Genie (interruptores de 9 códigos)
6 Genie (interruptores de 12 códigos)
1 Stanley • 2 Multi-Code
Localice las posiciones de los códigos del interruptor de su sistema en el control remoto manual original o en el receptor de la
unidad del motor. Si el interruptor está encendido (‘on’ o hacia arriba), anote un 1 en el cuadro correspondiente en la TABLA que
aparece a continuación. Si el interruptor está apagado (‘off’ o hacia abajo), anote un 3 en el cuadro correspondiente en la TABLA
que aparece a continuación.
PROGRAMACIÓN
Antes de empezar a programar el Clicker, seleccione el botón que desee usar para operar su
abridor de puerta de cochera. Una vez terminado cada paso, tiene 15 segundos para proceder al
paso siguiente.
Paso 1: Oprima el primer y el tercer botón al mismo tiempo y manténgalos oprimidos hasta que
la luz del indicador rojo empiece a parpadear. Suelte los dos botones. Espere a que la luz del
indicador rojo deje de parpadear.
Paso 2: Oprima el botón que desee usar para operar su abridor de puerta de cochera: Para el Stanley oprima
el botón una vez; para el Multi-Code oprima el botón dos veces. Espere a que la luz del indicador rojo parpadee el
mismo número de veces.
Paso 3: Utilizando la secuencia del código del interruptor de la tabla que aparece arriba, oprima y suelte el botón que corresponda
al número anotado en cada columna, hasta que haya ingresado todo el código al Clicker. Inmediatamente después de ingresar el
código, la luz del indicador parpadea (una vez para el Stanley y dos veces para el Multi-Code).
La programación está terminada. Para hacer una prueba, oprima el botón que haya seleccionado para activar la puerta de cochera.
Si la programación no funciona debidamente, invierta el código de la TABLA que aparece arriba. (Cambie 1 a 3 ó 3 a 1) Para las
marcas Stanley, intente como Multi-Code. Para las marcas Multi-Code, intente como Stanley. Repita los pasos 1 a 3 que aparecen
arriba.
Nota: Para programar otras puertas, proceda a la sección respectiva usando un botón distinto para el paso 2.
LOCK
LIGHT
Receptor y
unidad del motor
Control montado
en la pared
Control remoto
Secuencia del código del interruptor
Encendido/ hacia arriba (On/up)
Apagado/ hacia abajo (Off/down)
Señale la marca
correspondiente
con un círculo y
proceda a la
sección
correspondiente.
Paso 1
Paso 2
Paso 3
123456789
Secuencia del código del interruptor
✚
0
–Paso 1
Paso 2
Paso 3
KG KG
1
3
9
7
5
1
3
9
7
5
123
Botón inteligente
'Smart-learn'
Luz indicadora
123456789101112
Paso 1
Paso 2
Paso 3
Paso 1
Paso 2
Paso 3
123456789
Secuencia del código del interruptor
PRECAUCI N
ADVERTENCIA
ADVERTENCIA
ADVERTENCIA
AVISO: Con objeto de cumplir con el reglamento de FCC, está prohibido hacer ajustes o modificaciones a este receptor y/o transmisor, a
excepción del cambio de los códigos o de poner baterías nuevas. NO HAY OTRAS PIEZAS A LAS QUE EL USUARIO PUEDA DAR
SERVICIO.
Se ha probado para dar cumplimiento a las normas de FCC. PARA USO DOMÉSTICO O DE OFICINA. La operación está sujeta a las dos
condiciones siguientes: (1) este dispositivo puede causar interferencia nociva, y (2) este dispositivo debe aceptar cualquier interferencia
que reciba, incluyendo aquella interferencia que pueda ocasionar una operación no deseada.
SOPORTE TÉCNICO: 800-442-1255 (LUNES A VIERNES DE LAS 6:00 AM A LAS 7:00 PM
HUSO HORARIO CENTRAL; SÁBADOS DE LAS 8:00 AM A LAS 6:00 PM)
Chamberlain, LiftMaster y Moore -O- Matic son marcas registradas del Grupo Chamberlain. Genie es una marca registrada de Overhead Door
Corporation. Linear y Multi-Code son marcas registradas de Linear Corporation. Master Mechanic es una marca registrada de TruServ. Sears es una
marca registrada de Sears & Roebuck, Stanley es una marca registrada de The Stanley Works. Dolt es una marca registrada de Dolt Best Corporation.
Paso 1
Paso 2
Paso 3
12345678
Secuencia del código del interruptor
Encendido/ hacia arriba (On/up)
Apagado/ hacia abajo (Off/down)
Secuencia del código del interruptor
Encendido/ hacia arriba (On/up)
Apagado/ hacia abajo (Off/down)
12345678910
Para evitar posibles LESIONES GRAVES e incluso la MUERTE con el movimiento del portón o la puerta de cochera:
• SIEMPRE conserve los controles remotos donde los niños no los alcancen. NUNCA deje que los niños usen ni jueguen con
los transmisores de control remoto.
• Active el portón o la puerta SÓLO si puede verlos claramente, si están bien ajustados, y si no hay ninguna obstrucción en
su trayectoria.
• SIEMPRE conserve el portón o la puerta de cochera a la vista hasta que esté completamente cerrada. Nunca permita que
nadie cruce la trayectoria de una puerta o portón en movimiento.
Table of contents
Languages:
Other Clicker Remote Control manuals
Clicker
Clicker CLT1CD User manual
Clicker
Clicker CLT1 User manual
Clicker
Clicker KLIK1U User manual
Clicker
Clicker C-01v.2CB User guide
Clicker
Clicker CLT1 User manual
Clicker
Clicker CLT1D User manual

Clicker
Clicker CLT1C User manual

Clicker
Clicker KLIK1U User manual
Clicker
Clicker KLIK1C User manual
Clicker
Clicker Klik2U User manual
Popular Remote Control manuals by other brands
Miranda
Miranda RCP-100 Guide to installation and operation
Regency Fireplace Products
Regency Fireplace Products Onyx Remote Control manual
Linak
Linak Homeline HC40 Advanced Series user manual
Sony
Sony RM-NX7000 Navitus operating instructions
VENOM
VENOM Smart Temp Fail Safe Instructions
Pinnacle
Pinnacle PCTV quick start guide
