NOTICE: To comply with FCC and or Industry Canada (IC) rules, adjustment or modifications of this receiver
and/or transmitter are prohibited, except for changing the code setting or replacing the battery. THERE ARE NO
OTHER USER SERVICEABLE PARTS.
Tested to Comply with FCC Standards FOR HOME OR OFFICE USE. Operation is subject to the following two
conditions: (1) this device may not cause harmful interference, and (2) this device must accept any interference
received, including interference that may cause undesired operation.
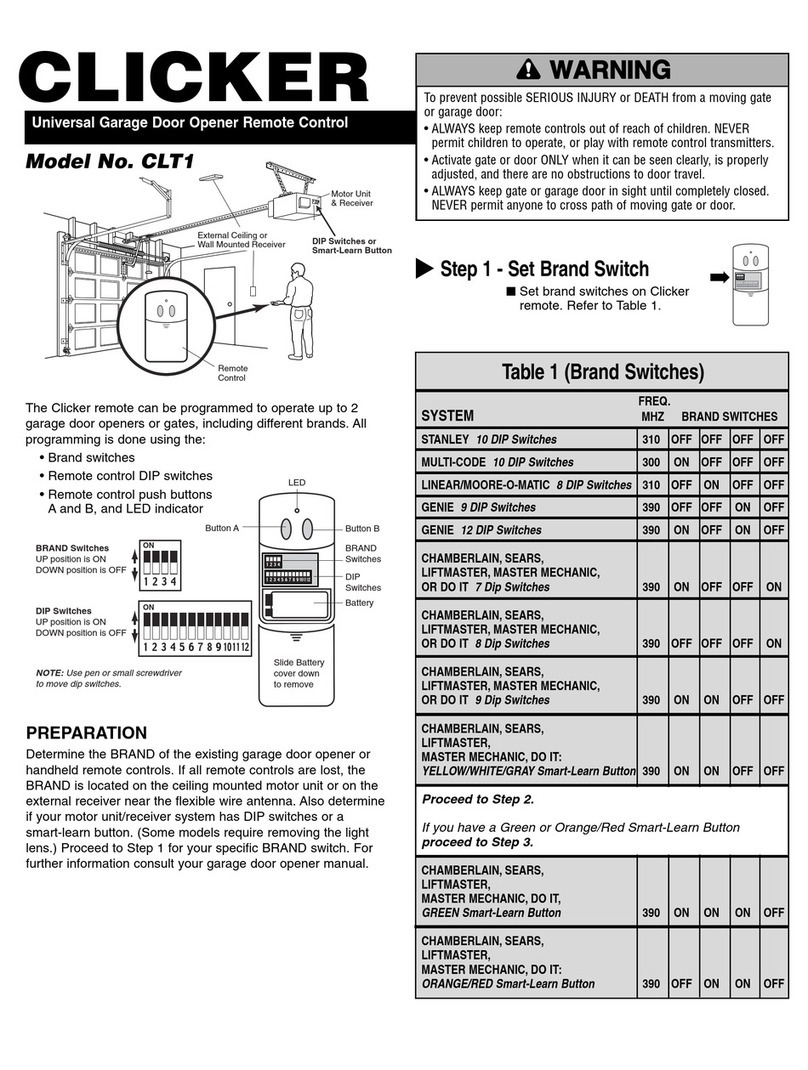
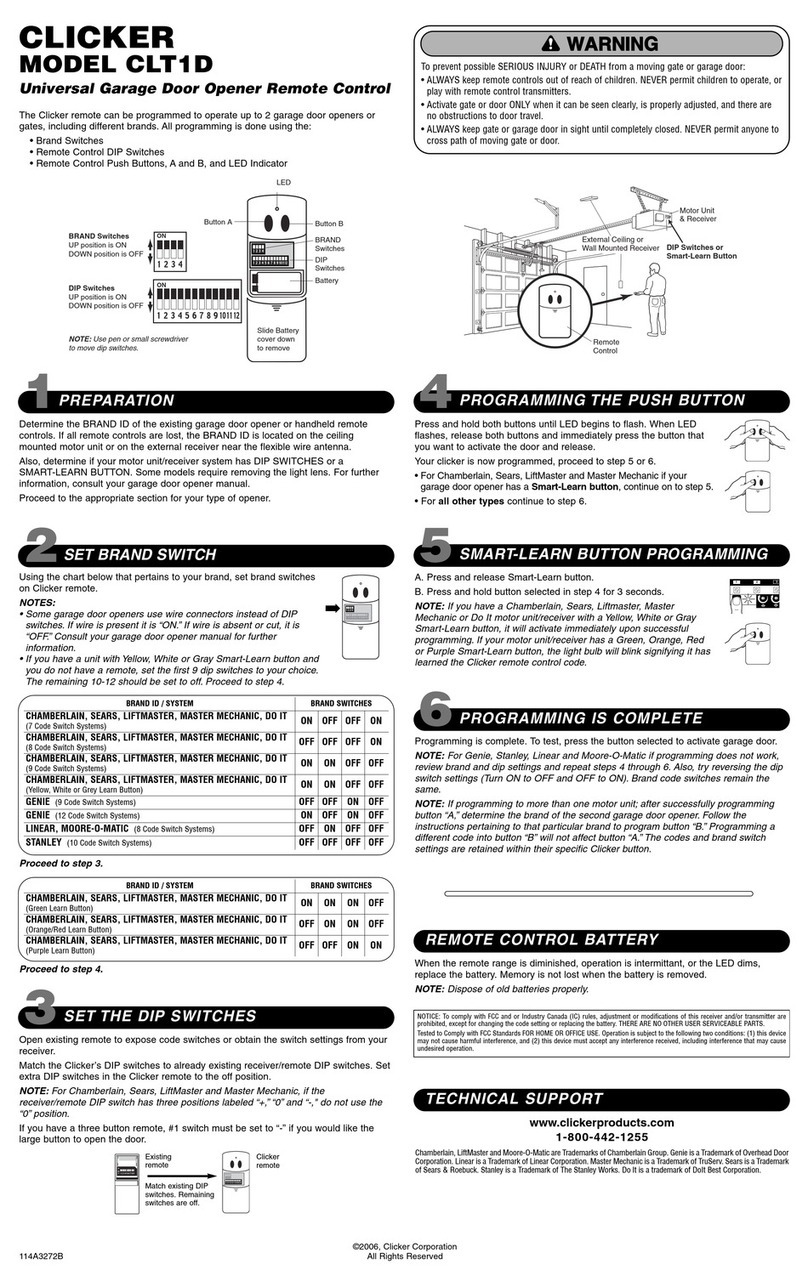
Open existing remote to expose code switches or
obtain the switch settings from your receiver.
Match the Clicker’s DIP switches to already existing
receiver/remote DIP switches. Set extra DIP
switches in the Clicker remote to the off position.
NOTE: For Chamberlain/Sears/LiftMaster. If the
receiver/remote DIP switch has three positions
labeled “+”, “0” and “-". Do not use the “0” position
(if you have a three button remote #1 switch must
be set to “-” for the large button to work).
Reprogram existing receiver and remote(s) using
“+” and “-”.
Press and hold both buttons until
LED begins to flash. When LED
flashes, release both buttons and
immediately press button of your
choice and release.
Your clicker is now programmed,
proceed to Step 4 or 5.
• For Chamberlain/Sears/LiftMaster. If your
garage door opener has a
Smart-Learn button, continue on to Step 4.
• For all other types continue to Step 5.
NOTE: For Genie, Stanley, Home Builder and Linear/Moore-
O-Matic. If Programming does not work review brand and
dip settings and repeat step 3 thru 5. Also try reversing the
dip switch settings (Turn ON to OFF and OFF to ON).
NOTE: If programming to more than one motor unit; after
successfully programming button “A”, determine the brand of the
second garage door opener. Follow the instructions pertaining to
that particular brand to program button “B”. Programming a
different code into button “B” will not affect button “A”. The codes
are retained within their specific Clicker button.
TECHNICAL SUPPORT: 800-442-1255
(MONDAY-FRIDAY 6AM-7PM CST; SATURDAY 8AM-6PM;
SUNDAY 8AM-4:30PM)
Chamberlain, LiftMaster and Moore-O-Matic are Trademarks of Chamberlain Group. Genie is a
Trademark of Overhead Door Corporation. Home Builder is a trademark of Home Hardware.
Linear and Multi-Code are Trademarks of Linear Corporation. Sears is a Trademark of Sears &
Roebuck. Stanley is a Trademark of The Stanley Works.
©2006, Clicker Corporation
114A2535E All Rights Reserved
Remote Control Battery
When the remote range is diminished, operation is intermittent,
or the LED dims, replace the battery. Memory is not lost when
the battery is removed.
NOTE: Dispose of old batteries properly.
Step 2 - Set Clicker Dip Switches
Step 3 - Programming the Desired
Clicker Push Button
Programming is complete, to test, press the button
selected to activate garage door.
Step 4 - For Smart-Learn Button
Programming ONLY
▼
Step 5 - Programming is Complete
▼
▼
▼
A. Press and release
Smart-Learn button.
B. Press and hold button selected in
Step 3 for 3 seconds.
NOTE: If you have a Chamberlain, Sears, Liftmaster, Home Builder
motor unit/receiver with a Yellow, White or Gray
Smart-Learn button it will activate immediately upon successful
programming. If your motor unit/receiver has a Green, Orange or
Red Smart-Learn button, the light bulb will blink signifying it has
learned the Clicker remote control code.
NOTE:
• Some garage door openers use wire connectors instead of DIP
switches, if wire is present it is “ON” if wire is absent or cut it is
“OFF”. Consult your garage door opener manual for further
information.
• If you have a unit with Yellow/White/Gray Smart-Learn button
and you do not have a remote, set the first 9 dip switches to
your choice. The remaining 10-12 should be set to off. Proceed
to Step 3.
Existing
remote
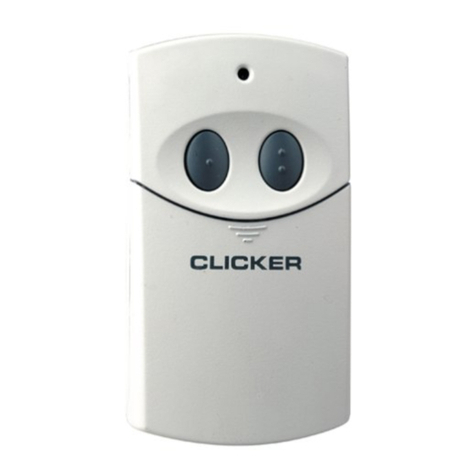
Clicker
remote
Match existing DIP switches.
www.clickerproducts.com
NOTE: Make sure all existing remotes operate correctly before
programming.
