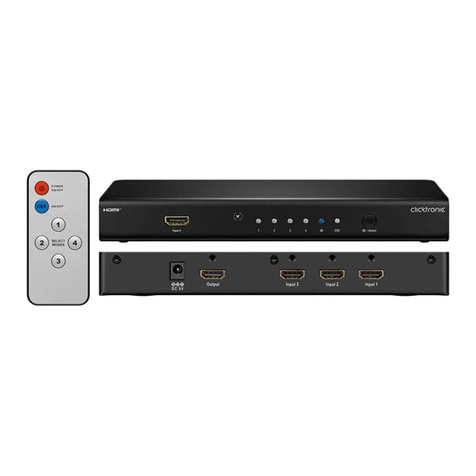
ClickTronic 60809 User manual

1Clicktronic®
ZH KO EL TR CS FI SV DA PT ES IT FR EN DE
Full HD Switch 6x1
• schaltet bis zu 6 HDMI™ Signale auf einen
Bildschirm um
• Switches up to 6 HDMI™ signals to a screen
• Commute jusqu‘à 6 signaux HDMI™ vers un
écran
Betriebsanleitung
User‘s manual
Mode d‘emploi
Article No: 60809

2 Clicktronic®
ZH KO EL TR CS FI SV DA PT ES IT FR EN DE
Full HD Switch 6x1
Inhaltsverzeichnis: Seite:
1 Sicherheitshinweise 2
2 Beschreibung und Funktion 3
3 Bestimmungsgemäßer Gebrauch 4
4 Lieferumfang 4
5 Anschluss und Bedienung 4
6 Pege, Wartung, Lagerung und Transport 6
7 Problembehebung 7
8 Technische Daten 8
9 Gewährleistung und Haftung 8
10 Allgemeine Hinweise 9
11 Entsorgungshinweise 9
12 CE-Konformitätserklärung 9
1 Sicherheitshinweise:
ACHTUNG! Die Montage und Demontage des
Produktgehäuses darf nur durch ausgebilde-
tes Fachpersonal erfolgen!
ACHTUNG! Lesen Sie die Betriebsanleitung
vollständig und sorgfältig durch. Sie ist Bestand-
teil des Produktes und enthält wichtige Hinweise
zur korrekten Installation und Benutzung. Bewah-
ren Sie sie auf, damit Sie diese bei Unsicherhei-
ten und Weitergabe des Produktes parat haben.
ACHTUNG! Kurzschlussgefahr!
Überbrücken Sie keine Kontakte!
Stecken Sie keine Gegenstände in Lüftungs-
schlitze oder Anschlussbuchsen!
GEFAHR! Lebensgefahr durch Stromschlag!
Vermeiden Sie den Kontakt mit Netzspannungen!
ACHTUNG! Verletzungsgefahr durch Stolpern!
Achten Sie auf sichere Kabelverlegung!
• Ihr Produkt ist kein Spielzeug und gehört nicht
in Kinderhände, weil zerbrechliche, kleine und
verschluckbare Teile enthalten sind, die bei
unsachgemäßem Gebrauch Personen schädi-
gen können!
• Installieren Sie das Produkt und die daran be-
festigten Geräte so, dass keine Personen
oder Gegenstände z.B. durch Herabstürzen
oder Stolpern verletzt oder beschädigt wer-
den können.
• Lassen Sie Verpackungsmaterial nicht einfach
liegen, da sich spielende Kinder daran schnei-
den können. Weiterhin besteht die Gefahr des
Verschluckens und Einatmens von Kleinteilen
und Dämmmaterial.
• Wir empfehlen, die Montage nur von quali-
zierten Technikern ausführen zu lassen.

Clicktronic®
3Clicktronic®
ZH KO EL TR CS FI SV DA PT ES IT FR DE
• Ziehen Sie bei Nichtgebrauch und Gewitter
das Netzkabel aus der Steckdose.
• Das Gerät darf keinen hohen Temperaturen
oder Feuchtigkeit ausgesetzt werden. Halten
Sie es von Stellen fern, an denen es mit Was-
ser in Berührung kommen könnte.
• Installieren Sie das Produkt nicht in der Nähe
von Klimaanlagenöffnungen oder an Stellen,
an denen es zu übermäßiger Staub- oder
Rauchbildung kommen kann. Setzen sie
das Gerät keinen Erschütterungen oder
Schwingungen aus.
• Modizieren und ändern Sie den Artikel und
dessen Zubehörteile nicht!
• Verwenden Sie keine beschädigten Produkte
und Teile.
• Stecken Sie keine Gegenstände in Lüftungs-
schlitze. Es besteht Stromschlag- und Kurz-
schlussgefahr!
• Achten Sie beim Transport auf die im Kapitel
„technische Daten“ gelisteten Angaben und
treffen Sie geeignete Transportmaßnahmen,
z.B. durch Nutzung der Originalverpackung.
• Bei Fragen, Defekten, mechanischen Be-
schädigungen, Störungen oder anderen nicht
durch diese Anleitung behebbaren Funktions-
problemen, wenden Sie sich an Ihren Händler.
Weitere Informationen dazu nden Sie im
Kapitel „Gewährleistung und Haftung“.
2 Beschreibung und Funktion:
Dieser professionelle HDMITM-Switch dient der
Wiedergabe von einer von 6 der angeschlosse-
nen Eingangsquellen (wie z.B. DVD-Player, Spie-
lekonsole oder SAT-Receiver), an 1 Display (z.B.
LCD/Plasma TV) gleichzeitig. Bild und Ton werden
in gleicher Qualität auf allen angeschlossenen
Fernsehern dargestellt.
Der Full HD Splitter ist mit seiner integrierten
Verstärker- und Equalizer-Funktion die ideale Lö-
sung für folgende Anwendungsbereiche: Home
Theater, Audio/Video-Installation, z.B. in Konfe-
renz-/Schulungsräumen, Messe- oder Verkaufs-
präsentationen.
Das Gerät ist nur für den Anschluss an HDMITM-
Ein- und Ausgänge von entsprechenden AV-Ge-
räten zugelassen. Als Stromversorgung darf nur
das mitgelieferte Netzteil verwendet werden.
Das Netzteil ist nur für den Anschluss an 100-240V
/ 50-60 Hz Wechselspannung zugelassen.
Quellgeräte: Signalquellen wie Receiver,
DVD-Player, Blu-RayTM-Player
Ausgabegeräte: Anzeigegeräte wie Fernseher,
Monitore, Beamer, usw.

4Clicktronic®
ZHKOELTRCSFISVDAPTESITFRENDE
ZH KO EL TR CS FI SV DA PT ES IT FR EN DE
3 Bestimmungsgemäßer Gebrauch:
Ein anderer als im Kapitel „Beschrei-
bung und Funktion“ beschriebener
Gebrauch ist nicht gestattet. Die
Verwendung darf nur in trockenen Innenräumen
erfolgen. Das Nichtbeachten und Nichteinhalten
dieser Bestimmungen und der Sicherheitshinwei-
se kann zu schweren Unfällen und Schäden an
Personen und Sachen führen.
4 Lieferumfang:
• 1 x Full HD Switch
• 1 x Netzteil 5 V DC
• 1 x IR-Fernbedienung
• 1 x Betriebsanleitung
5 Anschluss und Bedienung:
Der Full HD Switch unterstützt 3 verschiedene Be-
dienarten (Manuell, CEC/Auto, Fernbedienung).
Anschluss:
Schritt 1: Verbinden Sie die HDMITM-
Kabel Ihrer HD-Quellen (SAT-
Receiver, DVD-Player usw.) mit
den Eingängen des Full HD
Switchs.
Schritt 2: Verbinden Sie das HDMITM-
Kabel Ihres Bildschirms mit
dem Ausgang des Full HD
Switchs.
Schritt 3: Verbinden das 5 V DC-Netzteil
mit dem Full HD Switch.
Schritt 4: Wenn alle Geräte miteinander
verbunden sind, leuchtet eine
Power-LED (rot), die CEC/Auto-
Funktions-LED (blau) und die
Eingangs-LED für Eingang 1
(grün).
Hinweis:
1. Nachdem Sie das Netzteil mit dem Full HD
Switch verbunden haben, ist er betriebsbereit.
Sie können den Switch nun manuell, per
Fernbedienung oder im CEC-Auto-Modus
bedienen.
2. Die SELECT/AUTO-Taste kann auch als Auto-
Modus Kontrolltaste genutzt werden. Drücken

Clicktronic®
5Clicktronic®
ZHKOELTRCSFISVDAPTESITFRENDE
ZH KO EL TR CS FI SV DA PT ES IT FR EN DE
Sie die Taste für 3 Sekunden, um die Funktion
ein- oder auszuschalten.
3. Wenn die AUTO-LED leuchtet, kann der Full
HD Switch manuell, per Fernbedienung oder
im Auto-Modus gesteuert werden.
4. Wenn die AUTO-LED nicht leuchtet, ist der
Auto-Modus nicht verfügbar. Der Full
HD Switch kann dann nur manuell oder per
Fernbedienung gesteuert werden.
5. Wenn die Stromanzeige (rot) aufblinkt, sucht
und verbindet der Full HD Switch die ange-
wählte Quelle. Sobald eine Verbindung her-
gestellt wurde, leuchtet die Anzeige nicht
mehr. Blinkt die Anzeige weiter hin auf, stellen
Sie sicher, dass das Quellgerät angeschaltet
ist und eine Kabelverbindung besteht.
6. Der Full HD Switch wird die zuletzt gewählte
Quelle speichern. Bei der nächsten Benut-
zung wird er diese Quelle mit Ihrem Gerät
verbinden.
Bedienung
Fernbedienung:
Benutzen Sie die Fernbedienung, um den Full HD
Switch ein- oder auszuschalten. Benutzen Sie die
Tasten auf der Fernbedienung, um zwischen den
Quellgeräten zu wählen.
Auto-Modus:

6 Clicktronic®
ZHKOELTRCSFISVDAPTESITFRENDE
ZH KO EL TR CS FI SV DA PT ES IT FR EN DE
6 Pege, Wartung, Lagerung und
Transport:
GEFAHR! Lebensgefahr durch Stromschlag!
Vermeiden Sie den Kontakt mit Netz-
spannungen!
ACHTUNG! Kurzschlussgefahr!
Überbrücken Sie keine Kontakte!
Stecken Sie keine Gegenstände in Lüftungs-
schlitze oder Anschlussbuchsen!
Automatik-Schalt-Funktion:
Bei der ersten Inbetriebnahme des Full HD
Switchs wird dieser die erste Quelle wählen,
die verfügbar ist. Dies erfolgt nach folgendem
Schema:
Quelle 1 Quelle 2 Quelle 3 Quelle 4 Quelle 5 Quelle 6
Sobald Sie ein anderes Quellgerät einschalten,
erkennt der Full HD Switch dies und verbindet
Ihren Bildschirm automatisch mit der HD-Quelle.
Manuelle Bedienung:
Benutzen Sie die POWER-Taste, um den Full HD
Switch ein- oder auszuschalten. Die SELECT/
AUTO-Taste wird verwendet, um zwischen den
Quellgeräten zu wechseln. Drücken Sie dafür die
Taste nur einmal kurz.
3D Video-Format:
Aufzeichnungsdichte:
1920 x 1080p@23.98/24 Hz
1280 x 720p@59.94/60 Hz
1280 x 720p@50 Hz
Side-by-Side (Hälfte):
1920 x 1080i@59.94/60 Hz
1920 x 1080i@50 Hz
Oben und unten:
1920 x 1080p@23.98/24 Hz
1280 x 720p@59.94/60 Hz
1280 x 720p@50 Hz
3D-Nutzung:
1. Vergewissern Sie sich, dass alle Geräte
(HDTVs, Receiver, Kabel, Blu-RayTM Player, usw.)
das gleiche 3D-Format unterstützen.
2. Sollte ein Gerät kein 3D unterstützen, wird auf
allen Geräten 2D angezeigt.

Clicktronic®
7Clicktronic®
ZHKOELTRCSFISVDAPTESITFRENDE
ZH KO EL TR CS FI SV DA PT ES IT FR EN DE
• Ziehen Sie den Netzstecker! Reinigen Sie Ihr
Produkt mit einem trockenen oder bei starker
Verschmutzung mit einem leicht angefeuchte
ten, weichen Tuch. Achten Sie hierbei unbe-
dingt auf die stromführenden Leitungen Ihres
Geräts! Achten Sie beim Schwenken der
beweglichen Geräteteile darauf, dass Sie
keine Körperteile in den Schwenkvorrichtun-
gen einklemmen!
• Halten Sie um das Anzeigegerät ausreichend
Freiraum, um eine ausreichende Belüftung zu
gewährleisten.
• Kontrollieren Sie regelmäßig alle Befestigun-
gen und Schrauben auf festen Sitz und ziehen
Sie diese bei Lockerung wieder fest. Dies
kann z.B. bei häugem Bewegen eintreten.
• Vermeiden Sie Stellen mit hohen Temperatu-
ren, Feuchtigkeit, bzw. Stellen, die nass wer-
den können, auch bei Pege, Wartung, Lage-
rung und Transport.
7 Problembehebung:
Problem Maßnahme
Kein Bild • Stellen Sie sicher, dass die Ver-
bindung von Quellgerät zum TV
zunächst ohne Full HD Switch
funktioniert.
• Prüfen Sie alle Verbinder und
Kabel auf Beschädigungen.
• Stellen Sie sicher, dass das Gerät
eingeschaltet ist.
Bild ohne Ton • Achten Sie auf schlüssige
Kabelverbindungen.
• Prüfen Sie, ob Ihre Kabel/Adapter
nur Bilder übertragen, wie DVI-
Adapter z.B.
• Wenn Sie den Geräteausgang
mit einem Quellgerät verbinden,
sperrt HDCP die Audiospur.
HDCP ar-
beitet nicht
richtig nach
erstmaliger
Verbindung
• Schalten Sie das Gerät aus und
wieder an.
• Wenn Sie den Geräteausgang
mit einem Quellgerät verbinden,
sperrt HDCP die Audiospur.
Die Auö-
sung erreicht
nicht 1080p
• Stellen Sie sicher, dass Quell-
geräte (wie HD DVD-Player) und
Ausgabegeräte (wie TVs/Bild-
schirme) 1080p voll unterstützen.
• Prüfen Sie auch, ob Ihre HDMITM-
Kabel 1080p Videosignale über-
tragen können.

8 Clicktronic®
ZHKOELTRCSFISVDAPTESITFRENDE
ZH KO EL TR CS FI SV DA PT ES IT FR EN DE
9 Gewährleistung und Haftung:
• Über die europäischen Gewährleistungsre-
geln hinaus gewährt der Hersteller Ihnen auf
ein neues Gerät 10 Jahre Garantie.
• Da der Hersteller keinen Einuss auf örtliche
Gegebenheiten und die Installation des Pro-
duktes hat, deckt die Garantie nur das Produkt
selbst ab.
• Falls ein Fehler oder Defekt an Ihrem Gerät
festgestellt werden sollte, wenden Sie sich an
Ihren Fachhändler und zeigen Sie ggf. Ihre
Quittung oder Rechnung als Kaufnachweis vor.
Ihr Händler wird den Fehler entweder vor Ort
beheben, oder das Gerät an den Hersteller
weiterleiten. Sie erleichtern unseren Techni-
kern Ihre Arbeit sehr, wenn Sie eventuelle
Fehler ausführlich beschreiben – nur dann
haben Sie Gewähr, dass auch selten auftreten-
de Fehler mit Sicherheit gefunden und besei-
tigt werden!
• Sollte Ihr Händler nicht erreichbar sein, kön-
nen Sie uns auch direkt kontaktieren.
• Der Hersteller haftet nicht für Personen- oder
Sachschäden, die durch unsachgemäße Instal-
lation oder Bedienungsschritte, die
nicht in dieser Anleitung beschrieben sind,
entstanden sind. Dazu zählt u. a. jegliche Än-
derung und Modikation des Produktes und
seines Zubehörs.
• Ein anderer als in dieser Betriebsanleitung
beschriebener Einsatz ist unzulässig und führt
zu Gewährleistungsverlust, Garantieverlust
und Haftungsausschluss.
• Druckfehler behält sich der Hersteller vor.
• Der Hersteller behält sich weiterhin das Recht
vor, Änderungen an Geräten, Verpackungen
und sämtlichen Begleitpapieren wie Bedie-
nungsanleitungen ohne vorherige Ankündi-
gung zu vollziehen.
8 Technische Daten:
Modell 60809
Betriebsspannung 230 V AC / 50Hz (5 V DC)
Ausgänge 1 x HDMITM-Buchse
Gewicht und Maße 1.520 g, 220 x 29 x 70 mm
Eingänge 6 x HDMITM-Buchsen
Taktfrequenz bis zu 225 MHz
Auösung/Farbtiefe bis zu 1080p Full HD / 12-Bit
Gehäuse Metall
Buchsen 19 PIN HDMITM vergoldet
max. Kabellänge 10,0 m ohne Verstärkung
unterstützte Formate 3D, DTS®, HD Dolby®, True HD,
HDCP 2.0

Clicktronic®
9Clicktronic®
ZHKOELTRCSFISVDAPTESITFRENDE
ZH KO EL TR CS FI SV DA PT ES IT FR EN DE
10 Allgemeine Hinweise:
• HDMI, das HDMI Logo und High-Denition-
Multimedia-Interface sind registrierte Marken
oder Handelsmarken der HDMI Licencing LLC.
• Die Full HD Matrix beinhaltet HDMITM Techno-
logie.
• Markennamen und Handelsmarken sind das
Eigentum ihrer jeweiligen Inhaber.
• PS3 ist ein Markenzeichen von Sony Computer
Entertainment Inc.
• DTS ist eine registrierte Marke und das DTS
Logo und Symbole sind Handelsmarken von
DTS, Inc.
• Blu-RayTM ist eine registrierte Marke der
Blu-Ray Disc Association.
11 Entsorgungshinweise:
Elektrische und elektronische Geräte
dürfen nach der europäischen WEEE
Richtlinie nicht mit dem Hausmüll ent
sorgt werden.
Der Verbraucher ist nach dem ElektroG verpich-
tet, elektrische und elektronische Geräte am
Ende ihrer Lebensdauer an den dafür eingerich-
teten, öffentlichen Sammelstellen oder an die
Verkaufsstelle kostenlos zurückzugeben. Einzel-
heiten dazu regelt das jeweilige Landesrecht.
Das Symbol auf dem Produkt, der Gebrauchs-
anleitung oder der Verpackung weist auf diese
Bestimmungen hin. Mit dieser Art der Verwertung
von Altgeräten leisten Sie einen wichtigen Bei-
trag zum Schutz unserer Umwelt.
WEEE Richtlinie: 2002/95/EG
WEEE Nr.: 82898622
12 CE-Konformitätserklärung:
Dieses Gerät ist mit der nach der
Richtlinie 2004/108/EG und 2006/95/
EG vorgeschriebenen Kennzeichnung
versehen: Mit dem CE Zeichen erklärt Click-
tronic®, eine registrierte Marke der Wentronic
GmbH, dass das Gerät den grundlegenden
Anforderungen und Richtlinien der europäischen
Bestimmungen erfüllt. Diese können online auf
www.clicktronic.com angefordert werden.

10 Clicktronic®
ZH KO EL TR CS FI SV DA PT ES IT FR EN
Full HD Switch 6x1
Content: Page:
1 Safety Instructions 10
2 Description and Function 11
3 Intended Use 12
4 Parts Package 12
5 Connecting and Operating 12
6 Care, Maintenance, Storage, and Transport 15
7 Troubleshooting 15
8 Specications 16
9 Warranty and Liability 16
10 General Notes 17
11 Note on Waste Disposal 17
12 CE Declaration 17
1 Safety Instructions:
ATTENTION! Only skilled electricians may
assemble and disassemble the housing of the
product.
ATTENTION! Please read the user manual com-
pletely and carefully. It is part of the product and
includes important information for proper instal-
lation and use. Keep this guide to have it availab-
le, when there are uncertainties, or the product
will be passed on.
ATTENTION! Risk injury by short-circuit!
Never bridge contacts!
Do not put things into ventilation slots or ports!
ATTENTION! Risk of injury by stumbling!
Attend to safe cable installation!
• This product is not a toy and is not meant
for children, because it contains small parts
which can be swallowed and can injure
when used inappropriately!
• Please install the system and devices at-
tached to it in a way that persons cannot be
injured, or objects not be damaged for
example by dropping or stumbling.
• Remove the packing materials, because
children may cut themselves on them while
playing. Furthermore, there is a risk of
swallowing and inhalation of incidentals
and insulating material.
• Remove the mains plug from mains during
thunder storms an when not in use.
• Avoid places with high temperatures, or
humidity, or places which might come into
DANGER! Risk of life by electric shock!
Avoid contacting mains voltages!

Clicktronic®
11Clicktronic®
ZH KO EL TR CS FI SV DA PT ES IT FR EN
contact with water.
• Do not install the product close to openings
of air conditioners, or at places with an
excessive amount of dust or smoke.
• Do not install the product at places subject
to vibration, or oscillation.
• Do not modify and alter the product and
any accessories! Make sure you also read
the chapter “Warranty and Liability”. Do not
use any damaged parts.
• Do not insert things like parts of metal and
not tting cables into the ventilation slots
or ports. There is a risk of electric shock
and short circuit!
• Keep sufcient space around all devices for
good ventilation and free motion and to
avoid damages.
• Plug and unplug all cables slowly and care-
fully.
• During transport, observe the details listed
in the chapter “Specications”, and imple-
ment measures suitable for transport, e.g.
use the original package.
• For questions, defects, mechanical dama-
ges, malfunctions, and other functional pro-
blems which cannot be resolved by this
guide, please contact your dealer for repair
or replacement, as described in the chap-
ter “Warranty and Liability”.
• Please also observe the terms of use de-
scribed in the chapter “Intended Use”.
2 Description and Function:
This professional HDMITM switch can display
the signals of one of 6 connected HDMITM
sources (e.g. a DVD-Player, game console or
satellite receiver) on 1 HDMITM display (LCD/
Plasma) at the same time. The switch grants
the same quality for images and sound at all
connected HDMITM displays.
The Full HD switch with amplier and equalizer
functions offers solutions for Home Theater,
AV installation data center, information distri-
bution, conference room presentation, school
and corporate training environment.
As power supply, only use the supplied mains
adapter. The power supply is only permitted
for the connection to 100-240 V / 50-60 Hz
alternating current.
Source Devices: sources like Receiver, DVD-
Player, Blue Ray-Player, PCs
Output Devices: drains like monitors, video
projectors, TVs, etc.

12 Click tronic®
ZH KO EL TR CS FI SV DA PT ES IT FR EN
3 Intended Use:
It is not allowed to use the device
in other ways than described in chapter
“Description and Function”. Use this
device only in dry interior rooms. The symbol
with the house reminds you of that. If you do not
attend to these regulations and notes on safety,
it might causes fatal accidents, injuries and da-
mages to persons and property.
4 Parts Package:
• 1 pc. Full HD switch
• 1 pc. power supply 5 V DC
• 1 pc. IR remote control
• 1 pc. user‘s manual
5 Connecting and Operating:
The Full HD Switch is designed with 3 operation
modes.
Step 1: Connect the HDMITM cables from the HD
sources (SAT-Receiver, DVD Player etc.)
to the input ports of the Full HD switch.
Step 2: Connect the HDMITM cable from your HD
display to the ouput.
Step 3: Plug the 5 V DC power supply to the Full
HD switch.
Step 4: After you nished connecting, the pow-
er indication LED will be lighted up (red).
The CEC function LED lights up (blue)
and one of the input indication LEDs will
be lighted up after the input source is
selected (green).
Note:
1. After plugging in the DC 5V power supply, the
power can be switched on. You are free to
control the Full HD switch by remote control,
manual selecting or auto switching.
2. The SELECT/AUTO button can also be used as
an auto mode control button. Press the button
for 3 seconds to switch on or off the auto swit-
ching function.
3. When the AUTO LED light is ON, the Full HD
switch can be operated under remote control,
manual selecting and auto detecting.
You can switch input sources by these

Clicktronic®
13Clicktronic®
ZH KO EL TR CS FI SV DA PT ES IT FR EN
three functions.
4. When the AUTO LED light is OFF, the auto
switching function will be disabled. The Full
HD switch can be operated under remote
control and manual select only.
5. If the power indication LED light (Red) is
ashing, the Full HD switch is detecting and
connecting the source. After the source is
detected and connected, ashing will stop.
If ashing continues, check the power of your
source being on, or check the HDMITM cable
for being working the right way.
6. The Full HD switch memorizes the latest input
port. For next use, the Full HD switch will
detect and connect the latest input port rst.
Operation:
IR Remote operation mode:
Use the IR remote control to switch on the Full
HD switch, the power indication LED on the
front panel will shine. In the IR remote operation
mode, use the number buttons to toggle bet-
ween the sources, or use the forward and back
button to select input sources.

14 Clicktronic®
ZH KO EL TR CS FI SV DA PT ES IT FR EN
Auto switching function operation mode:
For rst connection, the Full HD switch will detect
and connect the rst available source by the
following sequence:
For changing the source, only turn on the source
device you want to use. The Full HD switch will
automatically switch to the source device, you
turned on.
Auto switching mode control:
You can set the auto switching function OFF.
Press the SELECT/AUTO button for 3 seconds to
turn off the auto switching function. Press ano-
ther 3 seconds to turn it back on.
Manual operation mode:
• Use the POWER button to switch on or off the
power.
• Use the SELECT/AUTO button for manual
switching. If you want to change the input
channel, you can only press the button once.
There will be a LED indication for the active
channel. The procedure is a cyclic function.
3D video format:
Frame packing:
1920 x 1080p@23.98/24 Hz
1280 x 720p@59.94/60 Hz
1280 x 720p@50 Hz
Side-by-Side (Half):
1920 x 1080i@59.94/60 Hz
1920 x 1080i@50 Hz
Top-and-Bottom:
1920 x 1080p@23.98/24 Hz
1280 x 720p@59.94/60 Hz
1280 x 720p@50 Hz
3D application:
1. Ensure all devices (HDTVs, Receivers, cables,
Blu-RayTM Players, etc.) support the same 3D
formats.
2. If a device supports no 3D, on all devices 2D
will be displayed.
Source 1 Source 2 Source 3 Source 4 Source 5 Source 6

Clicktronic®
15Clicktronic®
ZH KO EL TR CS FI SV DA PT ES IT FR EN
6 Care, Maintenance, Storage and
Transport:
• Remove the mains plug from mains! Use a dry
and soft cloth to clean your product, or use a
slightly moist cloth for heavy stains. Look
out for live cables of your device during
cleaning!
• Attend avoiding risks of stumbling by installing
the cables.
• Make sure there is sufcient space around the
system to ensure proper ventilation, and
check the clearance of the system, if necessa-
ry.
• Avoid places with high temperatures, humidi-
ty, or places which can become wet, also du-
ring care, maintenance, storage, and trans-
port.
• Drill holes are still visible on the wall after the
device and the wall installation kit is removed.
After use for a longer time period, a spot may
remain on the wall.
• Follow the safety symbols on the packing
during transport.
ATTENTION! Risk injury by short-circuit!
Never bridge contacts!
Do not put things into ventilation slots or ports!
DANGER! Risk of life by electric shock!
Avoid contacting mains voltages!
7 Troubleshooting:
Problem Action
No picture • Make sure, the connection of
source devices and TV rstly works
without the product.
• Check all connectors and cables for
damages. Make sure, the device is
switched on.
Pictures
without
tone
• Mind conclusive connections of the
cables.
• Check, if the used cable only can
transmit pictures like DVI cables. By
using a DVI to HDMITM adaptor are
only pictures transmitted, too.
• If you connect the output devices
with a source device, HDCP will lock
the audio track or the complete
function.
HDCP does
not work
• Switch the Full HD splitter off and
on for one time.

16 Clicktronic®
ZH KO EL TR CS FI SV DA PT ES IT FR EN
9 Warranty and Liability:
• The manufacturer warrants this new device for
10 years beyond the European warranty regu-
lations.
• As the manufacturer has no inuence on ins-
tallation, warranty of the product only applies
to the product.
• If any fault or damage is detected on your
device, please contact your dealer and provi-
de your sales slip or invoice as evidence of the
purchase, if necessary. Your dealer will
repair the fault either on site, or send
the device to the manufacturer. You make
the work of our technicians considerably
easier, when you describe possible faults in
detail – only then you can be assured that
faults occurring only rarely will be found and
repaired with certainty! If your dealer cannot
be contacted, you can also contact us directly.
• The manufacturer is not liable for damages to
persons or property caused by improper ins-
tallation or operation not described in this
guide. This includes, among others,
any alteration and modication of the product
and its accessories.
• Any use other than described in this user‘s
guide is not permitted, and causes loss of
warranty, loss of guarantee, and non-liability.
• We reserve our right for misprints and chan-
ges of the device, packing, or all technical
Sockets 19 PIN HDMITM gold plated
max. length of cables 10.0 m without amplication
supported formats 3D, DTS®, HD Dolby®, True
HD, HDCP 2.0
Model 60809
Operating voltage 230 V AC / 50 Hz (5 V DC)
Outputs 1 pc. HDMITM socket
Weight & Measure-
ments 1,520 g, 220 x 29 x 70 mm
Inputs 6 pcs. HDMITM sockets
Pulse frequency up to 225 MHz
Resolution / color
depth up to 1080p Full HD / 12-Bit
Housing Metal
8 Specications:
Resolusion
does not
reach 1080p
• Make sure that source device and
output devices support 1080p.
• Also check the used HDMITM cables
for supporting 1080p.

Clicktronic®
17Clicktronic®
ZH KO EL TR CS FI SV DA PT ES IT FR EN
documentation.
10 General Notes:
• HDMITM, the HDMITM-Logo and High-Denition-
Multimedia-Interface are registered brands or
trademarks of the HDMI Licencing LLC.
• Brands and trademarks are the property of
their respective owners.
• The Full HD Matrix includes HDMITM technolo-
gy.
• PS3 is a brand label of Sony Computer Enter-
tainment Inc.
• Blu-RayTM is a registered brand of Blu-Ray Disc
Association.
11 Note on Waste Disposal:
In according to the European WEEE di-
rective, electrical and electronic
equipment must not be disposed with
consumers waste.
The consumer is committed by law to reposit
electrical and electronic devices to public coll-
ecting points or to the dealer at the end of the
devices lifetime for free. Particulars are regula-
ted in national right. The symbol on the product,
in the manual or at the packaging alludes to
these terms. With this kind of application of used
devices you achieve an important share to envi-
ronmental protection.
WEEE Directive: 2002/95/EC
WEEE No: 82898622
12 CE-Declaration:
This device corresponds to EU direc-
tives 2004/108/EC and 2006/95/EC:
With the CE sign Clicktronic®,a registe-
red brand of the Wentronic GmbH, ensures that
the product is conformed to the basic stan-
dards and directives. These standards can be
requested online on www.clicktronic.com. The
mentioned directives replace all former national
permissions in the European Union. All trade-
marks and registered brands are the property of
their respective owners.

18 Clicktronic®
ZH KO EL TR CS FI SV DA PT ES IT FR
Commutateur Full HD 6x1
Table des matières: Page:
1 Consignes de sécurité 18
2 Description et fonctions 19
3 Utilisation prévue 20
4 Contenu de la livraison 20
5 Connexion et Fonctionnement 20
6 Entretien, maintenance, stockage et
transport 22
7 Dépannage 23
8 Spécications 24
9 Garantie et responsabilité 24
10 informations générales 24
11 Instructions pour l‘élimination 25
12 Déclaration CE 25
1 Consignes de sécurité:
ATTENTION! Seuls les professionnels formés
sont utorisés à installer et démonter le loge-
ment du produit!
ATTENTION ! Lisez le présent manuel d‘utilisation
en entier et avec attention. Il fait partie intégrante
du produit et comprend d‘importantes informations
pour une bonne installation et une bonne utilisa-
tion. Conservez soigneusement ce manuel pour
toute clarication et ne le faites passer qu‘avec le
produit.
ATTENTION ! Risque de blessure par court-
circuit !
Ne reliez jamais les contacts !
Ne mettez rien dans les fentes ou les ports de
ventilation !
DANGER ! Risque vital d‘électrocution !
Évitez tout contact avec le secteur !
ATTENTION ! Risque de blessure en trébuchant !
Participez à l‘installation du câble en toute sécu-
rité !
• Votre produit n‘est pas un jouet. Il n‘est pas
censé être utilisé par des enfants parce qu‘il
contient de petites pièces pouvant être ava-
lées ni être utilisé de manière incorrecte par-
ce qu‘il pourrait entraîner des blessures !
• Ne pas utiliser un produit ni des pièces qui
seraient endommagés.
• Toujours jeter les matériaux d‘emballage pour
ne pas que les enfants jouent avec et se
coupent. Il y a en outre un risque d‘ingestion
et d‘inhalation des petites pièces et des maté-
riaux d‘isolation.
• Installez et placez les produits et ses acces-
soires de manière à ce que personne ne
puisse se blesser et que des objets ne puis-

Clicktronic®
19Click tronic®
ZH KO EL TR CS FI SV DA PT ES IT FR
sent subir des dommages, par ex. en tré-
buchant ou en basculant.
• Nous recommandons de coner l‘assemblage
à des spécialistes qualiés uniquement.
• Éviter toute condition extrême, telle que
des températures très élevées, très basses,
de l‘humidité ou une exposition directe au
soleil ainsi que des vibrations et une pression
mécanique.
• Ne pas installer le produit près de sorties de
climatiseurs ni dans des endroits particulière-
ment poussiéreux ou enfumés.
• Ne pas modier d‘une manière quelconque
le produit ou les accessoires ! Toujours prend-
re connaissance du chapitre portant sur Ga-
rantie et responsabilité.
• Lors du transport du produit, tenir compte des
informations stipulées dans les chapitres Spé-
cications et utiliser des méthodes de trans-
port appropriées, par ex. l‘emballage
d‘origine.
• Pour toute question, tout défaut, dommage
mécanique, dysfonctionnement et tout autre
problème fonctionnel ne pouvant pas être
résolu à l‘aide de ce guide, veuillez contacter
votre revendeur pour réparation ou échange,
tel que décrit dans le chapitre Garantie et
responsabilité.
• Ne pas introduit d‘objets, tels que des pièces
métalliques ou des câbles inappropriés dans
les évents ou les ports. Il y a risque de chocs
électriques et de court-circuits !
• Lorsque le dispositif n’est pas utilisé ou pen
dant les orages, débranchez le câble de
la prise secteur murale.
2 Description et fonctions:
Ce commutateur professionnel HDMI™ permet
d‘afcher simultanément les signaux depuis
une des 6 sources d‘entrée connectées (par ex.
lecteur DVD, console de jeux ou récepteur SAT)
sur un afchage (par ex. LCD/plasma/TV). La qua-
lité de l‘image et du son est la même sur toutes
les TV connectées.
Le séparateur Full HD, avec sa fonction
d‘amplicateur et d‘égalisateur intégrée est la
solution idéales pour les zones d‘application su-
ivantes : cinémas à domicile, installations audio/
vidéo, par ex. dans des salles de conférence/
formations, salles d‘expositions et présentations
commerciales.
Le dispositif est uniquement autorisé pour la
connexion aux entrées et sorties HDMI™ des
dispositifs AV correspondants. Seul l‘adaptateur
d‘alimentation fourni peut être utilisé pour
l‘alimentation électrique.
L‘adaptateur d‘alimentation est uniquement
approuvé pour une connexion à une source
d‘alimentation de 100-240 V CA/50-60 Hz.
Unités source : sources du signal, tels que les
récepteurs, lecteurs DVD, lecteurs Blu-Ray™
Unités de sortie : dispositifs d‘afchage, tels

20 Click tronic®
ZH KO EL TR CS FI SV DA PT ES IT FR
que TV, moniteurs, vidéoprojecteurs, etc.
3 Utilisation prévue:
ère autre que celle stipulée dans le
chapitre Description et fonction est
strictement interdite. Le produit ne peut
être utilisé que dans des pièces sèches. Si vous
ignorez cette réglementation ainsi que les con-
signes de sécurité, de graves accidents peuvent
se produire et blesser des personnes. Il peut en
outre y avoir des dégâts matériels.
4 Contenu de la livraison:
• 1 x Commutateur Full HD
• 1 x Adaptateur d‘alimentation 5 V CC
• 1 x Télécommande IR
• 1 x Guide d‘utilisateur
5 Connexion et Fonctionnement:
Le commutateur Full HD prend en charge 3 types
de modes de fonctionnement qui sont manuel,
CEC/auto, télécommande.
Connexion:
Etape 1 : Connectez les câbles HDMI™ de vos
sources HD (récepteur SAT, lecteur DVD,
etc.) avec les entrées du commutateur
Full HD.
Etape 2 : Connectez le câble HDMI™ de votre
moniteur à la sortie du commutateur
Full HD.
Etape 3 : Connectez l‘adaptateur d‘alimentation
5 V CC avec le commutateur Full HD.
Etape 4 : Lorsque tous les dispositifs sont
connectés les uns aux autres,
les LED suivantes s‘allument : LED
d‘alimentation (rouge), LED de la fonc-
tion CEC/auto (bleue) et LED d‘entrée
pour l‘entrée 1 (verte).
Tenez compte des points suivants :
1. L‘adaptateur d‘alimentation connecté au
commutateur Full HD est prêt à être utilisé.
Vous pouvez maintenant faire fonctionner le
commutateur manuellement, avec la télécom-
mande ou en mode CEC/auto.
2. Vous pouvez également utiliser le bouton
Power/SELECT comme bouton de commande
Table of contents
Languages:
Other ClickTronic Switch manuals
Popular Switch manuals by other brands
Enterasys
Enterasys Vertical Horizon VHIM1000-S1LX 1000BASE-LX Quick installation guide

D-Link
D-Link DGS-1210-10/FL Quick installation guide
H3C
H3C S5500-SI Series Operation manual
AETEK
AETEK D60-044-90 Quick installation guide
Renkforce
Renkforce SP-PCH-100 operating instructions
Spatz
Spatz PROSWITCH-8 Operation manual
Siemens
Siemens RUGGEDCOM RSG910C installation manual

American Megatrends
American Megatrends MegaRAC K1 user guide

SSI
SSI SAFE-T-LOCK Operation instructions
Kathrein
Kathrein EXE 156 Installation and safety instructions
Imagine
Imagine Neo NSM-8x1AES Installation and operation manual
Havis
Havis DS-DA-603 owner's manual
