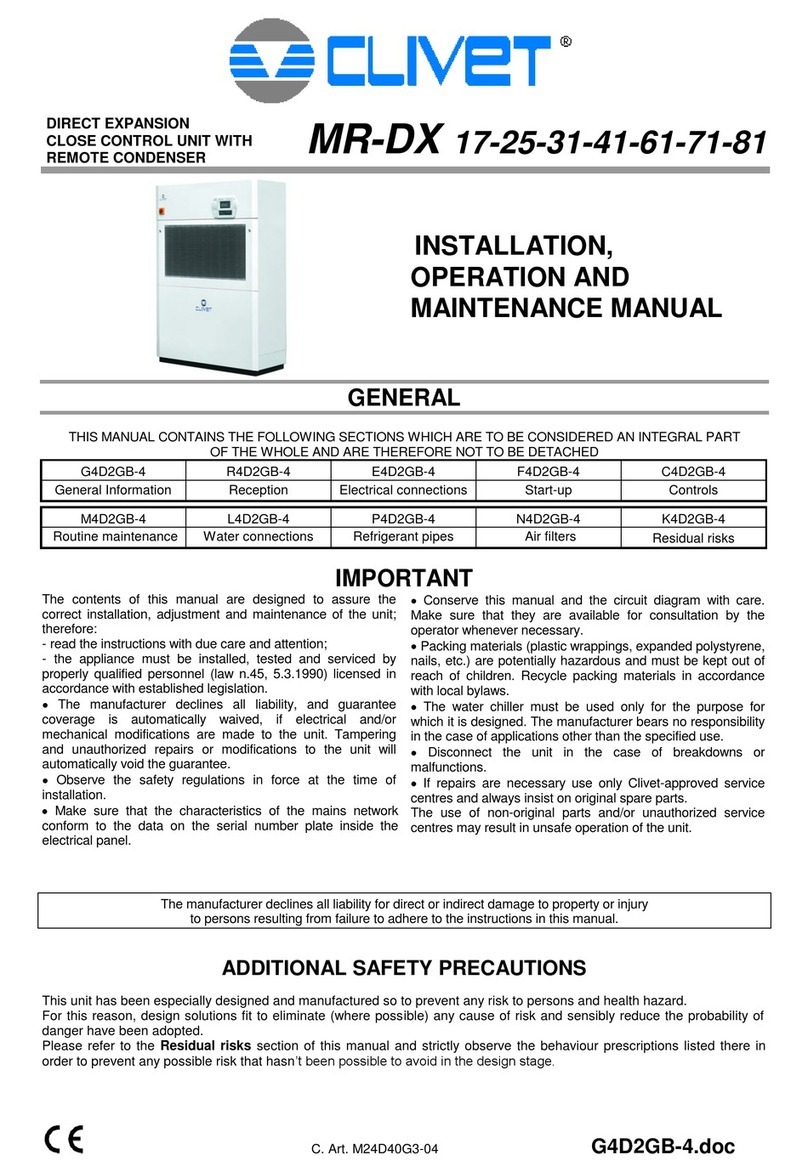
CLIVET MR-DX 17 Installation and operating instructions

C. Art. M24D40G3-03 G4D2GB-33
DIRECT EXPANSION
CLOSE CONTROL UNIT WITH
REMOTE CONDENSER MR-DX 17-25-31-41-61-71-81
INSTALLATION,
OPERATION AND
MAINTENANCE MANUAL
GENERAL
THIS MANUAL CONTAINS THE FOLLOWING SECTIONS WHICH ARE TO BE CONSIDERED AN INTEGRAL PART
OF THE WHOLE AND ARE THEREFORE NOT TO BE DETACHED
G4D2GB-3 R4D2GB-3 E4D2GB-3 F4D2GB-3 C4D2GB-3
General Information
Reception
Electrical connections
Start-up
Controls
M4D2GB-3 L4D2GB-3 P4D2GB-3 N4D2GB-3 K4D2GB-3
Routine maintenance Water connections Refrigerant pipes Air filters Residual risks
IMPORTANT
The contents of this manual are designed to assure the
correct installation, adjustment and maintenance of the unit;
therefore:
- read the instructions with due care and attention;
- the appliance must be installed, tested and serviced by
properly qualified personnel (law n.45, 5.3.1990) licensed in
accordance with established legislation.
•The manufacturer declines all liability, and guarantee
coverage is automatically waived, if electrical and/or
mechanical modifications are made to the unit. Tampering
and unauthorized repairs or modifications to the unit will
automatically void the guarantee.
•Observe the safety regulations in force at the time of
installation.
•Make sure that the characteristics of the mains network
conform to the data on the serial number plate inside the
electrical panel.
•Conserve this manual and the circuit diagram with care.
Make sure that they are available for consultation by the
operator whenever necessary.
•Packing materials (plastic wrappings, expanded polystyrene,
nails, etc.) are potentially hazardous and must be kept out of
reach of children. Recycle packing materials in accordance
with local bylaws.
•The water chiller must be used only for the purpose for
which it is designed. The manufacturer bears no responsibility
in the case of applications other than the specified use.
•Disconnect the unit in the case of breakdowns or
malfunctions.
•If repairs are necessary use only Clivet-approved service
centres and always insist on original spare parts.
The use of non-original parts and/or unauthorized service
centres may result in unsafe operation of the unit.
The manufacturer declines all liability for direct or indirect damage to property or injury
to persons resulting from failure to adhere to the instructions in this manual.
ADDITIONAL SAFETY PRECAUTIONS
This unit has been especially designed and manufactured so to prevent any risk to persons and health hazard.
For this reason, design solutions fit to eliminate (where possible) any cause of risk and sensibly reduce the probability of
danger have been adopted.
Please refer to the Residual risks section of this manual and strictly observe the behaviour prescriptions listed there in
order to prevent any possible risk that hasn’t been possible to avoid in the design stage.

2
GENERAL SPECIFICATIONS
Sizes 17 25 31 41 61 71 81
Standard voltage 400/3/50
Cooling capacity (1) kW 5.8 8.3 9.4 12.5 17.0 19.1 23.2
Sensible capacity (1) kW 5.3 6.9 8.1 11.2 14.6 15.5 21.4
Compr.input power (1) kW 1.5 2.3 2.9 3.0 4.7 5.6 5.8
Compressor type Scroll
N° of compressors 1
Total oil quantity kg 1.00 1.10 1.10 1.85 1.65 1.65 4
Handling zone
Frontal surface m20.36 0.44 0.64 0.78
N° of rows 3 4
Fin space mm 1.8
Coonections
Gas connection mm 16 18
Liquid connection mm 12 14 16
Condensate drain mm 22
Handling zone fans (Outlet)
N° of fans 1 2
Fan diametre mm 252 280 252 280
RPM rpm 600 1100 1300 1400 1300 1400
Standard air flow l/s 472 555 639 944 1150 1888
Single motor input kW 0.35 0.55 0.35 0.55
Max. ext. static press. Pa 50
Max. ext. static press. (2) Pa 100 150 200 190 200 190 200
Standard unit weight
Shipping weight (3) kg 166 170 218 265 275 295
Lenght mm 750 925 1250 1500
Depth mm 490
Height mm 1800
Sound levels
Sound Pressure Level (4)dB(A) 47 50 51 53 54 56 58
The data refers to the following conditions:
1) Ambient air 24°C BS/ 16,9°C BU
Relative humidity 50%
External air 35°C
Standard static pressure 50Pa
2) With standard ventilating section, upon request. Contact our sales office for further details.
3) Data refers to the version with outlet downwards.
4) Sound pressure level refers to 1 metre from the outside surface of the unit operating in an open field (version with outlet
downwards)

3
POSITIONING
The units are designed for indoor installation.
•Make sure that the supporting surface is perfectly level and able to bear the full weight of the unit (see general
specifications).
Interpose a layer of rubber sheeting between the base of the unit and the supporting surface (to reduce noise and vibration).
•Observe the specified functional clearances.
ACCESSORIES
The units can be fitted with the following accessories (upon request):
- Electric heating coil
Electric heating section made from reinforced aluminium
heaters with integral fins, 2 stage operation and safety
thermostat.
- Water heating coil
Extra heating coil with 3-way balancing control valve
supplied by external hot water.
- Hot gas post-heating
Used to maintain the desired room temperature in the
event of an increase in relative humidity, adding sensible
heat to the air which has already been cooled and
dehumidified.
Operation occurs by advantageously exploiting part of the
hot gas taken from the compressor discharge, conveying it
to a coil located downstream of the cooling section.
- Steam humidifier
Immersed electrode steam humidifier with electronic
controller featuring proportional control fitted with humidity
probe on the air intake and steam distributor.
- Differential pressure switch for dirty air filters
Differential pressure switch suitable for measuring a
pressure difference between the air intake and outlet in the
filter section. In the event where the differential pressure is
greater than the set value, a remote alarm is signalled.
- Soundproofing panels
The panels are lined on the inside with micro-perforated
metal plate for the maximum sound insulation.
- Serial communication module to PC or BMS
Serial connection kit for connecting the unit control module
to a centralised control system (PC or BMS).
- Phase monitor
Used to check the presence and the correct sequence of
the phases of the power supply.
- Flooding sensor
Floor water sensor to detect leaks from the water circuit,
with remote alarm.
- Adjustable support frame
Height adjustable support frame using painted telescopic
columns (RAL 7016).
Adjustment is possible from 300-500mm or from 500-
700mm.
- Adjustable support frame with duct
Height adjustable support frame using painted telescopic
columns (RAL 7016), fitted with aluminium deflector that
deviates the flow of air leaving the unit.
Adjustment is possible from 300-500mm or from 500-
700mm.
- Front outlet plenum
Plenum for front air discharge, outlets with double row of
painted "aluzink" adjustable fins (RAL7016).
- Outlet plenum on three sides
Plenum for air discharge from three sides, outlets with
double row of painted adjustable fins (RAL 7016).
- Clock
Programmable clock for automatic starts, set point
changes and time band settings.
- Condensate drain pump
The condensate drain pump is used to discharge the water
present in the pan to the outside, when the outside
discharge point is higher than the pan. The pump is
controlled automatically by a built-in level sensor.
- Isolating damper
The air outlet damper, controlled by an actuator with spring
return, isolates the unit when it is not in operation.
- EU5 air filter
Filter made up of a galvanised plate frame with galvanised
and electric-welded protective mesh, and regenerable
filtering media made from polyester fibre sized with
synthetic resins.
Efficiency F5 according to CEN-EN 779 standard
(classification EU5 according to Eurovent 4/5 – average
colorimetric efficiency between 40% and 60% ASHRAE
52-76 Atm). Self-extinguishing (resistance to flame class 1
- DIN 53438).
- Liquid line solenoid valve
Solenoid valve used to prevent the unwanted migration of
refrigerant during inactivity.

4
AIR INTAKE CONFIGURATIONS
1
2
Possible configurations: 1 = outlet downwards with intake from the front (M3 or D)
2 = outlet upwards with intake from the front (M5 or U)
WARNING: When positioning the unit, leave enough space at the front to inspect the air filters and all
the components subject to checks. To the side of the fittings leave enough space for
connections and checks.

5
AIR OUTLET DIMENSIONS
CBA
D E F
C BA B D
E F G
AABB
H
I
SEZ. B-B
61-71/81
SEZ. A-A
17-25-31/41
I = air outlet downwards
II = air outlet upwards
Sizes Dimensions
A B C D E F G H I
17-25-31 170 300 280 195 255 40 --- 630 260
41 260 335 330 173 285 32 --- 805 260
61-71 140 305 335 165 200 250 40 1130 260
81 145 333 489 200 172 285 33 1370 260

6
REMOVAL OF THE PANELS
1
3
9
4
5
6
7
8
2
Legend:
1) outlet grill for the version with outlet upwards
2) to remove the side panels, unscrew the 4 inner screws
3) right side panel
4) service panel (can be drilled for connections)
5) service connection
6) inside bottom panel
7) outside bottom panel
8) outside top panel (single piece with the outside bottom panel for sizes 17-25-31-41)
9) left side panel

7
UNIT WITH ONE FAN, INSIDE VIEW (17-25-31-41)
1
23
4
5
6
10
11
9
8
13
14
18
19
20
22
23
15
12
17
16
7
21
Legend:
1) control panel
2) main isolator switch
3) LCD display
4) electrical panel
5) humidity probe (optional)
6) inlet air temperature probe
7) liquid gauge
8) heater section (optional)
9) hot water or hot gas coil (optional)
10) air filter (optional EU5)
11) evaporating coil
12) steam humidifier (optional)
13) flow differential pressure switch
14) filter differential pressure switch (optional)
15) liquid line solenoid valve (optional)
16) dewatering filter
17) bypass cock
18) hot water control valve
19) outlet fan
20) compressor
21) user terminal block (with Isolert3+ option)
22) outlet air temperature probe (optional)
23) power supply input and connections

8
UNIT WITH TWO FANS, INSIDE VIEW (61-71-81)
1
2
3
4
5
6
10
11
9
8
13
14
20
21
23
24
16
12
17
15
7
22
18
19
20
Legend:
1) control panel
2) main isolator switch
3) LCD display
4) electrical panel
5) humidity probe (optional)
6) inlet air temperature probe
7) liquid gauge
8) heater section (optional)
9) hot water or hot gas coil (optional)
10) air filter (optional EU5)
11) evaporating coil
12) steam humidifier (optional)
13) flow differential pressure switch
14) filter differential pressure switch (optional)
15) liquid line solenoid valve (optional)
16) dewatering filter
17) bypass cock
18) hot water control valve
19) outlet fan
20) compressor
21) user terminal block (with Isolert3+ option)
22) outlet air temperature probe (optional)
23) power supply input and connections
For details of the water and gas connections, see the corresponding sections Water connections and Refrigerant pipes.

9
OUTLET PLENUM (optional)
A
B
C
I = air outlet from the front
II = air outlet on 3 sides
Sizes Dimensions A x B x C
17-25-31 750 x 490 x 450
41 925 x 490 x 450
61-71 1250 x 490 x450
81 1500 x 490 x450
The grills are double row (vertical - horizontal) and can be oriented as desired.

10
ASSEMBLY OF THE OUTLET PLENUM
2
1
Assembly phases:
1) unscrew the screws fastening the front grill
2) fasten the plenum to the unit at the points indicated in the figure, using the fastening screws supplied
3) replace the front grill

11
ADJUSTABLE SUPPORT FRAME (optional)
Available in two heights, 300-500 mm and 500-700 mm
I = exploded diagram * = with duct option
II = fastening the frame + = with 500-700 height option
Legend:
A) frame
B) rear duct support bracket
C) duct
D) front or rear bracket
E) adjustable leg
F) duct side bracket
G) side bracket
Assembly diagram
X) M6 screws on inserts
Y) Screw and bolt
Z) Self-tapping screw
A
*B
*C
+D
+G
E
*F
x
x
y
z
z
z
G
R
A
N
D
E
Z
Z
E
D
IM E
N
SI
O
N
I
1
7
-2
5
-
3
1
4
1
6
1-
7
1
8
1
7
0
0
x
4
9
0
x
H
8
7
5
x
4
9
0
x
H
12
0
0
x
4
9
0
x
H
1
4
5
0
x
4
9
0
x
H
SIZES DIMENSIONS

CLIVET S.p.A. - Z. I. 32030 VILLAPAIERA - FELTRE (BL) Italy - Tel 0439 3131 - Fax 0439 313300 - sito web: www.clivet.com
The information presented in this manual is not binding and may be changed by the manufacturer without notice. All rights reserved.
DIMENSIONS
C
AB
Sizes 17 25 31 41 61 71 81
A mm 750 750 750 925 1250 1250 1500
B mm 490 490 490 490 490 490 490
C mm 1800 1800 1800 1800 1800 1800 1800

R4D2GB-3
DIRECT EXPANSION
CLOSE CONTROL UNIT WITH
REMOTE CONDENSER MR-DX 17-25-31-41-61-71-81
RECEPTION
CONTENTS:
1.0 - INSPECTION UPON DELIVERY
2.0 - HANDLING
2.1 - HANDLING using a FORK LIFT TRUCK or SIMILAR
2.2 - HOISTING using a CRANE or SIMILAR
3.0 - STORAGE
4.0 - REMOVING THE PACKING
5.0 - POSITIONING
1.0 - INSPECTION UPON RECEIPT
The units are delivered in special protective packing.
When it arrives check the unit has not been damaged
during transport and that it has been supplied complete
with all the parts specified in the order. If there is any
visible damage make a note of it on the transport
document, accompanied by the words: “ ACCEPTED
WITH RESERVATIONS DUE TO OBVIOUS DAMAGE
TO PACKING ” since the delivery free at factory includes
cover for damage to be borne by the insurers in
compliance with Italian law N° 450 of 22.08.85 “limite di
risarcibilità”.
IMPORTANT
EVERY OPERATION DESCRIBED BELOW MUST BE CARRIED OUT IN COMPLIANCE WITH THE SAFETY
REGULATIONS IN FORCE CONCERNING BOTH THE EQUIPMENT USED AND THE OPERATING PROCEDURES
ADOPTED.
WARNING
ALWAYS MAKE SURE THE LIFTING CAPACITY OF THE EQUIPMENT USED IS SUITABLE FOR THE WEIGHT OF THE
UNIT IN QUESTION BEFORE CARRYING OUT ANY HANDLING OPERATIONS.
Unit weight table
Size 17 25 31 41 61 71 81
Downflow weight Kg 166 170 170 218 265 275 295
Upflow weight Kg 176 180 180 231 280 290 310
2.0 - HANDLING
2.1 - HANDLING using a FORK LIFT TRUCK or SIMILAR
2.1.1 - Insert the forks in the wooden platform supplied with the unit.
2.1.2 - Start lifting the unit, making sure that it is balanced and stable. Bear in mind that the heaviest part is where the
compressor is installed.

CLIVET S.p.A. - Z. I. 32030 VILLAPAIERA - FELTRE (BL) Italy - Tel (0439) 3131 - Fax (0439) 313300 – Web site http://www.clivet.com
The information presented in this manual is not binding and may be changed by the manufacturer without notice. All rights reserved.
2.2 - HOISTING using a CRANE or SIMILAR
2.2.1 - Insert the self-balancing fork in the long side of the
wooden base supplied with the unit.
2.2.2 - Place boards on the upper edges of the unit to
protect against damage.
2.2.3 - Gradually tension the lifting straps, checking that they
remain in position.
2.2.4 - Lift the unit, ensure that the unit is perfectly balanced
and stable. Bear in mind that the heaviest part is where
the compressor is installed.
WARNING
FOLLOWING THE ADVICE ON THE OUTSIDE OF THE CARDBOARD PACKING WILL ENSURE THE UNIT REMAINS IN
PERFECT CONDITION AND OPERATES CORRECTLY, TO THE BENEFIT OF THE END USER. THIS ADVICE IS AS
FOLLOWS :
- HANDLE WITH CARE
- KEEP DRY
- UNDER NO CIRCUMSTANCES EVER PLACE OTHER OBJECTS ON TOP OF THE UNIT
3.0 - STORAGE
- Store away from: direct sunlight, rain, sand and wind
- Temperature: maximum 60°C, minimum -10°C
- Maximum humidity: 90%
4.0 - REMOVING THE PACKING
4.1 - Remove the packaging, taking care to avoid damaging
the unit.
4.2 - Remove the brackets which hold the unit on the
wooden platform using a 10 mm spanner.
4.3 - Lift the unit off the platform.
4.4 - Lower the unit to the ground in the installation point
desired
4.5 - Check for any visible damage.
4.6 - Dispose of the packing so that it is taken to specialist
collection or recycling centres (respect the regulations in
force).
5.0 - POSITIONING
5.1 - Check that the area where the unit is to be located is
level and can support the weight involved.
5.2 - Prepare the holes in the floor, in the ceiling and in the
adjacent walls for all the service connections: air outlet,
refrigerant pipes, humidifier water supply, condensate
and humidifier drain, electrical cables.
When required, position the support frame, adjust the
height so that it corresponds to the raised floor, and
check that it is level.
5.3 - Make sure there is a suitable condensate discharge
near the site where the unit is installed. If gravity draining
is not possible, an electric condensate drain pump must
be installed.
5.4 - The doors and panels should be removed and
positioned in a safe place to prevent them from being
damaged during the various phases of installation.
5.5 – The MR units with outlet upwards have been designed
to discharge the air through an upper outlet with
adjustable louvers. If an outlet duct is required, this
should be fitted before all other connections to refrigerant
pipes or the electrical line.
All ducts fastened to the unit must be easily removable
so as to allow access to the unit from above.

M4D2GB-3
DIRECT EXPANSION
CLOSE CONTROL UNIT
WITH REMOTE CONDENSER MR-DX 17-25-31-41-61-71-81
ROUTINE MAINTENANCE
CONTENTS:
1.0 - ROUTINE MAINTENANCE
1.1 - UNIT
1.2 - WATER SYSTEM
1.3 - ELECTRICAL SYSTEM
1.4 - AIR DUCTING
1.5 - FANS
1.6 - HUMIDIFIER
1.7 - HEATERS
IMPORTANT
MAKE SURE THE UNIT IS NOT CONNECTED TO THE POWER SUPPLY BEFORE STARTING ANY MAINTENANCE OR
CLEANING OPERATIONS
1.0 - ROUTINE MAINTENANCE
This section is intended for the end user and contains
information that is extremely important to ensure the unit has
a long, trouble free service life.
Scrupulously carrying out the few simple operations
described below at regular intervals can avoid the need for
servicing by specialist personnel.
The operations which need to be carried out do not require
any special technical knowledge, involving the following
simple checks on the components of the unit:
- AIR FILTER CLEANING
- EVAPORATOR COIL
- STRUCTURE
1.1 - UNIT
1.1.1 – AIR FILTER CLEANING (SEE AIR FILTER
SECTION).
1.1.2 - EVAPORATOR COIL
IMPORTANT: accidentally touching the exchanger fins
could cause minor cuts. This operation should be carried
out using special gloves.
It is essential for the evaporator coil to provide the
maximum heat exchange. Consequently, the surface
must always be kept free of dirt and deposits.
Clean the coil, removing all impurities that may remain
on the surface. Check that the aluminium fins are not
damaged or bent, and if so, "comb" the coil using the
special tool so as to restore the initial condition and
ensure the optimum flow of air.
1.1.3 - STRUCTURE
- Check the condition of the parts forming the structure,
paying particular attention to its steel components.
- Treat any rusted points of the unit with paints designed to
eliminate or reduce this problem.
- Make sure that the unit’s casing panels are mounted firmly
in place. Poor mounting can cause abnormal vibrations
and noise.
1.2 - WATER SYSTEM
1.2.1 - CONDENSING DRAIN CONTROL
It is recommended periodical checking of the drain
condensing panel of the unit. The dust or calcareous
residues could lead to obstructions.
1.3 - ELECTRICAL SYSTEM
- Make sure there are no cuts, cracks or other signs of
deterioration indicating a possible loss of insulating
capacity in the power cable that connects the unit to the
distribution board. Contact an authorised service centre if
any maintenance operations are required
1.4 - AIR DUCTING
- Check that the fixing screws of the ducting and
corresponding structures have not loosened.
Loose screws are the source of vibrations and therefore
noise.
- Check any antivibration systems installed in the ducting to
avoid vibration transmission
1.5 - FANS
Before staring the unit each season, check the status of
the fans.
- Before starting the unit each season, check the
fastening of the fans to the structure of the unit.
- Also check that the impeller is perfectly aligned and has
not become dangerously unbalanced, as highlighted by
abnormal noise and vibrations.

2
1.6. - HUMIDIFIER
1.6.1 - Components to be checked or replaced
The steam humidifier has only one part that requires periodical
replacement: the steam production cylinder. This operation is
necessary when the lime scale that forms inside the cylinder
prevents the sufficient flow of current. This situation is signalled on
the control board by the LEVEL LED, which flashes. The frequency
of this operation depends on the supply water: the more salt or
impurities in the water, the more frequently the cylinder will need to
be replaced.
The following parts need to be checked annually:
• fill/drain solenoid valve: clean away any solid deposits, without
using compressed air, and check correct operation.
• water circuit/supply tank: clean away any deposits in the path
travelled by the water from the supply valve to the cylinder. Finally,
check that there are no leaks or drips.
• steam outlet pipe/condensate drain: check that along the path,
from the humidifier to the distributor in the duct or the room, the
pipe is not choked, which would prevent the normal release of
steam/condensate.
• humidity probes: check the condition of the probes, and if
necessary, re-calibrate them. Do not use compressed air or
solvents to clean the probe sensor.
Warning: if placing the unit out of service, completely empty
the water from the cylinder.
1.6.2 - Replacing the cylinder
To remove the cylinder, proceed as follows.
• Completely drain the water by pressing the “DRAIN” button on the
control board.
• Disconnect the power supply to the humidifier using the isolating
switch on the unit.
• Remove the steam pipe from the cylinder.
• Disconnect the electrical connections from the electrodes and
remove the plugs from the high level electrodes.
• Unscrew the nut to remove the flare coupling and the filter (when
the filter is outside the cylinder)
• Lift the cylinder to pull it out.
Before replacing it:
• The filter body does not need to be replaced, consequently, wash
it in water and reposition it on the new cylinder using the new
gasket supplied with the latter.
• Check the gasket between the cylinder and the drain assembly.
• Replace the cylinder, repeating the same operations in the reverse
order.
1 - pipe locking spring
2 - steam pipe
3 - fill pipe
4 - steam cylinder
5 - O-ring
6 - fill valve
7 - valve supports
8 - drain valve
9 - bottom sump
10 - pipe locking spring
11 - fill pipe
12 - overflow pipe
IMPORTANT
AUTHORISED PERSONNEL SHOULD BE PRESENT WHEN STARTING THE UNIT EACH SEASON, SO AS TO CARRY
OUT BOTH THE ABOVE CHECKS AND THE CHECKS ON THE REFRIGERANT CIRCUIT.

CLIVET S.p.A. - Z. I. 32030 VILLAPAIERA - FELTRE (BL) Italy - Tel 0439 3131 - Fax 0439 313300 - Web site: www.clivet.com
The data contained in this manual is not binding and may be changed by the manufacturer without prior notice. All reproduction, even partial, is prohibited.
3
1.7 – HEATERS
The unit is supplied with finned convection heaters that require periodical checking of their cleanliness and their fastening to
the support.
If requiring replacement, follow the instructions below, with reference to the figure:
1) -Remove the outlet grill A (version with outlet upwards) or the top access panel (outlet downwards).
2) - Remove the side panels B.
3) - Release the springs Cthat fasten the heaters to the supports.
4) - Remove the heaters D.
1
2
D
C
B
A
B

F4D2GB-3
DIRECT EXPANSION
CLOSE CONTROL UNIT WITH
REMOTE CONDENSER MR-DX 17-25-31-41-61-71-81
START-UP
CONTENTS:
1.0 - PRELIMINARY CHECKS
1.1 - ELECTRICAL PANEL
1.2 - COMPRESSORS
2.0 – STARTING THE UNIT
4.0 – SET POINT AND INTERFACE
1.0 - PRELIMINARY CHECKS
-Check that the unit is positioned correctly and that the
air and water connections have been performed
correctly.
- Check the power supply voltage and frequency:
WHICH MUST BE WITHIN THE FOLLOWING VALUES
400/3/50 ±10%
The phase unbalance must be less than a maximum of
3%
(see calculation example).
Calculation example:
L1 - L2 = 388V
L2 - L3 = 379V
L3 - L1 = 377V
The mean of the values measured is obtained by:
388 379 377
3
++ =381
The maximum deviation of the mean is obtained by:
388-381=7 V
The unbalance is obtained by:
7
381
x 100 = 1,83% (accettabile)
IMPORTANT:
The following operations must only be performed by
suitably trained and authorised personnel.
Before starting the following operations, ensure that
the power supply is disconnected from the unit at the
source and that the isolator device is padlocked and
marked by a special warning sign.
1.1 - ELECTRICAL PANEL
-Check that the screws fastening the wires to the
electrical components in the panel are tight (vibrations
during handling and transport may have caused these
to loosen).
-Close the control and power circuit breakers.
-Close the door on the electrical panel.
-Connect the power line to the unit.
-Close the main line isolator switch.
1.2 - COMPRESSORS
The scroll compressors used in these units are very noisy
if rotating in the wrong direction. If this occurs, reverse
two phases of the electrical power line. The power input
of the compressor must be lower than the FLA value
declared (seen under “electrical connections”).
(acceptable)

CLIVET S.p.A. - Z. I. 32030 VILLAPAIERA - FELTRE (BL) Italy - Tel (0439) 3131 - Fax (0439) 313300 - sito web http://www.clivet.com
The information presented in this manual is not binding and may be changed by the manufacturer without notice. All rights reserved.
2.0 – STARTING THE UNIT
When the unit is powered, with the main isolating switch
rotated in position I, and in standby, the “line” LED on the
interface is on and the display shows:
−Clock and weekday, if the optional clock card is
installed.
−Room temperature and corresponding unit of
measure.
−Ambient humidity and corresponding unit of measure
in % (if the optional humidifier and probe are
present).
−The OFF status of the remote switch, if present.
−Thermometer, indicating that the value displayed is
the temperature.
At this point, turn the remote on/off switch on (on the
display, the text OFF will be replaced by ON). If the
switch is not present, proceed as follows.
Press the On/Off button on the interface, causing the
following actions:
−The green “on” LED associated with the On/Off
button will light up.
−The display will show the symbols corresponding to
the actuators that, depending on the set point and
the parameters set, should start operating.
−The compressor starts after a delay of 20 seconds
from the start of the fan, which itself starts
immediately if requested to operate. The fan, in all
phases (cooling, heating, humidification and
dehumidification) always starts first.
The following are the symbols shown on the display
when the unit is operating, indicating the operating status
of the unit.
3.0 – STOPPING THE UNIT
To stop the unit, press the ON/OFF button; all the
actuators will switch off except for the fan, which will stop
after a delay of 20 seconds. The two green LEDs go off
to signal that the unit is in standby.
At this point, the isolating switch on the door of the panel
can be turned to position 0.
4.0 – SET POINT AND INTERFACE
To set the set point and use the interface, refer to the
section on the control of the unit.
SHORT DISPLAY LEGEND
Fan on
Cooling active, 1 and 2 refer to the cooling actuators
Heating active, 1 and 2 refer to the heating actuators (optional).
Humidification active (optional).
Dehumidification active (optional)

C4D2GB-3
DIRECT EXPANSION
CLOSE CONTROL UNIT WITH
REMOTE CONDENSER MR-DX 17-25-31-41-61-71-81
CONTROLS
CONTENTS:
1.0 – DISPLAY AND KEYPAD
1.1 - THE DISPLAY
1.2 - OPERATING SIGNALS
1.3 - THE KEYPAD
1.4 - MODIFYING THE PARAMETERS
1.5 - CONTROL PARAMETERS
1.6 - READ ONLY PARAMETERS
1.7 - DIAGRAMS
2.0 - ALARMS
2.1 - MANUAL, AUTOMATIC ALARMS AND RESET
2.2 - SHUT-DOWN SIGNAL
2.3 - OPTIONAL ALARMS
2.4 - DIAGNOSTICS
3.0 - OPTIONS
1.0 – DISPLAY AND KEYPAD
Table 1
Room temperature in programming mode displays the value
of the parameter
Temperature unit of measure: degrees Centigrade/Fahrenheit
Ambient humidity
in programming mode displays the no. of the parameter
Relative humidity unit of measure
Buzzer active
Hour counter limit exceeded
Off from time bands
Time bands active
External contact status:
- ON – enable unit
- OFF – unit in standby
Indicates that the value displayed is the temperature
(without this symbol on, the Set Point is displayed)
Time band selected
Dehumidification active
Fan active :% fan speed
Cooling active:
- number (1 or 2) of cooling actuators; % opening of
cooling valve, or (in shelter mode) % opening of
freecooling damper
Heating active:
- number (1 or 2) of heating actuators
- % opening of valve
Humidification active: % steam production
Programming phase
- set password
- lock parameter modification
(In clock operation) weekday
- display clock
- setup clock
1.1 - THE DISPLAY
The display shows the main values monitored, and the status
of the unit and the actuators.
Table 1 to the side lists the symbols and the texts shown on
the display, with the corresponding meanings.
N.B. Fig. 1 illustrates all the symbols and texts shown on
the display when the controller is started.
Fig. 1
1.2 - OPERATING SIGNALS
The main states of the controller (power supply, alarm active
and remote On/Off input status) are indicated by 3 LEDs on the
front panel.
Meaning of the LEDs:
Line LED (yellow): controller powered
Alarm LED (red): alarm active on the unit (the siren symbol on
the display is on only when the buzzer is active)
On LED (green): unit On. The effective On status of the unit
may also depend on the position of the remote On-Off switch,
on the active time band (function enabled only if the clock card
is fitted), on the standby condition transmitted by the master
unit (when a series of units are in rotation), and is indicated by
the fan symbol.
The ON-OFF symbols on the display indicate the status of
the remote on/off switch. If the switch is not fitted, the
display will always show the ON symbol.
This manual suits for next models
6
Table of contents
Other CLIVET Control Unit manuals
Popular Control Unit manuals by other brands
Fantini Cosmi
Fantini Cosmi EV02F manual
red lion
red lion Graphite GMJ1939 installation guide
Alfalaval
Alfalaval Unique PMO Plus CP HT Series instruction manual
Astral Pool
Astral Pool CONTROL BASIC installation manual

Hi-Tec
Hi-Tec SPECTRA AFHSS Module Instruction

Redline
Redline RDL-3000 Series product manual
