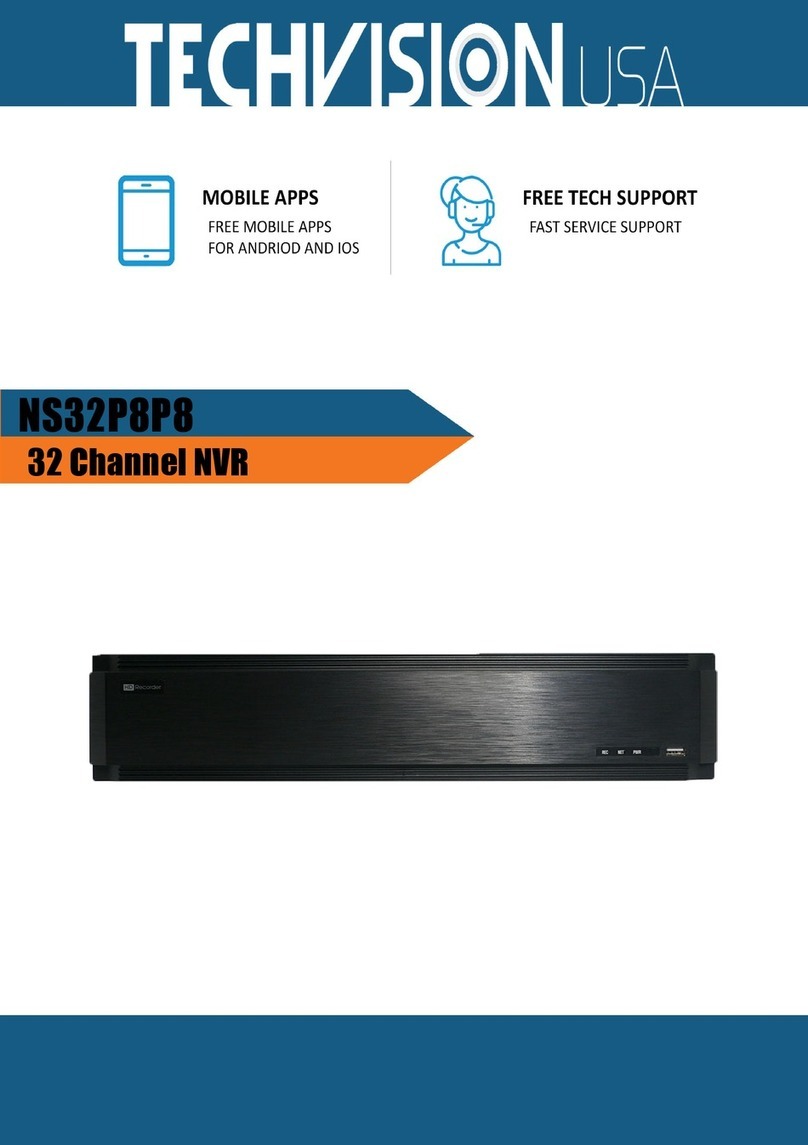
Clover DV1670 User manual

INSTRUCTION MANUAL
Stand-Alone 16Channel
DIGITAL VIDEO RECORDER
MODEL DV1670, DV1670D
Ver. 010312
Copyright © 2011 Clover Electronics U.S.A. All Rights Reserved.

System Users Manual
Version 1.1
Manual created in summer of 2011. This user manual contains instructions for operations for DVR Unit,
Client Application, Mobile Device Application and other helpful tips.

Table of Contents
Contents
Table of Contents.......................................................................................................................................... 3
Chapter 1. Preface ......................................................................................................................................10
1. About This Guide................................................................................................................................. 10
2. Precautions - Before You Start! ..........................................................................................................11
3. Precautions –After Powering On! ......................................................................................................13
4. Precautions –Routine Maintenance! .................................................................................................14
5. Contents of Items Included................................................................................................................. 15
Chapter 2. Hardware Description ............................................................................................................... 17
1. Technical Specification........................................................................................................................ 17
2. Rear Panel ...........................................................................................................................................19
3. Rear Port Specification and Connection Examples............................................................................. 21
Power input.........................................................................................................................................21
VGA (Video Graphics Array) Port ........................................................................................................21
Main Monitor Output .........................................................................................................................23
SPOT Monitor Output ......................................................................................................................... 23
Camera Input ...................................................................................................................................... 24
RS-232 Serial Connector......................................................................................................................24
Optional Alarm Sensor Extension Box ................................................................................................ 26
10-Way Terminal Block .......................................................................................................................27
RS-485 Connections ............................................................................................................................28
Alarm Out............................................................................................................................................29
Sensor Input........................................................................................................................................ 29
USB Connection ..................................................................................................................................32
Ethernet Port.......................................................................................................................................32
3. Front Panel..........................................................................................................................................36
4. Remote Controller...............................................................................................................................38
Chapter 3. Quick Setup ..............................................................................................................................39
1. Placement ........................................................................................................................................... 39

2. Connection..........................................................................................................................................39
3. Quick Power On .................................................................................................................................. 41
4. Initial Boot...........................................................................................................................................42
5. Setup Screen .......................................................................................................................................43
6. Change Password and Enable Auto Lock ............................................................................................44
7. Labeling Camera.................................................................................................................................. 48
8. Enable Recording ................................................................................................................................49
9. Prepare Network.................................................................................................................................51
Chapter 4. Main Menu (Root Menu) ..........................................................................................................53
1. Main Items. .........................................................................................................................................53
2. Sub operational items......................................................................................................................... 54
Chapter 5. The “System” Root Menu Item .................................................................................................55
Convention of Menu Tree.......................................................................................................................55
1. The “System” Branch ..........................................................................................................................56
2. The “Record” Branch........................................................................................................................... 58
3. The “Network” Branch........................................................................................................................ 59
4. The “Camera” Branch..........................................................................................................................60
5. The “Display” Branch ..........................................................................................................................61
6. The “Alarm” Branch ............................................................................................................................ 62
Chapter 6. The “Search” Root Menu Item.................................................................................................. 63
1. The “Calendar” Search Branch............................................................................................................63
2. The “Event” Search Branch................................................................................................................. 64
3. The “Date / Time” Search Branch .......................................................................................................65
Chapter 7. The “Backup” Root Menu Item .................................................................................................66
1. Calendar, Quick and List Branch .........................................................................................................66
Chapter 8. The “ER”, “PTZ”, and “Sound” Root Menu Items......................................................................67
Chapter 9. Systems Section In-Depth .........................................................................................................68
1. INFORMATION GUI ............................................................................................................................. 68
Language .............................................................................................................................................68
Remocon ID (Remote Controller ID) ...................................................................................................69
Mouse Sensitivity................................................................................................................................ 71
Video Standard....................................................................................................................................71

MAC Address....................................................................................................................................... 72
Webcode............................................................................................................................................. 72
Versions............................................................................................................................................... 72
2. DISK MANAGER GUI............................................................................................................................ 73
Adding, installing HDD and other drives............................................................................................. 73
Installing ODD (Optical Disk Drive)......................................................................................................74
Configuring HDD1 and HDD2 ..............................................................................................................76
CD / DVD RW.......................................................................................................................................77
Overwrite ............................................................................................................................................77
Auto Delete ......................................................................................................................................... 77
Error List.............................................................................................................................................. 77
S.M.A.R.T(Disk Management) .............................................................................................................78
3. DEFAULT SETTING GUI ........................................................................................................................79
Configuring Year/Month/Day ............................................................................................................. 80
Configuring Date & Time.....................................................................................................................81
Configuring Daylight Saving Time .......................................................................................................81
Configuring Time Server......................................................................................................................82
4. UPGRADE GUI...................................................................................................................................... 83
5. CONFIGURATION GUI.......................................................................................................................... 84
Configuration Download..................................................................................................................... 84
Configuration Upload.......................................................................................................................... 85
6. PASSWORD GUI...................................................................................................................................86
Configuring User ID ............................................................................................................................. 86
Modifying User Information ...............................................................................................................87
Configuring User Authority .................................................................................................................87
Configuring Network Covert ...............................................................................................................88
7. BUTTON SETTING GUI ......................................................................................................................... 89
Configuration of audible beep ............................................................................................................ 89
Configuration of Auto Key Lock .......................................................................................................... 89
Configuration of Emergency Lock ....................................................................................................... 90
Chapter 10. Record Section In-Depth .........................................................................................................91
1. Compression, Resolution, Quality, and Speed of Video ..................................................................... 91

Video Compression .............................................................................................................................91
Video Resolution................................................................................................................................. 91
Video Quality.......................................................................................................................................92
Speed of Video ....................................................................................................................................92
2. Calculating Storage Required.............................................................................................................. 94
4 Channel DVR Storage Reference Chart ............................................................................................ 95
9 Channel DVR Storage Reference Chart ............................................................................................ 96
16 Channel DVR Storage Reference Chart ..........................................................................................97
3. EVENT RECORDING GUI ......................................................................................................................98
Configuring Pre Recording .................................................................................................................. 98
Configuring Event Recording...............................................................................................................98
4. SCHEDULE RECORDING GUI .............................................................................................................. 100
Chapter 11. Network Section In-Depth.....................................................................................................105
1. About Network Section and Clients.................................................................................................. 105
2. IP ADDRESS GUI.................................................................................................................................106
DHCP (Dynamic Host Control Protocol) ............................................................................................ 106
Transmission Option ......................................................................................................................... 108
Web Server Port................................................................................................................................108
3. E-MAIL SETUP GUI............................................................................................................................. 110
4. DDNS OPTION GUI ............................................................................................................................112
Built in DDNS Server setup................................................................................................................112
DDNSIP.Net example.........................................................................................................................113
5. EMAIL NOTIFICATION GUI.................................................................................................................120
6. NETWORK FRAME GUI ......................................................................................................................121
Chapter 12. Camera Section In-Depth ...................................................................................................... 122
1. CAMERA SETTING GUI.......................................................................................................................122
2. PTZ SETTING GUI...............................................................................................................................123
Additional PTZ setting ....................................................................................................................... 124
3. CONTROLLER GUI.............................................................................................................................. 126
4. CAMERA TITLE GUI............................................................................................................................127
5. PTZ TOURING GUI .............................................................................................................................128
6. SERIAL PORT SETTING GUI ................................................................................................................129

7. How to operate PTZ camera ............................................................................................................. 130
Chapter 13. Display Section In-Depth ....................................................................................................... 132
1. OSD GUI.............................................................................................................................................132
2.SPLIT / SEQUENCE GUI.......................................................................................................................134
3. TV ADJUSTMENT ............................................................................................................................... 138
Chapter 14. Event Section In-Depth ......................................................................................................... 139
1. SENSOR GUI.......................................................................................................................................139
2. ALARM GUI........................................................................................................................................140
3. MOTION DETECTION GUI..................................................................................................................141
4. SPOT OUT GUI ................................................................................................................................... 143
5. INTERNAL BUZZER GUI...................................................................................................................... 144
6. EXTENDED GUI ..................................................................................................................................145
Alarm Sensor extension box setting .................................................................................................146
Chapter 15. Search Operation ..................................................................................................................147
1. Getting to Search Screen .................................................................................................................. 147
2. Calendar Search ...............................................................................................................................148
3. Event Search......................................................................................................................................151
4. Date and Time Search .......................................................................................................................153
5. Playback Control Menu Bar ..............................................................................................................154
Playback Controls..............................................................................................................................154
Play and Pause operation ................................................................................................................. 155
Fast Play, Rewind Operation.............................................................................................................155
Mouse Only Operation......................................................................................................................157
De-Interlacing Option........................................................................................................................ 158
Quick Backup During Playback..........................................................................................................159
Chapter 16. Backup Operation.................................................................................................................. 161
1. Calendar Backup ............................................................................................................................... 161
2. Backup Viewer ..................................................................................................................................167
Chapter 17. Mobile and Remote Client Applications ............................................................................... 169
1. iPhone ............................................................................................................................................... 169
iPhone Application Installation .........................................................................................................169
Adding a DVR To Your iPhones MPRMS Application ........................................................................169

Search from iPhone........................................................................................................................... 174
Controlling Relay-Out from iPhone................................................................................................... 177
PTZ control from iPhone ...................................................................................................................177
2. Android Phone ..................................................................................................................................179
Program Installation for Android ...................................................................................................... 179
Application Execution for Android.................................................................................................... 179
Register the product information for Android.................................................................................. 180
Modify/Delete of Registered Information for Android.....................................................................181
Remote connection for Android ....................................................................................................... 182
Live view on Android.........................................................................................................................183
Main menu view on Android ............................................................................................................ 183
PTZ control for Android..................................................................................................................... 184
PTZ Preset for Android...................................................................................................................... 186
Search on Android.............................................................................................................................187
Relay Out for Android .......................................................................................................................188
Information display option on Android ............................................................................................189
End the connection for Android........................................................................................................ 190
3. Windows Mobile ............................................................................................................................... 191
Install the program to Windows Mobile...........................................................................................191
Execute the program for Windows Mobile....................................................................................... 191
Register the Product Information on Windows Mobile.................................................................... 192
Connect / Disconnect on Windows Mobile ......................................................................................194
Search on Windows Mobile .............................................................................................................. 196
PTZ Control for Windows Mobile......................................................................................................197
Remote Alarm Control for Windows Mobile ....................................................................................199
4. Internet Explorer Version 7 and later ...............................................................................................200
Initial Connection.............................................................................................................................. 200
Display Configuration........................................................................................................................202


Chapter 1. Preface
1. About This Guide
Page 10
Chapter 1. Preface
This manual contains user instruction on how to operate the Digital Video Recording device (DVR Unit),
Remote Controller, Client Application, Mobile Application and Central Monitoring Software Application.
This manual also contains cautions and notification regarding safe operating parameters to protect the
equipment and equipment operator. Please read this manual and comply with its suggested guidelines
for proper operation of this equipment.
For any further concerns and question please inform sellers for further information.
Please properly retain this copy of the manual for future reference.
1. About This Guide
This guide is comprised of Table of Contents where you will find Chapters divided logically discussing
about particular topics. Then it is further divided by sections that discuss more detailed discussion
pertaining to certain features of Chapter topics.
This manual also includes Index section where popular subjects or key concepts are referenced by page
numbers where those topics are discussed.
What this manual is not discussing are topics about upgrades and repairing physical unit. These should
be done through seller’s authorized repair centers or by detailed direction from seller. Upgrades and
repairs consists of adding and removing Hard Disk Drive, adding and removing other media drive,
upgrade or downgrade the Firmware, replace any electronic components inside physical units. These
actions should be under the guidance of qualified technician because improper actions may cause
permanent damages to the unit. Some drives also have compatibility constraints and they are
constantly being updated as new products emerge from drive manufacturers.

Chapter 1. Preface
2. Precautions - Before You Start!
Page 11
2. Precautions - Before You Start!
Item 1. DVR Unit’s power setting must be on POWER OFF position before power adapter is
plugged into the DVR Unit.
Press down on toggle button towards bottom.
This event will prevent electric spark and prevent possible fire,
electrocution and product damages.
Item 2. DVR Unit’s power setting must be on POWER OFFposition before adding cameras,
monitor, Hard Disk Drive and other electronic component to DVR Unit.
Cover of the DVR Unit must be closed while DVR Unit is powered on.
All other external devices should be introduced while DVR Unit is turned
off.
Item 3. DVR Unit must have about 15 centimeters (about 6 inches) clearance from the wall.
DVR Unit must have 5 centimeters (about 2 inches)
clearance for the side of the DVR Unit of any
obstructions.
Item 4. DVR Unit must be installed in none humid place.
Also do not place the DVR Unit near dusty area.
It is also advised that DVR Unit must be away from large
power supplies such as power transformers, and also do not
install this DVR Unit in closets that does not have
temperature control.
Even if DVR Unit may tolerate higher temperature Hard Disk Drives may yield to lower
temperature tolerance compared to the DVR Unit.
It is advised that DVR Unit must be kept in standard room temperature whenever
possible and any way not to exceed 50C (122F).

Chapter 1. Preface
2. Precautions - Before You Start!
Page 12
Item 5. Never uplift the cover to perform an upgrade, attempt a hardware repair while DVR Unit
is still powered on.
Users should be aware that taking the cover off from the DVR
Unit might void the warranty without consulting with seller.
Improper upgrade may result on permanent equipment failure and user must consult
with sellers and their skilled technicians before any upgrade.
Item 6. Keep the area clean around where DVR Units will be installed.
In case you need to clean the DVR Unit itself, please use dry
cloth. DO NOT use any organic solvent. This will damage the
DVR Unit and may cause electronics failure if solvent or fumes
are exposed to the DVR Unit.
Item 7. Do not overload the circuit by having multiple devices on one power strip.
Avoid same power circuit input from hair dryer, coffee makers,
curling iron, refrigerator or other appliances that may draw
concentrated power consumption sporadically.
Uninterruptable power devices such as UPS power surge
protectors are recommended and at least the DVR DVR Units
must be connected properly approved power surge protector.
Input voltage tolerance should be at least 10% of specified voltage level indicated off
from included power adapters.
Failure to follow this guideline may cause equipment failure or possibly fire or
electrocution.

Chapter 1. Preface
3. Precautions –After Powering On!
Page 13
3. Precautions –After Powering On!
Item 1. If you detect strange odor or detect strange rattling noise immediately turn the DVR
Unit’s power off.
Please contact your seller or service center for further
instruction.
Item 2. Avoid shock and keep the DVR unit free from vibration.
Constant vibration and sudden shock will possible damage
Hard Disk Drive and may cause bad sectors on Hard Disk
Drive, dislodged connectors and may even cause damage
to the main board.
Item 3. Make sure any debris does not fall in through ventilation
hole.
Also be cautious about other conductive material such as
paper clips or other conductive material to have any
contact with the main board of the DVR unit.

Chapter 1. Preface
4. Precautions –Routine Maintenance!
Page 14
4. Precautions –Routine Maintenance!
Item 1. Check to see if the LED (Light Emitting Diode) is on.
If DVR unit does not have LED light on please check first if
power button is on or off and make sure that it is at
POWER ON position.
If you still do not see LED light, then please check power adapter and outlet.
Item 2. Make sure that HDD Overwrite (Hard Disk Drive) is enabled.
If DVR unit does not have HDD Overwrite not enabled HDD
will only write video information until HDD’s capacity
reaches maximum capacity.
This may result in latest recorded video information not
being present in DVR unit.
Chapter 9, Section 2. DISK MANAGER GUI on page 77 covers more details about setting
HDD Overwrite option.
Item 3. Hard Disk Drive is the only moving devices found on DVR
unit. As with many moving devices users must pay special
attention to the wellness and optimal functionality of such
devices. Your HDD is where video information is kept for
future review.
In the DVR unit there are HDD S.M.A.R.T. features that
monitor the wellness of HDD disk itself. The S.M.A.R.T displays the current hard drive
condition and temperature of the hard disk drive. The S.M.A.R.T is abbreviated from
Self-Monitoring, Analysis, and Reporting Technology, where hard disk manufacturers
have implemented to warn possible failing condition of hard disk drive. It recommended
that HDD with bad sectors, broken images when video images are played back, hear
clicking noise, and DVR unit indicating that it is no longer recording video, then it may
well be that there are defective HDD in DVR unit.
Please contact your seller or their authorized repair center for further instruction.
Later in this manual Chapter 9 section “S.M.A.R.T(Disk Management)”pages 78 will
explain more about HDD S.M.A.R.T. features.

Chapter 1. Preface
5. Contents of Items Included
Page 15
5. Contents of Items Included
Component
Description
DVR
Stand Alone Digital Video Recorder
Battery
1.5V (AAA) 2 pcs.
Screw
For HDD mounting
Program CD
Manual and Client program
Adapter
DC 12V 5A
Power cable
Power cable
Remote controller
For DVR operation
DVR
Battery
Screw
Adapter
Battery
cable
Remote
controller
Program CD

Chapter 1. Preface
5. Contents of Items Included
Page 16
*If you are missing any components listed above please contact your seller for further instruction.

Chapter 2. Hardware Description
1. Technical Specification
Page 17
Chapter 2. Hardware Description
1. Technical Specification
Operating System: Embedded Linux
Video Recording Compression: H.264
Video Transmission Compression: H.264
Supported Video Standards: NTSC / PAL
Video Output: Composite (main monitor output) via BNC
VGA monitor via VGA port
TV connection via S-Video
SPOT monitor via BNC
One to one video loop-out via BNC (equal number as camera input)
Audio Input: Single Mono RCA, 1Vpp, 10k ohm
Audio Output: Four Mono RCA, 1Vpp, 10k ohm
Audio Compression: G723.1
Sensor Input: Four sensor input ports via pluggable 10-way terminal block
Alarm Output: Single alarm output port via pluggable 10-way terminal block
Communication:
RS-485 Port –Single TX(+), single RX(-) via pluggable 10-way terminal block
RS-232 Port –9 pole D-Type male connector
Ethernet Port –RJ-45 Type 10/100/1000 Base-T, DHCP, Static IP and DDNS
Recording Resolution:
NTSC –CIF(352X240), 2CIF(704X240), D1(704X480)
PAL –CIF(352X288), 2CIF(704X288), D1(704X576)
Recording Frame Speed per second:
4ch DVR –CIF resolution 120 frames per second at NTSC (100 fps at PAL)
2CIF resolution 120 frames per second at NTSC (100 fps at PAL)
D1 resolution 120 frames per second at NTSC (100 fps at PAL)
9ch DVR –CIF resolution 270 frames per second at NTSC (255 fps at PAL)

Chapter 2. Hardware Description
1. Technical Specification
Page 18
2CIF resolution 240 frames per second at NTSC (200 fps at PAL)
D1 resolution 120 frames per second at NTSC (100 fps at PAL)
16ch DVR –CIF resolution 480 frames per second at NTSC (400 fps at PAL)
2CIF resolution 240 frames per second at NTSC (200 fps at PAL)
D1 resolution 120 frames per second at NTSC (100 fps at PAL)
Recording Mode: Emergency, Schedule, Sensor, Motion, Sensor + Motion, Pre and Post Alarm Recording
Recording Search Method Type:
Calendar Search, Date and Time Search, Event List Search, First Search (Oldest recording
not over written in HDD), Last Search (Newest recording in HDD)
Search Speed:
Forward –Normal Speed, 2X, 4X, 8X, 10X fast forward play
Rewind –Normal Speed, 2X, 4X, 8X, 10X fast rewind play
* 10X fast forward and fast rewind are shown as MAX indication.
Disk Drive Connection:
2 SATA HDD port
1 SATA optical drive port
*only may use 2 ports at any given time. (1 HDD + 1 optical or 2 HDD)
System Control:
Frontal key buttons (*Included)
USB mouse operation (*Included)
IR battery operated remote controller (*Included)
External DVR key controller via RS-232 (*Optional)
Operating Temperature: 32°F ~ 104°F (0°C ~ 40°C)
Dimension:
Unit –16.9in (W) X 2.12in (H) X 12.4 (D) or 430mm (W) X 54mm (H) X 315mm (D)
Outer Box –18.5in (W) X 8in(H) X 20.5in (L) or 470mm (W) X 203mm(H) X 521mm (L)
Weight:
Unit only –7.7 lbs (US) or 3.5kg
Unit with 2 HDD –10.5 lbs (US) or 4.77kg
Unit with 1 HDD and 1 ODD –10.9 lbs (US) or 4.94kg
Product box without unit –4.96 lbs (US) or 2.25kg
Unit with 1 HDD and 1 ODD, product box and accessories –15.86 lbs (US) or 7.19kg
*Some drive manufacturer weight will vary. It is always safe to add 1 or 2 lbs or physically measure
before shipping.

Chapter 2. Hardware Description
2. Rear Panel
Page 19
2. Rear Panel
Figure 1 (4ch Model)
Figure 2 (9ch Model)
Figure 3 (16ch Model)

Chapter 2. Hardware Description
2. Rear Panel
Page 20
①Power input –connection port for DC 12 volt
②Toggle Power Switch –POWER ON and POWER OFF switch that turns unit on and off
③ VGA (Video Graphics Array) Port –Location where VGA monitor cable must be inserted
④ Audio Out –Mono RCA, 1Vpp, 10k ohm
⑤ S-Video –S-Video out connection
⑥ Audio Input –Mono RCA, 1Vpp, 10k ohm, available in 4 channels
⑦ Main Monitor Output –BNC main monitor output
⑧SPOT Monitor Output –Secondary monitor output for public display
⑨Camera Input / Video Loop Out –Analog Type BNC camera plug-in location and video loop out
⑩Serial Connection –9 pole D-Type male connector
⑪PTZ, Sensor, Alarm Out Port –Single TX(+), single RX(-), 1 Alarm out, 4 Sensor In via pluggable 10-
way terminal block
⑫USB Port –Connection for USB mouse or for small USB memory device
⑬Network Port –Ethernet port
This manual suits for next models
1
Table of contents
Other Clover DVR manuals
Clover
Clover CDR 0440 User manual
Clover
Clover DVR 1600 User manual
Clover
Clover LCD2084 User manual
Clover
Clover DV0890 User manual
Clover
Clover CDR-4770 User manual
Clover
Clover CDR-4170 User manual
Clover
Clover C1704DVR User manual
Clover
Clover CDR-1610 User manual
Clover
Clover CDR1660 User manual
Clover
Clover DV1630 User manual
Clover
Clover CDR-4070 User manual
Clover
Clover CDR-4015 User manual
Clover
Clover HDV043 User manual
Clover
Clover CDR-0850 User manual
Clover
Clover CDR-4570 User manual
Clover
Clover CDR4450 User manual
Clover
Clover CDR-1650 User manual
Clover
Clover CDR-4010 User manual

Clover
Clover CDR-4770 User manual
Clover
Clover CDR0430 User manual
