Reach and ReachHD- Information and Instruction Sheet
CMD Ltd, Sycamore Road, Eastwood Trading Estate, Rotherham, S65 1EN
Part Number 133813 Issue 5 Date: 30/07/18
Cleaning, Storage and Maintenance
Service Components Available to order.
Cleaning &
Maintenance
Dry cloth, no abrasives or solvents
to be used on the product surface.
Handling & Storage Do not drop.
Warning
Do not exceed the recommended maximum weight.
We recommend using the pre-cut EVA pad to improve grip
and protect the desk surface.
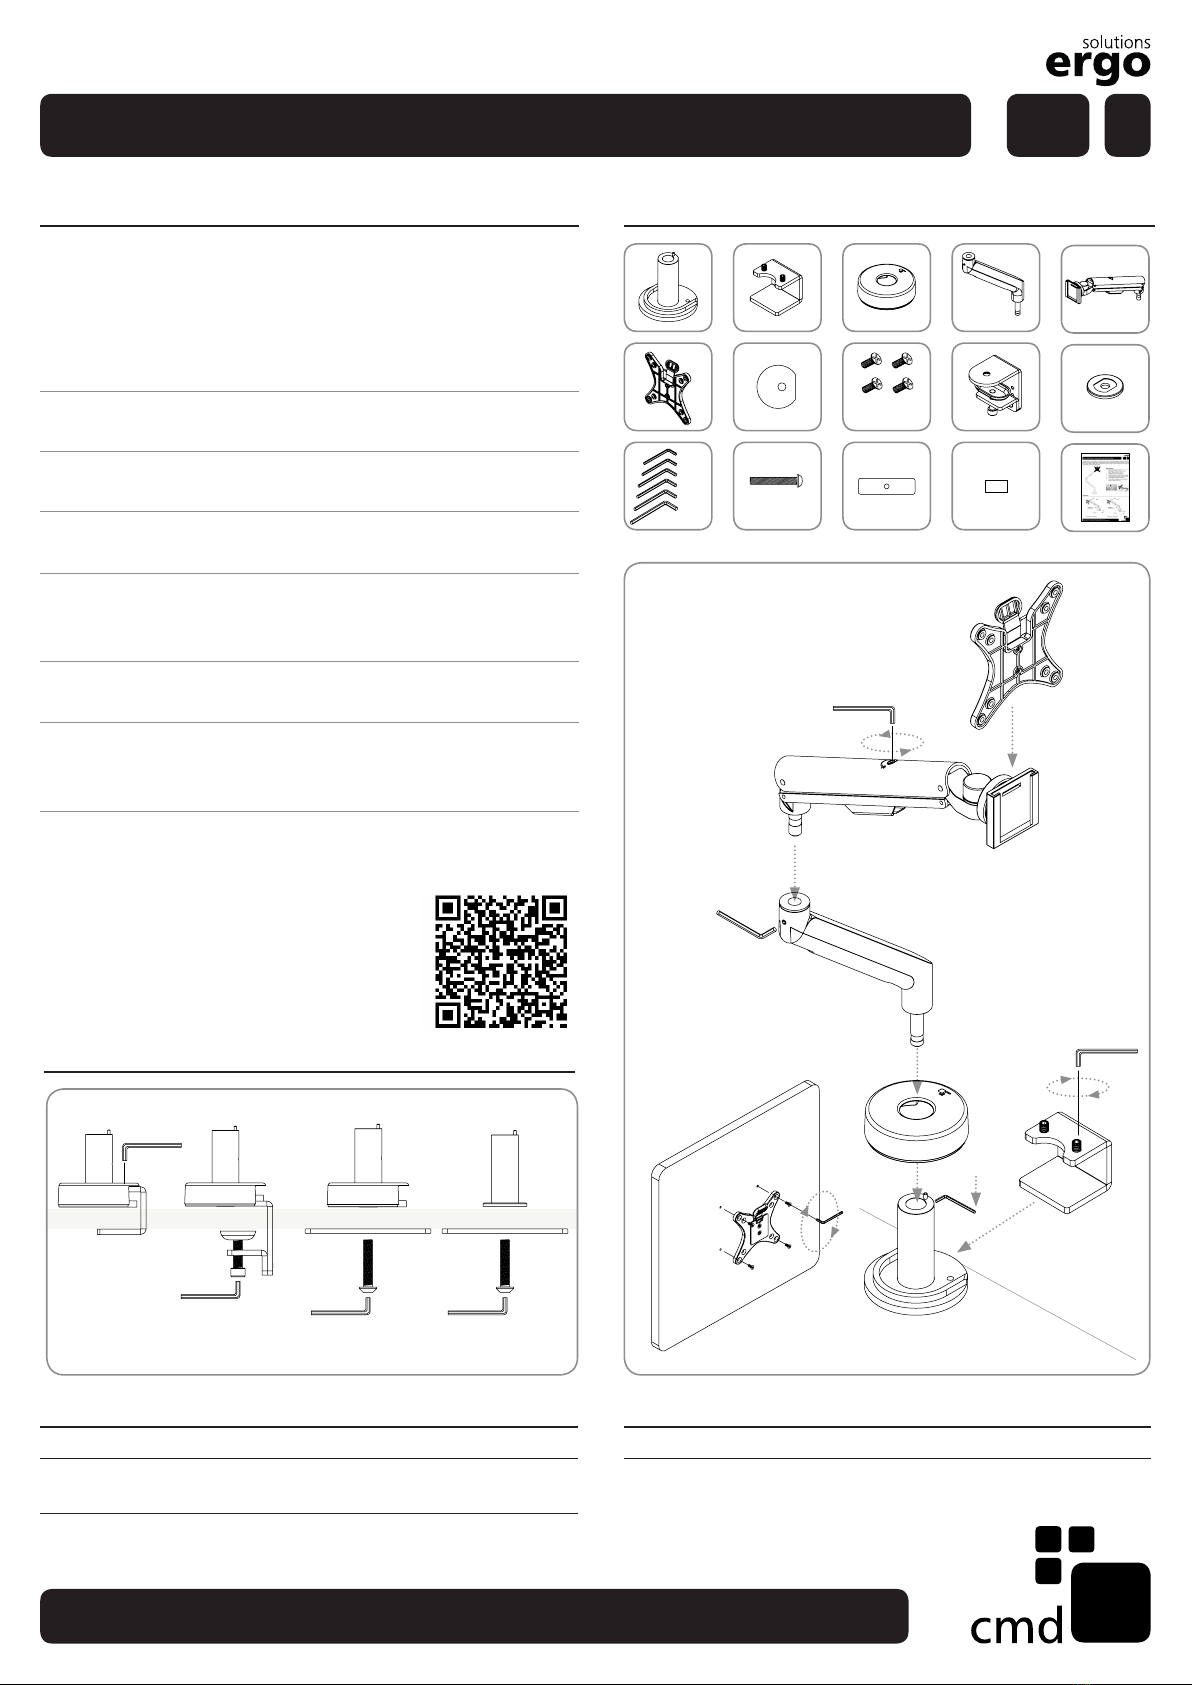
Fixing Instructions
1. Reach and ReachHD come supplied with the top
xing C clamp as standard. Place the stem and
spreader on the edge of the desk and secure
using the top xing bracket. Note: An EVA pad
is included in the xing kit to improve grip and
protect the desk surface.
2. Remove the grub screw from the back of the stem
and place the C clamp cover over the C clamp.
3. Install the lower arm section into the C clamp stem
and replace the grub screw. Tighten as required.
4. Install the upper arm section into the lower arm
section. Tighten the grub screw as required.
5. Attach the quick release VESA to the back of the
monitor using the screws provided (12mm and
16mm screws are provided).
6. Attach the monitor to the arm by sliding the VESA
into the head assembly until you hear a load click.
7. To adjust the arm, insert an Allen key into the
adjustment nut and rotate clockwise for heavier
monitors or counter clockwise for lighter monitors.
NB Scan the QR code below to see the installation
video, which includes details of how to change the
xing options shown below.
Fixing Options
1.
2.
3.
Attaching The Monitor
Single Reach Arm Assembly
4.
7.
Adjusting The Arm
5.
6.
Top Fixing Split Fixing Through Desk Rail Fixing
1x 1x 1x1x
1x
4x M4*12mm
4x M4*16mm
M10*60
1x 1x 1x 1x
1.5MM
1x
1x
1x
1x
1x
2.5MM
4MM
5MM
6MM
Contents
8MM


