manuals.online logo
Brands
  1. Home
  2. •
  3. Brands
  4. •
  5. CME Medical
  6. •
  7. Medical Equipment
  8. •
  9. CME Medical BodyGuard 595 User manual

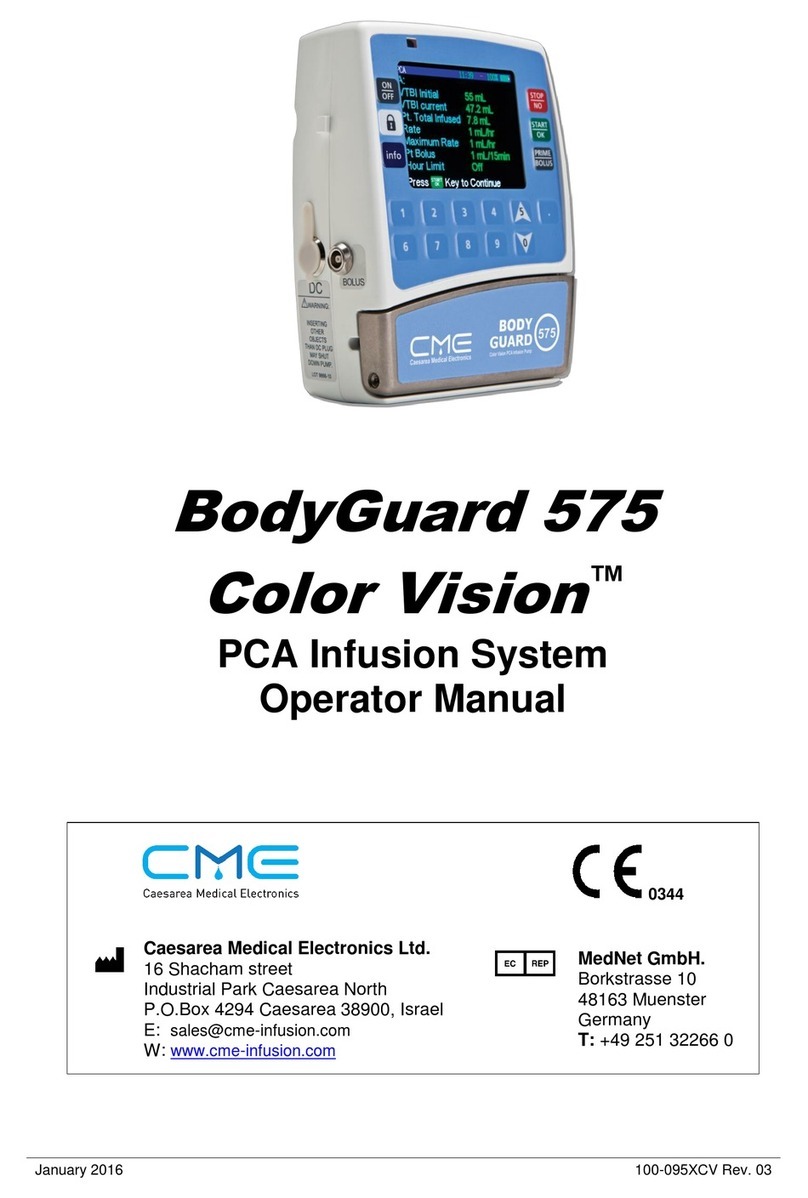
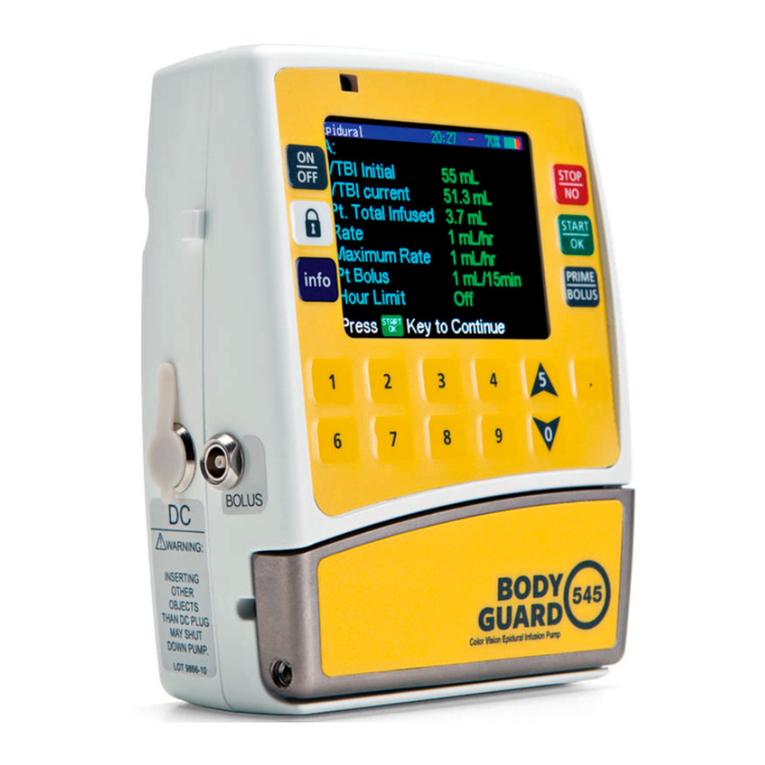
CME Medical BodyGuard 595 User manual

Operation Manual
CME Medical BodyGuard ™ 595 Regional Analgesia Infusion Pump Operation Manual Rev 2.3 October 2013
CONTENTS
NO DESCRIPTION PAGE
1.0 BODYGUARD PUMP OVERVIEW 3
2.0 PUMP DESCRIPTION AND FUNCTIONS 4-6
3.0 SYSTEM SAFETY CHECKS 7
4.0 SYMBOLS AND LABELS 8
5.0 INTENDED USE, WARNINGS, NOTES AND PRECAUTIONS 9-10
6.0 INSTALLATION AND SET-UP (Including Battery Charging and Powering Up) 11-12
7.0 OPERATING THE BODYGUARD PUMP 13-32
7.1 Security: Access Codes and Keypad Lock 13
7.2 Setting Up and Modifying Protocols 14-17
7.3 Administration Sets 18
7.4 Loading the Administration Set 19
7.5 Powering Up and Priming a Set 20
7.6 Selecting a Protocol 21
7.7 Interpreting Display Screen Whilst Infusing 22
7.8 Rate Change During Delivery (Rate Titration) 22
7.9 Bolus Dose Delivery: Patient Controlled Clinician Activated 23-25
7.10 End of Infusion and Bag Change 26
7.11 Using History Functions: Current Patient and 512 Event log 27-28
7.12 Eliminating Air During Operation 29
7.13 Alarms, Alerts and Troubleshooting 30-31
7.14 Review Pump Set Up 32
7.15 Change Pump Set Up 32
7.16 Keep Vein Open (KVO) 32
7.17 MAINTENANCE AND SERVICE 33
8.0 APPENDICES 34-44
10.0 INDEX 45
CME Medical BodyGuard ™ 595 Regional Analgesia Infusion Pump Operation Manual Rev 2.3 October 2013 2
3
CME Medical BodyGuard ™ 595 Regional Analgesia Infusion Pump Operation Manual Rev 2.3 October 2013
1.0 BODYGUARD PUMP OVERVIEW
The BodyGuard™ 595 Regional Analgesia Infusion Pump provides the follow-
ing:
Multiple programmes

Bolus only (Patient Controlled (PCA))

Continuous (basal) plus patient controlled bolus

Continuous only analgesia
Used for ambulatory care, can be pole mounted or used with a carrying pouch
A small, light and compact pump with quiet operation
+ - 5% accuracy, even at low infusion rates
Rechargeable Li-Polymer internal battery and mains operations
Battery charged in a pole mount charging cradle or with an A C adaptor
Free-flow protection integral to all administration sets (anti-siphon reflux)
Prevents false occlusion alarms when delivering boluses through narrow catheters by automatically
varying bolus delivery rate
Post-occlusion bolus prevention system
MediGuard™ protection ensures protocol is appropriate to patients weight
512 Event Log plus detailed patient history (1024 events log is optional)
Ability to output history to PC (printer or file) using BodyComm™ communications software (optional)
4
CME Medical BodyGuard ™ 595 Regional Analgesia Infusion Pump Operation Manual Rev 2.3 October 2013
2.0
PUMP DESCRIPTION AND FUNCTIONS
FRONT OF BODYGUARD PUMP
1
2
3
4
5
10
6
7
9
8
1.
DISPLAY SCREEN
a.
Displays pump infusion status
b.
Displays programming choices and instructions
2.
UP ARROW
a.
Scrolls up through options on menu screens
3.
START OK
a.
Confirms parameter selection
b.
Starts infusion
4.
STOP NO
a.
Stops infusion bolus
b.
Silences an alarm condition
c.
Stops priming
d.
Zeroes the displayed value during programming
e.
Erases the last digit during programming
f.
Returns to previous screen
g.
Returns to main menu when held down for 2 seconds after stopping
infusion delivery
5.
BOLUS
a.
Administers bolus dose during PCA regimes (this function is normally
performed using the remote bolus cable)
b.
Activates clinician (CA) bolus when pump in STOP mode. (Can only be
activated under code conditions)
5
CME Medical BodyGuard ™ 595 Regional Analgesia Infusion Pump Operation Manual Rev 2.3 October 2013
6.
POWER ON OFF
a.
Turns the pump on by pressing and holding the key until the software
version confirmation screen appears and a beep is heard
b.
Turns the system off by pressing and holding the key until the graph is
black and a beep is generated
7.
LED window (beneath the bolus and on off keys)
a.
Green indicator
-Lights during system self-test
-Intermittent green light indicates infusion delivery
b.
Red indicator
-Indicates an alarm state with a continuous red light
-Lights when the pump is in a stand-by mode during programming
8.
INFO
a.
When pressed during infusion displays:
-Infused volume and total to be infused
-Battery status
-Bolus attempts, given and Clinician Bolus volume
-Protocol review screen
-Date and time
b.
Press STOP/NO and then INFO to access:
-Volume and boluses given in the last 24 hours
-Hour-by-hour utilisation data
-Hour-by-hour chart of bolus demand in last 24 hours
-Hour-by-hour chart of volume infused in last 24 hours
c.
Holding the INFO key down whilst the pump is infusing (until the graph
displayed turns black), locks and unlocks the keypad to prevent
accidental or deliberate changes to pump operation
9.
DOWN ARROW
a.
Scrolls down through options on menu screens
10.
NUMERICAL KEYS
a.
Enters numeric parameters during programming
b.
Enter access code
6
CME Medical BodyGuard ™ 595 Regional Analgesia Infusion Pump Operation Manual Rev 2.3 October 2013
BODYGUARD PUMP WITH DOOR OPEN
1
6
2
7 3
4
5
No.
Area Function
1. Door latch Opens the door and holds it closed when latch is in vertical position
2. Pressure sensor Detects downstream tubing restriction and occlusion (behind keyway)
3. Keyway Guides the administration set into correct position and ensures only
dedicated administration sets are used
4. Pressing plate Helps keep tubing in place in tubing chamber. Connected to the door by
two springs
5. Pump door Covers the pressing plate
6. Flow direction Shows direction of fluid flow
7. Ultrasonic air sensor Detects air bubbles in tubing
BODYGUARD PUMP IN CHARGING UNIT
Charger display
Displays major pump messages and operation values
Release handle
Push to release the pump from the charging unit
7
CME Medical BodyGuard ™ 595 Regional Analgesia Infusion Pump Operation Manual Rev 2.3 October 2013
3.0 SYSTEM SAFETY CHECKS
The following details outline the safety checks designed into the BodyGuard™ pump to minimise the
possibility of under or over infusions.
FREE FLOW PROTECTION
When the set is installed in the pump and the door closed, two ridges on the door clamp the set so only
the movement of the motor pistons can allow fluid to pass. With the door open, protection is afforded by
a check valve, present in all
BodyGuard™
sets, that prevents free flow towards the patient when the set is
not attached to the pump. When the pump is attached to the set and delivering fluid, the pressure
delivered by the pump opens the valve. The check valve also prevents reflux. The design of the check
valve means that although a pressure of 2-3psi can open the check valve in the direction of the patient,
reflux cannot occur regardless of the pressure that builds up in the set.
POST OCCLUSION BOLUS REDUCTION SYSTEM
During an occlusion, pressure in the downstream section of the line can build up to 21psi (depending on
user defined settings). When the pump alarms the user will check the line and attempt to clear the
occlusion. In the absence of Post Occlusion Bolus Reduction System the pressure build up could cause a
surge of fluid into the patient. This feature works by reversing the operation of the motor until pressure
in the downstream line is returned to neutral (usually within 15 seconds).
AIR-IN-LINE DETECTION
The
BodyGuard™
pump utilises two modalities to detect air-in-line. The ultrasonic detector can be config-
ured between 0.0 (OFF) and 1.0ml on the
BodyGuard™
pump for single bubble detection whilst a
cumulative check triggers the alarm if an accumulation of smaller bubbles totals 1.0ml (non-configurable)
in any 15 minute period. Although a single bubble may not exceed the user defined threshold (e.g. 0.5ml)
if the cumulative volume of smaller bubbles exceeds 1ml (e.g. if three 0.4ml bubbles pass the sensor
within a 15 minute period) an ‘Air Up Occlusion’ alarm is activated. This accumulation feature is
particularly useful when infusing products that create a significant number of small air bubbles (out-gas)
to a patient who is highly sensitive to air i.e. infants, neonates, children. If OFF (0.0ml) there is a 3ml
volume for air in line detection.
PROGRAMME LIMITS (including MediGuard™ toxicity settings)
Under ‘Change Set Up’ users can choose from a number of options to limit protocol parameters and set
safe ceilings on drugs infused. When the MediGuard™ feature is on users are asked to set the patients
weight (kg) and a toxicity ceiling in either ml, mg or mcg (depending on pump configuration) per kilogram
bodyweight per hour. If users try to set a protocol where the component elements (basal rate and
boluses) exceeds the MediGuard™ limit the pump will alert the user to this and request they re-confirm
their intentions, amend or revise the toxicity ceiling. Level One users will not be able to change the
protocol or ceiling under Select Protocol and will have to select an alternative appropriate protocol or
consult senior clinical staff with Level Three authority. Alternatively you can choose to simply limit either
the rate or number of boluses delivered over either a 0, 1, 4, or 24 hour period according to local
practice.
8
CME Medical BodyGuard ™ 595 Regional Analgesia Infusion Pump Operation Manual Rev 2.3 October 2013
4.0
SYMBOLS AND LABELS
The following symbols are used on the BodyGuard pump, accessories and consumables. Labels on the
pump or statements in this manual preceded by any of the following words and or symbols are of special
significance, intended to help you to operate the pump in a safe and successful manner.
IPX3
Symbol for degree of protection against ingress of water
Symbol for type of protection against electric shock - Class II equipment
Attention, consult accompanying instructions
0344
CE mark indicates conformance to Medical Device Directive 93 42 EEC
Do not dispose of in municipal waste. Symbol indicates separate collection
for electrical and electronic equipment. (WEEE Directive 2002 96 EEC)
NOTE: Does not apply to the battery
Do not dispose of battery in municipal waste. Symbol indicates separate
collection for battery is required
The use of single-use disposable components on more than one patient is a
biological hazard. Do not reuse single-use disposable components
Type CF applied part
Date of manufacture
Serial number
Expiry date of disposable
LOT
Lot number
STERILE EO Sterilised with Ethylene Oxide
9
CME Medical BodyGuard ™ 595 Regional Analgesia Infusion Pump Operation Manual Rev 2.3 October 2013
5.0 INTENDED USE, WARNINGS, NOTES AND OPERATING PRECAUTIONS
INTENDED USE
The BodyGuard™ 595 Regional Analgesia Infusion Pump is designed for patients who require nerve block
or wound infiltration pain management. CME Medical recommends dedicated pumps for differentiation
between nerve block, epidural and IV administration to prevent medication errors.
The BodyGuard™ pump is also available in both a PCA and colour-coded epidural format.
Please ask your local representative or contact us direct for further details. Please ensure the pumps are
only used by, or under the supervision of trained medical staff.
WARNINGS AND NOTES
Warnings and notes will be seen throughout this manual. These are described as:
PRECAUTIONS
ABOUT THIS MANUAL
•
The operator must be thoroughly familiar with the BodyGuard™ 595 Regional Analgesia Infusion
Pump described in this manual prior to use, and in particular must read and understand any precau-
tions stated herein. If a software change occurs and the operation specification for the pump chang-
es, new or additional operating instructions will be issued, if needed. All illustrations used in this man-
ual show typical settings and values that may be used in setting up the functions of the pump. These
settings and values are for illustrative use only. The complete range of settings and values are speci-
fied in the specifications section of this manual.
•
This operating manual document has been developed with consideration to the requirements in rele-
vant Harmonised Standards. Data presented in the Technical Specifications reflect specific test condi-
tions defined in this standard. Other external factors such as varying back pressure, temperature,
head height, set usage, fluid restrictions, solution viscosity or combinations of these factors, may re-
sult in deviations from the performance data enclosed.
WARNING: Warnings advise of circumstances that could result in injury or death to the user operator
or circumstances that could result in damage to the device. Read and understand this manual and all
warnings before operating the BodyGuard 595 Regional Analgesia Infusion Pump .
NOTE: Indicates that the information that follows is additional important information or a tip that
will help you recover from an error.
10
CME Medical BodyGuard
™ 595 Regional Analgesia Infusion Pump Operation Manual Rev 2.3 October 2013
OPERATING PRECAUTIONS

Although the BodyGuard pump has been designed and manufactured to exact specifications, it is not
intended to replace trained personnel in the supervision of pain management infusions.

CME Medical will assume no responsibility for incidents which may occur if the product is not used,
stored or transported in accordance with the environmental conditions stipulated in this document
and on the package labelling.

This infusion pump is designed for ambulatory use, and should withstand everyday handling. If the
pump is dropped onto a hard surface, or is suspected of being dropped, the operation and calibration
should be checked by a qualified technician.

Do not bathe or shower whilst using the pump or immerse into liquid. The pump is resistant to a lim-
ited amount of splashing, but its construction does not make it resistant to large amounts of spraying
or immersion in liquids. Damage to the internal components may result.
•
The BodyGuard pump should be operated within a temperature range of +18ºC (+59ºF) to +45ºC
(+113ºF) and up to 85% humidity. Operating the pump at temperatures and or humidity other than
within that range may affect accuracy.

Do not operate the pump near high-energy radio-frequency emitting equipment, such as electro-
surgical cauterising equipment. False alarm signals may occur.
INFUSION PRECAUTIONS

Always read and follow the instructions which accompany the administration sets. Carefully follow
the instructions for priming the set, as well as the recommended set change interval.

The fluid bag and administration set should be disposed of in an appropriate manner, considering the
•
nature of the residual fluid that may be contained within, in accordance with the hospital homecare
provider’s disposal practices.

Drugs for infusion by use of the pump may only be prescribed by a qualified medical practitioner.

Caution must be exercised in the selection of drugs and the amount and rate intended to be delivered
via any infusion pump.

If the drug contained in the fluid bag will be exposed to extreme environmental conditions for pro-
longed time periods, it is important to select drugs that will not change pharmacologically upon such
exposure.

As with all automatic infusion devices, whenever a toxic or dangerous level of drug is stored in the
reservoir, constant monitoring of the infusion is required.

In all applications, time to alarm under occlusion or other fault conditions will depend on the infusion
rate and levels of alarm settings. It is recommended to consider these parameters when using drugs
requiring infusion stability or low flow rates, and therefore a quick time to alarm.

Disposables must be compatible with the medicine delivered.

When operating the pump on patient controlled programme with a rate of 0.00ml h there is a hazard
of blood clot forming. Connecting a clear fluid infusion in parallel will avoid this problem.
GENERAL PRECAUTIONS

Do not use hard or sharp objects on the keypad.

The specified accuracy of the pump can only be maintained if the pump is used, maintained and ser-
viced in accordance with the instructions given in this manual. If the pump has failed to calibrate dur-
ing the servicing procedure, it must be returned for repair or disposal.

If the pump is dropped, subjected to excessive moisture, humidity or high temperature, or otherwise
suspected to have been damaged, remove it from service for inspection by qualified personnel.

The pump has been designed to be as safe as possible to handle; however, care should be exercised
to avoid trapping of fingers or other body parts in the mechanism.
1
1
CME Medical BodyGuard
™ 595 Regional Analgesia Infusion Pump Operation Manual Rev 2.3 October 2013
6.0 INSTALLATION AND SET-UP
PLACING AND REMOVING THE PUMP FROM THE CHARGING UNIT
PLACING THE PUMP INTO THE CHARGING UNIT
Put the pump into the charger top first until it clicks into place
REMOVING THE PUMP FROM THE CHARGING UNIT
Press the pump release button to lift the pump out of the charger bottom first
CHARGING THE PUMP
Connect the charger unit to AC power, the AC power indicator will be amber
Battery charging status Indicator
Verify that the indicator is lit: Green light = fully charged battery
Red light = battery charging
BATTERY AND CHARGING PRECAUTIONS

Be sure that the battery is fully charged at all times.

Replace the battery once every two years.

When the pump is not in use store the pump in the charger.
•
After the “End Battery” signal has been activated or following long periods of storage, wait 2 minutes
after the pump has been connected to an AC power supply before operating.

Do not operate the pump on AC power if the battery is not loaded in the pump for back up.

Whenever possible, use the pump connected to an AC power supply via the charging unit. This pre-
serves the battery power supply for emergency use or for situations where the AC power is not availa-
ble.

The pump is protected against overcharging. In order to keep your battery fully charged, connect the
pump to the mains via the charger whenever possible.

Blown fuses could cause a fire hazard. Replace blown fuses on the charger only with fuses of the same
type and rating (see fuse values on the charger PCB).

Battery charging is enabled as long as the charger cord is connected to the mains and the pump is in
the charger unit. Switching the pump off does not disconnect it from the mains. To disconnect from
the mains, remove the charger cord from the mains.
WARNING: Voltage present on internal components may cause severe shock or death upon contact.
Disconnect the charger from the mains, prior to opening the casing. Only trained service personnel
should open the pump cover.
NOTE: Before using the BodyGuard pump ensure the battery is fully charged
1
2
CME Medical BodyGuard
™ 595 Regional Analgesia Infusion Pump Operation Manual Rev 2.3 October 2013
MAINS POWER AND BATTERIES
The BodyGuard pump is powered by an AC (mains) power source. The pump uses external rechargeable
1800mAh Li-Polymer Li-ion battery as an alternate power source. To assure continuous operation, the
pump will switch from AC to battery power automatically in the event of AC power interruption. The pump
also switches to battery power when disconnected from AC power. For example, if the patient needs to
ambulate, you can disconnect the pump from AC power and it will automatically continue operating on
battery power until reconnected to AC power.
MAINS POWER AND BATTERY USAGE

Do not operate the pump on AC power if the battery is not loaded in the pump for back up.

The pump is protected against overcharging. In order to keep your battery fully charged, connect the
pump to the mains via the charger whenever possible.

Switching the pump off does not disconnect it from the mains. To disconnect from the mains, remove
the charger cord from the mains.

Whenever possible, use the pump connected to an AC power supply via the charging unit. This pre-
serves the battery power supply for emergency use or for situations where the AC power is not availa-
ble.

Battery charging is enabled as long as the charger cord is connected to the mains and the pump is in the
charger unit.

Replace the battery once every two years.

Always make sure that the pump’s rechargeable battery is fully charged before using the pump.

A fully-depleted external rechargeable 1800mAg Li-Polymer Li-ion battery takes about six hours to re-
charge. The battery level does not have to be empty for the battery to be recharged.

To avoid complete loss of power, check the battery level frequently and recharge the battery if needed
using a BodyGuard pump battery charger.

When the Low Battery alert condition occurs, connect the pump to the charger as soon as possible. You
have about 30 minutes before total loss of battery power.

When the End Battery alarm condition occurs, connect the pump to the charger immediately otherwise
the battery will fail imminently.

When the pump is not in use store the pump in the charger.

After the “End Battery” signal has been activated or following long periods of storage, wait 2 minutes
after the pump has been connected to an AC power supply before operating.
FACTORS THAT AFFECT BATTERY LIFE
The actual battery life you experience depends on many factors. These factors vary among pump users,
according to how and under what conditions they use the pump.
Factors that affect battery life include:

Age of battery

Infusion flow rate

Other programmed infusion parameters

Which pump features are used

Ambient temperature in which pump is used

How often the pump display screen backlight is used

How long the pump is left on, in Standby mode

How long the battery is left uncharged before recharging
WARNING: Voltage present on internal components may cause severe shock or death upon contact.
Disconnect the charger from the mains, prior to opening the casing. Only trained service personnel
should open the pump cover.
WARNING: Blown fuses could cause a fire hazard. Replace blown fuses on the charger only with fuses
of the same type and rating (see fuse values on the charger PCB).
1
3
CME Medical BodyGuard
™ 595 Regional Analgesia Infusion Pump Operation Manual Rev 2.3 October 2013
7.0
OPERATING THE BODYGUARD PUMP
7.1
DEDICATED BODYGUARD ADMINISTRATION SETS
Only dedicated BodyGuard administration sets should be used with BodyGuard pumps. All BodyGuard mi-
cro sets incorporate the following features:

Latex-free, micro bore anti-kink tubing to prevent occlusion particularly in ambulatory configuration.

Colour-coded to aid identification of administration route.

Pumping segment non-colour coded, section containing the key block, visible on the pumping
segment ensures set can only be installed correctly (for direction of flow) and that only dedicated
sets (calibrated to the pump to ensure accuracy) are used

Check valve (anti-siphon anti-reflux) at the distal end of the set

Choice of straight or angled spikes
Straight
spike
Angled
spike
230cm, colour coded, intravenous administration spike set with approximate 5ml priming capacity.
ANTI-FREE FLOW VALVE
The Anti-Free Flow valve enhances pump functioning by:
°Preventing free-flow in the event the set is detached from the pump
°Preventing back-flow (reflux) in the event several infusion pumps are connected simultaneously to the
same patient
°Preventing free-flow in the event of a mechanical malfunction
°The mechanism along the inner door side of the pump maintains optimal accuracy even if the line is
used over several days
WARNING: BodyGuard sets are designed specifically for ambulatory use. They have a set capacity of
c.5ml for safety reasons. Normal hospital lines can hold up to 16ml of fluid which is not appropriate
when administering potent drug agents. Non-colour coded sets are available on request.
WARNING: Use of administration sets other than dedicated sets may impair the operation of the
pump and accuracy of infusion. Do not operate the BodyGuard pump with any set other than those
supplied by CME Medical or through their distribution partners.
WARNING: All BodyGuard dedicated administration sets incorporate sections of PVC tubing and the
pumping segment is polyurethane silicone. Do not use pharmaceuticals with this device that are not
compatible with either PVC or polyurethane administration sets.
NOTE: A kinked occluded administration set may impair operation of the pump and the accuracy of
the infusion. Before operation, verify that the set is not kinked or occluded. BodyGuard sets are manu-
factured from kink resistant tubing.
1
4
CME Medical BodyGuard
™ 595 Regional Analgesia Infusion Pump Operation Manual Rev 2.3 October 2013
7.2
LOADING THE ADMINISTRATION SET
1.
Prepare fluid bag and attach to administration set.
2.
Open the BodyGuard pump door (using latch on right side of door).
3.
The clear, silicone section of the administration line fits into the pump. Hold this section of tubing
with the key (small plastic block) on the right and make sure the flow direction is in line with the flow
direction arrows inside the pump door.
4.
Insert the BodyGuard administration set into the pump by placing the black key into the keyway mak-
ing sure the protrusions face upwards. Close the pump door until the catch clicks.
WARNING: Use aseptic technique. Patient infection may result from the use of non-sterile
components. Maintain sterility of all disposable components and use single use consumables marked
once only.
WARNING: Do not attach the set to the patient’s access device before priming the administration set.
WARNING: The key can only be fitted into the keyway one way. If you are having trouble fitting it do
not force it in. Check to ensure you have correctly lined up the tubing with the direction of flow.
20
CME Medical BodyGuard ™ 595 Regional Analgesia Infusion Pump Operation Manual Rev 2.3 October 2013
7.3
POWERING UP AND PRIMING A SET
1.
Once the set is loaded turn on the BodyGuard pump by pressing
ON/OFF
2.
During power up these screens display
automatically to confirm pump software
version and pre-set limits
3
Press
START/OK
to resume a previous infusion (retain patient history) or
Press
STOP/NO
to take you to the main menu
4.
Enter Level One access code, press START/OK
5 Ensure the cursor is pointing to ”Prime”, or scroll to if necessary (the
text appears in a larger font), press START/OK
6.
The screen prompts you to check and ensure the pump is disconnected
from the patient, to commence priming press START/OK
7.
The chart now displays the progress versus total pre-set priming
volume.
You may stop priming at any time or repeat the last two steps if
the line is not completely primed after first priming function
8.
On completion of priming the screen displays the main menu
WARNING: Do not attach the set to the patient’s access device before priming the administration set.
NOTE: Priming volume is user configurable depending on the capacity of the administration sets in
regular use in your service. For pain management sets, a 6ml prime volume is suggested.
NOTE: All BodyGuard administration sets contain a check valve which means the line cannot be
primed using gravity. Sets must be primed using the infusion pumps priming function.
NOTE: The priming volume and rate can be changed in via the “Change Set Up” option in the main
menu. Increasing the priming rate may cause excessive turbulence in the set on priming and make it
difficult to purge all air from the system. CME Medical recommend a priming rate of <425ml h.
PRIME
0
6
Press OK to Resume
Press NO for Menu
Level One Code
...................
Enter and Press OK
Prime
Select Protocol
Change Bag
Prime
=>Select Protocol
Change Bag
BodyGuard
XXXXX
Limit OFF
Air Alarm 0.5 ml
Occlusion XX psi
WARNING !!
Disconnect Patient
Press OK to Prime
2
1
CME Medical BodyGuard ™ 595 Regional Analgesia Infusion Pump Operation Manual Rev 2.3 October 2013
7.4
SELECTING A PROTOCOL
Under normal, everyday circumstances most users of dedicated infusion pumps use the pumps to perform
the same or a limited number of infusion protocols for the majority of patients. For example, in pain man-
agement it is common for patients to be on a regime consisting of bolus only delivery of a set concentra-
tion supplied by pharmacy in a fixed infusion bag volume. The service may occasionally use different bolus
volumes or lockout times depending on individual patient needs.
This means once you have set up these protocols, using the Level Three access code in ‘Modify Protocol’ as
described in the previous section, Level One code users can then access the pump and run the standard
protocols for a patient without having to enter or change any infusion parameters. This reduces the risk of
inadvertent changes of key parameters during set up. To select a protocol for a new patient:
1
Load an administration set, close the pump door and turn the power on (refer to page 18 “Powering
up and priming” for full instructions) following completion of priming, the pump returns to the main
menu.
2.
Ensure the curser points to “Select Protocol”, (larger font denotes the
option selected), press START/OK
3.
To confirm set up is for a new patient, press START/OK
To resume press STOP/NO (this carries forward patient totals)
4
Select the Protocol required by using ↑ ↓ (larger font denotes the
option selected), press START/OK
5.
The infusion summary screens displays, to confirm press START/OK
6
The protocol summary screen displays, to confirm press START/OK
Review the summary screen carefully to ensure the parameters match the
prescription
7.
Start the infusion when ready to do so by pressing START/OK
8
The infusion summary screen now displays
(See over the page for interpretation of this screen)
NOTE: If MediGuard feature is turned on the user is prompted for patients weight. Enter in kilograms
then press START. Refer to Appendices for MediGuard set up.
Rate
0ml h
Max. Rate 0ml h
PCA 1ml
5min
OH
Limit
OFF
Prime
=>
Select
Protocol
Change Bag
New Patient?
Answer OK or NO
A:
BOLUS
B: CONT + BOLUS
C:
D:
VTBI Initial 480 ml
VTBI Current 480 ml
Volume Infused 0
Press OK to Continue
Start Infusion?
P
A
BOLUS
Bolus 1ml
Lock Out 5 min
2
2
CME Medical BodyGuard ™ 595 Regional Analgesia Infusion Pump Operation Manual Rev 2.3 October 2013
P
A
BOLUS
Bolus 1ml
Lock Out 5 min air
Rate 1 ml h
Enter and Press
7.5
INTERPRETING THE SCREEN WHILST INFUSING
1 4
2
5
3
6 7
1.
“P”= Protocol.
2.
The title assigned to the protocol selected.
3.
The currently selected protocol letter displays in the left hand margin of the display.
4.
Programmed infusion rate (mg or ml hour) - displays the current infusion rate in the units
configured for that protocol, (i.e. ml h, mg h or mcg h). If the maximum basal rate has been set
to 0ml h in ‘Change Set Up’, or the protocol does not contain a continuous infusion element, the
infusion rate line will be replaced with bolus volume.
5.
Battery Status indicator—the battery symbol will be visible if the pump is not connected to the
mains charger and the level of charge can be checked by monitoring the black fill inside the
symbol (i.e. A completely black symbol indicates a fully charged battery).
6.
Displays the bolus volume for the current protocol. As with infusion rate this will be displayed in
mls, mgs or mcg depending on how the current protocol is set up. If the maximum basal rate has
been set to 0ml h in ‘Change Set Up’ then this line is replaced with the bolus lock out time in
minutes.
7.
Air detector indicator: if the single bubble air detection has been disabled then the display will
indicate this with the word “air” (scored through) to warn the user.
NOTE: Users can also confirm the pump is infusing by checking the LED is blinking green. The LED can
be
7.6
RATE CHANGE DURING DELIVERY (Rate Titration)
If the protocol selected contains an initial infusion rate and a maximal rate that allows titration then this rate
can be titrated as follows: (example shown is changing rate to 2ml h)
1.
Whilst the infusion is running, enter the new infusion rate using the
numerical keypad, press START/OK (change not available if keypad
locked)
2.
Enter the relevant access code, press START/OK
3.
The pump beeps to confirm acceptance of the change and the new
rate is confirmed on the display
NOTE: If the rate selected is above the protocol maximum range the pump will not accept the entry
and will display a message notifying the maximum rate allowed.
Level One Code
...................
Enter and Press OK
P
B
CONT + BOLUS
Rate 2 ml
Pt Bolus 1ml
2
3
CME Medical BodyGuard ™ 595 Regional Analgesia Infusion Pump Operation Manual Rev 2.3 October 2013
7.7
BOLUS DOSE DELIVERY
The BodyGuard pump can be configured to deliver a patient-controlled bolus or an auto-bolus. In addition
there is the option of a Clinician Activated Bolus.
BodyGuard has a feature which optimises bolus delivery speed and prevents false occlusion alarms when
infusing through narrow catheters. The pump attempts the bolus at the pre-set bolus rate. If a back pres-
sure above the pre-set occlusion pressure level is detected during delivery it reduces the delivery speed
until a pressure below the occlusion alarm level is achieved. If it cannot achieve this even at the minimum
bolus delivery rate the pump will then alarm ‘Down Occlusion’. This feature prevents false occlusion
alarms during bolus delivery through narrow catheters.
PATIENT CONTROLLED BOLUS
The BodyGuard pump can be programmed to allow the patient to administer bolus doses of medication on
demand, either with or without a continuous background (basal) infusion.
A patient-controlled bolus can
only be activated via the remote bolus button.
If a bolus has been programmed into the current regime it will always include the following parameters:
1.
Bolus volume – the volume of drug to be delivered in each bolus event. When the bolus button is
pressed the pump will beep to confirm acceptance and a bar chart will appear on the display
confirming bolus volume to be delivered and progress as the pump delivers it.
2.
Lock Out – the lockout time which must elapse after a bolus dose has been delivered before the pump
will allow another bolus dose. If the patient presses the bolus button during the Lock Out the pump will
beep to confirm the press but no chart is displayed and the pump continues with the back ground Infu-
sion (if programmed).
Users can check the time until the next bolus dose will be available for the patient by using the INFO
key to view the Bolus Summary screen where the countdown is shown beside the boluses given count.
Every minute, the infusion running screen will display when the next bolus is available.
If an occlusion is experienced or the pump is stopped during bolus administration the pump will allow the
remainder of the partially delivered bolus dose to be requested and delivered, once the occlusion has
been cleared and or the pump restarted, without the patient having to wait another full lockout period.
If the patient does not take the residual within the lockout time the amount available resets to the
programmed dose.
NOTE: BodyGuard is capable of delivering the bolus dose up to a maximum rate of 1000ml h and
down to a minimum of 100ml h in ‘Change Set Up’ Mode. The default setting is 300ml h. A Level Three
access code user can adjust bolus delivery rate as required.
NOTE: Patient-controlled bolus and Clinician Activated Bolus will be covered in the following sections.
For information on auto-bolus refer to Appendices, page 42.
NOTE: Every press of the bolus button, whether a dose is given or just attempted, enters a record in
the patient history and 512 event log. Using the information key (see next section). It allows the user
to check boluses given vs. attempts in order to check patient’s current regime is sufficient for their
pain status.
2
4
CME Medical BodyGuard ™ 595 Regional Analgesia Infusion Pump Operation Manual Rev 2.3 October 2013
CLINICIAN ACTIVATED (CA) BOLUS
During certain pain management protocols it may be necessary for the clinician to administer loading or
top up bolus outside of the parameters of the standard protocol. A Clinician Activated Bolus can be given
prior to, or during an infusion.
A loading dose delivered before the user goes to ‘Select Protocol’, using the Clinician Bolus’ option from
the main menu, will not show in the patient history as all counters are cleared when you select ‘New Pa-
tient?’ during protocol selection. If you wish the loading dose to be recorded then deliver it immediately
after the infusion has commenced using the steps described over the page.
CA boluses delivered after the start of a protocol are recorded in the current patient history and the num-
ber of doses and total volume can be seen on the Bolus Summary screen.
TO ADMINISTER A CLINICIAN ACTIVATED BOLUS LOADING DOSE BEFORE THERAPY COMMENCES
(i.e. immediately after the set has been primed and connected to the patient but before selecting a
protocol):
1.
Scroll down the main menu to ‘Clinician Bolus’, press START/OK
2.
Enter the relevant access code (if authorised), press START/OK
3.
Enter the desired volume of the bolus required, press START/OK
4.
To commence bolus delivery, press START/OK
Bolus delivery status displays:
On completion of bolus delivery the screen reverts to the main menu
5.
In the main menu, scroll to Select Protocol and proceed with set up
WARNING: CA Bolus overrides programme limits. Take care to ensure only trained, authorised
personnel have the relevant code and understand the function of this feature.
NOTE: Lead personnel can limit the maximum clinician dose under ‘Change Set Up’ to prevent
accidental overdosing. Default setting is 0ml for a single dose but this can be configured between 0ml
(disabled) to 20ml (maximum).
NOTE: If an occlusion occurs or the pump is stopped during clinician bolus delivery the user will have
to repeat steps to deliver the balance of the CA bolus.
NOTE: If the user requests a dose above the default or configured maximum clinician dose the pump
will display the maximum single dose available and the user should then re-enter within this limit.
Volume
2 ml
0 1.3
2
2
5
CME Medical BodyGuard ™ 595 Regional Analgesia Infusion Pump Operation Manual Rev 2.3 October 2013
TO ADMINISTER A CLINICIAN ACTIVATED BOLUS DURING AN INFUSION:
1. To stop infusion delivery, press STOP/NO
2. Press the bolus key (syringe icon)
3. Enter Clinician access code, press START/OK
4. Enter the desired volume of the bolus required, press START/OK
Bolus delivery status displays:
Once BodyGuard has delivered the CA Bolus the infusion continues running the current protocol
NOTE: If the user requests a dose above the default or configured maximum clinician dose the pump
will display the maximum single dose available and the user should then re-enter within this limit.
Volume
2 ml
0 1.3
2

Other CME Medical Medical Equipment manuals

CME Medical BodyGuard 323 Instruction manual

CME Medical

CME Medical BodyGuard 323 Instruction manual

CME Medical Body Guard 323 Instruction manual

CME Medical

CME Medical Body Guard 323 Instruction manual

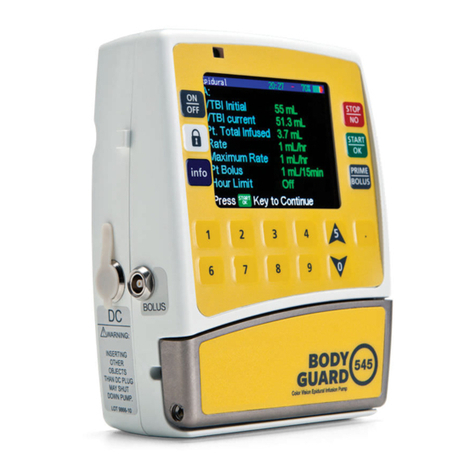
CME Medical Bodyguard 545 Instruction manual

CME Medical

CME Medical Bodyguard 545 Instruction manual

CME Medical T34 User manual

CME Medical

CME Medical T34 User manual

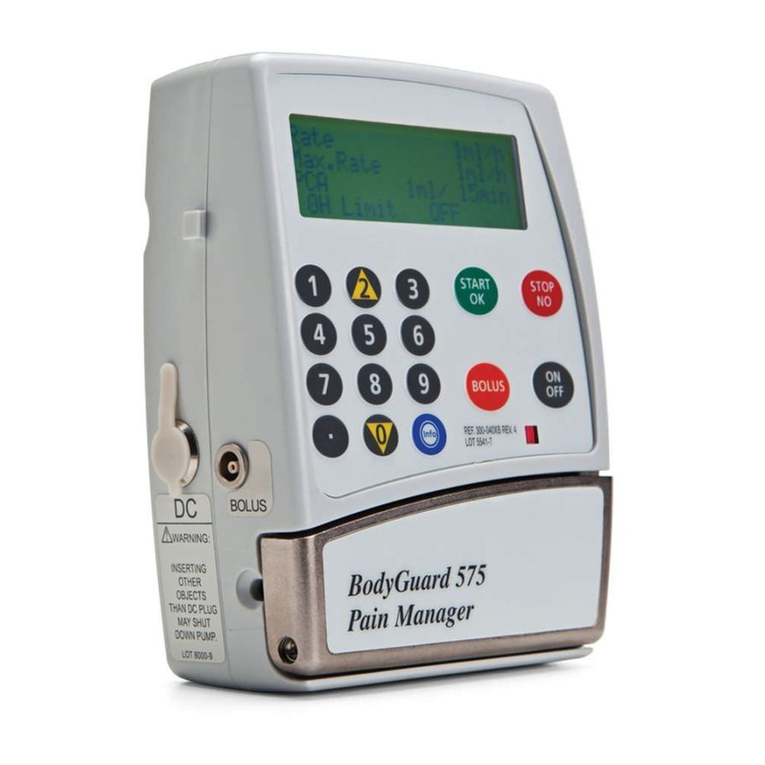
CME Medical Color Vision BodyGuard 575 User manual

CME Medical

CME Medical Color Vision BodyGuard 575 User manual

CME Medical BODY GUARD 545 User manual

CME Medical

CME Medical BODY GUARD 545 User manual

CME Medical BODY GUARD 2CH CONTINUOUS MODE Instruction manual

CME Medical

CME Medical BODY GUARD 2CH CONTINUOUS MODE Instruction manual

Popular Medical Equipment manuals by other brands

AirSep VisionAire V Patient manual

AirSep

AirSep VisionAire V Patient manual

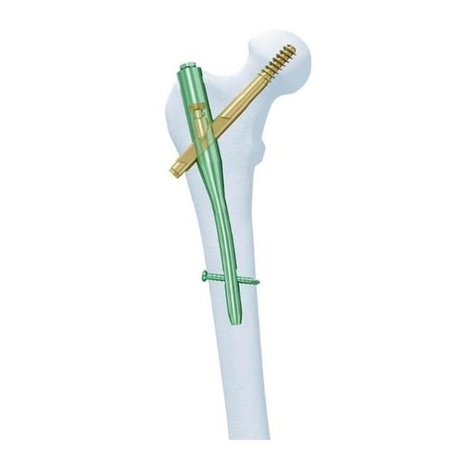
Synthes Titanium Trochanteric FixationNail System Technique guide

Synthes

Synthes Titanium Trochanteric FixationNail System Technique guide

HeartSine SAM 350P AED quick start guide

HeartSine

HeartSine SAM 350P AED quick start guide

Zeiss Cryo Trap instruction manual

Zeiss

Zeiss Cryo Trap instruction manual

idi Aspect ISO-Drive Operator's manual

idi

idi Aspect ISO-Drive Operator's manual

Orliman DS03 Use and maintenance instructions

Orliman

Orliman DS03 Use and maintenance instructions

Innovo INV-430J Operation guide

Innovo

Innovo INV-430J Operation guide

DMT 630MA user guide

DMT

DMT 630MA user guide

IngMar Medical QuickLung Breather user manual

IngMar Medical

IngMar Medical QuickLung Breather user manual

Handicare System RoMedic PositioningCover user manual

Handicare

Handicare System RoMedic PositioningCover user manual

Leica M822 user manual

Leica

Leica M822 user manual

Omron HJA-306 CaloriScan instruction manual

Omron

Omron HJA-306 CaloriScan instruction manual

Medix Biochemica Actim PROM 1ngeni Instructions for use

Medix Biochemica

Medix Biochemica Actim PROM 1ngeni Instructions for use

Mediblink M170 Instructions for use

Mediblink

Mediblink M170 Instructions for use

Drive DeVilbiss Healthcare Phase III user guide

Drive DeVilbiss Healthcare

Drive DeVilbiss Healthcare Phase III user guide

Hillrom CarePorter P3000 Service manual

Hillrom

Hillrom CarePorter P3000 Service manual

Mindray Panorama Quick reference guide

Mindray

Mindray Panorama Quick reference guide

Sirona SIVISION Digital operating instructions

Sirona

Sirona SIVISION Digital operating instructions

manuals.online logo
manuals.online logoBrands
  • About & Mission
  • Contact us
  • Privacy Policy
  • Terms and Conditions

Copyright 2025 Manuals.Online. All Rights Reserved.