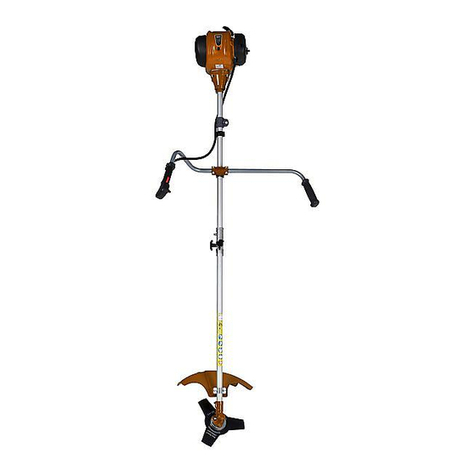
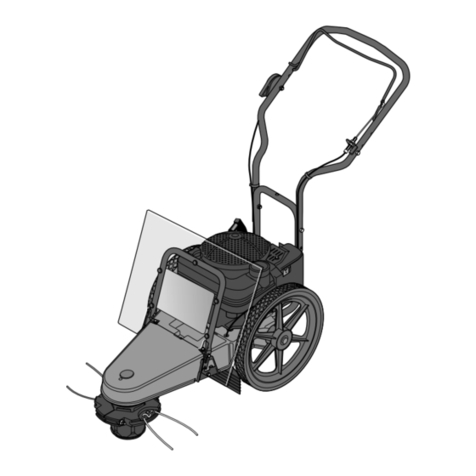
CO/Tech HY3315A1 User manual

Grass Trimmer
Grästrimmer
Ruohotrimmeri
Gresstrimmer
Ver. 200705
Important Information:
Read the instruction manual carefully and
make sure that you understand everything
before you use the product, keep it for
future reference.
Viktig information:
Läs hela bruksanvisningen noggrant och
försäkra dig om att du har förstått den innan
du använder utrustningen och spara den för
framtida bruk.
Viktig informasjon:
Les disse anvisningene nøye og forsikre deg
om at du forstår dem før du bruker enheten
og oppbevar dem for senere bruk.
Tärkeätä tietoa:
Lue nämä ohjeet huolellisesti ja varmista
että olet ymmärtänyt ne, ennen kuin alat
käyttää laitetta. Säilytä ohjeet myöhempää
tarvetta varten.
English 2
Svenska 14
Norsk 26
Suomi 38
Ver. 200705
English 2
Svenska 14
Norsk 26
Suomi 38
Article number: 30-9290
Model: HY3315A1

ENGLISH
Grass Trimmer Co/TECH, article number: 30-9290
Danger: This product is only meant to be used with trimmer line, never use a saw
blade or other cutters as this will only increase the risk of accidents.
Warning! Children, animals and onlookers should keep at least 15 metres away from
the grass trimmer when it is being used, turn it off immediately if anyone comes
closer.
1. Grass trimmer safety symbols and their meaning
Wear head protection, eye protection/visor and ear defenders.
Wear hand protection.
Wear foot protection.
Read the entire instruction manual before using this product.
This product is only designed to be used with trimmer line.
NEVER use a saw blade or other cutters.
Warning!
Warning! Keep feet away from the trimmer line.
Stones and other particles can be thrown up by the trimmer.
Do not permit anyone else to come close to the trimmer when it is being
used. Children, pets and onlookers should keep at a distance of at least
15 metres from the grass trimmer when it is being used.
Warning! Hot surface.
8500min-1
8500min-1
8500min-1
8500min-1
8500min-1
8500min-1
8500min-1
8500min-1
8500min-1

ENGLISH
2. Guidelines for safe use
Note! Switch off the engine before all servicing, adjusting and cleaning of the grass
trimmer.
1. Wearprotectivefootwear,tight-ttingclothes
and safety glasses/visor, ear defenders and a
helmet.
2. Never use the grass trimmer if you are tired,
sick,upsetorundertheinuenceofmedi-
cation which causes drowsiness, alcohol or
drugs.
3. Always be careful when handling fuel. Open
the fuel tank carefully and release any pressu-
re which might have built up in the tank. Wipe
off any spilt fuel and move the grass trimmer
at least 3 metres away from the refuelling
place before starting it. Remove any sources
ofignition,sparks,openames,smoking,etc.
from places where the fuel is mixed, used or
stored. Do not smoke while fuelling or using
the grass trimmer.
4. Do not permit anyone other than the operator
to come close to the grass trimmer when it
is being started or used. Children, pets and
onlookers should keep at a distance of at least
15 metres from the grass trimmer when it is
being used.
5. Always hold both handles of the grass trim-
merrmlywithyourngersononesideofthe
handle and thumb on the other side, once the
engine is running.
6. Keep all of you body parts away from the trim-
mer line when the engine is running.
7. Make sure that the trimmer line is not in con-
tact with anything before starting.
8. Only transport the grass trimmer with the
engine switched off.
9. Always inspect the grass trimmer before star-
ting, do not start it if there are worn, damaged
or missing parts. Never use a grass trimmer
which is damaged, incorrectly adjusted or not
assembled correctly.
10. All service other than that mentioned in this
instruction manual should be carried out by
qualiedpersonnel.
11. Switch off the grass trimmer before laying it on
the ground.
12. Be extra vigilant when cutting small bushes
or thick grass, it can get stuck in the trimmer
head.
13. Keep the handles clean, dry and free from oil
or fuel.
14. Only use the grass trimmer outdoors or in
well ventilated locations. Never start it in a
closed room or building. Exhaust fumes are
dangerous to inhale, they contain carbon
monoxide.
15. Avoid moving the trimmer head close to small
objects which can be thrown about, check
the area to be trimmed for small stones etc,
before starting work.
16. Always stand below the trimmer if you are
using it on a slope. NEVER use the trimmer
on a slope if there is the slightest risk of you
losing your footing, falling or sliding. Keep
hold of both handles.
17. Keep the grass trimmer free from grass cut-
tings and other deposits, particularly the
guard, trimmer head and engine.
18. The grass trimmer must only be used by
adults who have read the instruction manual.
19. Only use two-stroke engine fuel with a mix-
ture of 2.5% good quality two-stroke oil (40:1)
intended for air-cooled two-stroke engines.
Using petrol without oil mixed in will cause
engine damage that is not covered by the
guarantee.
20. Do not use the grass trimmer without the
silencer or silencer cover.
21.Holdbothhandlesofthegrasstrimmerrmly,
withyourngersononesideofthehandle
and thumb on the other.
22. The silencer can become very hot, do not
touch it with your hands or other parts of your
body.
23. The trimmer head must not be raised during
use, the trimmer line can injure the operator,
work as close to the ground as possible.
24. The grass trimmer must not be used for any
other purpose than for the trimming of lawns
and gardens.
25. The grass trimmer must not be used if the
guard is damaged or missing.
26. This product must not be altered or used for
other tasks, the risk of accidents will increase
and the guarantee will not be valid.
27. Do not use the grass trimmer close to
ammablegasesandliquids;thiscould
causeareoranexplosion.

ENGLISH
3. Presentation
1. Trimmer head
2. Trimmer line
3. Trimmer guard
4. Shaft
5. Loop handle
6. Throttle
7. Ignition switch (1- STOP)
8. Safety catch
9. Choke
10. Fuel tank
11. Airlter
12. Starter handle
13. Trimmer line cutter
14. Primer pump
15. Spark plug
1
2
3
4
58
6
12
13
9
14
11
10
15
7

ENGLISH
4. Specifications
Model: HY3315A
Dry weight: 4.2 kg
Engine: Air-cooled 2-stroke engine
Cylinder volume: 25cm³
Fuel: Mixture of petrol & oil 40:1 (2.5%)
Ignition: Electronic
Max engine output: 0.74 kW at 7500 rpm
Max. spindle speed: 9000 rpm
Max engine speed: 9000 rpm
Idling speed: 3000 rpm
Spark plug: TORCH L8RTC, Champion CJ7Y, NGK BPMR7A
Tank capacity: 600 cm³
Cutting line: Nylon line Ø 2 mm
Drive shaft length: 150 cm
Vibration level (ISO 7916) Front handle Rear handle
Idle 6.35 m/s² 3,88 m/s²
Full speed 9.57 m/s² 8.55 m/s²
Sound level (EN 27917) Idle 78. 7dB (A)
98. 2dB (A)
95. 2dB (A)
88. 1dB (A)
109dB(A)
105dB(A)
Full speed
Normal speed
Sound level (ISO 10884) Idle
Full speed
Normal speed

ENGLISH
5. Assembly
Assembling the loop handle
1. Clamp the loop handle (A) on to the shaft tube and lock it in
place using the wing nut (B) and bolt (C).
2. Adjust the position of the loop handle (160-200 mm forward of
the throttle) lock in place with the wing nut (B) and bolt (C).
Assembling the trimmer guard.
Warning! The trimmer guard must be assembled correctly to protect the
operator and to limit the length of the trimmer line. There is a cutter on the
guard that cuts the line to the right length.
3. The trimmer head should be disassembled before
assembling the trimmer guard (3).
4. Hold the trimmer head and use your hand or the enclosed
key to loosen the trimmer head nut. See picture 2.
5. Remove the trimmer head from the spindle.
6. Slide the trimmer guard over the shaft and align the holes
in the guard with holes in the bracket. See picture 3.
7. Pass the bolt through the trimmer guard from the side with
the hexagonal countersink and assemble the washer and
nut. See picture 4.
8. Reassemble the trimmer head on the spindle. See picture 5.
6. Fuel and lubrication
Warning! Petrol is highly ammable. Avoid smoking close
to where fuel is handled, do not cause any sparks embers
or naked ames either. Switch off the grass trimmer and
let it cool before refuelling it. Refuel outdoors and always
move at least 3 metres away from the refuelling site before
starting the trimmer.
Mix petrol (unleaded 95 octane without added ethanol) with a
good quality 2-stroke oil intended for air-cooled 2-stroke engi-
nes. Recommended mixture: Petrol/oil 40:1 (2.5 %).
• The engine is designed to be used with unleaded fuel.
• Use at least 87 octane fuel.
• Use unleaded fuel to protect the environment and your
health.
• Bad quality fuel or oil can damage seals, fuel lines or the
fuel tank.
!
Picture 2
Picture 3
Picture 4
Picture 5
Picture1

ENGLISH
6.1 Mixing the fuel
Note! Be precise with the mixture.
1. Measure out the petrol and oil precisely before mixing.
2. Pour a small amount of the petrol into a clean fuel can.
3. Pour in all of the oil and shake the fuel can.
4. Pour in the rest of the petrol and shake the fuel can for at least a minute. Certain oils do not
mixwell;thereforeitisimportantthatthefuelcanbeagitatedtomixtheoilandpetrol.The
engine will last longer if the fuel is well mixed, if the fuel is not mixed properly the mixture
will be too lean and the engine may be damaged.
5. Labelthefuelcanclearly,toavoidtheriskofmisidentication.
6. Fuel containing oil is only intended for 2-stroke engines, pure petrol is for 4-stroke engines,
it is therefore very important to label the fuel cans clearly.
Note! Donotmixtoomuchfuel;itshouldbeusedwithin90days.
Warning!
Only use fuel containing oil for 2-stroke engines, using pure petrol without the addition
of oil will soon cause engine damage which is not covered by the guarantee.
6.2 Refuelling the grass trimmer
1. Unscrew and remove the fuel cap.
2. Fill with fuel until the tank is roughly 80% full.
3. Replace and tighten the fuel cap then wipe up any spilt fuel on or around the grass trimmer.
Warning!
1. Refuel outdoors and on the ground.
2. Always move at least 3 metres away from the refuelling site before starting the trimmer.
3. Switch off the grass trimmer and let it cool before refuelling it. Only refuel when you are
sure that the fuel can contains 2-stroke fuel!
7. Starting the engine
Note! Pull the starter handle straight out, if you pull at an angle the starter cord will rub on the
sleeve and soon wear out. Keep hold of the starting handle after pulling it and allow it to return
slowly. Never let go of the starting handle straight after pulling it, it could get tangled or break
something on the trimmer.
Note! See section “Troubleshooting” if the trimmer doesn’t start after several attempts.
7.1 Starting the engine from cold
Cut the trimmer line to a length of 13 cm before starting to
reduce the load while the trimmer warms up.
1. Place the grass trimmer on a level surface.
13 cm
Fig. 6

ENGLISH
2. Turn the cut off switch (7) to position “1”. See picture 7
3. Turn the choke (9) to the “COLD START” position. See picture 8.
4. Pump the primer pump (14) 8 times (the primer pump is
located on the bottom of the carburettor). See picture 9.
5. Holdtherearhandlermlyandatthesametimeholdinthe
safety catch and throttle (6) See picture 10.
6. Pull the starter handle until you feel some resistance (approx.
100 mm) See picture 11, pull the starter handle quickly yet
smoothly.
7. Assoonastheenginehasstartedorred,thechokeshould
be set to the “WARM START” position, if it cuts out attempt to
restart it with the choke in the “WARM START” position.
8. Once started, let the engine run without any load for 10 seconds.
7.2 Starting a warm engine
1. Place the grass trimmer on a level surface.
2. Turn the ignition switch (7) to position “1”. See picture 7.
3. Holdtherearhandlermlyandatthesametimeholdthe
safety catch (8) and the throttle (6) in completely. See
picture 10.
4. Pull the starter handle until you feel some resistance (approx.
100 mm) See picture 11, pull the starter handle quickly and
smoothly until the engine starts or up to 6 times in quick
succession.
5. If the engine doesn’t start: Repeat all the steps in “Starting the
engine from cold”.
7.3 Switching the engine off
Release the throttle and let the engine idle, turn the ignition switch
(7) to “STOP”. See picture 7.
Helpful suggestions
Warning! Remove all objects such as cans, bottles and sto-
nes from the ground before starting to use the grass trimmer,
otherwise they can be thrown about by the trimmer line and
cause injury or damage the trimmer.
Switch off the grass trimmer at once and check it for damage if you
notice that something is ejected or if the grass trimmer starts vibra-
ting. Do not operate the grass trimmer if it has been damaged.
Note! Allow the engine to reach full speed before starting to cut the grass, never try to cut
grass at low speed.
Warning! Never raise the trimmer head above knee-height when it is spinning.
Warning! Never use metal or plastic coated metal trimmer line, this could cause serious
accidents.
Picture 7
Picture 8
Picture 9
Picture 10
Picture 11

ENGLISH
8. Use
• Hold the grass trimmer in both hands.
• Depress the throttle and let the engine speed up.
• Hold the trimmer head parallel to the ground and swing
the grass trimmer from side to side whilst walking slowly
forwards, do not move forward so much if the going gets
heavy.Seeg.12
• Do not move the trimmer head towards you, always work
away from yourself.
8.1 Trimming round trees and bushes
Lean the trimmer head forward slightly and start trimming
from left to right whilst slowly walking around the tree. Be
careful, so the trimmer line doesn’t cut the bark of the tree or
the plants you want to keep! If you trim grass close to fences,
foundations, rocks etc, the trimmer line will soon wear out.
8.2 Preparing the ground (removing all vegetation)
• Angle the trimmer head approx. 30 degrees to the left (it
is easier if you loosen the loop handle and adjust it) See
g.13.
• Do not do this if there is the slightest risk of something
beingungupandinjuringpeopleoranimalsstanding
within a radius of 30 metres.
8.3 Adjusting the trimmer line
Adjust the trimmer line like this:
1. Run the engine at full speed whilst carrying out points 2-4.
2. Bangthetrimmerheadonthegroundandliftitupagain.Seeg.14.
3. The line will be fed out automatically.
4. The line will be cut to the correct length by the cutter under the trimmer guard.
5. Switch off the engine and using something like a screwdriver, clean off any grass and
debris from around the guard and trimmer head, otherwise it could impair the cooling of
thedriveshaft.Seeg.15.
Tap the
trimmer
head
Fig. 12.
Fig. 13.
Fig. 14. Fig. 15.

10
ENGLISH
9. Maintenance
Warning! Disconnect the sparkplug lead before carrying out any maintenance.
A. Locking cap
B. Spool
C. Spring
D. Spindle
E. Housing
F. Line slot
G. Line hole
H. Trimmer line
9.1 Changing the trimmer line
1. Turn the locking cap (A) anticlockwise and remove it (either by hand or using the spanner
supplied).
2. Remove the spool (B) and the spring (C) from the spindle (D).
3. Remove the existing trimmer line (H).
4. First measure, then cut a 8.6 metre length of trimmer line (Ø 2 mm). Fold it in the middle
so that you have two ends measuring 4.3 metres. Place the middle of the fold in one of the
slotsinthediscdividingthespoolSeeg.17.
5. Windbothendsofthelineontothespool,clockwiseasshowning.18.Holdthelinein
yourngerssothatitistaughtasitiswoundon,stopwhenroughly15cmofthelineends
remain.
6. Presstheendsofthelineintotheslotsonoppositesidesofthespoolasg.19shows.
7. Push in the spring (C) on the bottom of the spool (if it is not already secure). Pull the ends
ofthelinethroughtheholes(G)inthesideofthehousing(E).Seeg.20.
Fig. 16.
Fig. 17. Fig. 18.
Fig. 19. Fig. 20.

11
ENGLISH
8. Push the spool (B) into the housing whilst feeding the ends of the line through the holes (G).
9. Press down the spool (B), depressing the spring, tug the ends of the line, freeing them from
the slots (F) in the spool.
10. Push the assembled trimmer head onto the spindle, screw on the locking cap (A) clockwise
(onlyngertight).(Seeg.22)
11. Cut the ends of the line so they are no longer than 13 cm.
9.2 Air filter, inspection/cleaning
Never use the grass trimmer without an air lter, clean or replace the lter if it is dama-
ged or dirty.
Clean the air lter like this:
1. Pinchthesidesoftheairlterhousingandremoveit.
2. Removethelterfromthelterhousing.
3. Washthelterwithsoapandwater.Donotusepetrol!
4. Squeezethelterandletitdrynaturally.
5. Replacethelterandremountthehousingwiththe
opening facing downwards.
6. Make sure that the housing is secure so that it won’t
shake loose.
9.3 Fuel cap/fuel filter, inspection/cleaning
Remove any sources of ignition, sparks, open ames, smoking, etc. from places where
the fuel is mixed, used or stored.
Do not smoke while refuelling or using the grass trimmer.
1. Open the fuel tank carefully and release any pressure
which might have built up in the tank. Wipe off any
spillage and pour any remaining fuel into a petrol can.
2. Pulloutthefuelline/fuellterusingsomethinglikeabent
wire.
3. Inspectthefuellterandchangeitifitisclogged.
4. Changethefuellterbypullingitloose(twistinghelps
releasethelter)
5. Insertanewfuellter.
Note! Never run the engine without a fuel lter.
Fig. 21. Fig. 22.
Fig. 23.
Fig. 24.

1
ENGLISH
9.4 Adjusting the carburettor
The carburettor has been factory adjusted for optimum power.
9.5 Spark plug
Type of spark plug: TORCH L8RTC, Champion CJ7Y, NGK BPMR7A
Recommended spark plug gap:0.635mm.Seg.25.
Tightening moment: 12 – 15 Nm.
9.6 Sharpening the trimmer line cutter
(on the trimmer guard)
1. Remove the cutter (E) from the trimmer guard (F). See
g.26.
2. Holdthecutterinavice,sharpenthebladewithaat
le,sharpeninginonedirectiononlyandmakingsureto
maintain the original grinding angle.
10. Storage
1. Clean the exterior of the grass trimmer, guard, trimmer head, spindle, the external parts of
the engine, etc.
2. Transfer any fuel remaining in the fuel tank to a petrol can.
3. Start the engine when the fuel tank has been emptied.
4. Allow the engine to idle until it cuts out, to empty the carburettor of fuel.
5. Allow the engine to cool for 5 minutes.
6. Use a spark plug socket to remove the spark plug.
7. Pour one teaspoon of pure 2-stroke oil into the cylinder via the spark plug hole, pull the
starter handle slowly a few times to distribute the oil evenly over the inside of the engine,
replace the spark plug.
8. Store the grass trimmer in a dry and well ventilated place.
10.1 Using the trimmer after it has been stored
1. Use a spark plug socket to remove the spark plug.
2. Pull the starter handle quickly and smoothly a few times to get the surplus oil out of the
cylinder.
3. Clean the spark plug electrodes or replace the spark plug with one having the correct plug
gap.
4. Tighten the spark plug using a spark plug socket.
5. Fill the fuel tank.
6. Follow the instructions in section 6.1 “Starting the engine from cold”
0,635 mm
Fig. 25.
Fig. 26.

1
ENGLISH
10. Troubleshooting
Problem Cause Correction
The engine won’t start or
only runs at low speed.
Incorrect starting procedure. Read the instruction ma-
nual.
Dirt in the carburettor. Allowaqualiedtechnician
to clean the carburettor.
Faulty spark plug. Clean or change the spark
plug.
Cloggedfuellter. Changethefuellter(inside
the fuel tank).
The engine starts but with
loss of power.
Wrong choke setting. Set the choke to “OPEN”.
Dirtyairlter. Clean or change the air
lter.
Dirt in the carburettor. Allowaqualiedtechnician
to clean the carburettor.
The engine doesn’t respond
to the throttle.
The engine is not warm
enough.
Allow the engine to idle for
a minute.
Loss of power under load. Incorrect spark plug gap. Clean and check the gap or
change the spark plug.
The engine runs irregularly. Dirt in the carburettor. Allowaqualiedtechnician
to clean the carburettor.
The engine smokes a lot. Incorrect fuel mixture. Use petrol and 2-stroke oil
in the ratio 40:1 (2.5%).
Note!
The grass trimmer conforms to current safety requirements. Repairs to the grass trimmer
shouldalwaysbecarriedoutusingoriginalsparepartsandbyaqualiedtechnician,failureto
do so may result in injury.
We apologise for any text or photo errors and any changes of technical data.
If you have any questions concerning technical problems please contact our
Customer Service Department (see address on reverse).

14
SVENSKA
Grästrimmer CO/TECH, artikelnummer: 30-9290
Fara: Produkten är endast avsedd för att användas med trimmerlina, använd aldrig
sågklinga eller andra tillbehör, det ökar faran för olycksfall.
Varning: Barn, husdjur och åskådare skall vara på ett avstånd av minst 15 meter från
grästrimmern när den används, stäng av omedelbart om någon kommer närmare.
1. Produktmärkning med säkerhetssymboler på maskinen
Använd skyddshjälm, skyddsglasögon/visir och hörselskydd.
Använd skyddshandskar.
Använd skyddsskor.
Läs hela bruksanvisningen innan användning av produkten.
Produkten är endast avsedd för att användas med trimmerlina,
använd ALDRIG sågklinga eller andra tillbehör.
Varning!
Varning! Håll undan fötterna från trimmerlinan.
Stenar och andra föremål kan kastas iväg av grästrimmern.
Tillåt ingen annan än användaren vara nära grästrimmern när den
används.Barn,husdjurochåskådareskallbennasigpåettavstånd
av minst 15 meter från grästrimmern när den används.
Varning! Het yta.
8500min-1
8500min-1
8500min-1
8500min-1
8500min-1
8500min-1
8500min-1
8500min-1
8500min-1

15
SVENSKA
2. Säker användning
Obs! Stäng av motorn innan all service, justering och rengöring av grästrimmern.
1. Använd skyddsskor, åtsittande kläder och
skyddsglasögon/visir, hörselskydd och
hjälm.
2. Använd aldrig grästrimmern om du är trött,
sjuk, upprörd eller under påverkan av medi-
ciner som gör dig trött, eller påverkad av
alkohol eller droger.
3. Var alltid aktsam vid hantering av bränsle.
Öppna tanklocket försiktigt och släpp ut
trycket som kan ha uppkommit i tanken.
Torkauppalltspillochyttasedangrästrim-
mern minst 3 meter från tankningsplatsen
innan den startas.
3a Avlägsna alla antändningskällor, gnistor, öp-
pen låga, tobaksrökning etc. från platser där
bränsle blandas, hanteras eller förvaras.
3b Rök inte under tankning eller under arbete
med grästrimmern.
4. Tillåt ingen annan än användaren vara nära
grästrimmern vid start eller arbete med den.
Barn, husdjur och åskådare skall vara på
ett avstånd av minst 15 meter från grästrim-
mern när den används.
5. Håll alltid grästrimmern stadigt i båda hand-
tagenmedngrarnapåensidaavhandta-
get och tummen på andra sidan när motorn
är startad
6. Håll undan alla kroppsdelar från trimmerli-
nan när motorn går.
7. Kontrollera före start att trimmerlinan inte
har kontakt med något föremål.
8. Transportera endast grästrimmern med
motorn avstängd.
9. Inspektera alltid grästrimmern innan start,
startadeninteomdetnnsutslitna,sak-
nade eller skadade delar. Använd aldrig en
grästrimmer som är skadad, feljusterad eller
som inte är monterad på rätt sätt.
10. All annan service på grästrimmern än de
som nämns i bruksanvisningen ska utföras
avkvaliceradpersonal.
11. Stäng av grästrimmern innan den läggs ner
på marken.
12. Var extra uppmärksam när du kapar små
buskar eller tjockt gräs kan fastna i trimmer-
huvudet.
13. Håll handtagen rena, torra och fria från olja
eller bränsle.
14. Använd grästrimmern endast utomhus eller
i väl ventilerade lokaler. starta den aldrig i
ett stängt rum eller byggnad. Avgaserna är
farliga att andas in, de innehåller koloxid.
15. Undvik att föra trimmerhuvudet nära små
föremål som kan kastas iväg, kontrollera
ytan som ska trimmas har småstenar etc.
innan arbetet påbörjas.
16. Stå alltid nedanför trimmern om du använ-
der den på lutande mark. Använd ALDRIG
trimmernpålutandemarkomdetnnsden
minsta risk att du tappar fotfästet, ramlar
eller glider ner, håll i båda handtagen.
17. Håll grästrimmern ren från gräsrester och
andra beläggningar, speciellt skyddet, trim-
merhuvud och motor.
18. Grästrimmern får endast användas av vux-
na personer som har läst bruksanvisningen.
19. Använd endast tvåtaktsbränsle med in-
blandning av 2,5 % tvåtaktsolja (40:1)
avsedd för luftkylda tvåtaktsmotorer av god
kvalitet, användning av bensin utan oljein-
blandning leder snabbt till motorskador som
inte omfattas av garantin.
20. Använd inte grästrimmern utan ljuddämpare
eller ljuddämparkåpa.
21. Håll i grästrimmerns båda handtag på ett
säkertsättmedngrarnapåensidaav
handtaget och tummen på andra sidan.
22. Ljuddämparen blir mycket het, håll undan
händer och andra kroppsdelar.
23. Trimmerhuvudet får inte lyftas upp under ar-
betet, trimmerlinan kan skada användaren,
arbeta så nära marken som möjligt.
24. Grästrimmern får inte användas till något
annat ändamål än trimmning av gräsmattor
och trädgårdar.
25. Grästrimmern får inta användas om skyddet
saknas eller är skadat.
26. Produkten får inte ändras och/eller använ-
das för andra arbetsmoment, risken för
olycksfall ökar och garantin gäller inte.
27. Använd inte grästrimmern i närheten av
brännbara gaser och vätskor annars kan det
leda till brand eller explosion.

16
SVENSKA
1. Trimmerhuvud
2. Trimmerlina
3. Trimmerskydd
4. Riggrör
5. Bygelhandtag
6. Gasreglage
7. Strömbrytare (1 - STOP)
8. Säkerhetsspärr
9. Chokereglage
10. Bränsletank
11. Luftlter
12. Starthandtag
13. Kniv för trimmerlina
14. Primerpump
15. Tändstift
3. Presentation
1
2
3
4
58
6
12
13
9
14
11
10
15
7

17
SVENSKA
4. Specifikationer
Modell: HY3315A
Torrvikt: 4,2 kg
Motor: Luftkyld 2-taktsmotor
Cylindervolym: 25 cm³
Bränsle: Blandning bensin & olja 40:1 (2.5%)
Tändning: Elektronisk
Max motoreffekt: 0,74 kW vid 7500 rpm
Max spindelvarvtal: 9000 rpm
Max motorvarvtal: 9000 rpm
Tomgångsvarvtal: 3000 rpm
Tändstift: TORCH L8RTC, Champion CJ7Y, NGK BPMR7A
Tankvolym: 600 cm³
Skärutrustning: Nylontråd Ø 2 mm
Drivaxel längd: 150 cm
Vibrationsnivåer (enligt ISO 7916) Främre handtag Bakre handtag
Tomgång 6.35 m/s² 3,88 m/s²
Fullvarv 9,57 m/s² 8,55 m/s²
Ljud enligt EN 27917 Tomgång 78, 7dB (A)
98,2dB(A)
95,2dB(A)
88,1dB(A)
109dB(A)
105dB (A)
Fullvarv
Normalvarv
Ljud enligt ISO 10884 Tomgång
Fullvarv
Normalvarv

18
SVENSKA
5. Montering
Montera bygelhandtaget
1. Tryck fast bygelhandtaget (A) på riggröret och fäst det med
vingmutter (B) och bult (C).
2. Justera placeringen av bygelhandtaget (160 – 200 mm framför
gasreglaget)xeradetmedvingmutter(B)ochbult(C).
Montera trimmerskyddet
Varning: Trimmerskyddet måste monteras korrekt för att skydda användaren
och för att begränsa trimmerlinans längd, det sitter en kniv i skyddet som skär
av linan till rätt längd.
3. För att montera trimmerskyddet (3) skall trimmerhuvudet
först demonteras.
4. Håll emot på trimmerhuvudet och använd handen eller den
medföljande nyckeln för att lossa på muttern/låsratten för
trimmerhuvudet. Se bild 2.
5. Ta bort hela trimmerhuvudet från spindeln.
6. Skjut på trimmerskyddet på riggröret och passa in hålen i
trimmerskyddet med hålen i fästet. Se bild 3.
7. Skjut i bulten i trimmerskyddet från den sidan som har en
sexkantig fördjupning och montera brickan och muttern. Se
bild 4.
8. Montera trimmerhuvudet på spindeln igen. Se bild 5.
6. Bränsle och smörjning
Varning! Bensin är mycket eldfarligt. Undvik att röka i när-
heten där bränsle hanteras, medför inte heller någon öppen
låga, glöd eller gnistor. Stäng av grästrimmern och låt den
kallna innan den tankas. Var utomhus vid tankning och ytta
alltid minst 3 meter från tankningsplatsen innan grästrim-
mern startas.
Blanda bensin (oblyad 95 oktan utan etanoltillsats) med en 2-
taktsolja av god kvalitet som är avsedd för luftkylda tvåtaktsmo-
torer. Rekommenderat blandningsförhållande: bensin/olja 40:1
(2,5 %)
• Motorn är konstruerad för att användas med oblyat bränsle.
• Använd bränsle med minst 87 oktan.
• Använd oblyat bränsle för att skydda miljön och din hälsa.
• Bränsle eller olja av dålig kvalitet kan skada tätningar,
bränsleledningar eller bränsletank.
!
Bild 2.
Bild 3.
Bild 4.
Bild 5.
Bild 1.

19
SVENSKA
6.1 Blanda bränsle
Obs! Var noga med blandningen.
1. Mät noga upp bensin och olja innan blandning.
2. Häll i lite bensin i en ren dunk som är godkänd för bränsle.
3. Häll i all oljan och skaka dunken.
4. Häll i resten av bensinen och skaka dunken i minst en minut. Vissa oljor är svåra att
blanda, därför är det viktigt att skaka dunken så att olja och bensin blandas, motorn håller
längre om bränslet är välblandat, om bränslet inte är rätt blandat kan motorn gå på för
mager blandning med större risk för motorskador.
5. Märk dunken så att inga missförstånd om innehållet kan uppkomma.
6. Oljeblandat bränsle är endast avsett för tvåtaktsmotorer, och ren bensin för
fyrtaktsmotorer, därför är det mycket viktigt att märka upp bränsledunkarna.
Obs! Blanda inte för mycket bränsle, det bör användas inom 90 dagar.
Varning! Använd endast oljeblandat bränslet för tvåtaktsmotorer, användning av ren ben-
sin utan inblandad olja leder mycket snabbt till motorskador som inte täcks av garantin.
6.2 Tanka grästrimmern
1. Skruva upp, och ta bort påfyllningslocket.
2. Fyll på bränsle till ca 80 % av tankens rymd.
3. Skruva fast tanklocket så att det sitter säkert och torka upp ev. bränslespill på och omkring
grästrimmern.
Varning!
1. Var utomhus på marken vid tankning.
2. Flytta alltid minst 3 meter från tankningsplatsen innan grästrimmern startas.
3. Stäng av grästrimmern och låt den kallna innan den tankas. Tanka endast om du är helt
säker på att dunken innehåller tvåtaktsbränsle!
7. Start av motor
Obs! Dra starthandtaget rakt utåt, om draget är snett gör friktionen mot kanten av bussningen
att startsnöret slits och går av i förtid. Håll kvar starthandtaget efter startförsöket och släpp
tillbaka det sakta, släpp aldrig starthandtaget efter rycket då kan det trassla sig eller slå sön-
der något på grästrimmern.
Obs! Se avsnittet ”Felsökning” om grästrimmern inte startar efter upprepade försök.
7.1 Start av kall motor
Klipp av trimmerlinorna till en längd av ca 13 cm innan start
för att minska belastningen under varmkörningen. Se bild 6.
1. Placera grästrimmern på en plan yta.
13 cm
Bild 6.

20
SVENSKA
2. Ställ strömbrytaren (7) i läge ”1”. Se bild. 7
3. Vik chokereglaget (9) uppåt till läge ”COLD START”. Se bild. 8
4. Tryckinprimerpumpen(14)8gånger(primerpumpenåternns
på undersidan av förgasaren). Se bild. 9
5. Håll stadigt i det bakre handtaget och tryck samtidigt in säker-
hetsspärren (8) och gasreglaget (6) Se bild. 10
6. Dra ut starthandtaget tills ett motstånd känns (ca 100 mm) Se
bild. 11, ryck i starthandtaget snabbt och mjukt.
7. Så fort motorn startat eller tänt till skall chokereglaget vikas
ned till läge ”WARM START”, om den lägger av så dra igång
den igen med chokereglaget i läge ”WARM START”.
8. Låt motorn gå obelastad i 10 sekunder när den har startat.
7.2 Start av varm motor
1. Placera grästrimmern på en plan yta.
2. Ställ strömbrytaren (7) i läge ”1”. Se bild. 7
3. Håll stadigt i det bakre handtaget och tryck samtidigt in säker-
hetsspärren (8) och gasreglaget helt. (6) Se bild. 10.
4. Dra ut starthandtaget tills ett motstånd känns (ca 100 mm) Se
bild. 11, ryck i starthandtaget snabbt och mjukt tills motorn star-
tar eller upp till 6 gånger i snabb takt.
5. Om inte motorn startar: Repetera alla stegen i ”Start av kall
motor”.
7.3 Stäng av motorn
Släpp gasreglaget och låt motorn gå ner på tomgång, ställ ström-
brytaren (7) i läge ”STOP”. Se bild 7.
Tänk på detta
Varning! Plocka bort alla föremål från marken som burkar,
askor, stenar etc. innan du börjar använda grästrimmern, de
kan annars kastas iväg av trimmerlinaen och leda till olycks-
fall eller skada grästrimmern.
Stäng av grästrimmern direkt och undersök om den har blivit ska-
dad om du märker att något kastas iväg eller om grästrimmern
börjar vibrera. Använd inte grästrimmern om den har skadats.
Obs! Låt motorn gå upp i fullt varv innan du börjar trimma gräset,
försök aldrig trimma gräs med lågt motorvarv.
Varning! Lyft aldrig trimmerhuvudet över knähöjd när det
snurrar.
Varning! Använd aldrig trimmerlina av metall eller plastad
metall, det kan leda till svåra olycksfall.
Bild 7.
Bild 8.
Bild 9.
Bild 10.
Bild 11.
Table of contents
Languages:
Other CO/Tech Trimmer manuals

CO/Tech
CO/Tech GTC350B User manual
CO/Tech
CO/Tech HY33PD-1 User manual
CO/Tech
CO/Tech GT102 B User manual

CO/Tech
CO/Tech LXC GT 18 User manual

CO/Tech
CO/Tech WLBC260-2WNO User manual

CO/Tech
CO/Tech M1E-TD3-510-UK User manual

CO/Tech
CO/Tech DCHT201B-UK User manual

CO/Tech
CO/Tech MOE-LR02-120-UK User manual

CO/Tech
CO/Tech OB-LR06-230/C-UK User manual

CO/Tech
CO/Tech YT9231 User manual
