pellenc HELION 3 User manual

ELECTRIC HEDGE TRIMMER
HELION 3
Operating instructions 54_161520-B
01/2022
ENG
Translation of the original op-
erating instructions manual
READ THE USER GUIDE CAREFULLY BEFORE USE
.


ELECTRIC HEDGE TRIMMER HELION 3
54_161520-B
TABLE OF CONTENTS
1. INTRODUCTION ..................................................................................................................... 5
2. SAFETY ................................................................................................................................... 6
2.1. INTENDED USAGE .......................................................................................................................... 6
2.2. GENERAL POWER TOOL SAFETY WARNINGS .......................................................................... 6
2.2.1. WORK AREA SAFETY ...................................................................................................................... 6
2.2.2. ELECTRICAL SAFETY ....................................................................................................................... 6
2.2.3. PERSONAL SAFETY ......................................................................................................................... 7
2.2.4. POWER TOOL USE AND CARE ........................................................................................................ 7
2.2.5. BATTERY TOOL USE AND CARE ..................................................................................................... 7
2.2.6. SERVICING ....................................................................................................................................... 8
2.2.7. MANAGEMENT OF THE RECYCLING AND RECOVERY OF WASTE FROM YOUR TOOL ................... 8
2.3. SAFETY WARNING FOR THE HEDGE TRIMMER ........................................................................ 8
2.4. SAFETY SIGNAGE .......................................................................................................................... 9
2.5. PERSONAL PROTECTION EQUIPMENT ..................................................................................... 10
3. DESCRIPTION AND TECHNICAL CHARACTERISTICS .................................................... 11
3.1. DESCRIPTION OF THE TOOL ...................................................................................................... 11
3.2. TECHNICAL FEATURES ............................................................................................................... 11
3.2.1. TOOL FEATURES ........................................................................................................................... 11
3.2.2. CHARGERS AND BATTERIES COMPATIBILITY .............................................................................. 12
3.2.3. COMPATIBLE BLADES .................................................................................................................... 12
3.2.4. VIBRATION AND NOISE EMISSION VALUES .................................................................................. 12
4. COMMISSIONING ................................................................................................................. 13
4.1. PACKAGE CONTENTS ................................................................................................................. 13
4.2. MOUNTING THE HANDLE ............................................................................................................ 13
4.3. MOUNTING THE BLADE .............................................................................................................. 14
4.4. POSITION OF THE HANDLE ........................................................................................................ 15
4.5. CONNECTING PELLENC BATTERIES TO THE TOOL ............................................................... 15
4.6. DISCONNECTING THE BATTERY ............................................................................................... 16
5. USAGE .................................................................................................................................. 16
5.1. STARTING AND STOPPING THE ELECTRIC HEDGE TRIMMER HELION 3 ............................. 16
5.1.1. START-UP OF THE TOOL ............................................................................................................... 16
5.1.2. STOPPING THE TOOL .................................................................................................................... 18
5.2. HEDGE-TRIMMING SPEED MANAGEMENT ............................................................................... 18
5.3. TIPS FOR USING THE ADAPTABLE BLADES ........................................................................... 19
5.4. WORKING TECHNIQUES ............................................................................................................. 19
6. MAINTENANCE .................................................................................................................... 20
6.1. MAINTENANCE ADVICE ............................................................................................................... 20
6.2. TOOL MAINTENANCE TABLE ..................................................................................................... 21
3

ELECTRIC HEDGE TRIMMER HELION 3
54_161520-B
6.3. ANNUAL OVERHAUL ................................................................................................................... 22
6.4. TIGHTENING BLADES .................................................................................................................. 22
6.5. CLEANING THE BLADES ............................................................................................................. 23
6.6. GREASING THE HEDGE TRIMMER BLADE REDUCER ............................................................ 24
6.7. SHARPENING THE BLADES ........................................................................................................ 25
7. INCIDENTS AND TROUBLESHOOTING ............................................................................. 26
7.1. TROUBLESHOOTING SYMPTOMS OF THE HELION 3 ELECTRIC HEDGE TRIMMER ............ 26
8. STORAGE AND TRANSPORT ............................................................................................ 27
8.1. STORAGE ...................................................................................................................................... 27
8.2. OFF-SEASON STORAGE ............................................................................................................. 27
9. ACCESSORIES AND CONSUMABLES .............................................................................. 28
9.1. PRESENTATION OF BLADE TYPES ........................................................................................... 28
9.1.1. ACCESSORIES PROVIDED WITH EACH BLADE ............................................................................. 28
9.2. ACCESSORIES .............................................................................................................................. 28
9.3. CONSUMABLES ............................................................................................................................ 28
10. WARRANTIES .................................................................................................................... 29
10.1. GENERAL WARRANTIES ........................................................................................................... 29
10.1.1. STATUTORY WARRANTY ............................................................................................................. 29
10.1.2. COMMERCIAL WARRANTYPELLENC ............................................................................................ 29
10.1.3. PAID AFTER-SALES SERVICE ...................................................................................................... 30
11. COMPLIANCE STATEMENTS ........................................................................................... 32
11.1. STATEMENT OF COMPLIANCE: HELION 3 ...................................................................... 32
11.2. UK DECLARATION OF CONFORMITY : HELION 3 ............................................................ 33
4

ELECTRIC HEDGE TRIMMER HELION 3
54_161520-B
1. INTRODUCTION
Dear Customer,
Thank you for purchasing your Electric hedge trimmer Helion 3. Properly used and maintained, this equipment will
give you years of satisfaction.
Warning
Your machine contains numerous recoverable or recyclable materials. Return it to
your dealer or, failing this, to an approved servicing centre to be treated.
Comply with the regulations in force in your country as concerns environmental protection associated with your
activity.
Warning
It is imperative that you read through the ENTIRE user’s manual guide before using or servicing
the tool. Always comply with the instructions and illustrations provided in the user’s manual.
Throughout the user’s manual guide you will find advisory notes and information entitled: NOTE, IMPORTANT,
ATTENTION and WARNING.
Points marked “NOTE” indicate additional information.
Points marked "IMPORTANT" warn the user of a potential risk for the equipment.
Points marked “ATTENTION” warn the user of a potentially hazardous situations which if not avoided may result
in minor injuries.
Points marked “WARNING” warn the user of a potentially hazardous situation which if not avoided may result in
serious injury or death.
The warning indicates that damage resulting from failure to comply with the procedures and instructions is not
covered by the warranty and the owner will be liable for any repair costs.
Safety indications are also given on the tool; they remind you of the safety precautions to be taken. Identify and
read these indications before using the tool. Immediately replace any indications that may become partially illegible
or deteriorated.
Refer to Section 2.4, “Safety signage” for the location diagram of the safety stickers affixed to the tool.
No part of this manual may be reproduced without the written permission of the company PELLENC. The illustrations
provided in this manual are for information purposes only and are in no way contractual. The PELLENC company
reserves the right to make any modification or improvement to its products as deemed necessary without inform-
ing customers already in possession of a similar model. This manual forms an integral part of the tool and must
accompany the tool if it changes hands.
5

ELECTRIC HEDGE TRIMMER HELION 3
54_161520-B
2. SAFETY
2.1. INTENDED USAGE
• The Electric hedge trimmer Helion 3 is a professional tool whose use is reserved exclusively for trimming vege-
tation.
• Any other use of this tool is not intended.
• The PELLENC company accepts no responsibility for any damage caused by improper or unspecified use different
from its original intention.
• The user is responsible for any accident resulting from improper use or unauthorized modification of this tool.
• The PELLENC company accepts no responsibility for any damage caused by the use of non-original parts or
accessories.
2.2. GENERAL POWER TOOL SAFETY WARNINGS
Warning
Read all safety warnings, instructions, illustrations and specifications provided with this
power tool. Failure to follow all instructions listed below may result in electric shock, fire and/
or serious injury.
Note
Save all warnings and instructions for future reference.
The term "power tool" in the warnings refers to your mains-operated (corded) power tool or battery-operated (cord-
less) power tool.
2.2.1. WORK AREA SAFETY
1. Keep the work area clean and well lit. Cluttered or dark areas invite accidents.
2. Do not operate power tools in explosive atmospheres, such as in the presence of flammable liquids,
gases or dust. Power tools create sparks, which may ignite the dust or fumes.
3. Keep children and bystanders away while operating a power tool. Distractions can cause you to lose
control of the tool.
2.2.2. ELECTRICAL SAFETY
1. Power tool plugs must match the outlet. Never modify the plug in any way. Do not use any adapter plugs
with earthed (grounded) power tools. Unmodified plugs and matching outlets will reduce risk of electric shock.
2. Avoid body contact with earthed surfaces or grounded surfaces such as pipes, radiators, ranges, and
refrigerators. There is an increased risk of electric shock if your body is earthed or grounded.
3. Do not expose power tools to rain or wet conditions. Water entering a power tool will increase the risk of
electric shock.
4. Do not abuse the cord. Never use the cord for carrying, pulling or unplugging the power tool. Keep
cord away from heat, oil, sharp edges or moving parts. Damaged or entangled cords increase the risk of
electric shock.
5. When operating a power tool outdoors, use an extension cord suitable for outdoor use. Use of a cord
suitable for outdoor use reduces the risk of electric shock.
6. If operating a power tool in a damp location is unavoidable, use a residual current device (RCD) pro-
tected supply. Use of an RCD reduces the risk of electric shock.
6

ELECTRIC HEDGE TRIMMER HELION 3
54_161520-B
2.2.3. PERSONAL SAFETY
1. Stay alert, watch what you are doing, and use common sense when operating a power tool. Do not use
a power tool while you are tired or under the influence of drugs, alcohol or medication. A moment of
inattention while operating power tools may result in serious personal injury.
2. Use personal protective equipment. Always wear eye protection. Protective equipment such as dust mask,
non-skid safety shoes, hard hat, or hearing protection used for appropriate conditions will reduce personal
injuries.
3. Prevent unintentional starting. Ensure the switch is in the off-position before connecting to power
source and/or battery pack, picking up or carrying the tool. Carrying power tools with your finger on the
switch or plugging in power tools with the switch in the on position can cause accidents.
4. Remove any adjusting key or wrench before turning the power tool on. A wrench or a key left attached
to a rotating part of the power tool may result in personal injury.
5. Do not overreach. Keep proper footing and balance at all times. This enables better control of the power
tool in unexpected situations.
6. Dress properly. Do not wear loose clothing or jewelry. Keep your hair and clothing away from moving
parts. Loose clothes, jewelry or long hair can be caught in moving parts.
7. If devices are provided for connection of dust extraction and collection facilities, ensure these are
connected and properly used. Use of dust collection can reduce dust-related hazards.
8. Do not let familiarity gained from frequent use of tools allow you to become complacent and ignore tool
safety principles. A careless action can cause severe injury within a fraction of a second.
2.2.4. POWER TOOL USE AND CARE
1. Do not force the power tool. Use the correct power tool for your application. The correct power tool will
do the job better and safer at the rate for which it was designed.
2. Do not use the power tool if the switch does not turn it on and off. Any power tool that cannot be controlled
with the switch is dangerous and must be repaired.
3. Disconnect the plug from the power source and/or remove the battery pack, if detachable, if from the
power tool before making any adjustment, changing accessories, or storing power tools. Such preven-
tive safety measures reduce the risk of starting the power tool accidentally.
4. Store idle power tools out of the reach of children and do not allow persons unfamiliar with the power
tool or these instructions to operate the power tool. Power tools are dangerous in the hands of untrained
users.
5. Maintain power tools and accessories. Check for misalignment or binding of moving parts, breakage
of parts and any other condition that may affect the power tool’s operation. If damaged, have the power
tool repaired before use. Many accidents are caused by poorly maintained power tools.
6. Keep cutting tools sharp and clean. Properly maintained cutting tools with sharp cutting edges are less likely
to bind and are easier to control.
7. Use the power tool, accessories and tool bits etc. in accordance with these instructions, taking into
account the working conditions and the work to be performed. Use of the power tool for operations different
from those intended could result in a hazardous situation.
8. Keep handles and grasping surfaces dry, clean and free from oil and grease. Slippery handles and grasp-
ing surfaces do not allow for safe handling and control of the tool in unexpected situations.
2.2.5. BATTERY TOOL USE AND CARE
1. Recharge only with the charger specified by the manufacturer. A charger that is suitable for one type of
battery pack may create a risk of fire when used with another battery pack.
2. Use power tools only with specifically designated battery packs. Use of any other battery packs may
create a risk of injury and fire.
3. When battery pack is not in use, keep it away from other metal objects, like paper clips, coins, keys,
nails, screws or other small metal objects, that can make a connection from one terminal to another.
Shorting the battery terminals together may cause burns or a fire.
4. Under abusive conditions, liquid may be ejected from the battery; avoid contact. If contact accidentally
occurs, flush with water. If liquid contacts eyes, additionally seek medical help. Liquid ejected from the
battery may cause irritation or burns.
7

ELECTRIC HEDGE TRIMMER HELION 3
54_161520-B
5. Do not use a battery pack or tool that is damaged or modified. Damaged or modified batteries may exhibit
unpredictable behaviour resulting in fire, explosion or risk of injury.
6. Do not expose a battery pack or tool to fire or excessive temperature. Exposure to fire or temperature
above 130 °C (or 265°F) may cause explosion.
7. Follow all charging instructions and do not charge the battery pack or tool outside the temperature
range specified in the instructions. Charging improperly or at temperatures outside the specified range may
damage the battery and increase the risk of fire.
2.2.6. SERVICING
1. Have your power tool serviced by a qualified repair person using only identical replacement parts. This
will ensure that the safety of the power tool is maintained.
2. Never service damaged battery packs. Service of battery packs should only be performed by the manufac-
turer or authorized service providers.
2.2.7. MANAGEMENT OF THE RECYCLING AND RECOVERY OF WASTE FROM YOUR TOOL
1. When the tool reaches the end of its life, PELLENC keeps the end of life sheet of the equipment at
disposal. The end of life sheet provides instructions for safely removing components.
2.3. SAFETY WARNING FOR THE HEDGE TRIMMER
1. Keep all parts of the body away from the cutting blade. Do not clear away cut materials or hold elements
when blades are moving. The cutting blades continue to move after powering off. A moment of inattention
while operating a hedge trimmer may result in serious personal injury.
2. Carry the hedge trimmer by the handle with the cutter bar stopped and being careful not to press the On/
Off switch. Proper transportation of the hedge trimmer reduces the risk of inadvertent starting of the machine
and bodily injuries from the blades.
3. When transporting or storing the hedge trimmer, always install the blade protector sleeve. Correct use
of the hedge trimmer reduces the risk of bodily injury from the blades.
4. When clearing jams or repairing the machine, make sure all power switches are off and the power cable
is removed or disconnected. Unintentional activation of the hedge trimmer when clearing jams or undertaking
repairs can result in serious injury.
5. Hold the hedge trimmer with both hands on the insulated gripping surfaces only, as the blade may come
into contact with hidden electrical wires. Blades that come in contact with an "active" wire may "electrify"
the exposed metal parts of the hedge trimmer and expose the operator to electrical shock.
6. Keep all power cords and cables away from the cutting area. Power cords and cables may be hidden in
hedges or bushes and can be accidentally cut by the blade.
7. Do not use the hedge trimmer in adverse weather conditions, especially if there is a risk of lightning.
This decreases the risk of being struck by lightning.
8

ELECTRIC HEDGE TRIMMER HELION 3
54_161520-B
2.4. SAFETY SIGNAGE
LwA sound power level guaranteed
Please read the operating instruc-
tions.
It is mandatory to wear safety goggles.
Protection rating IP54 (Allover protec-
tion against dust and water spray).
Risk of burns
Sharp cutting tool: Keep your hands
away from the hedge-trimmer blade.
Regulatory Compliance Mark
(RCM).
The product complies with the le-
gal requirements for electrical safety
and/or electromagnetic compatibility
(EMC).
Tool compliant with EC standards.
Tool compliant with British standards
Tool compliant with Moroccan stan-
dards.
Lithium-ion battery.
At the end of its life, the battery must
be returned to the authorized distrib-
utor from whom it was purchased to
be recycled in accordance with waste
regulations.
9

ELECTRIC HEDGE TRIMMER HELION 3
54_161520-B
2.5. PERSONAL PROTECTION EQUIPMENT
Equipment Wearing of Description
1Safety
helmet
Recom-
mended
Mandatory if there is a risk of falling
objects
2Protec-
tive visor
Recom-
mended Risk of projections.
3Protec-
tive gloves
Recom-
mended
Wear hand protection especially when
working on the cutting tool.
4
Robust, non-
slip safe-
ty shoes
Recom-
mended
When operating the machine, always
wear non-slip safety shoes. Do not op-
erate the machine in bare feet or with
sandals.
5Ear pro-
tection Mandatory
Wear approved ear protectors with suf-
ficient noise attenuating effect. Pro-
longed exposure to noise can cause
permanent hearing damage.
6Safety
goggles Mandatory Wear approved eye protection.
7Jacket or
over-sleeves
Recom-
mended Risk of projections.
8Work
trousers
Recom-
mended
Always wear clothing that covers the
operator's legs when the machine is in
operation.
9 Shin pads Optional Risk of projections.
10

ELECTRIC HEDGE TRIMMER HELION 3
54_161520-B
3. DESCRIPTION AND TECHNICAL CHARACTERISTICS
3.1. DESCRIPTION OF THE TOOL
1. Front handle safety trigger
2. Front handle
3. Power “On” and speed indicators
4. Speed button
5. Rear handle
6. Drive trigger
7. Quick connector
8. Handle rotation button
9. Engine housing
10. Hand guard
11. Blade (not included)
3.2. TECHNICAL FEATURES
3.2.1. TOOL FEATURES
HELION 3
Power 1200 W
Tool voltage 43.2V
Hedge trimmer blade L51 L63 L75
Blade weight 1.2 kg 1.3 kg 1.4 kg
Tool + blade weight 3.4 kg 3.55 kg 3.7 kg
Dimensions (l x w x h) in mm 985x232x181 1105x232x181 1225x232x181
Effective cutting length/blade 510 mm 630 mm 750 mm
Space between teeth 33 mm
Teeth height 23 mm
Blade speed 3200 to 3800 cuts/min
Battery-life Depends on use and battery type
Protection rating IP54
11

ELECTRIC HEDGE TRIMMER HELION 3
54_161520-B
3.2.2. CHARGERS AND BATTERIES COMPATIBILITY
Battery Charger Remarks
ALPHA 260 CB5022 ; CB5022HV *with adapter cord ref. 57248
ALPHA 520 CB5022 ; CB5022HV *with adapter cord ref. 57248
ULIB 750 CB5022; CB5022HV *with adapter cord ref. 57238
3.2.3. COMPATIBLE BLADES
Blade type References
L51 56205
L63 56206
L75 56207
3.2.4. VIBRATION AND NOISE EMISSION VALUES
The determination of noise levels and vibration rates is based on operating conditions at maximum rated speed
according to a standardised test method. It can be used to compare two machines.
Sound pressure values
Maximum sound pressure level at the user's position
(uncertainty KpA: 1.5 dB (A)) Lpa = 79 dB (A)
Peak sound pressure level at the user's position LpC < 130 dB(C)
Sound power values
Measured sound power level LWA (uncertainty KWA: 0.6 dB(A)) LWAm = 92 dB
Guaranteed sound power level LWAg LWAg = 93 dB
The measured sound power level and the guaranteed sound power level were measured on a hedge trimmer with
a 750 mm long blade.
The measured sound level and the guaranteed sound power level were measured according to a procedure in
accordance with Directive 2000/14 / EC Annex V.
Vibration values
Vibratory emission values at the handle determined in accordance with EN
62841-4-2: 2009 (uncertainty of K = 1.5 m / s²)
ah = 3.4 m/s²
The total declared values for vibration and noise emissions can be used for a preliminary exposure assessment.
Caution
Vibrations during actual working use of the machine may differ from the total declared value, depending on
the way the machine is used
It is necessary to identify safety measures to protect the operator, based on an estimate of exposure under
actual operating conditions (taking into account all parts of the operating cycle, such as the time the machine
is switched off and the time it is idling, in addition to the working time).
12

ELECTRIC HEDGE TRIMMER HELION 3
54_161520-B
4. COMMISSIONING
4.1. PACKAGE CONTENTS
Check that the Electric hedge trimmer Helion 3 is delivered with:
• 1x hedge trimmer without blade (handle removed)
• 1 x Torx wrench
• 1 x user guide
• 5 x M5x25 screws
• 1x warranty card
4.2. MOUNTING THE HANDLE
1. Take the tool out of its packaging.
2. Retrieve 2 M5x25 screws from the zip bag supplied
with the tool.
3. Position the front handle on the tool.
4. Attach the handle with the two M5x25 screws.
Important
Tightening torque: 2.5 N.m.
13

ELECTRIC HEDGE TRIMMER HELION 3
54_161520-B
4.3. MOUNTING THE BLADE
Caution
Before working on the tool, check that the battery is switched off and then disconnect the power
cord from the battery.
1. Retrieve three M5x25 screws from the zip bag sup-
plied with the tool.
2. Locate the motor shaft over the safety casing and
the reducer over the hedge trimmer blade.
3. Position the motor shaft halfway into the reducer.
4. If necessary, rotate the blade slightly to align it with
the safety casing.
5. Attach the blade with the three M5x25 screws.
Important
Tightening torque: 4 N.m.
Caution
Only ever use blades supplied by PELLENC to avoid the risk of injury.
Warning
Running-in of the blade must be done for 1 minute at each change of the blade in a dry run.
Check the tightness of the blade after running-in.
14

ELECTRIC HEDGE TRIMMER HELION 3
54_161520-B
4.4. POSITION OF THE HANDLE
1. Press and hold the handle rotation button (9) to un-
lock the handle rotation.
2. Rotate the handle to the desired position and re-
lease the button.
Note
The handle must be placed in one of the 5 lock po-
sitions in order to work.
4.5. CONNECTING PELLENC BATTERIES TO THE TOOL
Important
Always check the remaining battery-life before use. If necessary, recharge the battery using the charger.
To prolong the life of the connectors, it is advisable to protect them when they are disconnected. Avoid leaving
them in contact with abrasive or dirty surfaces, or subjecting them to significant impacts (falls).
For more information on PELLENC batteries see the battery instructions.
1. Install the battery and the power cord on the har-
ness, refer to the assembly sheet supplied with the
harness.
2. Check that the power cord is properly connected.
3. On the right chest strap of the harness, connect the
adapter cord (part number 57238 for 750 battery,
57248 for Alpha 520 battery) to the power cord quick
connector (7) of the Electric hedge trimmer.
15

ELECTRIC HEDGE TRIMMER HELION 3
54_161520-B
4.6. DISCONNECTING THE BATTERY
1. Switch off the battery.
2. On the right chest strap of the harness, disconnect
the adapter cord from the quick connector of the
power cord (7) of the Electric hedge trimmer.
3. To remove the battery from the harness, refer to the
battery instructions and to the harness assembly in-
structions
5. USAGE
5.1. STARTING AND STOPPING THE ELECTRIC HEDGE TRIMMER HELION 3
5.1.1. START-UP OF THE TOOL
Caution
Check that the safety devices are running properly before starting work.
1. Check the working area (fences, posts, etc.)
2. Turn the rear handle to the correct position.
3. Connect the tool to the battery, refer to Section 4.5,
“Connecting PELLENC batteries to the tool ”.
4. Turn on your battery.
Note
The front handle safety throttle trigger must be re-
leased when the power is turned on. If this is not the
case, a flashing inside/outside LED appears and
the tool remains non-functional.
Note
If at least 1 indicator light on the handle is on, the
tool is powered up.
16

ELECTRIC HEDGE TRIMMER HELION 3
54_161520-B
To start the Helion 3 Electric hedge
trimmer:
• Hold the front handle safety throttle trigger (1) and pull
the drive trigger (6) twice to start the tool.
• Hold the front handle safety throttle trigger (1) and the
drive trigger (6) while trimming.
Note
If the drive trigger remains released for more than 5 minutes, repeat the above process to re-prime the tool.
The Helion 3 hedge trimmer allows quick connector connection / disconnection. To activate the function, the
battery must remain on (switch on I)
Important
Always start the motor before bringing the cutter bar into contact with the wood
17

ELECTRIC HEDGE TRIMMER HELION 3
54_161520-B
5.1.2. STOPPING THE TOOL
1. Switch off the battery and disconnect the tool, refer
to Section 4.6, “Disconnecting the battery”.
2. Fit the sleeve over the blade.
Note
Cover the blade with the sleeve in all of the fol-
lowing situations: transport, adjustment, han-
dling and storage of the tool.
5.2. HEDGE-TRIMMING SPEED MANAGEMENT
Speed setting
Your tool is equipped with a speed selector system.
Changing speeds allows the desired quality of work to
be optimised using the speed selector (4) located on the
handle. Four indicator LEDs (3) located on the handle
indicate the selected speed level.
Note
Reduce the speed to a minimum for greater autonomy or when the lights flash (close to thermal safety stop)
Speed 1 = 1 LED on (3200 cuts / min)
Speed 2 = 2 LEDs on (3400 cuts /
min)
Speed 3 = 3 LEDs on (3600 cuts /
min)
Speed 4 = 4 LEDs on (3800 cuts /
min)
18

ELECTRIC HEDGE TRIMMER HELION 3
54_161520-B
5.3. TIPS FOR USING THE ADAPTABLE BLADES
L51 “POSSIBLE USE”
“OPTIMAL USE”
Pruning work over
large sections
“POSSIBLE USE” “POSSIBLE USE”
L63
“OPTIMAL USE”
Dense vegetation
in small sections
“POSSIBLE USE” “POSSIBLE USE” “POSSIBLE USE”
L75
“OPTIMAL USE”
Gain working depth on
the top of the hedge
“POSSIBLE USE” “POSSIBLE USE”
“OPTIMAL USE”
Not very dense, out-
put efficiency required.
5.4. WORKING TECHNIQUES
19

ELECTRIC HEDGE TRIMMER HELION 3
54_161520-B
6. MAINTENANCE
6.1. MAINTENANCE ADVICE
Caution
Always disconnect the tool battery before starting tool maintenance.
• Use products recommended by PELLENC.
• In the event of any problem, consult an authorised PELLENC distributor.
20
Table of contents
Other pellenc Trimmer manuals
pellenc
pellenc HELION 2 COMPACT User manual

pellenc
pellenc Excelion 1200 User manual
pellenc
pellenc HELION ALPHA User manual

pellenc
pellenc HELION POLE TELESCOPIC User manual
pellenc
pellenc EXCELION ALPHA User manual

pellenc
pellenc EXCELION ALPHA User manual

pellenc
pellenc EXCELION ALPHA User manual
pellenc
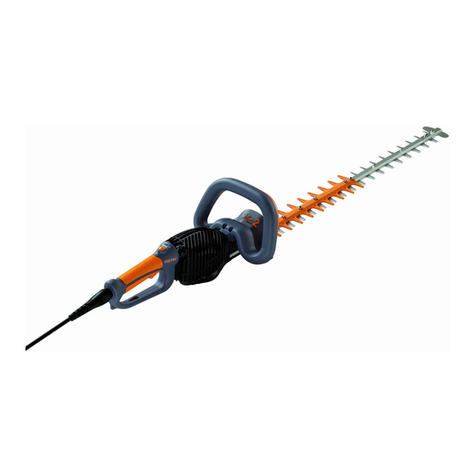
pellenc HELION 2 COMPACT User manual
Popular Trimmer manuals by other brands

Hurricane
Hurricane HHS 6055 operating instructions
EINHELL
EINHELL RG-CT 18 Li Original operating instructions

GreenWorks
GreenWorks STE302 manual

Grizzly
Grizzly ERT 530 R Original instructions for use

Tanaka
Tanaka TBC-260PF/L Illustrated parts manual

Craftsman
Craftsman WEEDWACKER Incredi-Pull 316.791191 Operator's manual


