Cocraft GT102 B User manual

ENGLISHSVENSKANORSKSUOMIDEUTSCH
Ver. 20160215
Original instructions
Bruksanvisning i original
Originalbruksanvisning
Alkuperäinen käyttöohje
Original Bedienungsanleitung
Art.no Model
18-4583 GT102 B
31-1324 GT102 B
Important!
Read the entire instruction manual
carefully and make sure that you fully
understand it before you use the
equipment. Keep the manual for future
reference.
Viktig information:
Läs hela bruksanvisningen noggrant och
försäkra dig om att du har förstått den
innan du använder utrustningen. Spara
bruksanvisningen för framtida bruk.
Viktig informasjon:
Les disse anvisningene nøye og forsikre
deg om at du forstår dem, før du tar
produktet i bruk. Ta vare på anvisningene
for seinere bruk.
Tärkeää tietoa:
Lue nämä ohjeet huolellisesti ja varmista
että olet ymmärtänyt ne, ennen kuin
alat käyttää laitetta. Säilytä ohjeet
myöhempää tarvetta varten.
Wichtiger Hinweis:
Vor Inbetriebnahme die komplette
Bedienungsanleitung sorgfältig
durchlesen und aufbewahren.
GT35 350 W
18-4583 • 31-1324
GRASS TRIMMER
GRÄSTRIMMER GRESSTRIMMER
RUOHOTRIMMERI RASENTRIMMER

2

ENGLISH
3
350 W Grass Trimmer
Art.no 18-4583 Model GT102 B
31-1324 GT102 B
Please read theentire instruction manual before using theproduct and then save
it for future reference. We reserve theright for any errors in text or images and any
necessary changes made to technical data. If you have any questions concerning
technical problems please contact our Customer Services.
Contents
Safety................................................................. 4
General Safety Requirements ................................................... 4
Specic Safety Instructions for Grass Trimmers ........................ 6
Grass trimmer symbol explanation............................................ 7
Product description............................................. 8
Assembly ............................................................ 9
Front handle ............................................................................ 9
Safety guard ............................................................................ 9
Edging wheel.......................................................................... 10
Operating instructions ...................................... 10
Setup..................................................................................... 10
Connecting the extension lead ............................................... 11
Switching the trimmer on .................................. 11
Care and maintenance....................................... 11
Changing the trimmer line ...................................................... 11
Disposal............................................................ 13
Specications ................................................... 13

ENGLISH
4
Safety
General Safety Requirements
General safety instructions for powertools
Warning: Readall theinstructions. Failure to adhere to thefollowing instructions
may lead to electric shocks, fires or serious injuries.
SAVE THESE INSTRUCTIONS.
Theterm “power tools” in thewarning text below refers to your handheld mains
operated or battery operated tool.
1) Work area
a) Keep thework area clean and well illuminated. Cluttered and poorly lit areas
invite accidents.
b) Do not use power tools in explosive environments, e.g. near to flammable
liquids, gases or dust. Powertools generate sparks that can easily ignite dust
orfumes.
c) Keep children and other bystanders away from thearea where you are using
thepower tool. Distractions can cause you to lose concentration and control of
thetool.
2) Electrical safety
a) Thepower tool plug must fit correctly into thewall socket. Nevermodify
theplug in any way. Neveruse anadaptor together with earthed power tools.
Unmodified plugs and suitable wall sockets minimize therisk of electric shocks.
b) Avoid physical contact with earthed objects such as pipes, radiators, ovens
and refrigerators. Thereis anincreased risk of receiving anelectrical shock if your
body is earthed.
c) Do not expose thepower tool to rain or other wet conditions. Waterentering
apower tool will increase therisk of electric shock.
d) Do not abuse themains lead. Neveruse thelead to carry thetool or pull
theplug from awall socket. Keepthelead away from heat, oil, sharp edges
and moving parts. Damaged or tangled leads increase therisk of electric shock.
e) When using power tools outdoors, use anextension lead that is suitable for
this purpose. Theuse of anextension lead designed for outdoor use decreases
therisk of electric shocks.
f) If theuse of thepower tool in awet environment is unavoidable, awall
socket equipped with aresidual current device (RCD) should be used. Useof
anRCD significantly reduces therisk of electric shock.

ENGLISH
5
3) Personal safety
a) Pay attention to what you are doing and use common sense when using
power tools. Neveruse power tools if you are tired or under theinfluence of
drugs, alcohol or medication. Onemoment of inattention while using apower
tool may result in aserious injury.
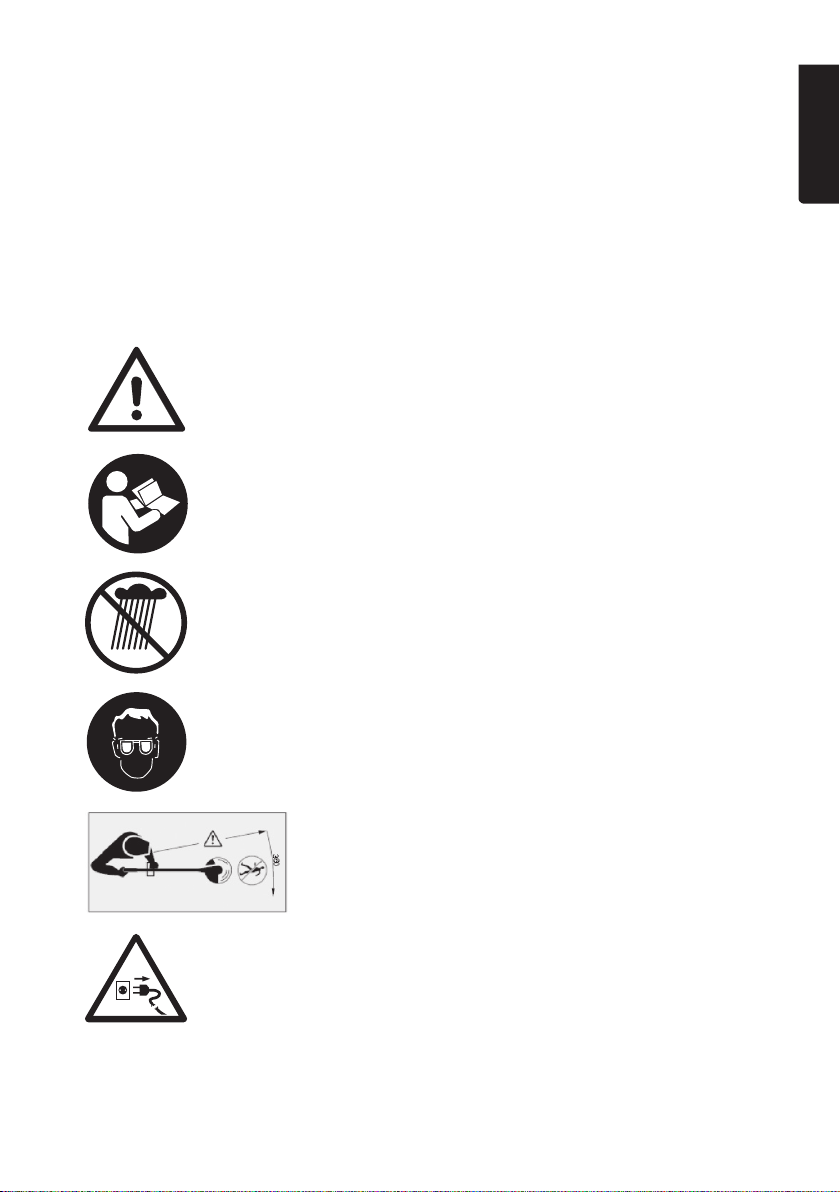
b) Wear protective clothing. Alwayswear safety glasses. Usingprotective
clothing such as dust masks, non-slip safety shoes, helmets and ear defenders
reduces therisk of injury.
c) Avoid accidental starts. Makesure that thepower switch is set to OFF before
plugging thepower tool into awall socket, picking up or carrying thepower
tool. Nevercarry apower tool with your finger on thetrigger and never connect
thepower tool to awall socket when theswitch is set to ON, since it may result
ininjury.
d) Remove all service tools/keys before switching on thepower tool.
Aservicetool left on arotating part of thepower tool may result in personal injury.
e) Do not overreach. Keepproper footing and balance at alltimes. Thisensures
better control over thepower tool in unexpected situations.
f) Wear suitable clothing. Donot wear loose-fitting clothing or jewellery.
Keephair, clothes and gloves away from moving parts. Loose-fitting clothes,
jewellery or long hair could become caught in moving parts.
4) Use and maintenance of the power tool
a) Do not force thepower tool. Usethecorrect power tool for your application.
Thecorrect power tool will perform thetask better and safer if used at thecorrect
feedrate.
b) Never use thepower tool if thepower switch does not switch thetool on and off.
Anypower tool that cannot be controlled by thepower switch is dangerous and
must be repaired.
c) Unplug thelead from thewall socket before making any adjustments,
changing accessories or storing thepower tool. Theseprecautions reduce
therisk of thepower tool starting unexpectedly.
d) Store power tools that are not being used out of children’s reach.
Donotallow people who are unfamiliar with thetool or these instructions
to operate thetool. Powertools can be dangerous if they fall into thehands of
inexperienced users.
e) Maintaining power tools. Checkfor any incorrect settings, parts that
catch, broken parts or anything else which may cause thepower tool
to malfunction. Ifsomething is damaged it must be repaired before use.
Manyaccidents are caused by poorly maintained powertools.
f) Keep cutting tools sharp and clean. Properly maintained cutting tools with sharp
cutting edges are less likely to bind and are easier to control.
g) Use thepower tool, and any accessories in accordance with these
instructions, taking into account theworking conditions and thework to
be performed. Using thepower tool for apurpose other than that for which it is
intended could result in adangerous situation.

ENGLISH
6
5) Service
a) Repairs and service should only be performed by qualified tradesmen, and
only with original spare parts. Thisguarantees that thesafety of thepower tool is
maintained.
Specic Safety Instructions for Grass Trimmers
• This grass trimmer is not intended for use by persons (including children) with
reduced physical, sensory or mental capabilities, or lack of experience and
knowledge, unless they have been given supervision or instruction concerning
thesafe use of thegrass trimmer by aperson responsible for their safety.
• Never let children operate or play with thegrass trimmer. Keepit out of reach of
children.
• Wear sturdy footwear, long trousers, safety glasses and gloves.
• Keep anyone standing close by at asafe distance from thegrass trimmer.
• Keep children and pets out of thework area. Stonesand other debris can be
ejected by thegrass trimmer. Switchthegrass trimmer off immediately should any
onlookers, adults, children or pets, come within 5 metres.
• Only use thegrass trimmer in good light conditions.
• If thegrass trimmer has been subjected to any shocks or impacts it must be
checked for damage. Anydefect or damage must be repaired before thegrass
trimmer is used. Makesure thetrimmer head is securely fastened on. Ifit is loose
or damaged thegrass trimmer must not beused.
• Always inspect thegrass trimmer before use.
• Thesafety guard must always be fitted before thegrass trimmer is used. Thegrass
trimmer must not be used if thesafety guard is damaged or missing.
• Before starting to use thegrass trimmer, check thearea to be trimmed for foreign
objects such as stones or cables.
• Always hold thegrass trimmer firmly. Holdit in bothhands.
• Never attach metal cutting blades to this grass trimmer.
• Keep theventilation openings of thetrimmer head free from debris. Removeany
grass or leaves.
• Theblade will continue to rotate after themotor has been turned off. Waituntil
theblade has completely stopped before servicing.
• Thegrass trimmer must not be exposed to rain or moisture.
• Make sure that you are familiar with all thecontrols and settings before using
thegrass trimmer.
• Keep hands and feet away from thetrimmer head and line at all times and
especially when switching themotoron.
• Be careful when adjusting thetrimmer line; do not switch themotor on until you
are holding thegrass trimmer in thecorrect way.

ENGLISH
7
• Only use thegrass trimmer with parts and accessories recommended by
themanufacturer.
• Keep proper footing and balance at alltimes.
• Avoid directing thetrimmer head towards immovable objects when thetrimmer
head is spinning, as they could damage thegrass trimmer.
• Do not attempt to stop thetrimmer head with hands or feet, let it stop by itself.
• Avoid operating thegrass trimmer on gravel paths, gravel covered yards or other
places where stones could be ejected.
Grass trimmer symbol explanation
Warning! Grasstrimmers can be dangerous.
Read theinstruction manual.
Do not expose thegrass trimmer to rain or moisture.
Wear eye protection.
Keep all persons and animals at asafe distance
from thegrass trimmer.
Unplug themains lead from theelectrical socket immediately
if it isdamaged.

ENGLISH
8
1 2 4 53 6 7 8 109 11
Product description
Thepicture shows theassembled grass trimmer, parts 2 and 3 are not attached
whensold.
1. Trimmer head
2. Edgingwheel
3. Safetyguard
4. Release button for adjusting thetrimmer head angle to one of its 5 fixed positions
5. Catchfor twisting thetrimmer head to one of its 3 fixed positions. Pushthecatch
forward towards thetrimmer head.
6. Telescopic handle
7. Locking knob for adjusting thelength of thetelescopic shaft. Twistclockwise to
unlock and anticlockwise tolock.
8. Adjustable front handle
9. Cablerestraint
10. [ ] Trigger
11. Safetyswitch for preventing unintentional operation. Holdthebutton in before
pulling thetrigger.

ENGLISH
9
Assembly
Note: Donot connect thegrass trimmer to anelectrical
socket until it is completely assembled.
Note: Whensold, thegrass trimmer shaft is
contracted to enable it to fit into thebox. Thefirst time
thetelescopic shaft is extended, it passes anon-return
pawl creating anew end-stop. Theshaft will then only
be able to contract as far as thenew end-stop.
Retracted when sold Max retracted length once having
been extended
Front handle
1. Attach thefront handle to theshaft.
Thehandle can be mounted so that it
leans forwards or backwards.
2. Tighten thehandle locking knob.
Safety guard
1. Pushthesafety guard (3) into
thegroove in thetrimmer head (1).
2. Fastenthesafety guard to thetrimmer
head using theincluded screw.
Note: Handletheguard carefully; it has
avery sharp blade on it (indicated by
thearrow).

ENGLISH
10
Edging wheel
Thegrass trimmer comes with anedging
wheel (2). Itconsists of two parts which click
together to surround thetrimmer head.
It is used for trimming edges.
Operating instructions
Setup
1. Adjustthelength of thetelescopic shaft
(6) to suit your height. Twistthelocking
knob (7) clockwise to release theshaft,
adjust thelength and then twist
thelocking knob anticlockwise to
tighten.
2. Adjusttheangle of thetrimmer head
by holding in thebutton (4) and moving
thehead to one of the5 settings.
Release thebutton when thetrimmer
head is at thedesired setting.
3. Thetrimmer head can be rotated
and set to one of 3 fixed settings.
Slidethespring-loaded catch (5)
forward towards thetrimmer head, twist
thetrimmer head into one of its fixed
settings and then release thecatch.

ENGLISH
11
Connecting the extension lead
1. Makesure that theextension lead is not connected to themains.
2. Makealoop out of 20–25 cm of theextension lead and attach it to thecable
restraint (9) on thehandle.
3. Tighten theloop over thecable restraint (9).
4. Plugthegrass trimmer lead into theextension lead.
5. Plugtheextension lead into awall outlet when it is time to use thetrimmer.
Switching the trimmer on
1. Holddown thesafety switch (11) on therear handle.
2. Startthetrimmer by pressing in thepower trigger (10).
3. Release thepower trigger to stop themotor.
Care and maintenance
Note: Alwaysdisconnect theplug from thepower supply before cleaning, adjusting or
transporting thegrass trimmer.
Changing the trimmer line
1. Openthetrimmer head by
twisting thebottom, “thecover”,
anticlockwise and removing it.
Theline spool can then be removed,
but take care not to lose thespring
located under thespool.
2. Takeanew spool and line and make
sure that theline passes through
thenotches in thespool and that
theends of theline stick out about
15 cm to make fitting easier.

ENGLISH
12
3. Placethespring in thetrimmer head
with thewider end at thebottom
of thecylinder and thenarrow end
pointing up towards thespool.
4. Threadtheends of theline through
theholes in theside of thetrimmer
head and place thespool on top of
thespring in thetrimmer head.
5. Pullgently on theends of theline so
that it comes out of thenotches in
thespool.
7. Refitthebottom cover, which has
abayonet fitting. Pushit down whilst
simultaneously twisting it clockwise
until it won’t turn any further.
6. Ifthere is anunnecessary length of
line protruding from thespool, turn
thespool anticlockwise to wind
theline back onto thespool until
only about 5–6 cm of line sticks out.

ENGLISH
13
Note: Wearsafety glasses and make sure that there are no bystanders nearby when
starting thegrass trimmer after new line has been fitted because any excess cut off
line will fly out at highspeed.
• Check regularly to ensure that no grass and twigs have built up around thespindle.
• Check before each use that thepower trigger and safety catches are undamaged
and work correctly.
• Clean theexterior of thetrimmer with asoft brush or cloth, do not use water,
solvents or polish.
• Regularly remove all dirt, especially from around themotor ventilation slits on
thetrimmer head.
• Store thegrass trimmer in asafe, dry place out of thereach of children.
Responsible disposal
This symbol indicates that this product should not be disposed of
with general household waste. This applies throughout the entire EU.
In order to prevent any harm to the environment or health hazards
caused by incorrect waste disposal, the product must be handed in
for recycling so that the material can be disposed of in a responsible
manner. When recycling your product, take it to your local collection
facility or contact the place of purchase. They will ensure that the
product is disposed of in an environmentally sound manner.
Specications
Voltage 220–240 V AC, 50Hz
Power 350W
No-load speed 10,000rpm
Cutting diameter 250mm
Line diameter 1.5mm
Noise level LpA 82 dB(A), K: 3dB
LwA 93 dB(A) K: 3dB
Vibration Rear handle 6.531m/s², K: 1.5m/s²
Front handle 6.764m/s², K: 1.5m/s²
Weight 18-4583: 2.7kg
31-1324: 2.3 kg

SVENSKA
14
Grästrimmer 350 W
Art.nr 18-4583 Modell GT102 B
31-1324 GT102 B
Läs igenom hela bruksanvisningen före användning och spara den sedan för framtida
bruk. Vireserverar oss för ev. text- och bildfel samt ändringar av tekniska data.
Vid tekniska problem eller andra frågor, kontakta vår kundtjänst.
Innehållsförteckning
Säkerhet ........................................................... 15
Generella säkerhetsföreskrifter.............................................. 15
Särskilda säkerhetsföreskrifter för grästrimmer ..................... 17
Förklaring av symbolerna på grästrimmern.............................. 18
Produktbeskrivning ........................................... 19
Montering ......................................................... 20
Handtag................................................................................. 20
Skydd .................................................................................... 20
Stödhjul ................................................................................. 21
Användning ....................................................... 21
Inställningar........................................................................... 21
Anslutning av skarvsladden .................................................... 22
Starta trimmern ................................................ 22
Skötsel och underhåll........................................ 22
Byte av trimmertråd ............................................................... 22
Avfallshantering................................................ 24
Specikationer.................................................. 24

SVENSKA
15
Säkerhet
Generella säkerhetsföreskrifter
Generella säkerhetsinstruktioner för elektriska handverktyg
Varning! Läsalla instruktioner. Omnedanstående instruktioner inte följs kan detta
leda till elektrisk stöt, brand eller allvarlig skada.
SPARA DESSA INSTRUKTIONER.
Termen ”elektriskt handverktyg” ivarningstexten nedan refererar till ditt nätanslutna
eller batteridrivna handverktyg.
1) Arbetsutrymmet
a) Håll arbetsutrymmet rent och väl upplyst. Belamrade och mörka utrymmen
inbjuder till olyckor.
b) Använd inte elektriska handverktyg iexplosiva miljöer, som inärheten av lätt-
antändliga vätskor, gaser eller damm. Elektriska handverktyg genererar gnistor
som kan antända damm ellerångor.
c) Håll undan barn och åskådare medan du använder det elektriska handverktyget.
Störningsmoment kan göra att du tappar kontrollen över verktyget.
2) Elektrisk säkerhet
a) Det elektriska handverktygets stickpropp måste passa ivägguttaget. Modifiera
aldrig stickproppen på något vis. Användaldrig adapter tillsammans med jordade
elektriska handverktyg. Omodifierade stickproppar och passande vägguttag
minskar risken för elektrisk stöt.
b) Undvik kroppskontakt med jordade föremål, t.ex. rör, element, köksspis och
kylskåp. Detinnebär ökad risk för elektrisk stöt om din kropp är jordad.
c) Utsätt inte det elektriska handverktyget för regn eller våta förhållanden.
Omvatten tränger in iett elektriskt handverktyg ökar det risken för elektrisk stöt.
d) Misshandla inte nätsladden. Användaldrig nätsladden för att bära, dra eller
rycka stickproppen ur vägguttaget. Hållnätsladden undan från värme, olja,
vassa kanter och rörliga delar. Skadade eller trassliga nätsladdar ökar risken för
elektrisk stöt.
e) När du använder ettelektriskt handverktyg utomhus, använd enskarvsladd
anpassad för detta ändamål. Användning av enskarvsladd för utomhusbruk
minskar risken för elektrisk stöt.
f) Om det inte går att undvika att det elektriska handverktyget används ifuktig
miljö, använd ettvägguttag utrustat med jordfelsbrytare. Användning av jordfels-
brytare minskar risken för elektrisk stöt.

SVENSKA
16
3) Personlig säkerhet
a) Var uppmärksam på vad du gör och bruka sunt förnuft när du använder
ettelektriskt handverktyg. Användinte ettelektriskt handverktyg om du
är trött eller påverkad av droger, alkohol eller medicinering. Ettögonblicks
ouppmärksamhet när du använder ettelektriskt handverktyg kan resultera iallvarlig
personskada.
b) Använd skyddsutrustning. Bäralltid skyddsglasögon. Attvid behov använda
skyddsutrustning, t.ex. andningsskydd, halksäkra skyddsskor, hjälm och hörsel-
skydd, minskar risken för personskada.
c) Undvik oavsiktlig start. Setill att strömbrytaren är iläge OFF innan du ansluter
stickproppen till vägguttaget, lyfter upp eller bär det elektriska handverktyget.
Attbära ettelektriskt handverktyg med ettfinger på strömbrytaren/avtryckaren
eller att ansluta ettelektriskt handverktyg till elnätet när strömbrytaren är iläge ON
inbjuder till olyckor.
d) Ta bort alla serviceverktyg/nycklar innan du slår på det elektriska handverktyget.
Ettkvarglömt serviceverktyg på enroterande del av det elektriska handverktyget
kan resultera ipersonskada.
e) Sträck dig inte för långt. Setill att du står stadigt med god balans hela tiden.
Dettamöjliggör bättre kontroll över det elektriska handverktyget ioväntade situationer.
f) Bär lämplig klädsel. Bärinte löst sittande kläder eller smycken. Hållundanhår,
kläder och handskar från rörliga delar. Lösakläder, smycken och långt hår kan
fastna irörliga delar.
4) Användning och underhåll av det elektriska handverktyget
a) Pressa inte det elektriska handverktyget. Användettelektriskt handverktyg
som är avsett för det arbetsmoment du utför. Korrekt elektriskt handverktyg gör
jobbet bättre och säkrare med avsedd matningshastighet.
b) Använd inte det elektriska handverktyget om strömbrytaren inte slår på och
stänger av verktyget. Allaelektriska handverktyg som inte kan kontrolleras med
strömbrytaren är farliga och måste repareras.
c) Ta stickproppen ur vägguttaget innan du utför några justeringar, byter tillbehör
eller lägger undan det elektriska handverktyget för förvaring. Dessaförebyggande
skyddsåtgärder minskar risken för att starta det elektriska handverktyget oavsiktligt.
d) Förvara elektriska handverktyg som inte används utom räckhåll för barn och
låt inte personer som inte är förtrogna med det elektriska handverktyget eller
dessa instruktioner använda det. Elektriska handverktyg är farliga om de kommer
ihänderna på ovana användare.
e) Underhåll elektriska handverktyg. Kontrollera om något är felinställt, om
rörliga delar kärvar, om delar har gått sönder eller om något annat har inträffat
som kan påverka funktionen hos det elektriska handverktyget. Omnågot är
skadat måste det repareras före användning. Mångaolyckor beror på dåligt
underhållna elektriska handverktyg.

SVENSKA
17
f) Håll skärverktyg vassa och rena. Ordentligt underhållna skärverktyg med vassa
eggar är mindre benägna att kärva och lättare att kontrollera.
g) Använd det elektriska handverktyget, tillbehör etc. enligt dessa instruktioner,
ta hänsyn till arbetsförhållanden och till det arbete som ska utföras. Användning
av det elektriska handverktyget för andra arbeten än vad det är ämnat för kan
resultera ien farlig situation.
5) Service
a) Låt behörig personal utföra service och reparationer, och endast med original-
reservdelar. Dettagaranterar att säkerheten hos det elektriska handverktyget
behålls.
Särskilda säkerhetsföreskrifter för grästrimmer
• Produkten får inte användas av personer (inklusive barn) med begränsad fysisk,
sensorisk eller psykisk förmåga eller som saknar erfarenhet/kunskap om produktens
användningssätt samt risker, undantaget om personen handleds och undervisas
av enperson som ansvarar för personens säkerhet.
• Låt aldrig barn använda eller leka med produkten, förvara produkten utom räckhåll
förbarn.
• Bär alltid kraftiga skor och långa byxor samt skyddsglasögon och handskar.
• Håll personer som står inärheten på betryggande avstånd från grästrimmern.
• Se till att inga barn eller husdjur uppehåller sig inärheten. Stenaroch andra före-
mål kan kastas iväg. Stänggenast av grästrimmern om någon vuxen, barn eller
husdjur uppehåller sig närmare än 5meter.
• Använd endast grästrimmern vid bra ljusförhållanden.
• Om grästrimmern har varit utsatt för stöt eller slag måste den kontrolleras beträffande
skador, den måste då repareras före användning. Omtrimmerhuvudet sitter löst
eller är skadat får inte grästrimmern användas.
• Kontrollera grästrimmerns funktion före användning.
• Skyddet ska alltid vara monterat vid användning av grästrimmern. Grästrimmern
får inte användas om skyddet är trasigt.
• Kontrollera före användning att det inte finns några stenar, kablar, rep eller andra
främmande föremål iområdet som ska trimmas.
• Håll alltid grästrimmern stadigt. Hållden ibåda handtagen.
• Montera aldrig skärande verktyg av metall.
• Håll rent runt motorns kylluftsöppningar på trimmerhuvudet. Tabort gräs ochlöv.
• Kniven fortsätter att snurra efter att motorn stängts av. Väntatills den har stannat
helt före service etc.
• Grästrimmern får inte utsättas för regn eller hög luftfuktighet.
• Se till att du känner till hur alla reglage och inställningar fungerar före användning.
• Håll undan händer och fötter från trimmerhuvudet och trimmertråden, särskilt när
motorn startas.
• Var försiktig vid justering av trimmertråd, starta inte motorn förrän du håller igräs-
trimmern på rättsätt.

SVENSKA
18
• Grästrimmern får endast användas tillsammans med tillbehör som rekommenderas
av tillverkaren.
• Se till att du står stadigt när du använder grästrimmern.
• Undvik att rikta trimmerhuvudet mot fasta föremål när trimmerhuvudet snurrar,
annars kan grästrimmern skadas.
• Försök inte att stoppa skärhuvudet med händer eller fötter, låt det alltid
stanna av sig självt.
• Undvik att använda grästrimmern inärheten av grusvägar, gård med
grusbeläggning eller annan plats där stenar kan kastas iväg.
Förklaring av symbolerna på grästrimmern
Allmänna varningar för riskmoment.
Läs bruksanvisningen.
Utsätt inte grästrimmern för regn ellerfukt.
Använd skyddsglasögon.
Håll andra personer på betryggande avstånd
från grästrimmern.
Dra stickkontakten ur vägguttaget omedelbart
om nätsladden skadas.

SVENSKA
19
1 2 4 53 6 7 8 109 11
Produktbeskrivning
Bilden visar grästrimmern monterad, 2 och 3 är inte monterade vid leverans.
1. Trimmerhuvud
2. Stödhjul
3. Skydd
4. Spärrför justering av trimmerhuvudets vinkel i5 fastalägen
5. Spärrför vridning av trimmerhuvudet i3 fasta lägen. Tryckspärren framåt mot
trimmerhuvudet.
6. Teleskopskaft
7. Låsvred för justering av teleskopskaftets längd. Vridmedurs för att öppna och
moturs för attlåsa.
8. Justerbart främre handtag
9. Fästeför skarvsladd
10. [ ] Strömbrytare
11. Säkerhetsspärr för att förhindra oavsiktlig start. Hållin knappen innan
strömbrytaren trycks in.

SVENSKA
20
Montering
Obs! Sättinte istickproppen iett eluttag innan trimmern
är helt monterad ochklar.
Obs! Vidleverans är grästrimmern extra hopskjuten,
men detta är endast ettleveransläge för att den ska få
plats iförpackningen, när man drar ut teleskopskaftet
första gången klickar ettnytt ändläge in och grästrim-
mern kan nu endast skjutas ihop till detta nya ändläge.
Hopskjuten vid leverans Max hopskjuten efteratt
teleskopskaftet dragits ut engång
Handtag
1. Placera handtaget på trimmern (handta-
getgår att vända så att det lutar framåt
eller bakåt).
2. Dra åt med vredet.
Skydd
1. Tryckin skyddet (3) iurtagen itrimmer-
huvudet (1).
2. Skruvafast skyddet på trimmerhuvudet
med den bifogade skruven.
Obs! Varförsiktig, det finns enmycket vass
kniv på skyddet (vid pilen).
Table of contents
Languages:
Other Cocraft Trimmer manuals

Cocraft
Cocraft DCHT201 User manual

Cocraft
Cocraft BLR01-R3-300 User manual

Cocraft
Cocraft HB 380-4T User manual

Cocraft
Cocraft LXC GT18 Series User manual

Cocraft
Cocraft 18V Lithium Series User manual

Cocraft
Cocraft HH 500-L User manual

Cocraft
Cocraft ASYPHT5450 User manual

Cocraft
Cocraft LXC HT18 User manual

Cocraft
Cocraft HB430-2T User manual