Coba Nitrox PDU SM-1688 User manual

Manual
PDU SM-1688
PDU SW-1081
PDU SW-1681
1Important Informationen .................................................................................................3

Manual Nitrox PDU SW-xxxx/ SM-xxxx 2 of 23
19.01.2018
1.1 Introduction ............................................................................................................3
1.2 Scope of delivery....................................................................................................3
1.3 Symbols.................................................................................................................3
2Safety................................................................................................................................4
2.1 Intended use ..........................................................................................................4
2.1.1 Environmental...........................................................................................4
2.1.2 Disposal....................................................................................................4
2.2 General information................................................................................................4
2.3 Danger and protection............................................................................................4
3Product information ........................................................................................................5
3.1 Features.................................................................................................................5
3.2 Description.............................................................................................................6
3.3 Technical Data.......................................................................................................8
3.4 Elektric connection.................................................................................................8
4Installation........................................................................................................................9
5The Web interface..........................................................................................................10
5.1 Login....................................................................................................................10
5.2 Information - PDU.................................................................................................10
5.3 Information - System............................................................................................12
5.4 Control - Outlet.....................................................................................................12
5.5 Control - Group (only SM-1688) ...........................................................................13
5.6 Control - Schedule (only SM-1688) ......................................................................14
5.7 Control - Ping Action (only SM-1688) ...................................................................14
5.8 Configuration - PDU.............................................................................................15
5.9 Configuration - Threshold.....................................................................................16
5.10 Configuration - User.............................................................................................17
5.11 Configuration - Network........................................................................................18
5.12 Configuration - Mail..............................................................................................18
5.13Configuration - SNMP ..........................................................................................19
5.14Configuration - Time.............................................................................................20
6Using SNMP...................................................................................................................21
7Using PDU Utility...........................................................................................................21
8Maintenance...................................................................................................................21
9Disposal .........................................................................................................................21
10 Warranty terms ..............................................................................................................22
11 Contact...........................................................................................................................22

Manual Nitrox PDU SW-xxxx/ SM-xxxx 3 of 23
19.01.2018
1 Important Information
1.1 Introduction
Thank you for buying a Coba Nitrox PDU.
PDUs are intelligent power distribution units for computers in server racks. They are
offering a couple additional features, depending on the model.
Please read the following instructions carefully.
1.2 Scope of delivery
1x PDU
1x Power cord
1x CD with manual in German and English
1.3 Symbols
Symbol
Meaning
Dangerous situation which can result in violation or
death.
Possible damage of property and other important
information

Manual Nitrox PDU SW-xxxx/ SM-xxxx 4 of 23
19.01.2018
2 Safety
2.1 Intended use
2.1.1 Environmental
This product is only for indoor use and for connection with computers.
Don´t use and store it inside humid rooms or near water.
Don´t use it close to source of heat. The additional heat could lead to
overheating and fire.
2.1.2 Disposal
Please dispose your product by using the special discharge point for
electronic waste. Please ask your municipality or disposal company in
case of further questions.
2.2 General information
Please read this manual carefully before installing or using this product.
Keep this manual and pass it when passing the product.
Please follow the instructions and warnings of this manual before using the product.
The inobservance of this manual can effect violations and damage.
We disclaim liability for violations and damages caused by inobservance
of this manual.
2.3 Danger and protection
Don´t damage the cable.
Don´t pull the plug by pulling the cable.
Don´t use any patched or damaged cable or plug.
Don´t use the cable or product close to heat source.
Don´t open the housing of the product.
In case of strange noise or smell pull the power cord out of the socket.
Ensure that all cables are fixed permanently.
Keep the product away from children.
Don´t remove the cables with wet hands (electric strike).
Don´t use the product with wet hands (electric strike).
Keep the product free of dust (overheating and fire).
Leave service and cleaning only authorized and qualified personnel.

Manual Nitrox PDU SW-xxxx/ SM-xxxx 5 of 23
19.01.2018
3 Product information
The PDU enables to power-on and –off the connected devices via a TCP/ IP network.
Each of the output sockets can be switched separately. You can also read single or total
power consumption as well as environmental parameters (with optional sensor),
depending model.
3.1 Features
-Intergrated Web Server with Realtime Current Monitoring
-Integrated True RMS Current measurement
-Indicating IP Address
-Alarm by speaker
-Alarm by E-Mail and SNMP
-Supports PDU Monitor Software for monitoring several PDUs.
-Supports SNMP and MIB for monitoring by NMS
-Supports individual protection of sockets
-Realtime switching from output
-Status display by LED
-Supports switch-on delay
-Optional Temperature-/ Humidity sensor (only SM-1688)

Manual Nitrox PDU SW-xxxx/ SM-xxxx 6 of 23
19.01.2018
3.2 Description
1 Fuse, Over Load Protection
2 LED DHCP: Indicates active DHCP
LED SSL: No function
3 Display Meter - Indicates Current and IP-Address
ID - PDU identification
4 Function button
Turn-Off Alarm (Over load alarm can´t be turned off)
Push and hold for 2 Sec. to show IP-Address
Push and hold for 4 Sec. for switch between DHCP and fixed IP
Push and hold for 6 Sec. for Reset
5 LED socket status
Green Connected device
Red Fault
6 Optional Sensor
7 Network
8 Speaker
Warning - 1 tone / sec.
Over load - 3 tone / sec (The alarm will sound till the current is normal again
and the real value is 0,5A lower than the critical value.)
9 Output
10 Input
SM-1688 Vorne
SM-1688 Hinten
12345678
1 2 3 4 5 6 7 8
Funct i on ENV Et her net
PDU
St atus
Meter ID
SSL
DHCP
1 3 4 6 75
910
2 8

Manual Nitrox PDU SW-xxxx/ SM-xxxx 7 of 23
19.01.2018
A B C D E F G H
Functi on
Ethernet
Meter
DHCP
1 4 5 7
9
63
SW-1081/ 1681 Vorne
SW-1081/ 1681 Hinten
2 8
1 Fuse, Over Load Protection
2 Output
3 LED DHCP: Indicates active DHCP
4 Display Meter - Indicates Current and IP-Address
ID - PDU identification
5 LED socket status
Green Connected device
6 Function button
Turn-Off Alarm (Over load alarm can´t be turned off)
Push and hold for 2 Sec. to show IP-Address
Push and hold for 4 Sec. for switch between DHCP and fixed IP
Push and hold for 6 Sec. for Reset
7 Network
8 Speaker
Warning - 1 tone / sec.
Over load - 3 tone / sec
(The alarm will sound till the current is normal again and the real value is 0,5A
lower than the critical value.)
9 Input

Manual Nitrox PDU SW-xxxx/ SM-xxxx 8 of 23
19.01.2018
3.3 Technical data
Sockets: 1x Input 230V~ AC, 10A (IEC-60320 C13), 47-63 Hz
(only model SW-1081)
1x Input 230V~ AC, 16A (IEC-60320 C20), 47-63 Hz
(only model SM-1688/ SW-1681)
8x Output 230V~ AC, 10A (IEC-60320 C13)
1x Ethernet (RJ45)
1x Sensor (RJ11) (only model SM-1688)
Network: 10 Mbit/s 10baseT Ethernet (RJ45)
Protocol: TCP/IP, HTTP, DHCP, SNMP, Mail
Switched current (total): 10A (2300W) only model SW-1081
16A (3600W) only model SM-1681/ SW-1681
Switched current (per port): 10A (2300W)
Display: 0-20A
Resolution: 0,1A
Accuracy: +/- 2%
Temperature: 5°C - 45°C
Humidity: 0% - 95%
Dimension: 19“ / 1 HU
Weight: 1,5 kgs
3.4 Electric connection
Model SW-1081: Power cord 10A
Total current max. 10A (2300W)
Model SW-1681: Power cord 10A
Total current max. 16A (3600W)
Model SM-1688: Power cord 16A
Total current max. 16A (3600W)

Manual Nitrox PDU SW-xxxx/ SM-xxxx 9 of 23
10.04.2017
4 Installation
Temperature –When mounting inside a closed cabinet the temperature
inside the cabinet can be higher than outside. Ensure that the temperature
is within the specification mentioned in 3.3
Air Flow –Avoid to affect the air flow inside the rack.
1. Take out the PDU and check the package content for completeness and
damages.
In case of missing parts or external damages, please contact your local
dealer for replacement.
Please keep the original package for shipping in case of warranty issue.
2. Ensure to switch-off all devices before installing.
3. Fix the rack-brackets at the housing. Use the included screws.
4. Look for a suitable place in the rack and fix the PDU into the rack.
5. Connect all output cords. Then connect the input cord.
Take care of the total current (look at 3.3/ 3.4).
6. Connect the PDU with the network.
7. The PDU is ready now.

Manual Nitrox PDU SW-xxxx/ SM-xxxx 10 of 23
19.01.2018
5 The Web interface
5.1 Login
Enter the IP address in a Web-Browser
The user name is „snmp“
The password is „1234“
5.2 Information - PDU
Displays the total current
If a sensor is connected (only SM-1688) also temperature and humidity will be shown.

Manual Nitrox PDU SW-xxxx/ SM-xxxx 11 of 23
19.01.2018
SW-1081/ 1681
SM-1688

Manual Nitrox PDU SW-xxxx/ SM-xxxx 12 of 23
19.01.2018
5.3 Information - System
Displays the system information like:
Model number
Firmware version
MAC address
System name
System contact
Location
5.4 Control - Outlet
Displays status/ Change of socket status
Choose the right output and push the relevant button
ON:Push to Turn-On
OFF: Push to Turn-Off
OFF/ON: Push for Reboot

Manual Nitrox PDU SW-xxxx/ SM-xxxx 13 of 23
19.01.2018
5.5 Control –Group (only SM-1688)
You can group different outputs to switch them together.
Register the outputs as named at Configuration-PDU and separate them by comma.

Manual Nitrox PDU SW-xxxx/ SM-xxxx 14 of 23
19.01.2018
5.6 Control –Schedule (only SM-1688)
Adjust the time schedule for automatic On/ Off switch.
You can also adjust an Off-On Cycle
5.7 Control –Ping Action (only SM-1688)
Ping IPAddress and start automatic switch if no response.
Manual Nitrox PDU SW-xxxx/ SM-xxxx 15 of 23
19.01.2018
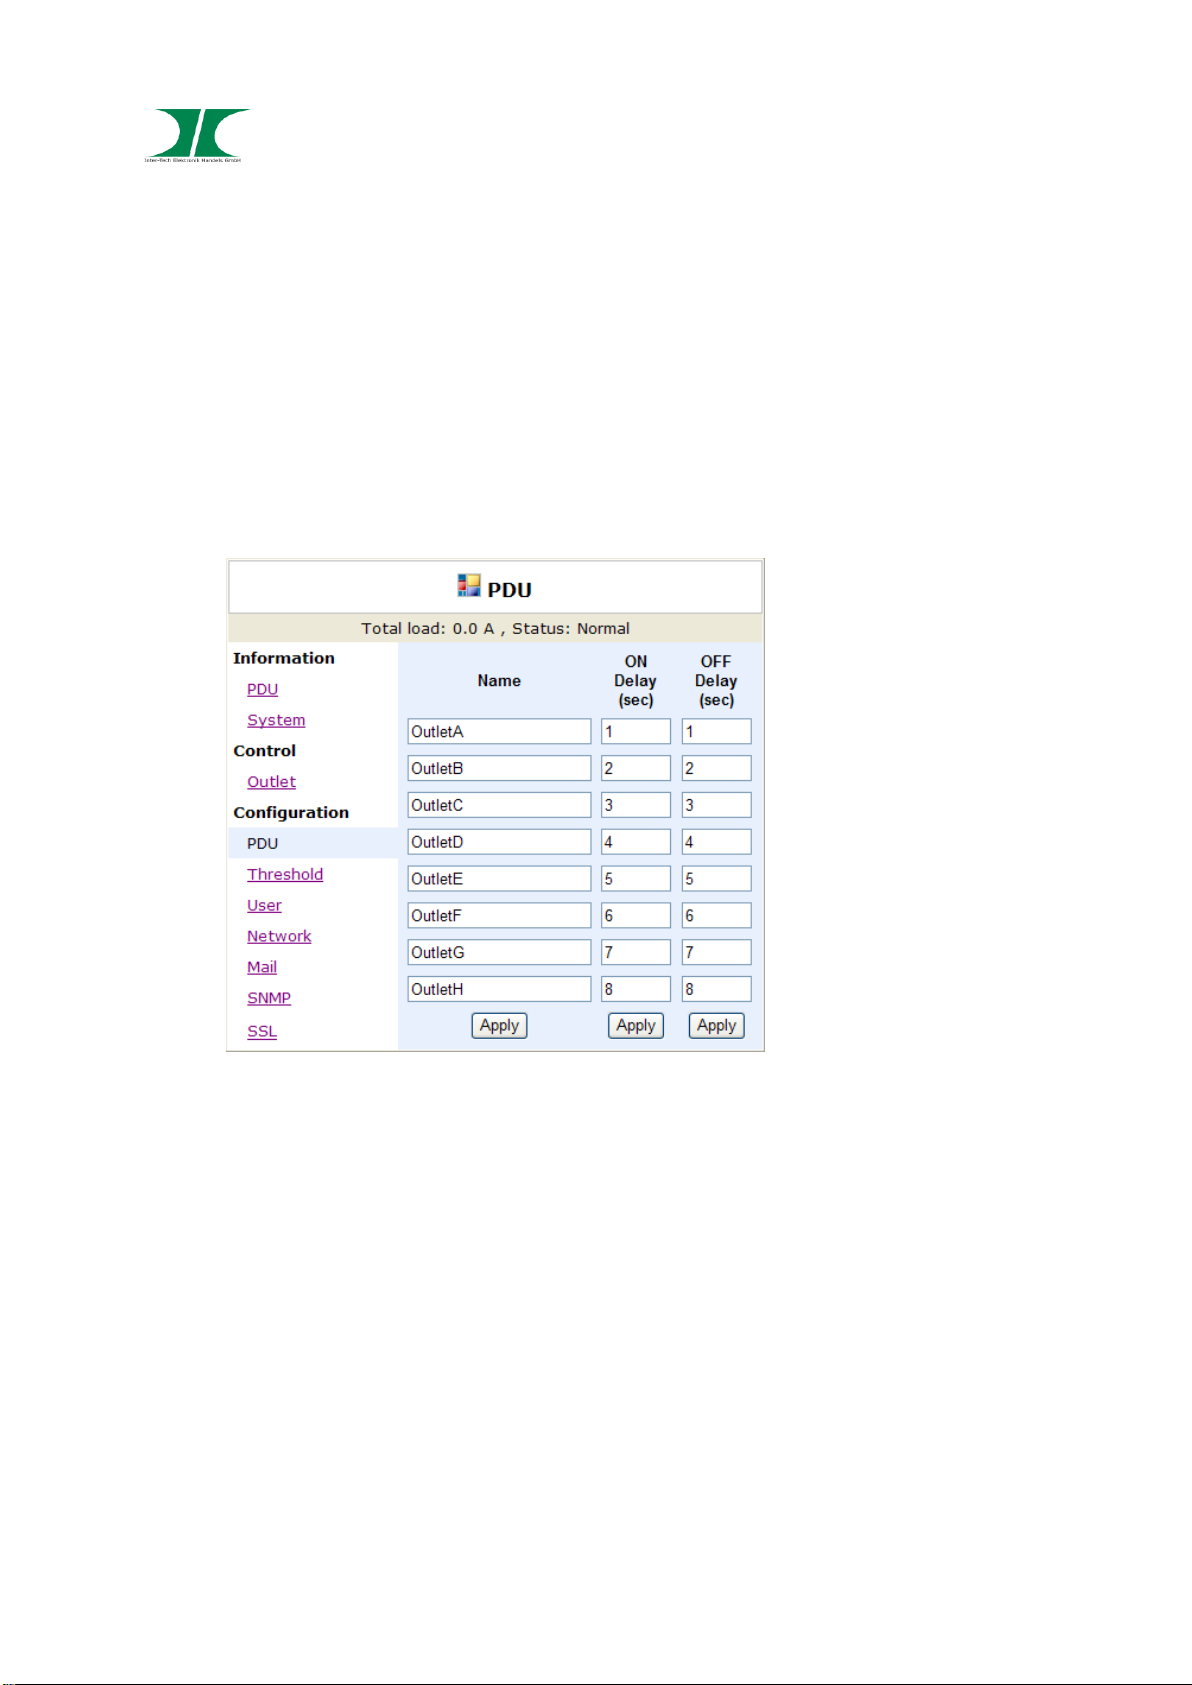
5.8 Configuration - PDU
Nomination of output sockets and adjusting of Power-On delay.
Name: Name of output socket
ON: Adjusting of Power-On delay, per socket.
OFF: Adjusting of Power-Off delay, per socket.
Max. delay time is 255 sec.
Consider:
When the PDU is connected to the electric grid it will start the outputs automatically
according the preset data. Factory setting will start each output with a delay of 1
second.
If the PDU will be disconnected before finishing all operations, it will recover the last
status. Probably not started operations have to be started manually.

Manual Nitrox PDU SW-xxxx/ SM-xxxx 16 of 23
19.01.2018
5.9 Configuration - Threshold
Adjusting Threshold for warning and over load
Only SM-1688: - Adjusting Treshold for temperature and humidity
- Adjustable per port
SW-1081/ 1681

Manual Nitrox PDU SW-xxxx/ SM-xxxx 17 of 23
19.01.2018
SM-1688
5.10 Configuration –User
Change of ID and password
Default for ID is „snmp“ and for password “1234”
Manual Nitrox PDU SW-xxxx/ SM-xxxx 18 of 23
19.01.2018
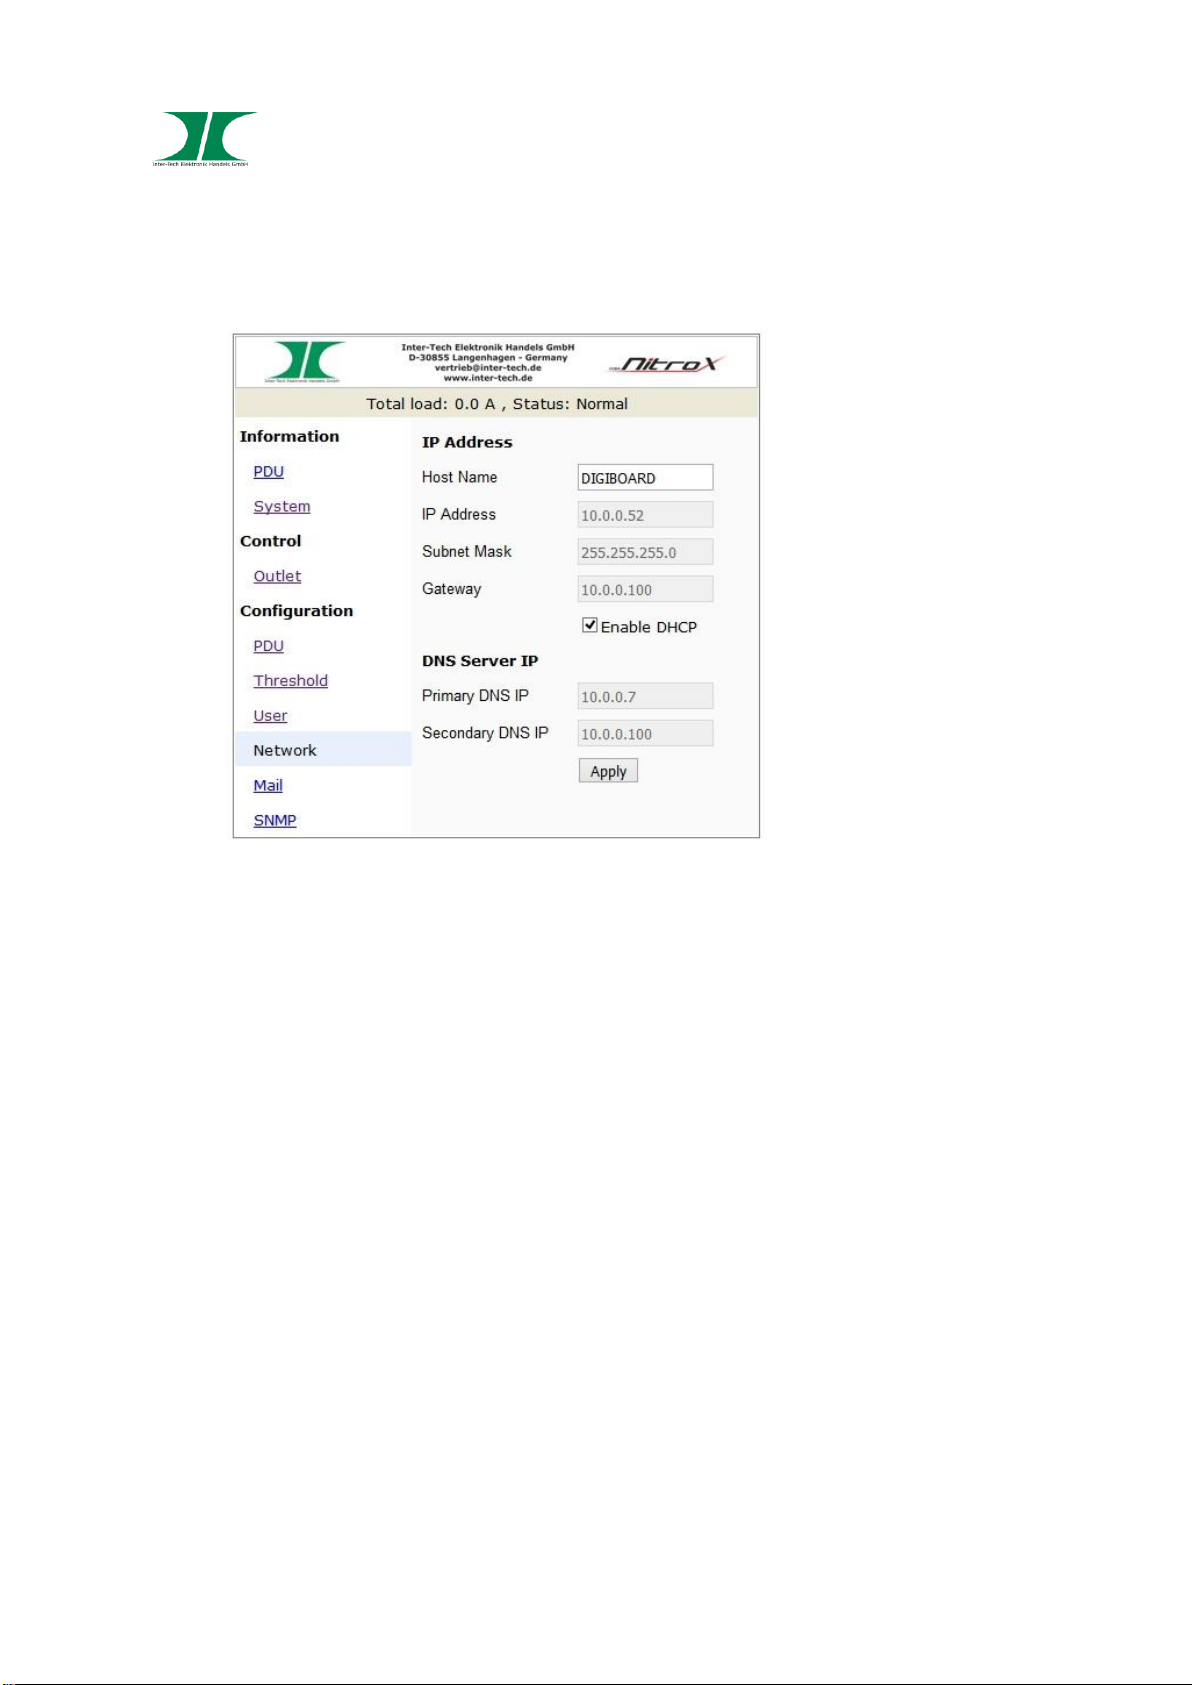
5.11 Configuration –Network
Network information
5.12 Configuration –Mail
Email Notification Setup for Alarm and Warning.
Email Server: Mail server name
Sender’s Email:
Email Address: Recipient email address
The email will contain the following information:
Output A-H XXXXXXXX
X=0 : Off
X=1 : On

Manual Nitrox PDU SW-xxxx/ SM-xxxx 19 of 23
19.01.2018
5.13 Configuration –SNMP
Email Notification Setup for Alarm and Warning by SNMP
Trap Notification: Recipient IP-Adresse
Community: Adjust SNMP area
Read: is fixed to “public”
Write: Default is “public”, can be changed individually.

Manual Nitrox PDU SW-xxxx/ SM-xxxx 20 of 23
19.01.2018
5.14 Configuration –Time (only SM-1688)
Preset of time and time server
6 Using SNMP
This manual suits for next models
2
Table of contents
Popular Power Distribution Unit manuals by other brands


Cisco
Cisco Surge-Gap Multimedia Tap Installation and operation guide

SMAR
SMAR FI302 Operation, maintenance & instruction manual

Graco
Graco 3A0239F Instructions - parts

Marway
Marway Optima 520 Series Operating Guide and Reference

Rittal
Rittal PDR Assembly and operating instructions

Marway
Marway Optima 820 Series operating guide