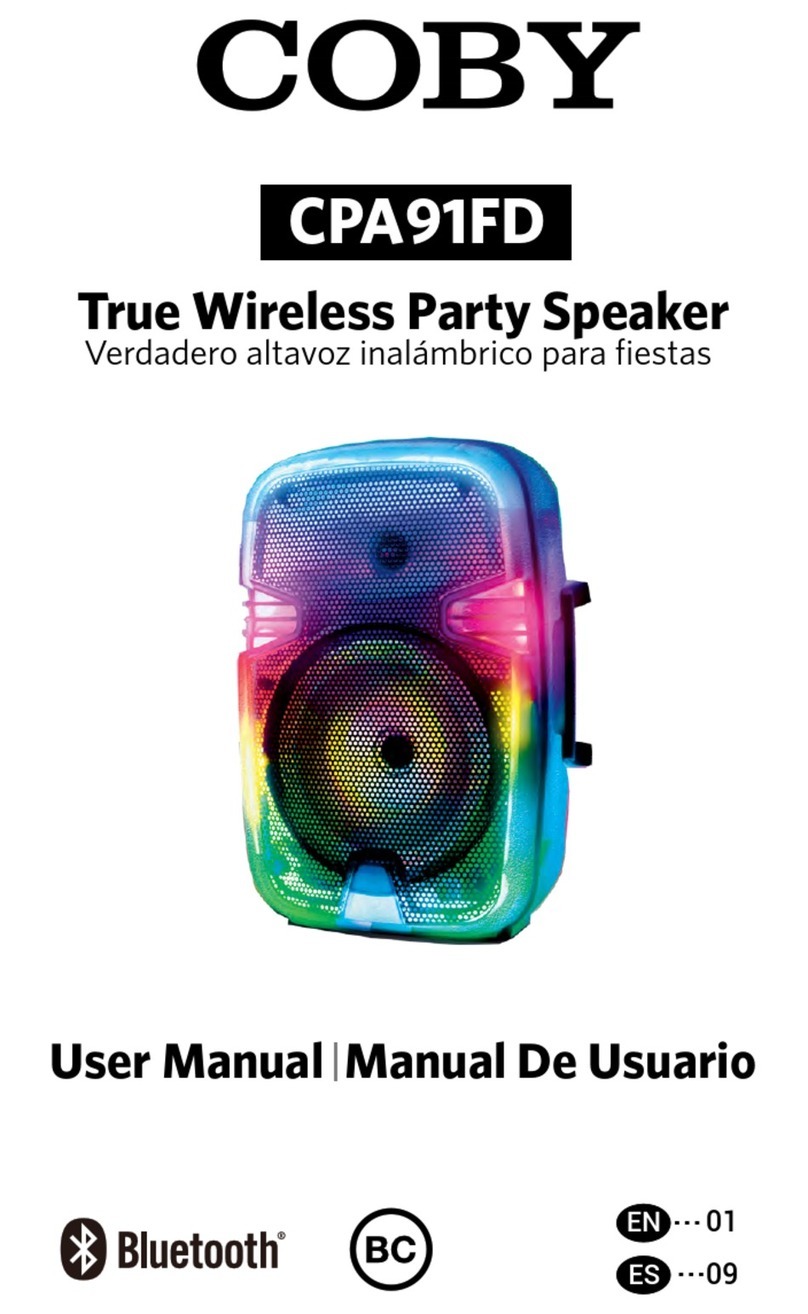
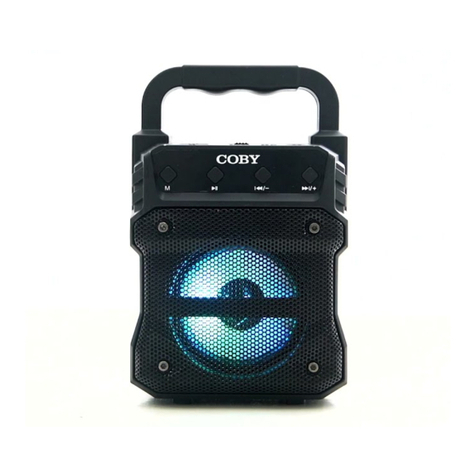
Coby CPA800 User manual

True Wireless Party Speaker
Instruction Manual
CPA800
®

Read Me ....................................................................................... 3
English ......................................................................................... 4
Introduction .........................................................................................4
Package Contents.................................................................................4
Product Overview ................................................................................5
Powering on/off the speaker ...............................................................6
True Wireless Pairing ...........................................................................6
Connecting Via Bluetooth®...................................................................7
Music Controls .....................................................................................7
Light Modes .........................................................................................8
Radio ....................................................................................................8
Karaoke Mode......................................................................................9
AUX, Memory Card & USB Mode ........................................................9
Specifications.......................................................................................9
Español ...................................................................................... 10
Introducción.......................................................................................10
Contenidos del paquete ....................................................................10
Descripción del producto...................................................................11
Encender / apagar el altavoz .............................................................11
Verdadero emparejamiento inalámbrico ..........................................12
Conexión a través de Bluetooth®.......................................................13
Controles de la música.......................................................................13
Modos de luz .....................................................................................14
Radio ..................................................................................................14
Modo Karaoke....................................................................................15
AUX, tarjeta de memoria y modo USB ..............................................15
Especificaciones.................................................................................16
SUMMIT ELECTRONICS LLC ONE YEAR LIMITED Warranty 16
Contact Us..........................................................................................19

Read Me
time.
If repairs are necessary, please use qualified
service personnel. Repairs may be necessary
if the device has been damaged in any way.
Such as the power-supply cord or plug being
damaged, the device being exposed to rain or
moisture, objects falling into the device, the
device does not operate normally, or has been
dropped.
Refer all servicing to qualified service
personnel. Servicing is required when the
apparatus has been damaged in any way,
such as power-supply cord or plug is
damaged, liquid has been spilled or objects
have fallen into the apparatus, the apparatus
has been exposed to rain or moisture, does
not operate normally, or has been dropped.
Read these instructions.
Keep these instructions.
Heed all warnings.
Follow all instructions.
Do not use this apparatus near water.
Clean only with dry cloth
Do not block any ventilation openings.
Install in accordance with the manufacturer’s
instructions.
Do not install near any heat sources such as
radiators, heat registers, stoves, or other
apparatus (including amplifiers) that
produce heat.
Protect the power cord from being walked
on or pinched particularly at plugs, and the
point where they exit from the apparatus.
Only use attachments/accessories
specified by the manufacturer.
Unplug this apparatus during lightning
storms or when unused for long periods of
FCC Notice to Users
FCC ID: 2AMSOCPA800
Caution: Changes or
modifications not expressly
approved by the Party responsible
for compliance could void the user’s
authority to operate the equipment.
Note: This equipment has been tested
and found to comply with the limits for a
Class B digital device, pursuant to part 15
of the FCC Rules. These limits are
designed to provide reasonable
protection Against harmful interference in
a residential installation. This equipment
generates, uses and can radiate radio
frequency energy and, ifnotinstalled and
used in accordance with the instructions,
may cause harmful interference to radio
communications, however there is no
guarantee that interference will not occur
in a particular installation. If this
equipment does cause harmful
interference to radio or television
reception, which can be determined by
turning the equipment off and on, the
user isencouraged to try tocorrect the
interference by one or more of the
following measures:
•Reorient or relocate the receiving
antenna.
•Increase the separation between the
equipment and receiver.
•Connect the equipment into an outlet
on a circuit different from that to which
the receiver is connected.
•Consult the dealer or an experienced
radio/TV technician for Help.
The device complies with part 15 of the
FCC Rules. Operation is subject to the
following two conditions: (1) this device
may not cause harmful interference, and
(2) this device must accept any
interference received, including
interference that may cause undesired
operation. The Bluetooth®word mark and
logos are registered trademarks owned
by Bluetooth SIG, Inc. and any use of
such marks by Summit Electronics LLC is
under license. Other trademarks and
trade names are those of their respective
owner.
3
FCC Radiation Exposure Statement:
The device has been evaluated to meet
general RF exposure requirement.
The device can be used in portable exposure
condition without restriction.
English
Introduction
Thank you for purchasing the CPA800. This
instruction manual is intended to help you
better understand and use your Bluetooth®
Speakers. Terms covered in this manual will
become more familiar to you as you use your
speaker.
Before using this device for the first time,
please fully charge the battery by plugging the
provided Micro USB cable into the port of your
speaker and plugging the other end into a local
power source. The Power LED indicator will
light red to indicate that the speaker has begun
charging and will turn off when the speaker is
fully charged.
Package Contents
•1 x CPA800 True Wireless Speaker
•1 x Charging cables
•1 x3.5mm AUX cables
•1x User manual
Note: The speaker must be charged up to 10% in order for it to work,
even while plugged in. Please wait a few minutes after plugging in to
charge.
4

Product Overview
1. Microphone input
port
2. Next Track/Channel
button
3. Play/Pause button
4. USB input port
5. Previous Track/Channel
button
6. Mode button
7. Charging port
8. Power LED indicator
9. Power/Volume button
10. AUX In port
11. LED display
12.TF card slot
5

Powering on/off the speaker
To power on the speaker, turn the Power/Volume
button clockwise until you hear a click.
To power off the speaker, turn the Power/Volume
button anti-clockwise until you hear a click.
True Wireless Pairing
Your CPA800 speaker supports True Wireless
Pairing, meaning you may transmit music from
your device to two speakers at the same time
with no wires connecting the two speakers.
To pair or unpair speakers with each other
press and hold the Mode button on either
speaker. When your speakers connect to each
other you will the LED indicator on the primary
speaker rapidly flashing red, and a solid red on
the secondary speaker's LED indicator.
Once the speakers are connected to each
Other, connect your Bluetooth device as
instructed in Connecting Via Bluetooth. .
Note: The speaker that’s connected to the Bluetooth®enabled
device will become the primary speaker. If the user turns off the
primary speaker, both speakers will turn off.
True Wireless Pairing only works in Bluetooth
®
mode.
6

Connecting Via Bluetooth®
Press the Mode button on the speaker to
select Bluetooth mode, The “BLUE” will slowly
flash red on the LED display.
Open the Bluetooth settings on a Bluetooth
enabled device (phone, tablet, laptop, etc.)
Turn on the device’s Bluetooth®functionality
and select CPA800 when it appears. You will
hear a tone and see the “BLUE” is steady red
to indicate that the device has connected
successfully.
Music Controls
After you connect your device to the CPA800.
music will be playable through your app of
choice.
Press Mode button to select Bluetooth mode
or AUX mode. The “BLUE” or “AUX” will be
steady red on the LED display.
To pause or resume your music in Bluetooth
mode, AUX Input mode, USB Input mode and
Memory Card Input mode, press the
Play/Pause button.
To skip to next track, press Next track/channel
button. To skip to previous track, press
Previous track/channel button.
Note: On some devices you may need to scan for devices or search
for devices, please reference your devices user manual on
connecting Bluetooth®devices if you are unsuccessful
7

Adjust the volume by turn the Power/Volume
button clockwise or anti-clockwise. As you
adjust the volume you will see the circular LED
light display grow or shrink accordingly.
Light Mode
Press and hold the Play/Pause button to turn
on the light. The light can also be turned off by
pressing and holding the Play/Pause button
again.
Radio
Press Mode button to select Radio mode. The
“Rad” will be steady red on the LED display.
To begin scanning FM radio stations, press
the Play/Pause button this process may take a
few minutes so please be patient. Once all the
stations are automatically downloaded and
stored you will hear the radio begin to play and
cycle through stations. When you arrive at the
station you want to listen to, press the
Play/Pause button again to stop cycling.
To manually switch FM radio stations, press
Previous Track/Channel button and Next
Track/Channel button.
Note: if reception is not good you can plug in the included 3.5mm
AUX cable to increase signal.
8

Karaoke Mode
Connect a wired microphone (not included)
into the Microphone Input port, to allow you to
sing along with your favorite songs.
AUX, Memory Card & USB Mode
Use the included AUX cable to connect on
non-Bluetooth enabled devices. Connect the
other end to the device you wish to play audio
from.
Insert a memory card or USB flash drive with
MP3 files to play music directly on your
speaker. See Music Controls on page 7 to
make adjustments as necessary.
Specifications
Bluetooth® Version
5.0
Bluetooth® Range
33 Feet
Bluetooth® Pairing Name
CPA800
Playtime
Up to 7 Hours
Charge Time
5 Hours
Frequency Response
20Hz - 20KHz
Driver Unit Size
8 Inches
Impedance
4 Ω
USB & Memory Card Storage
Up to 32 GB
FM Radio
87.5 MHz - 108.0 MHz
Battery Capacity
1200mAh
Battery Type
Rechargeable Lithium-ion
Note: When an AUX cable is connected, It will automatically unpair
from any actively paired Bluetooth®device.
9

Charge Voltage
5V/1A
Output Power
10W
Español
Introducción
Gracias por comprar el CPA800. Este
manual de instrucciones está destinado a
ayudarlo a comprender y usar mejor sus
altavoces Bluetooth®. Los términos cubiertos
en este manual le resultarán más familiares a
medida que use su altavoz.
Antes de usar este dispositivo por primera
vez, cargue completamente la batería
enchufando el cable Micro USB provisto en el
puerto de su altavoz y conectando el otro
extremo a una fuente de alimentación local. El
indicador LED de encendido se iluminará en
rojo para indicar que el altavoz ha comenzado
a cargarse y se apagará cuando e
l altavoz esté completamente cargado.
Contenidos del paquete
•1 x Altavoz inalámbrico verdadero CPA800
•1 xcables de carga
•1 cables AUX de 3,5 mm
•1x manual de usuario
Nota: El altavoz debe cargarse hasta un 10% para que funcione,
incluso mientras está enchufado. Espere unos minutos después de
10

Descripción del producto
1.Puerto de entrada 6. Botón de modo
de micrófono 7. Puerto de carga
2.Botón Siguiente 8.Indicador LED
pista / canal de encendido
3.Botón de reproducción 9. Botón de encendido
/ pausa / volumen
4. Puerto de entrada USB 10. Puerto de entrada AUX
5. Botón de pista 11. Pantalla LED
/ canal anterior 12. Ranura para tarjetas TF
11

Encender / apagar el altavoz
Para encender el altavoz, gire el botón Encendido /
Volumen en el sentido de las agujas del reloj hasta que
escuche un clic.
Para apagar el altavoz, gire el botón Encendido /
Volumen en sentido antihorario hasta que escuche un
clic.
Verdadero emparejamiento
inalámbrico
Su altavoz CPA800 es compatible con True
Emparejamiento inalámbrico, lo que significa
que puede transmitir música de su dispositivo
a dos altavoces en el Al mismo tiempo sin
cables que conecten los dos Altavoces.
Para emparejar o desvincular altavoces entre
sí presione y mantenga presionado el botón
Modo en altavoz. Cuando sus altavoces se
conectan a entre sí, verá el indicador LED en
el el altavoz principal parpadea rápidamente en
rojo y un rojo en el indicador LED del altavoz
secundario.
Una vez que los altavoces están conectados
a cada Otro, conecte su dispositivo Bluetooth
como instruido en Conexión a través de
Bluetooth. .
12

Conexión a través de Bluetooth
Presione el botón Mode en el altavoz para
seleccionar el modo Bluetooth. El "AZUL"
parpadeará lentamente en rojo en la pantalla
LED.
Abra la configuración de Bluetooth en un
dispositivo habilitado para Bluetooth (teléfono,
tableta, computadora portátil, etc.) Encienda la
funcionalidad Bluetooth® del dispositivo y
seleccione CPA-800 cuando aparezca.
Escuchará un tono y verá que el "AZUL" está
en rojo fijo para indicar que el dispositivo se ha
conectado correctamente.
Controles de la música
Después de conectar su dispositivo a la
música CPA-800, podrá reproducirla a través
de la aplicación que elija.
Presione el botón Mode para seleccionar el
modo Bluetooth o el modo AUX. El "AZUL" o
"AUX" será rojo fijo en la pantalla LED.
Para pausar o reanudar su música en modo
Bluetooth, modo de entrada AUX, modo de
entrada USB y modo de entrada de tarjeta de
memoria, presione el botón Reproducir /
Pausa.
Para saltar a la siguiente pista, presione el
botón Siguiente pista / canal. Para saltar a la
Nota: En algunos dispositivos, es posible que deba buscar
dispositivos o buscar dispositivos, consulte el manual de usuario de
sus dispositivos para conectar dispositivos Bluetooth® si no tiene
13

pista anterior, presione el botón Pista / canal
anterior.
Ajuste el volumen girando el botón Encendido
/ Volumen en sentido horario o antihorario. A
medida que ajusta el volumen, verá que la
pantalla de luz LED circular crece o se reduce
en consecuencia.
Modos de luz
Mantenga presionado el botón Reproducir /
Pausa para encender la luz. La luz también se
puede apagar presionando y manteniendo
presionado el botón Reproducir / Pausa
nuevamente.
Radio
Presione el botón Mode para seleccionar el
modo Radio. El "Rad" estará rojo fijo en la
pantalla LED.
Para comenzar a buscar estaciones de radio
FM, presione el botón Reproducir / Pausa.
Este proceso puede demorar algunos minutos,
así que tenga paciencia. Una vez que todas las
estaciones se descarguen y almacenen
automáticamente, oirá que la radio comienza a
reproducirse y recorre las estaciones. Cuando
llegue a la estación que desea escuchar,
presione el botón Reproducir / Pausa
nuevamente para detener el ciclo.
14

Para cambiar manualmente las estaciones de
radio FM, presione el botón Pista / Canal
anterior y el botón Pista / Canal siguiente.
Modo Karaoke
Conecte un micrófono con cable (no incluido)
en el puerto de entrada de micrófono, para que
pueda cantar junto con sus canciones
favoritas.
AUX, tarjeta de memoria y
modo USB
Use el cable AUX incluido para conectarse en
dispositivos no habilitados para Bluetooth®.
Conecte el otro extremo al dispositivo que
desea reproducir audiode.
Inserte una tarjeta de memoria o unidad flash
USB con archivos MP3 para reproducir música
directamente en su altavoz. Consulte Controles
de música en la página 5 para realizar los
ajustes necesarios.
Nota: Si la recepción no es buena, puede enchufar el cable auxiliar
de 3.5 mm incluido para aumentar la señal.
Nota: Cuando se conecta un cable AUX, se desvinculará
automáticamente de cualquier dispositivo Bluetooth® activamente
jd
15

Especificaciones
Versión Bluetooth®
5.0
Alcance Bluetooth®
33 pies
Nombre de emparejamiento
de Bluetooth®
CPA800
Tiempo de juego
Hasta 7 horas
Tiempo de carga
5 horas
Respuesta frecuente
20Hz - 20KHz
Tamaño de la unidad del
conductor
8 pulgadas
Impedancia
4 Ω
Almacenamiento de USB y
tarjeta de memoria
Hasta 32 GB
Radio FM
87.5 MHz - 108.0 MHz
Capacidad de la batería
1200mAh
Tipo de Batería
Recargable de iones de
litio
Voltaje de carga
5V / 1A
Potencia de salida
10W
SUMMIT ELECTRONICS LLC ONE
YEAR LIMITED Warranty
WARRANTY SUMMIT ELECTRONICS LLC LIMITED WARRANTY
(“Warranty”) ― For Product Categories Listed in Chart Below (as applicable,
“Product”) Before returning your Product for service under this Warranty, please
(i) read the instruction manual carefully. If you are still having trouble with your
Product, please contact Technical Support at support@summitcegroup.com
Warning: Some Products may contain components that are small enough to
be swallowed. Please keep out of reach of children.
Subject to the terms and conditions herein, SUMMIT ELECTRONICS LLC
(hereinafter called “SUMMIT ELECTRONICS LLC”) warrants to the original
purchaser of the Product (“Customer”) that for the applicable Warranty Period
listed below, the Product will be free from defects in material or workmanship
under normal, non-commercial use (“Defects”). Warranty Period encompasses,
16

as listed below, separate “Coverage Periods” for Parts and Labor, each
Coverage Period for one year, to begin from the original date of Customer
purchase. If Customer returns a defective Product (or any component thereof)
during the applicable Warranty Period, SUMMITELECTRONICSLLC will, at its
option, during the specified Coverage Periods for Parts and Labor (as
applicable) either: (i) repair the Product (or, as applicable, any component
thereof) or (ii) replace the Product (or, as applicable, any component thereof)
with a new or refurbished Product (or, as applicable, any component thereof),
in either case free of charge to Customer for Parts and/ or Labor (as
applicable) during the specified Coverage Period only, and excluding applicable
shipping charges (noted below), for which the Customer is responsible. The
foregoing states the Customer’s exclusive remedy and SUMMIT
ELECTRONICS LLC’s sole liability for breach of the limited warranty contained
herein.
This Warranty specifically excludes any Product (or, as applicable, any
component thereof) that has been subject to or Defects resulting from: (a) any
neglect or misuse by a Customer, an accident, improper application, violation of
operating instructions for the Product, any other Customer-induced damage, or
the alteration or removal of any Product serial number: (b) any modification or
repair to Product (or, as applicable, any component thereof) by any party other
than SUMMIT ELECTRONICS LLC or a party authorized in writing by SUMMIT
ELECTRONICS LLC; (c) any damage to Product (or, as applicable, any
component thereof) due to power surges, incorrect electrical voltage,
misconnection to any device, or malfunction of any device used with the
Product (or, as applicable, any component thereof); (d) cosmetic damage to the
Product (or, as applicable, any component thereof) caused by normal wear and
tear; (e) shipping damage that occurs while the Product is in transit; (f) damage
caused by heat sources, sunlight, electromagnetic conditions, or other climatic
conditions; or (g) any acts of God. Product is sold to Customer for personal,
non-commercial use only. Product is not warranted for Customer’s commercial
or rental use.
In addition, Product is not warranted against failure, and should not be used
by Customer for any application where (i) there is a risk that any data stored on
Product will be breached or otherwise compromised, or (ii) the data stored on
Product is relied upon for medical or lifesaving applications. SUMMIT
ELECTRONICS LLC disclaims any Warranty for any of the foregoing uses to
the fullest extent permitted by law. Customer assumes any and all risks
associated with such uses of Product and agrees to indemnify SUMMIT
ELECTRONICS LLC for any damages claimed against SUMMIT
ELECTRONICS LLC for such uses. EXCEPT FOR EXPRESS WARRANTIES
STATED ABOVE AND TO THE MAXIMUM EXTENTPERMITTED BYLAW, THE
PRODUCTS ARE PROVIDED “AS IS”, AND SUMMIT ELECTRONICS LLC
DISCLAIMS ALLOTHER WARRANTIES, INCLUDING WITHOUT LIMITATION
ANY IMPLIED WARRANTY(I) OF MERCHANTABILITY, (II) OF FITNESS FOR
APARTICULAR PURPOSE, OR (III) OF NON-INFRINGEMENT OF THIRD-
PARTY RIGHTS. TO THE MAXIMUM EXTENT PERMITTED BY APPLICABLE
LAW, IN NO EVENT WILL SUMMIT ELECTRO- NICS LLC BE LIABLE TO
CUSTOMER OR ANY THIRD PARTY FOR ANY INDIRECT, SPECIAL,
INCIDENTAL, CONSEQUENTIAL, EXEMPLARY OR PUNITIVE DAMAGES,
INCLUDING, WITHOUT LIMITATION, ANY LOST PROFITS OR REVENUES,
LOSS OR INACCURACY OF ANY DATA OR COST OF SUBSTITUTE
GOODS, REGARDLESS OF THE THEORY OF LIABILITY (INCLUDING
NEGLIGENCE) AND EVEN IF SUMMIT ELECTRONICS LLC HAS BEEN
17

ADVISED OF THE POSSIBILITY OF SUCH DAMAGES, SUMMIT
ELECTRONICS LLC’S AGGREGATE LIABILITY TO CUSTOMER FOR
ACTUAL DIRECT DAMAGES FOR ANY CAUSE WHATSOEVER SHALL BE
LIMITED TO THE CUMULATIVE PRODUCT FEES PAID BY THAT
CUSTOMER FOR THE PRODUCT CAUSING THE DAMAGES, IF ANY. This
Warranty gives Customer specifics rights, and Customer may also have other
rights that vary from jurisdiction to jurisdiction. To obtain Warranty service,
Customer must email SUMMIT ELECTRONICS LLC Technical Support prior to
making a Product return. Customer must include with Product return the
following items (failure to enclose any of these items may result in a delay in
the processing of your Warranty claim): (i) a dated sales receipt that indicates
the place of purchase, model number of Product, and amount paid; (ii) a
detailed description of Customer’s problem with Product; (iii) Customer’s full
name, phone number, and return address, and; (iv) a money order made
out to SUMMIT ELECTRONICS LLC Electronics Corporation to cover return
shipping charges to US destinations only, for the applicable dollar amount
shown for the Product in the table above. SUMMIT ELECTRONICS LLC will
not make return shipments to a P.O. Box. For shipping to international
addresses, actual freight will be charged to Customer. Return your Product
freight-prepaid in its original packaging, or packaging that affords an equal
measure of protection. Please allow 4 to 6 weeks for the processing of your
claim (6 to 8 weeks from November to February).
You must email SUMMIT ELECTRONICS LLC Technical Support prior to
making a return. Please ask if you are unsure of which category your product
falls under.
*US destinations only.
PRODUCT CATEGORY
SHIPPING*
(USD)
Adapters, Converters, Chargers, Headphones,
Microphones, Cellular Accessories $7.99
Alarm Clocks, Portable CD Players, Radios, Corded
Telephones, MP3 Players, Digital Photo Frames (screen
size less than 5")
$7.99
Portable Stereo Systems, Speaker Systems, Cordless
Telephones, Home DVD Players $14.99
Home Theater DVD Systems, Portable DVD Players,
Portable Media Players, Digital Photo Frames (screen
sizes 5" to 11")
$21.99
18

Contact Us
Contact us at support@summitcegroup.com for
return information and customer support!
PO No.: 90
525
V
ersion No.: V1.1
19
Table of contents
Other Coby Speakers manuals

Coby
Coby CSBT-322 User manual

Coby
Coby DVD988 User manual

Coby
Coby CMB-102 User manual

Coby
Coby CMB-104 User manual

Coby
Coby CSTW52FD User manual

Coby
Coby CS-MP23 - Portable Speakers User manual

Coby
Coby CPA640 User manual

Coby
Coby CSTV-130 User manual

Coby
Coby CSBT-328-BLK User manual

Coby
Coby CSTW-43FD User manual
Popular Speakers manuals by other brands

Brookstone
Brookstone BIG BLUE PARTY manual

XTZ
XTZ 99.26 P user manual

Matco Tools
Matco Tools MTCFOOTBLSPK Operating Instructions, Warning Information

Definitive Technology
Definitive Technology StudioMonitor 65 owner's manual

Phantom
Phantom PMR-GP1 operating guide

Fresh 'N Rebel
Fresh 'N Rebel ROCKBOX ROUND H2O manual