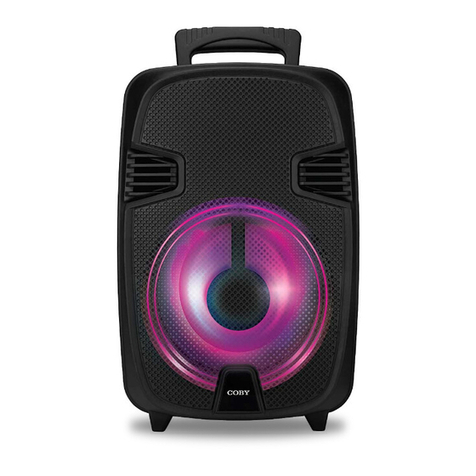
Coby Party Blaze CPA910 User manual

®
Party Blaze
True Wireless Speaker
Instruction Manual
CPA910

Table of Contents
Read Me............................................................................................ 3
Introduction...................................................................................... 4
Package Contents. ...........................................................................4
Product Overview. ........................................................................... 5
Remote Control Overview............................................................... 6
General Usage. .................................................................................7
Main Menu......................................................................................... 7
Choosing a Mode. ..............................................................................8
Using Bluetooth® Mode. ................................................................... 8
True Wireless Pairing. .......................................................................9
LED Light Modes. ............................................................................ 10
Changing EQ Settings. .................................................................... 10
Using Line In (AUX) Mode. .............................................................. 10
Using USB/TF Mode........................................................................ 11
Using FM Mode. ..............................................................................11
Specifications. ..................................................................................12
Español. ..................................................................... 13
Introducción................................................................................... 13
Contenido del Paquete.................................................................. 13
Descripción General del Producto............................................... 14
Descripción General del Mando a Distancia. .............................. 15
Uso General. ...................................................................................16
Menú Principal................................................................................. 16
Elegir un Modo. ................................................................................17
Uso del Modo Bluetooth®.................................................................17
Verdadero Emparejamiento Inalámbrico......................................... 18
Modos de Luz LED. ......................................................................... 18
Cambiar la Configuración de Ecualización...................................... 19
Uso del Modo de Entrada de Línea (AUX). ..................................... 19
Uso del Modo USB/TF..................................................................... 19
Uso del Modo FM. ...........................................................................20
SUMMIT LLC ONE YEAR WARRANTY......................................... 22
Contact Us...................................................................................... 24
Contáctanos................................................................................... 24

Read Me
1. Read theseinstructions.
2. Keep theseinstructions.
3. Heed all warnings.
4. Follow all instructions.
5. Do not use this apparatus near water.
6. Clean only with dry cloth
7. Do not block any ventilation openings.
Install in accordance with the manufacturer’s
instructions.
12. If repairs are necessary, please use
qualified service personnel. Repairs
may be necessary if the device has
been damaged in any way. Such as the
power-supply cord or plug being
damaged, the device being exposed to
rain or moisture, objects falling into the
device, the device does not operate
normally, or has been dropped.
8. Do not install near any heat sources such 13. Refer all servicing to qualified service
as radiators, heat registers, stoves, or other
apparatus (including amplifiers) that produce
heat.
9. Protect the power cord from being walked on
or pinched particularly at plugs, and the point
where they exit
from the apparatus.
10. Only use attachments/accessories
specified by the manufacturer.
11. Unplug this apparatus during lightning
storms or when unused for long periods of
time.
FCC Notice to Users
FCC ID: 2AMSOCPA910
Caution: Changes or modifications not
expressly approved by the Party responsible
for compliance could void the user’s authority
to operate the equipment.
Note: This equipment has been tested and
found to comply with the limits for a Class B
digital device, pursuant to part 15 of the FCC
Rules. These limits aredesigned to provide
reasonable protection Against harmful
interference in a residential installation. This
equipment generates, uses and can radiate
radio frequency energy and, ifnot installed
and used in accordance with the instructions,
may cause harmful interference to radio
communications, however there is no
guarantee that interference will not occur
in a particular installation. If thisequipment
does cause harmful interference to radio
or television reception, which can be
determined by turning the equipment offand
on, the user is encouraged to try to correct the
interference by one or more of the following
measures:
personnel. Servicing is required when
the apparatus has been damaged in any
way, such as power-supply cord or plug
is damaged, liquid has been spilled or
objects have fallen into the apparatus,
the apparatus has been exposed to rain
or moisture, does not operate normally,
or has been dropped.
•Reorient or relocate the receiving antenna.
•Increase the separation between the
equipment and receiver.
•Connect the equipment into an outlet on a
circuit different from that to which the receiver
isconnected.
•Consult the dealer or an experienced radio/
TV technician for Help.
The device complies with part 15 of the FCC
Rules. Operation is subject to the following two
conditions: (1) this device may not cause
harmful interference, and
3
(2) this device must accept any interference
received, including interference that may cause
undesired operation. The Bluetooth® word mark
and logos are registered trademarks owned by
Bluetooth SIG, Inc. and any use of such marks
by Summit Electronics LLC isunder license.
Other trademarks and trade names are those of
their respectiveowner. FCC Radiation Exposure
Statement:
The device has been evaluated to meet general
RF exposure requirement.
The device can be used in portable exposure
condition without restriction.
FCC Radiation Exposure Statement
The device has been evaluated to meet general
RF exposure requirement.
The device can be used in portable exposure
condition without restriction.

English
Introduction
Thank you for purchasing the CPA910 Party Blaze
True Wireless Speaker. This instruction manual is
intended to help you better understand and use your
Bluetooth® Speaker. Terms covered in this manual
will become more familiar to you as you use your
speaker.
Before using this device for the first time, please fully
charge the battery by plugging the provided Charging
Adapter into the port of your speaker and plugging
the other end into a local power source. The
Charging Indicator will glow red to indicate that the
speaker has begun charging and will turn off when
the speaker is fully charged.
Package Contents
•1x CPA910 Party Blaze Speaker
•1 x Remote Control
•1x 9V Charging Adapter
•1x Wired Microphone
•1x User Manual
4

Product Overview
5

Remote Control
6

General Usage
Main Menu
Begin by adjusting the speaker's sound levels to
your liking. To cycle through various sound output
settings, short press the Menu button on the
speaker. The LED screen will display
"b/e/nv/nb/ne/EC/V" Press the Menu button to cycle
through these options.
b: Bass Control. While in this setting, use the Main
Volume Knob to adjust the level of Bass.
e: Treble Control. Use the Main Volume Knob to
adjust the level of Treble.
nv: Microphone Volume. Use the Microphone
Volume Knob to adjust the microphone volume
output.
nb: Microphone Bass. Use the Microphone Volume
Knob to adjust the microphone audio's bass level.
ne: Microphone Treble. Use the Microphone
Volume Knob to adjust the microphone audio's
treble level.
V: Main volume control.
7

You may also use the Microphone Priority button to
override the music that is playing in order to
output sound from your microphone.
Choosing a Mode
Next, choose the input mode you will use to play
your music. To cycle between the Modes
of the Speaker, short press the Mode button on the
Speaker or the Remote Control once to
skip between BLUETOOTH®, LINE IN,
USB/TF, and FM Modes, in that order. Long press
the Mode button to turn voice prompts on and off.
Using Bluetooth® Mode
1. Begin by pressing the Mode button on the
Speaker or Remote Control until Bluetooth®
Mode is selected.
2. With your smartphone or other Bluetooth®audio
device within 10 meters of the Speaker, turn on
your device's Bluetooth® for pairing.
3. Select CPA910 from the list of available devices.
8

Note: On some devices you may need to scan or search for devices,
please reference your devices user manual on connecting Bluetooth®
devices if you are unsuccessful
-You can control music settings from your device or
from the buttons on the Speaker and Remote
Control.
-Press Play/Pause on either input method to Play
or Pause the music.
-Press the Previous Track or Next Tack button to
switch between tracks.
-Note: The Repeat function is not compatible with
Bluetooth® Mode.
True Wireless Pairing
Your CPA-910 speaker supports True
Wireless Pairing, meaning you may transmit
music from your device to two CPA910
speakers at the same time with no wires
connecting the two speakers.
1.
To pair two speakers for True Wireless
surround sound, begin by turning them both on
in BT (Bluetooth®) Mode. Choose one speaker
and press its Control Button for 5 seconds to
pair it to the other speaker. The speakerwhose
Control Button you pressed is now the "host
speaker" and can be used to control playback 9

10
and sound levels.
2.
Turn on your smartphone or other audio
device's Bluetooth® and pair to CPA910. Both
speakers will now play your music in stereo.
LED Light Modes
To turn LED Party Lights On/Off and switch
between modes, use the Light Mode button on
the Remote Control.
Changing EQSettings
The speaker also comes with built-in frequency-
adjusted presets to suit various musical genres. To
switch between the frequencies, use either the EQ
Switch on the Speaker or the EQ Mode button on
the Remote Control. Pressing either button will
switch to one of five EQ modes: Pop, Rock, Jazz,
Classical, and Flat. Choose the one that sounds
best to you.
Using Line In(AUX) Mode
Begin by pressing the Mode button on the
Speaker or Remote Control until LINE IN Mode
is selected. Plug in your 3.5mm AUX cord to
the correct input on the speaker and use the
connected device to control the music or audio.

Using USB/TF Mode
-Choose USB/TF Mode to play music or other
audio from a USB drive or TF Card (not included),
or simply insert the USB drive or TF Card to
automatically switch to USB/TF Mode.
-Press Play/Pause on either input method to Play
or Pause the music.
-Use the Remote to skip between tracks with one
press of the Previous Track or Next Track button.
Hold the Previous Track button to rewind audio.
Hold the Next Track button to fast forward. You can
also use the Number Pad on the Remote Control to
select a song by track number.
-With a USB drive inserted, you can also make
recordings of the audio that's playing on the
speaker. Simply press the Record button on the
Remote Control to begin recording. To play the
recording back, press the Play Recording button.
To delete the recording, press the Delete Recording
button.
Using FM Mode
-Choose FM Mode to play music and other
audio from all FM radio stations within range.
-With FM Mode selected, press either the
Control Button on the Speaker or Play/Pause 11

on the Remote Control to begin scanning.
Use the Remote Control to skip between FM
stations with one press of the Previous Track or
Next Track button.
-You can also use the Remote Control's
Number Pad to recall stations after they have
been found through scan. Every scanned
station will be committed to memory in order.
Simply press the corresponding number on the
number pad to return to that station (for
example, press 3 to recall the third scanned
station).
Specifications
Bluetooth
®
Version
Bluetooth®Range
Bluetooth®Pairing Name
Playtime
Charge Time
Frequency Response
Driver Unit Size
Impedance
USB & Memory Card Storage
FM Radio
Battery Capacity
Battery Type
Charge Voltage
Output Power
12
5.0
20M
CPA910
Up to 22 hours
4 hours
45Hz-20KHz
5.5 Inches
bass 4Ω,treble 6Ω
Up to 32GB
87.5MHz-108MHz
5400mAh
Rechargeable Lithium-ion
DC9V
32W

Introducción
Gracias por comprar el Altavoz Inalámbrico CPA910 Party
Blaze. Este manual de instrucciones está diseñado para
ayudarle a entender y usar mejor su altavoz Bluetooth®.
Los términos cubiertos en este manual serán más
familiares para usted a medida que utilice su altavoz.
Antes de usar este dispositivo por primera vez, cargue
completamente la batería enchufando el adaptador de
carga proporcionado en el puerto de su altavoz y
enchufando el otro extremo a una fuente de alimentación
local. El indicador de carga se iluminará en rojo para
indicar que el altavoz ha comenzado a cargarse y se
apagará cuando el altavoz esté completamente cargado.
Contenidos del paquete
•1 x altavoz CPA910 Party Blaze
•1x Mando a Distancia
•1 x Adaptador de carga de 9 V.
•1x Micrófono con cable
•1x Manual de usuario
13

DescripciOn general del producto
14

Control remoto
15

Uso General
Menú Principal
Comience ajustando los niveles de sonido del altavoz a
su gusto. Para desplazarse por varios ajustes de salida
de sonido, pulse brevemente el botón Menú del altavoz.
La pantalla LED mostrará "b/e/nv/nb/ne/ec/V" Pulse el
botón Menú para recorrer estas opciones.
b: Control de graves. Mientras esté en esta
configuración, utilice la perilla de volumen principal para
ajustar el nivel de graves.
e: Control de agudos. Utilice la perilla de volumen
principal para ajustar el nivel de Agudos.
nv: Volumen del micrófono. Utilice el botón de volumen
del micrófono para ajustar la salida del volumen del
micrófono.
nb: Micrófono bajo. Utilice el botón de volumen del
micrófono para ajustar el nivel de graves del audio del
micrófono.
ne: Micrófono Agudos. Utilice el botón de volumen del
micrófono para ajustar el nivel de agudos del audio del
micrófono.
v: Control de volumen principal.
16

También puede usar el botón Prioridad del micrófono
para anular la música que se está reproduciendo con el
fin de generar sonido desde el micrófono.
Elegir un Modo
A continuación, elija el modo de entrada que utilizará
para reproducir su música. Para desplazarse entre los
modos del altavoz, pulse brevemente el botón Modo del
altavoz o del mando a distancia una vez para saltar entre
los modos BLUETOOTH®, LINE IN, USB/TF y FM, en
ese orden. Mantenga pulsado el botón Modo para activar
y desactivar las indicaciones de voz.
Uso del modo Bluetooth®
1. Comience pulsando el botón Modo del altavoz o del
mando a distancia hasta que se seleccione el modo
Bluetooth®.
2. Con su teléfono inteligente u otro dispositivo deaudio
Bluetooth® a 10 metros del altavoz, encienda el
Bluetooth® de su dispositivo para emparejarlo.
3. Seleccione CPA910 de la lista de dispositivos
disponibles.
-Puedes controlar la configuración de música desde tu
dispositivo o desde los botones del altavoz y el mando a
distancia.
17

-Pulse Reproducir/Pausa en cualquiera de los métodos
de entrada para reproducir o pausar la música.
-Presione el botón Pista anterior o Siguiente Tack para
cambiar entre pistas.
-Nota: La función de repetición no es compatible con el
modo Bluetooth®.
Emparejamiento True Wireless
El altavoz CPA-910 admite el emparejamiento True
Wireless, lo que significa que puede transmitir música
desde su dispositivo a dos altavoces CPA-910 al mismo
tiempo sin cables que conecten los dos altavoces.
1. Para emparejar dos altavoces para el sonido
envolvente True Wireless, comience por encenderlos en
el modo BT (Bluetooth®). Elija un altavoz y pulse su
botón de control durante 5 segundos para emparejarlo
con el otro altavoz. El altavoz cuyo botón de control ha
presionado ahora es el “altavoz anfitrión” y se puede
utilizar para controlar la reproducción y los niveles de
sonido.
2. Encienda el Bluetooth® de su smartphone u otro
dispositivo de audio y empareje a CPA-910. Ambos
altavoces ahora reproducirán su música en estéreo.
Modos de luz LED
Para encender y apagar las luces LED de fiesta y
cambiar entre modos, utilice el botón Modo de luz del
mando a distancia.
18

Cambio de la configuración de EQ
El altavoz también viene con ajustes preestablecidos de
frecuencia ajustados para adaptarse a diversos géneros
musicales. Para cambiar entre las frecuencias, utilice el
interruptor de ecualización del altavoz o el botón Modo
de ecualización del mando a distancia. Pulsando
cualquiera de los botones cambiará a uno de los cinco
modos de ecualización: Pop, Rock, Jazz, Clásico y
Plano. Elige la que mejor te parezca.
Uso del modo de entrada de línea
(AUX)
Comience pulsando el botón Modo del altavoz o del
mando a distancia hasta que se seleccione el modo
LINE IN. Conecte el cable AUX de 3,5 mm a la entrada
correcta del altavoz y utilice el dispositivo conectado
para controlar la música o el audio.
Uso del modo USB/TF
-Elija el modo USB/TF para reproducir música u otro
audio desde una unidad USB o tarjeta TF (no incluida), o
simplemente inserte la unidad USB o la tarjeta TF para
cambiar automáticamente al modo USB/TF.
-Pulse Reproducir/Pausa en cualquiera de los métodos
de entrada para reproducir o pausar la música.
19

-Utilice el mando a distancia para saltar entre pistas
pulsando el botón Pista anterior o Siguiente pista.
Mantenga pulsado el botón Pista anterior para rebobinar
el audio. Mantenga pulsado el botón Siguiente pista para
avanzar rápidamente. También puede utilizar el teclado
numérico del mando a distancia para seleccionar una
canción por número de pista.
-Con una unidad USB insertada, también puede realizar
grabaciones del audio que se está reproduciendo en el
altavoz. Simplemente presione el botón Grabar en el
mando a distancia para comenzar a grabar. Para
reproducir la grabación, pulse el botón Reproducir
grabación. Para eliminar la grabación, pulse el botón
Eliminar grabación.
Uso del modo FM
-Elija el modo FM para reproducir música y otro audio de
todas las emisoras de radio FM dentro del alcance.
-Con el modo FM seleccionado, pulse el botón de control
del altavoz o Reproducir/Pausa en el mando a distancia
para comenzar a escanear.
-Utilice el mando a distancia para saltar entre emisoras
FM con una sola pulsación del botón Pista anterior o de
la siguiente pista.
-También puedes usar el teclado numérico del mando a
distancia para recuperar las estaciones después de
haber sido encontradas a través del escaneo. Cada
estación escaneada se asignará a la memoria en orden.
20
Table of contents
Languages:
Other Coby Speakers manuals

Coby
Coby CSTV-130 User manual

Coby
Coby CS-MP23 - Portable Speakers User manual

Coby
Coby csbt22 User manual

Coby
Coby CPA91FD User manual

Coby
Coby CPA800 User manual

Coby
Coby CSTW52FD User manual

Coby
Coby CSTW52FD User manual

Coby
Coby CMB-104 User manual

Coby
Coby CSBT-322 User manual

Coby
Coby CSTV-130 Instruction Manual