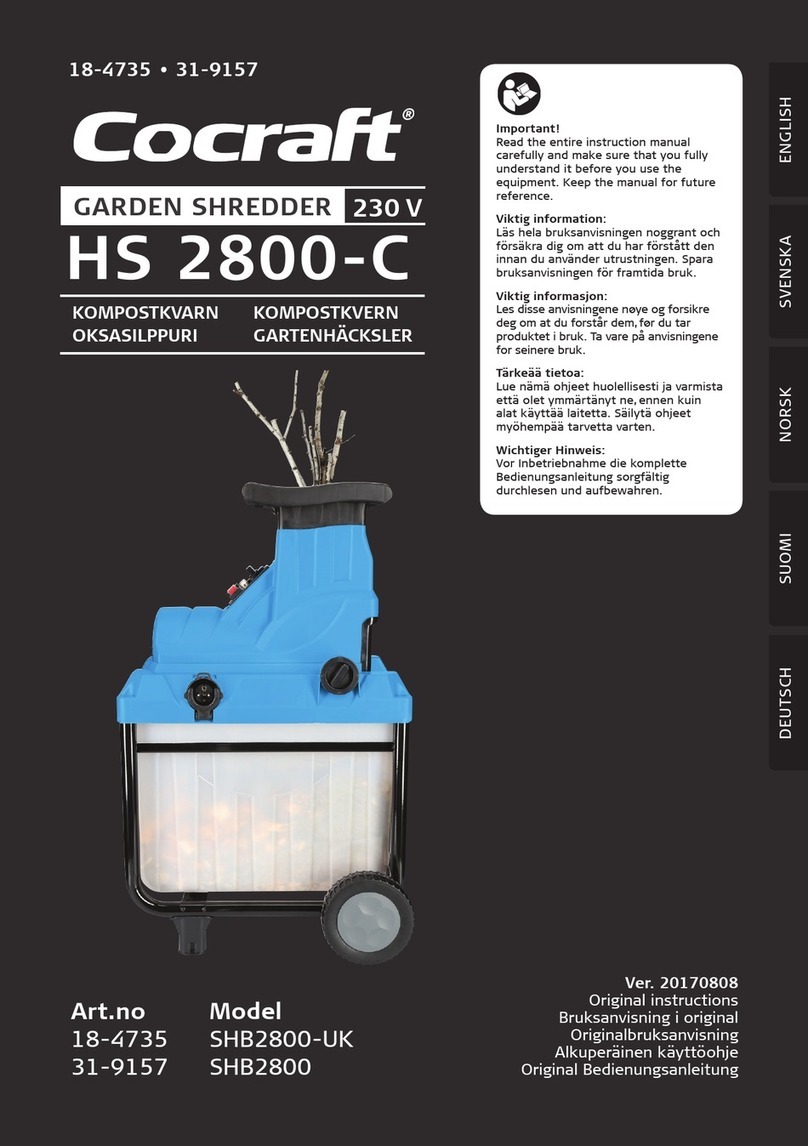
Cocraft GS40 User manual

ENGLISHSVENSKANORSKSUOMIDEUTSCH
Ver. 20151117
Original instructions
Bruksanvisning i original
Original bruksanvisning
Alkuperäinen käyttöohje
Original Bedienungsanleitung
Art.no Model
18-3120 LSG2503-UK
40-6000 LSG2503
Important!
Read the entire instruction manual
carefully and make sure that you fully
understand it before you use the
equipment. Keep the manual for future
reference.
Viktig information:
Läs hela bruksanvisningen noggrant och
försäkra dig om att du har förstått den
innan du använder utrustningen. Spara
bruksanvisningen för framtida bruk.
Viktig informasjon:
Les disse anvisningene nøye og forsikre
deg om at du forstår dem, før du tar
produktet i bruk. Ta vare på anvisningene
for seinere bruk.
Tärkeää tietoa:
Lue nämä ohjeet huolellisesti ja varmista
että olet ymmärtänyt ne, ennen kuin
alat käyttää laitetta. Säilytä ohjeet
myöhempää tarvetta varten.
Wichtiger Hinweis:
Vor Inbetriebnahme die komplette
Bedienungsanleitung sorgfältig
durchlesen und aufbewahren.
GS40
18-3120 • 40-6000
GARDEN SHREDDER
KOMPOSTKVARN KOMPOSTKVERN
OKSASILPPURI HÄCKSLER
SELF-FEEDING AND QUIET OPERATION

ENGLISH
2
Garden Shredder
Art.no 18-3120 Model LSG2503-UK
40-6000 LSG2503
Please read theentire instruction manual before using theproduct and save it for future
reference. Wereserve theright for any errors in text or images and any necessary
changes made to technicaldata. Ifyou have any questions regarding technical problems
please contact our Customer Services (see address on reverse).
Safety Instructions
• Note: Beforecleaning or performing service on themachine
make sure that thepower switch is set to 0. Makesure
that thepower lead has been removed from themachine.
Themotor will continue to rotate ashort while after being
turned off before coming to acompletestop.
• If thesupply cord is damaged, it must be replaced by
themanufacturer, its service agent or similarly qualified
persons in order to avoid ahazard.
• This appliance can be used by children aged from 8 years and
above and persons with reduced physical, sensory or mental
capabilities or lack of experience and knowledge if they
have been given supervision or instruction concerning use of
theappliance in asafe way and understand thehazards involved.
• Theuser is responsible for proper use of themachine and is
responsible for any possible injuries occurring to third parties
through improperuse.
• Thegarden shredder must be placed on aflat stable surface.
• Use gloves, hearing protection and eye protection/visor when
using themachine.
• Before going away from thegarden shredder make sure that
you have turned off themotor and have removed thepower
lead from themachine.
• Children shall not play with theappliance. Cleaning and user
maintenance shall not be made by children without supervision.

ENGLISH
3
• Themachine can only be adjusted and cleaned once
themotor has completely stopped and thepower lead has
been removed from themachine.
Note: Whenadjusting thecutting plate however, themotor
must be in operation (see section Adjusting thecuttingplate).
• Make sure that themachine is completely and correctly
assembled before turning on themotor.
• Do not hold your hands near theintake opening or
theoutputchute.
• Make sure to wear proper fitting clothing; no hanging or
oversized clothes, no jewellery or similar items which may get
caught in therotating blades.
General safety guidelines
• Make sure to inspect themachine visually before usingit. Donot
use themachine if thesafety devices are damaged orworn.
Thesafety devices must not be compromised or deactivated.
• Themachine must never be used if thehousing is broken or if
any of theparts aremissing.
• Themachine may only be used for thepurposes outlined in
this instruction manual.
• Check theappropriateness of thematerial being shredded
before using themachine. Removeany foreign objects.
Beaware of any foreign objects during thetime ofuse. Ifyou
still manage to accidently insert aforeign object, make sure
that you turn off themachine immediately. Thencarefully
remove theforeign object.
• Work only when there is adequate daylight or lighting.
• Make sure that you are standing steady and well balanced
when using themachine.
• Always keep aneye on themachine. Ifyou need to stop
working, turn off themachine, unplug it, and store it in
asafeplace. Ifyou need to stop work and change locations
you must turn off themachine before movingit.

ENGLISH
4
• Never use themachine in rain or in amoist or damp
environment. Protect themachine from rain or moisture.
• Turn off themotor and remove thepower leadwhen: not
using themachine, when themachine is not being attended,
when themachine is being checked, if thelead or theblades
are damaged, or if themachine needs to be moved to
another location.
• Make sure that there is adequate distance between themachine
and bystanders. Keepaclose eye on children and pets within
themachine’s dangerzone.
• Make sure that theventilation openings are unobstructed from
leaves and debris.
• Unplug themachine after each use and check for any possible
damage before storing.
• When not using themachine for anextended period ensure that
themachine is stored in adry location out of thereach of children.
• Only use themachine as described in this instruction manual.
• Regularly check that all screws are adequately tightened.
• Voltage from themains must correspond to themachine’s
ratingplate.
• Thepower point used must be protected with at least a10Aslow
blowfuse.
• Any extension cables used must be suitable for outdoor use
and have at least aH07RN-F rating and aminimal conductor
cross sectional area of 3G1.5 mm². Plugsmust be earthed
and thesockets must be splash-proof. Checkthepower lead
regularly for damage andwear. Themachine can only be use
if thepower lead is suitable foruse.
• If theextension lead has areduced conductor cross sectional
area themachines performance will be reduced considerably.
Forleads under 25 m in length a3G1.5 mm² minimum
conductor cross sectional area is required, if over 25 m
a3G2.5mm² area is required.

ENGLISH
5
• Never move themachine by pulling on thelead.
• If theshredder vibrates extremely abnormal, turn off
themachine immediately, pull out theplug and find thecause
of theproblem. Strongvibrations are often anindication of
aproblem.
• Repairs should only be carried out by aqualified service
technician.
• Before operating themachine and every time it has been
exposed to shocks or impact it should also be checked for
damage orwear. Leaveit in for repairs when necessary.
• Use only spare parts and accessories that are intended
for themachine or have been recommended by
themanufacturer.
• Note: Therotary blades continue to rotate afew seconds
after turning off themachine.
• Thegarden shredder should only be connected to anearthed
wall socket. Connect it via aRCD for personal safety.

ENGLISH
6
Safety symbol guide
Caution: Readthrough theentire instruction manual and follow all
warnings and safety guidelines.
Caution: Itis aneccessity to use eye protection, hearing protection,
protective gloves and sturdy work wear when using themachine.
Usepreferably ahelmet with avisor.
Caution: Protect themachine against moisture ando not expose
it torain.
Caution: Rotating blades. Keephands and feet away from theintake
opening and outputchute.
Note: Theblades continue to rotate ashort while after themachine has
been turnedoff.
Caution: Immediately pull out theplug if thepower outlet or lead has been
damaged orcut.
Caution: Setthepower switch to 0and remove thecable from
themachine. Ensurethat theblades have stopped completely before
servicing, transporting,etc.
Caution: Ensurethat thesafety area is of adequatesize.
Caution: Thereis arisk of material being thrown forcefully from
themachine duringuse. Makesure that bystanders and pets are removed
from theworkarea.
Note: Cutting plate adjustmentscrew.

ENGLISH
7
13
12
11
10
9
7
6
5
432 1
8
Product description
1. Intakeopening
2. Resetbutton/overload
protection
3. Powerswitch
[0 - STOP ]
4. Powerswitch
[1 - START]
5. Rotational direction
switch
6. Powersocket
7. Ventilationports
8. Outputchute
9. Cutting plate
adjustmentscrew
10. Robusttubular stand
with wheelaxle
11. Plastic spacer
12. Wheel
13. Wheelcover

ENGLISH
8
Operating range
Thegarden shredder is only intended for shredding bio-degradable garden waste like
branches and twigs from bushes, hedges and smaller trees, etc in smaller gardens.
Itis not intended for professionaluse.
Theshredder cannot be used for shredding earth coated roots, stones, metal, glass,
fabric, paper or plastic. Non-solid waste such as kitchen waste is also not suitable.
Assembly
1. Placethemotor housing upside down on
aflat surface and fasten thestand on thefour
screws found under themotor housing.
2. Mountthewheel axle onto
thestand with theincluded
screws, washers and
lockingnuts.
3. Fastenthestand on thefour
screws found under themotor
housing using theincluded
washers and lockingnuts.
4. Placetheplastic spacers on both sides of
thewheelaxle. Makesure that theflat surface
is facing outwards. Mountthewheels onto
thewheelaxle.
5. Pressin thewheel covers onto thewheels to
lock thewheels.

ENGLISH
9
3
4
5
2
Operation
Connecting to the mains
Connect themachine to amains socket using anextensionlead. Connect
theextension lead to thepower socket on themachine. Foldout thespring loaded
fastener from thesocket, insert theextension lead and release thefastener.
Power switch
• Push thegreen button (4)
to start theshredder.
• Push thered button (3) to
turn theshredderoff.
Note: Themachine is
equipped with azero voltage
breaker. Thisis to prevent
themachine from starting
accidentallyafter
apowercut.
Rotational direction switch
Thedirection switch (5) can be used to back out twigs or other debris which has been
caught in theshredder.
Note: Thisfunction must only be used when theshredder is turned off and is
standingstill.
1. Settheswitch (5) to theposition for normaluse.
2. Settheswitch (5) to theposition to change rotational direction. Theknives
will rotate backwards which mean that thematerial that has been caught can be
released and pulled backwards. Inthis setting thepower button (4) has areturn
spring which stops themotor once thegreen start button is released.
Note: Alwayswait until theshredder comes to acomplete stop before restartingit.
Overload protection
1. Iftheshredder is overloadedi.e. iftheblades are caught, themotor will stop within
afew seconds. Theoverload protection will automatically cut offpower. Waitat
least 1 minute so that themotor has time to cool before pressing thereset button (2).
2. Pushthegreen button (4) to start themotor.

ENGLISH
10
9
Distance:
0–0.5 mm
15
14
16
Adjusting the cutting plate
9. Cutting plate adjustmentscrew
14. Cuttingplate
15. Rotating blades
16. Allenkey (accessory)
Thecutting mechanism consists of rotating blades and thecuttingplate. Foroptimal
results thedistance between theblades and cutting plate should be 0–0.5mm.
Ahalf turn of theadjustment screw moves thecutting plate approx. 0.5mm.
Thedistance is pre-adjusted by themanufacturer and does not need to be adjusted
before using it for thefirsttime.
After some time theresults may become compromised, thecutting blade may then be
adjusted in thisway.
• Themotor should always be on when adjusting thecuttingplate.
• Themachine should be set for normal feed when adjusting thecuttingplate.
Adjusting the cutting plate
1. Startthemachine.
2. Usetheincluded allen key and turn theadjustment screw (9) slowly clockwise.
3. Turncarefully until ascraping noise is heard and aminimal amount of aluminium
shavings fall through theoutputchute.
4. Thespace between theblades and cutting plate is now at 0 and is set for optimal
shredding.

ENGLISH
11
General use guidelines
• Read and thefollow safety instructions.
• Use protective eyewear, hearing protection, protective gloves and sturdy
workwear. Usepreferably ahelmet with avisor.
• Material that you feed in will automatically be drawn in by thecutting blades.
Warning! Ifoverly long objects are placed into themachine there is arisk that
thematerial will begin towhip. Keepasafe distance.
• Feed in material from therights side of theintake opening feeding in just theright
amount of material so as not to clog theintake opening.
• Wilted or damp garden waste which has lain for several days must be processed
in alternating turns with branches. Thiswill prevent clogging theintake opening.
• Kitchen waste and other soft waste cannot be processed in theshredder but
should be placed directly on thecompostheap.
• Branches with numerous twigs and leaves should be fed in entirely before
attempting to feed in any more material.
• Make sure to empty thecatcher bag before theshredded material plugs
theoutputchute.
• Theventilation ports must be kept free of debris.
• Avoid continuous feeding of bulky materials. Thiscan lead to clogging of
theblades.
• If theblades become clogged: Usethedirection switch to reverse themotor and
consequently loosen theclogged material from theblades.
Storage and maintenance
• Clean themachine at regular intervals. Thiswill ensure many yearsof
good operation.
• Keep theventilation ports clean while using themachine.
• Theplastic housing and other plastic parts can be cleaned by using amild
washing-up liquid and amoistcloth. Donot use strong detergents or solvents to
clean themachine.
• Never spray theshredder withwater.
• Water may under no circumstances get into themachine.
• Check every now and then that thestand’s assembly screws aretight.
• If you plan not using theshredder for anextended period of time, lubricate
themachine with acorrosion protective eco friendly lubricant.
• Store themachine in adryplace.
• Keep themachine out of children’sreach.

ENGLISH
12
Responsible disposal
This symbol indicates that this product should not be disposed of with
general householdwaste. Thisapplies throughout theentire EU. Inorder
to prevent any harm to theenvironment or health hazards caused by
incorrect waste disposal, theproduct must be handed in for recycling
so that thematerial can be disposed of in aresponsible manner.
Whenrecycling your product, take it to your local collection facility or
contact theplace of purchase. Theywill ensure that theproduct is
disposed of in anenvironmentally sound manner.
Troubleshooting
Problem Possible Cause Remedy
Themotor
does notstart.
1. Powercut.
2. Themotor’s overload
protection has triggered.
3. Thedirection button is in
theneutral setting.
1. Checkthepower lead, connec-
tions andfuse.
2. Resetthemachine.
3. Checkthedirection
button’s setting.
Thematerial
being inserted
is no longer
being pulledin.
1. Theblades are rotating
backwards.
2. Theintake opening is
clogged. / Theblades
are clogged.
3. Thecatcher bag is
too full and is blocking
theoutputchute.
1. Changerotational direction.
2. Changetherotational direction
and remove any stuck material
from theintake opening.
Re-feed larger branches turning
them so that theblades do not
immediately bite into old grooves
caused by thefirstfeed.
3. Emptythecatcher bag and make
sure that he output chute isclear.
Thematerial is
not shredded
adequately.
Thecutting plate has been
set incorrectly.
Adjust thecuttingplate.
Seesection Adjusting
thecuttingplate.
Technical data
Mains supply 230 V, 50 Hz
Output power 2500 W
No load speed 40 RPM
Branch diameter Max.40 mm (depending on thebranch’s hardness)
Sound pressure level (LpA) 88 dB(A)
Sound power level (LwA) 93 dB(A)
Weight 26kg
TheS6 operation mode is for continuous use with intermittentload. 40 % stands
for aload profile with 4 minutes of load and 6 minutesidle.

SVENSKA
13
Kompostkvarn
Art.nr 18-3120 Modell LSG2503-UK
40-6000 LSG2503
Läs igenom hela bruksanvisningen före användning och spara den sedan för fram-
tidabruk. Vireserverar oss förev. text- och bildfel samt ändringar av tekniskadata.
Vidtekniska problem eller andra frågor, kontakta vår kundtjänst (se adressuppgifter
påbaksidan).
Säkerhetsanvisningar
• Obs! Innandu rengör eller utför service på maskinen, måste
strömbrytaren stå på 0. Setill att nätkabeln har tagits bort från
maskinen. Närmotorn har blivit avstängd fortsätter den att
rotera ettkort stund innan den stannarhelt.
• Om nätsladden skadats får den, för att risk för elektrisk stöt
eller brand ska undvikas, endast bytas av tillverkaren, dess
serviceställe eller av enkvalificerad yrkesman.
• Apparaten får användas av barn från 8 år och av personer
med någon form av funktionsnedsättning, brist på erfarenhet
eller kunskap som skulle kunna äventyra säkerheten, om de
har fått instruktioner om hur produkten på ettsäkert sätt ska
användas och förstår faror och risker som kan uppkomma.
• Inom kompostkvarnens arbetsområde är användaren själv
ansvarig förev. skador gentemot tredjeman.
• Kompostkvarnen måste placeras stabilt på ettplant och fast
underlag.
• Bär handskar, hörselskydd och skyddsglasögon/visir när du
använder maskinen.
• Innan du lämnar kompostkvarnen måste du stänga av motorn
och ta bort nätkabeln från maskinen.
• Låt aldrig barn leka med produkten. Rengöring och skötsel får
inte utföras av barn utan vuxens närvaro.
• Maskinen får endast justeras och rengöras om motorn står
stilla och nätkabeln har tagitsbort. Obs!När mothållet justeras
måste dock motorn vara igång, se kapitel Justering av mothåll.

SVENSKA
14
• Se till att maskinen är komplett och rätt monterad innan du
startar motorn.
• Håll inte händerna nära inmatningsöppningen eller utmat-
ningsöppningen.
• Var riktigt klädd, använd inga stora klädesplagg, smycken eller
annat som kan fastna iden roterande kniven.
Allmänna säkerhetsanvisningar
• Kontrollera maskinen visuellt varje gång innan du använderden.
Användinte maskinen om säkerhetsanordningarna är skadade
eller slitna. Säkerhetsanordningarna får aldrig sättas ur funktion.
• Maskinen får aldrig användas om höljet är trasigt eller om
någon del saknas.
• Maskinen får endast användas till de användningsändamål
somanges idenna bruksanvisning.
• Kontrollera materialet som ska krossas innan du startar maskinen.
Tabortev. främmande föremål. Varuppmärksam på främmande
föremål under tiden som du använder maskinen. Omdu ändå
skulle råka mata in något främmande föremål när du använder
maskinen, måste du genast stänga av maskinen. Tasedan
bort det främmande föremålet.
• Arbeta endast när du har tillräckligt bra dagsljus eller elbelysning.
• Se till att du står säkert med god balans när du använder
maskinen.
• Håll alltid maskinen under uppsikt. Omdu behöver avbryta
arbetet måste du stänga av och dra ur stickproppen och
placera maskinen på ensäkerplats. Omdu behöver avbryta
ditt arbete för att använda maskinen på ettannat ställe måste
du stänga av den innan du flyttar påden.
• Använd aldrig maskinen vid regn eller ifuktig eller våt omgivning.
Skyddamaskinen mot fukt ochregn.
• Slå ifrån motorn och ta bort nätkabeln när du inte använder
maskinen, när maskinen inte är under uppsikt, när maskinen
ska kontrolleras, om kabeln eller kniven är skadad, eller om
maskinen ska transporteras till enannanplats.

SVENSKA
15
• Se till att tillräckligt avstånd finns mellan maskinen och obehöriga
personer. Hållsärskilt uppsyn på barn och husdjur inom
maskinens riskområde.
• Se till att ventilationsöppningarna är rena från löv ochsmuts.
• Dra ut stickkontakten efter användning och kontrollera om
maskinen är skadad innan du ställer undan den till förvaring.
• När du inte använder maskinen ska du se till att den förvaras
på entorr plats utom räckhåll förbarn.
• Använd endast maskinen enligt beskrivningarna idenna
bruksanvisning.
• Kontrollera regelbundet att alla skruvar är ordentligt åtdragna.
• Spänningen ielnätet måste vara samma som anges på
maskinens typskylt.
• Eluttaget måste vara säkrat med minst 10 Atrög.
• Anslutningskablarna som används måste vara avsedda
för utomhusbruk och minst hålla klassningen H07RN-F
och måste ha enminsta ledningsarea på 3G1,5 mm².
Stickkontakterna måste vara jordade och anslutningen vara
sköljtät. Kontrollera regelbundet om nätkabeln har skadats
eller om den börjar åldras. Maskinen får endast användas om
nätkabeln är ifullgottskick.
• Med enalltför liten ledningsarea ianslutningskabeln kommer
maskinens prestanda att reduceras märkbart. Vidkablar
under 25 m längd krävs enledningsarea på minst 3G1,5
mm², vid enlängd över 25 m minst 3G2,5 mm².
• Flytta aldrig maskinen genom att dra isladden.
• Om kompostkvarnen vibrerar ovanligt mycket måste du slå
ifrån motorn, dra ut stickkontakten och genast finna orsaken.
Starkavibrationer är ofta etttecken på att något ärfel.
• Reparationer får endast utföras av enbehörig servicetekniker.
• Innan du tar maskinen idrift och varje gång som maskinen har
utsatts för stötar eller slag måste du kontrollera om maskinen
är sliten eller skadad. Lämnain den för reparation vidbehov.
• Använd endast reservdelar och tillbehör som är avsedda för
maskinen eller har rekommenderats av tillverkaren.

SVENSKA
16
• Obs! Efteratt du slagit ifrån kompostkvarnen fortsätter kniven
att rotera ytterligare ettpar sekunder!
• Kompostkvarnen får endast anslutas till ettjordat eluttag.
Anslutvia enjordfelsbrytare avsedd för personskydd.
Produktmärkning med säkerhetssymboler
Varning! Läsigenom bruksanvisningen och följ varnings- och
säkerhetsanvisningarna.
Varning! Närdu använder maskinen måste du absolut använda
skyddsglasögon, hörselskydd, skyddshandskar samt kraftiga
arbetskläder. Användhelst hjälm med ansiktsvisir.
Varning! Skyddamaskinen mot fukt och utsätt den inte förregn.
Varning! Roterandekniv. Hållhänder och fötter ifrån inmatnings-
öppningen och utmatningsöppningen.
Obs!Kniven fortsätter att rotera enkort stund efter maskinen
slagitsav.
Varning! Dragenast ur stickkontakten ur eluttaget om nätkabeln
har skadats eller kapatsav.
Varning! Ställströmbrytaren iläge 0och ta bort nätkabeln från
maskinen. Väntatills kniven har stannat innan rengöring, service,
transportetc.
Varning! Setill att säkerhetsavståndet är tillräckligtstort.
Varning! Närmaskinen används finns det risk för att material
slungas ut ur kompostkvarnen. Hållundan andra personer och
husdjur från arbetsområdet.
Obs!Inställningsskruv för justering av mothåll.

SVENSKA
17
13
12
11
10
9
7
6
5
432 1
8
Produktbeskrivning
1. Inmatningsöppning
2. Återställningsbart
motorskydd
3. Strömbrytare
[0 - STOPP ]
4. Strömbrytare
[1 - START]
5. Omkopplare för
rotationsriktning
6. Faststickkontakt
7. Ventilationsöppningar
8. Utmatningsöppning
9. Inställningsskruv för
mothåll
10. Stativmed hjulaxel
11. Plastbricka
12. Hjul
13. Navkapsel

SVENSKA
18
Användningsområde
Den elektriska kompostkvarnen är endast avsedd för finfördelning av biologiskt
nedbrytbart trädgårdsavfall som, grenar och kvistar från buskar, häckar och mindre
tränetc. imindre trädgårdar, den är inte avsedd för yrkesmässigtbruk.
Kompostkvarnen får inte användas för bearbetning avt.ex. rötter med jord, stenar,
metallbitar, glas, textiler, papper eller plast, inte heller till avfall som inte har fast
konsistens,t.ex. köksavfall.
Montering
1. Läggmotordelen upp och ner på ettplant
underlag och sätt fast stativrören på dom
fyra skruvarna som finns under motorn på
maskinen.
2. Montera hjulaxeln på
stativrören med bifogade
skruvar, brickor och
låsmuttrar.
3. Skruvafast stativrören på de
fyra skruvarna som finns under
motorn, använd bifogade brickor
och låsmuttrar.
4. Skjutpå plastbrickorna på båda sidorna av
hjulaxeln. Vänddemså att den plana ytan
blirutåt. Montera sedan hjulen på hjulaxeln.
5. Tryckin navkapslarna ihjulaxeln för att låsa fast
hjulen.

SVENSKA
19
3
4
5
2
Användning
Nätanslutning
Anslut maskinen till etteluttag med enskarvkabel. Anslutkabelns skarvuttag till den
fasta stickkontakten på maskinen. Vikut den rörliga delen vid fasta stickuttaget, tryck
fast skarvuttaget och släpp den rörligadelen.
Strömbrytare
• Tryck på den gröna
knappen (4) för att starta
kompostkvarnen.
• Tryck på den röda
knappen (3) för att stänga
avden.
Obs! Maskinen är utrustad
med ennollspänningsbrytare.
Denska förhindra att
maskinen startas av misstag
efter ettströmavbrott.
Omkopplare för rotationsriktning
Omkopplaren (5) kan användas för att mata ut kvistar eller annat som har fastnat
ikvarnen.
Obs! Dennaomkopplare får endast aktiveras när kompostkvarnen är avstängd och
står stilla.
1. Ställomkopplaren (5) iläge för normal användning.
2. Ställomkopplaren (5) iläge för att byta rotationsriktning. Knivenroterar
iomvänd rotationsriktning vilket innebär att material som klämts fast kan lossna
och dras utbakåt. Idetta läge är strömbrytaren (4) återfjädrande så att motorn
stannar när du släpper den gröna startknappen.
Obs! Väntaalltid tills kompostkvarnen har stannat helt, innan du startar denigen.
Motorskydd
1. Omkompostkvarnen överbelastas t ex om kniven blockeras, kommer motorn
att stanna inom några sekunder, motorskyddet stänger automatiskt av
strömförsörjningen. Väntaiminst 1 minut så att motorn kyls av och tryck sedan
indet återställningsbara motorskyddet (2).
2. Tryckdärefter på strömbrytarens (4) gröna knapp för att starta motorn.

SVENSKA
20
9
Avstånd:
0–0,5 mm
15
14
16
Justering av mothåll
9. Inställningsskruv
14. Mothåll
15. Roterandekniv
16. Bifogad insexnyckel
Skärmekanismen består av enroterande kniv och ettmothåll. Föroptimal malning
skall spalten mellan kniv och mothåll vara 0–0,5mm. Etthalvt varv på inställnings-
skruven flyttar mothållet ca 0,5mm.
Spalten är justerad vid fabriken och behöver inte justeras när maskinen tas ibruk för
första gången.
Efter entids användning kan resultatet försämras, då kan mothållet justeras såhär:
• Motorn skall alltid vara igång då mothållet justeras.
• Maskinen skall vara inställd på normal matning då mothållet justeras.
Justering av mothåll
1. Startamaskinen.
2. Användden bifogade insexnyckeln och vrid inställningsskruven (9) sakta medurs.
3. Vridprecis tills ettskrapande ljud börjar höras och små aluminiumspånor faller ut
genom utkastaröppningen på undersidan.
4. Nuär åter spalten mellan kniv och mothåll 0 mm och sönderdelningen blir optimal.
This manual suits for next models
2
Table of contents
Languages:
Other Cocraft Paper Shredder manuals
Popular Paper Shredder manuals by other brands

Genie
Genie 206 S instruction manual

Fellowes
Fellowes Powershred W11C instruction manual

MBM
MBM Ideal 2220 instruction manual

Pitney Bowes
Pitney Bowes SHG6 Operator's guide

UNITED OFFICE
UNITED OFFICE UAVS 450 A1 Operating instructions and safety instructions

Formax
Formax FD 87 Operator and maintenance manual