ENGLISH
7
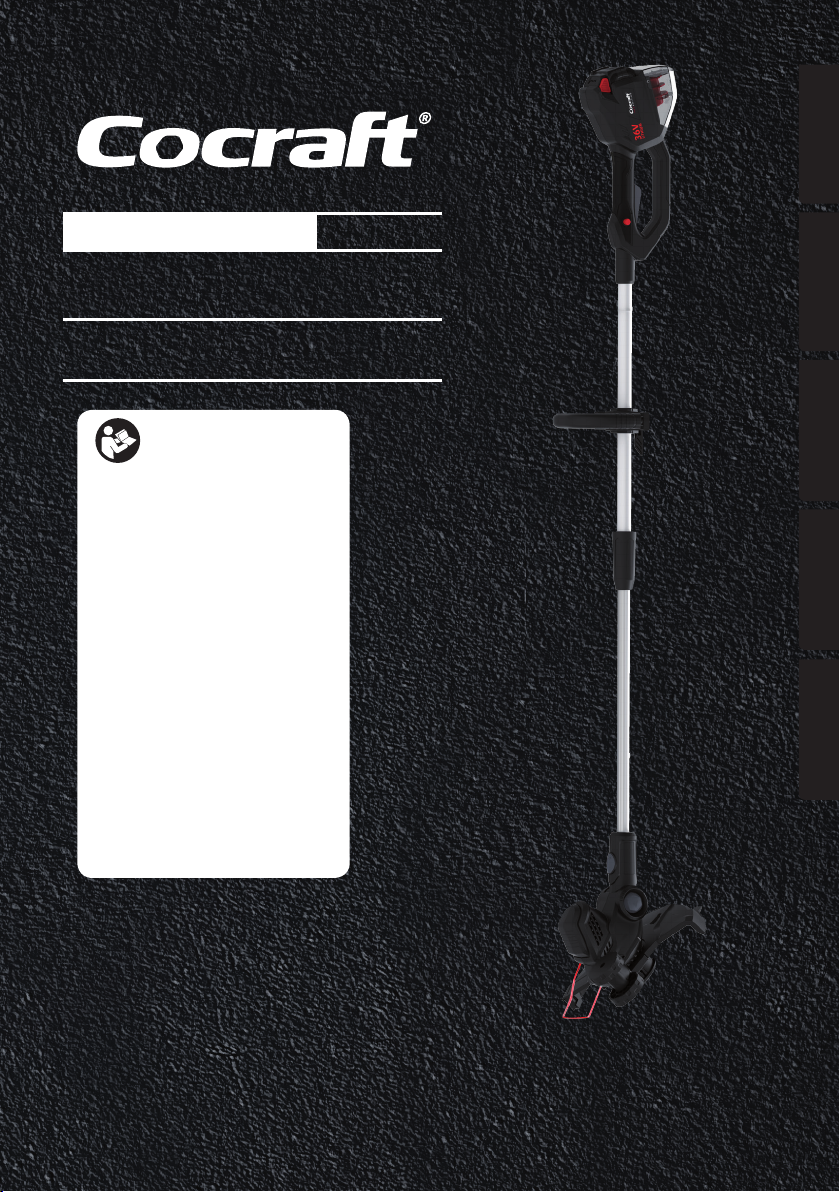
Specic Safety Instructions for Grass Trimmers
• Never allow children or persons with reduced physical, sensory or mental capabilities
or lack of experience and knowledge or people unfamiliar with these instructions to
use the machine. Local regulations may restrict the age of the operator.
• Never let children operate or play with thegrass trimmer. Keep it out of reach of children.
• Wear sturdy footwear, long trousers, safety glasses and gloves.
• Keep anyone standing close by at asafe distance from thegrass trimmer.
• Keep children and pets out of thework area. Stones and other debris can be
ejected by thegrass trimmer. Switch thegrass trimmer off immediately should any
onlookers, adults, children or pets, come within 5 metres.
• Only use thegrass trimmer in good light conditions.
• If thegrass trimmer has been subjected to any shocks or impacts it must be
checked for damage. Any defect or damage must be repaired before thegrass
trimmer is used. Make sure thetrimmer head is securely fastened on. If it is loose
or damaged thegrass trimmer must not be used.
• Always inspect thegrass trimmer before use.
• The safety guard must always be fitted before thegrass trimmer is used. The grass
trimmer must not be used if thesafety guard is damaged or missing.
• Before starting to use thegrass trimmer, check thearea to be trimmed for foreign
objects such as stones or cables.
• Always hold thegrass trimmer firmly. Hold it in both hands.
• Never attach metal cutting lines to this grass trimmer.
• Keep theventilation openings of thetrimmer head free from debris. Remove any
grass or leaves.
• The line will continue to rotate after themotor has been turned off. Wait until
theline has completely stopped before servicing.
• The grass trimmer must not be exposed to rain or moisture.
• Make sure that you are familiar with all thecontrols and settings before using
thegrass trimmer.
• Keep hands and feet away from thetrimmer head and line at all times and especially
when switching themotor on.
• Be careful when adjusting thetrimmer line; do not switch themotor on until you
are holding thegrass trimmer in thecorrect way.
• Only use thegrass trimmer with parts and accessories recommended by themanufacturer.
• Always remove thebattery before inspecting, cleaning or adjusting thegrass trimmer
and when it is not in use.
• Keep proper footing and balance at all times.
• Avoid directing thetrimmer head towards immovable objects when thetrimmer
head is spinning, as they could damage thegrass trimmer.
• Do not attempt to stop thetrimmer head with hands or feet, let it stop by itself.
• Avoid operating thegrass trimmer on gravel paths, gravel covered yards or other
places where stones could be ejected.