manuals.online logo
Brands
  1. Home
  2. •
  3. Brands
  4. •
  5. Coleman
  6. •
  7. Grill
  8. •
  9. Coleman LC30001E User manual

Coleman LC30001E User manual

C
CHARCOAL
HARCOAL G
GRILL
RILL
A
ASSEMBLY
SSEMBLY I
INSTRUCTIONS
NSTRUCTIONS
B
BARBECUE
ARBECUE À
ÀCHARBON
CHARBON
DE
DE BOIS
BOIS I
INSTRUCTIONS
NSTRUCTIONS
D
D'
'ASSEMBLAGE
ASSEMBLAGE
A
ASADOR
SADOR DE
DE CARBÓN
CARBÓN
I
INSTRUCCIONES
NSTRUCCIONES DE
DE
A
ARMADO
RMADO
10010A050 (02/27/02)
LEA ACERCA DE LOS PELIGROS,
ADVERTENCIAS Y PRECAUCIONES EN
LA PÁGINA 17 DE LA GUÍA DEL PROPIETARIO,
ANTES DE OPERAR EL ASADOR.
AVANT DE FAIRE FONCTIONNER CE BARBECUE,
LIRE ATTENTIVEMENT LES IMPORTANTS
AVERTISSEMENTS ET MISES EN GARDE À LA
PAGE 16 DU MANUEL D'UTILISATION ET
D'ENTRETIEN.
LC30001E
LC30001E
LC101-EX
LC101-EX
AVERTISSEMENT:
LES BORDS DES PIÈCES DE MÉTAL PEUVENT
BLESSER SI ELLES NE SONT PAS
MANIPULÉES AVEC PRÉCAUTION.
ÊTRE TRÈS PRUDENT!
ADVERTENCIA:
LAS ORILLAS DE LAS PARTES DE METAL
PUEDEN LASTIMAR A LA PERSONA SI NO SE
MANEJAN CON CUIDADO.
¡USE PRECAUCIÓN EXTREMA!
INSTALLATEUR :
LAISSEZ CES INSTTRUCTTIONS À L''UTTILISATTEUR.
CONSOMMATEUR/UTILISATEUR:
LISEZ TTOUTTES CES INSTTRUCTTIONS ETTCONSERVEZ-LES
DANS UN LIEU SÛR POUR TTOUTTE RÉFÉRENCE
ULTTÉRIEURE.
MONTADOR/INSTALADOR:
DEJE ESTAS INSTRUCCIONES CON EL CONSUMIDOR.
CONSUMIDOR/USUARIO:
LEA TODAS ESTAS INSTRUCCIONES Y MANTÉNGALAS
EN UN LUGAR SEGURO COMO REFERENCIA.
READ IMPORTANT DANGERS, WARNINGS
AND CAUTIONS IN OWNER’SGUIDE PAGE
15, BEFORE OPERATING THIS BARBECUE.
WARNING:
THE EDGES OF SHEET METAL PARTS CAN
CAUSE INJURY IF NOT HANDLED WITH CARE.
USE EXTREME CAUTION!
ASSEMBLER/INSTALLER:
LEAVE THESE INSTRUCTIONS WITH THE CONSUMER.
CONSUMER/USER:
READ ALL THESE INSTRUCTIONS AND KEEP THEM IN A
SAFE PLACE FOR FUTURE REFERENCE.
Coleman Company, Inc.
3600 N. Hydraulic
Wichita, Kansas 67219
Internet site:
Site internet :
PAGINA EN INTERNET:
www.coleman.com
1-800-356-3612
TDD: 316-832-8707
(Pg. 2)
4
4
4
42
42
4
4
16
1
1
L
F
R
B
R
F
L
B
Back
Arrière
Atrás
Front
Devant
Adelante
L
e
f
t
G
a
u
c
h
e
I
z
q
u
i
e
r
d
a
D
r
o
i
t
e
D
e
r
e
c
h
a
R
i
g
h
t
AAR R O W S IIN D I C A T E
LLEESSFFLLÈÈCCHHEESSIINNDDIIQQUUEENNTT
LLA S F L E C H A S I N D I C A N
Tools Needed
Ö#2 Phillips Screwdriver
ÖStraight edge Screwdriver
ÖPliers
ÖHammer Optional Tools
ÖElectric or Cordless Screwdriver
Ö#2 Phillips driver bit
Outils nécessaires
Ö
Tournevis Phillips no 2
Ö
Tournevis standard
Ö
Pinces
Ö
Marteau
Outils facultatifs
ÖTournevis électrique ou sans fil
ÖEmbout pour tournevis Phillips no 2
Herramientas necesarias
ÖDestornillador Phillips #2
ÖDestornillador plano
ÖPinzas
ÖMartillo
Herramientas Opcionales
ÖDestornillador eléctrico o inalámbrico
ÖDados Phillips #2
NOTE
TOPROTECT THE PAINT
FINISH, DO NOT OVER-
TIGHTEN THE FASTENERS.
NOTE
POUR PROTÉGER LE FINI
DE LA PEINTURE, NE PAS
TROP SERRÉ LE FERMOIR.
NOTA
NO APRIETE DEMASIADO
LOS SUJETADORES, PARA
PROTEGER EL ACABADO
DE LA PINTURA.
(Pg. 3)
2
2
2
23
3
16
16
16
3
3
L
16
2
UNDERNEATH VIEW -
VUE DU DESSOUS
VISTA DE ABAJO
L
R
(Pg. 4)
4
4
18
18
18
5
5
R
D
O
N
O
T
R
E
M
O
V
E
S
C
R
E
W
S
!
-
N
E
P
A
S
E
N
L
E
V
E
R
L
E
S
V
I
S
!
-
¡
N
O
Q
U
I
T
E
L
O
S
T
O
R
N
I
L
L
O
S
!
BACK OUT THE
SCREWS
LOCATED IN THE
TOP RIGHT LEGS
(2 OR 3 TURNS).
DÉVISSER (2 OU
3 TOURS) LES
VIS DES PIEDS
GAUCHES.
DESATORNILLE
LOS TORNILLOS
UBICADOS EN
LAS PATAS
SUPERIORES
IZQUIERDAS (2 Ó
3 VUELTAS).
R
(Pg. 5)
6
6
11
13
7
7
SLIDE SIDE TABLE BRACKETS (11 AND 13) IN PLACE AND TIGHTEN SCREWS.
GLISSER LES SUPPORTS DE TABLETTES LATÉRALES (11 ET 13) ET RESSERRER LES VIS.
DESLICE LOS SOPORTES DE LA MESA LATERAL (11 Y13) HASTA QUE QUEDEN EN SU
LUGAR Y APRIETE LOS TORNILLOS.
4
9R
RR
(Pg. 6)
L
L
8
8
D
O
N
O
T
R
E
M
O
V
E
S
C
R
E
W
S
!
-
N
E
P
A
S
E
N
L
E
V
E
R
L
E
S
V
I
S
!
-
¡
N
O
Q
U
I
T
E
L
O
S
T
O
R
N
I
L
L
O
S
!
BACK OUT THE
SCREWS
LOCATED IN THE
TOP LEFT LEGS
(2 OR 3
TURNS).
DÉVISSER (2 OU
3 TOURS) LES
VIS DES PIEDS
GAUCHES.
DESATORNILLE
LOS TORNILLOS
UBICADOS EN
LAS PATAS
SUPERIORES
IZQUIERDAS (2 Ó
3 VUELTAS).
9
9
13
11
SLIDE SIDE TABLE BRACKETS (11 AND 13) IN PLACE AND TIGHTEN
SCREWS.
GLISSER LES SUPPORTS DE TABLETTES LATÉRALES (11 ET 13) ET
RESSERRER LES VIS.
DESLICE LOS SOPORTES DE LA MESA LATERAL (11 Y13) HASTA QUE
QUEDEN EN SU LUGAR Y APRIETE LOS TORNILLOS.
L
(Pg. 7)
12
12
LR
10
10
9L
4
1
11
1
2
63
62
L
(Pg. 8)
B13
13
R
1
1
L
L
F
40
40
41
R
41
1
1
LEFT
HINGE
LINK
RIGHT
HINGE
LINK
(Pg. 9)
56
55
55
50 50
BQ
2
6
15
15
14
14
F
F
B
6
ALL HARDWARE MUST BE SECURE.
TOUTE LA BOULONNERIE DOIT ÊTRE BIEN À BLOC.
TODOS LOS UTENSILIOS TIENEN QUE ESTAR ASEGURADOS.NOTE: STEP 15 IS FOR MODEL LC30001E ONLY.
IF YOU HAVE MODEL LC101-EX, SKIP TO STEP 16.
NOTE: L’ÉTAPE 15 EST POUR LE MODÈLE
LC30001E SEULEMENT. SI VOUS AVEZ LE MODÈLE
LC101-EX, PASSEZ À L’ÉTAPE 16.
NOTA: EL PASO15 ES PARA EL MODELO
LC30001E SOLAMENTE.S
I USTED TIENE EL
MODELO LC101-EX, SALTE AL PASO 16.
(Pg. 10)
58 59
2
58 59
L
L
16
16 F
(Pg. 11)
47
53
53
55
17
17
1
1
1
(Pg. 12)
18
18
4
51
52
52
52
51
51
51
WO
WO
WO
51
B
(Pg. 13)
2
2
19
19
L
R
F
CAUTION:
Pinch points!
Watch your
hands.
PRECAUCIÓN:
¡ÁREA SPUNZANTES!
¡MANEJE CON
CUIDADO EXTREMO!
MISE EN GARDE:
POINTS DE PINCEMENT!
ÊTRE EXTRÊMEMENT
PRUDENT!
ALL HARDWARE MUST BE SECURE.
TOUTE LA BOULONNERIE DOIT ÊTRE BIEN À BLOC.
TODOS LOS UTENSILIOS TIENEN QUE ESTAR ASEGURADOS.
(Pg. 14)
20
20
L
R
61
61
60
60
F
DO NOT use lighter fluid if using an electric
charcoal starter. Follow directions furnished
with starter.
Open vent doors, open grill lid and remove
grid. Do not block vent openings.
Pyramid about 50-60 charcoal briquettes in
center.
If you are not using an electric starter, apply
the lighting fluid. Light carefully with a match.
When flames disappear and coals are ½ gray,
use a tool to spread charcoal evenly.
Hint: Add damp wood shavings if desired.
Replace cooking grid, add food and close grill
lid.
If you are using liquid lighter fluid do not add
meat or close grill lid until flames have
disappeared.
(Pg. 15)
Failure to follow these instructions will cause serious bodily injury or death or a fire or explosion
resulting in damage to property.
DO NOT use indoors. For Outdoor use Only!
DO NOT use a charcoal-burning unit indoors due to hazard of carbon monoxide fumes. Lack of ventilation
can cause death.
DO NOT use gasoline or kerosene for lighting and keep these fuels away from the grill.
DO NOT allow children near a hot grill.
DO NOT use under or near unprotected combustible surfaces. Keep combustible surfaces at least one
yard (1 meter) away from all sides of grill.
DO NOT use lighter fluid if using an electric charcoal starter. Follow manufacture’s directions furnished with
starter.
DO NOT move or transport the unit when it is HOT!
DO NOT remove ashes or coals until they are completely burned out and are cold.
DO NOT wear loose clothing while lighting or using the barbecue grill.
Warning: The edges of sheet metal parts can cause injury if not handled with
care. USE EXTREME CAUTION!
USE ONLY where permitted by local codes and regulations!
Plastic bags may cause suffocation. Dispose of all packaging materials properly.
Keep the barbecue grill in a level position at all times.
Use only a method of lighting, which is acceptable to your local codes. The manufacturer of this product
does not assume liability for damage due to excessive heat or use of flammable fuels.
Closing vent doors slightly or all the way can control a Grease Fire. After a grease fire always use care
when opening the grill lid as it may flare up again when exposed to air.
Read and follow all instructions and warnings on charcoal package.
Protective gloves and long handled tools are recommended for use with this barbecue.
NEVER touch the cooking or charcoal grate, or the barbecue to see if they are hot.
To extinguish the coals, close vent doors and the lid all the way.
DANGER
WARNING
CAUTION
BEFORE BEGINNING:
1. Read instructions thoroughly.
2. Check that all parts are present.
3. Handle sheet metal parts with care.
4. Save all instructions when assembly is
complete for future reference.
WHEN COOKING WITH THE GRILL LID IN
CLOSED POSITION.
1. Closing the vent doors partially will restrict
airflow, lower cooking temperature and
increase cooking time.
2. Closing vent doors all the way will put out the
fire.
CCOORRRREECCTTUUSSEEFFOORRBBUUIILLDDIINNGGAAFFIIRREE
H E A T CCO N T R O L HHI N T S
NOTE: Store this product in a dry place. Ashes
will corrode metal rapidly if left in bottom.
Tout défaut d'observer ces directives peut entraîner de sérieuses blessures ou la mort, ou encore
provoquer un incendie ou une explosion pouvant causer des dommages matériels.
NE PAS utiliser à l'intérieur. Pour usage extérieur seulement!
NE PAS UTILISER un barbecue à charbon de bois à l'intérieur, car les émanations d'oxyde de carbone
sont dangereuses. Un manque de ventilation peut entraîner la mort.
NE PAS se servir de kérosène ou d'essence pour allumer le barbecue, ni conserver ce genre de
combustible près du barbecue.
ÉLOIGNER les enfants de l'appareil lorsqu'il est chaud.
NE PAS UTILISER le barbecue au-dessous de surfaces combustibles non protégées. Les surfaces
combustibles doivent être dégagées d'au moins un mètre (une verge) des côtés du barbecue.
NE PAS utiliser un allume-feu liquide lorsqu'on se sert d'un allumeur électrique pour charbon de bois.
Observer le mode d'emploi indiqué par le fabricant de l'allumeur.
NE PAS déplacer ou transporter le barbecue pendant qu'il est CHAUD!
ATTENDRE que les cendres ou les briquettes aient fini de brûler et aient complètement refroidi avant de
les retirer du barbecue.
NE PAS porter de vêtements amples au-dessus du barbecue pendant que vous l'allumez ou que vous
l'utilisez.
Avertissement : MANIPULER AVEC PRUDENCE pour éviter les blessures contre le rebord des
pièces métalliques!
N'UTILISER CE PRODUIT que si les codes et règlements locaux le permettent.
Les sacs en plastique peuvent étouffer. Bien se débarrasser des matériaux d'emballage.
S'assurer que le barbecue est d'aplomb en tout temps.
N'utiliser qu'une méthode d'allumage conforme aux codes locaux. Le fabricant de ce produit n'accepte
aucune responsabilité pour les dommages causés par une chaleur excessive ou l'usage de combustibles
inflammables.
Un feu de graisse peut être maîtrisé en fermant le volet d'évent totalement ou partiellement. Après un feu
de graisse, toujours ouvrir le couvercle avec précaution car il pourrait se renflammer par l'arrivée de l'air.
Lire attentivement le mode d'emploi et observer les directives et avertissements indiqués sur l'emballage de
charbon de bois.
Il est recommandé de porter des gants et d'utiliser des ustensiles à long manche.
NE JAMAIS toucher la grille de cuisson, la grille à charbon de bois ou le barbecue pour voir s'ils sont
chauds.
Pour éteindre les briquettes, fermer complètement les volets d'évent et le couvercle.
(Pg. 16)
DANGER
AVERTISSEMENT
MISE EN GARDE
AVANT DE COMMENCER :
1. Bien lire toutes les instructions.
2. Vérifier s'il n'y a pas de pièces manquantes.
3. Manipuler les pièces de métal avec prudence.
4. Conserver ce livret d'instructions après avoir
terminé l'assemblage.
NE PAS utiliser un allume-feu liquide lorsqu'on se
sert d'un allumeur électrique pour chabon de
bois.
Ouvrir les volets d'évent, soulever le couvercle du
barbecue et retirer les grilles. Ne pas bloquer
l'aération.
Empiler environ 50 à 60 briquettes de charbon de
bois en pyramide au centre du barbecue.
Si on ne se sert pas d'un allumeur électrique,
ajouter l'allume-feu liquide. Allumer prudemment
avec une allumette.
Quand les flammes disparaissent et que les
briquettes deviennent à moitié grises, les étaler
à l'aide d'un ustensile.
Conseil : Ajouter des copeaux de bois humides si
désiré.
Replacer la grille de cuisson, y déposer la
nourriture, puis fermer le couvercle.
Si on se sert d'un allume-feu liquide, ne pas
déposer la viande ni fermer le couvercle du
barbecue avant que les flammes n'aient disparu.
QUAND LE COUVERCLE EST FERMÉ PENDANT
LA CUISSON.
1. Un volet d'évent fermé partiellement réduit le
tirage; la température de cuisson est donc plus basse
et le temps de cuisson est plus long.
2. Un volet d'évent fermé complètement étouffe le
feu.
MMOODDEEDD''EEMMPPLLOOIIAAPPPPRROOPPRRIIÉÉ
ppoouurrpprrééppaarreerrllaabbrraaiissee
C O N S E I L S PPOUR CCO N T R Ô L E R
L A CCH A L E U R
NOTA : Ranger le barbecue dans un endroit sec.
Les cendres corrodent rapidement le métal si
elles sont laissées au fond du barbecue.
(Pg. 17)
Si no sigue estas instrucciones causará graves daños a su cuerpo o la muerte, o un fuego o
explosión que resulte en daños a la propiedad
NO se use en el interior. ¡Sólo para uso en el exterior!
NO use una unidad en donde se quema carbón en el interior de su casa debido al peligro que
representan los gases tóxicos del carbón. La falta de ventilación puede causar la muerte.
NO use gasolina o queroseno para prender el asador y mantenga estos combustibles lejos del asador.
NO permite que se acerquen los niños al asador caliente.
NO USE cerca o debajo de superficies flamables que no estén protegidas. Mantega las superficies
flamables por lo menos a una yarda (1 metro) de distancia del asador.
NO use combustible de encendedor si usa un iniciador eléctrico para el carbón. Siga las instrucciones
del fabricante que acompañan al iniciador.
¡NO mueva o transporte la unidad si está CALIENTE!
NO quite las cenizas o el carbón hasta que se hayan apagado por completo y esté frío.
NO use ropa suelta mientras prende o usa el asador.
Advertencia: Las orillas de las partes hechas con metal laminado pueden producir lesiones si
no se manejan con cuidado. ¡SEA EXTREMADAMENTE PRECAVIDO!
¡ÚSESE SOLAMENTE donde lo permitan los códigos y reglamentos locales!
Las bolsas de plástico pueden producir asfixia. Deseche los materiales de empaque apropiadamente.
Mantenga el asador siempre en posición horizontal.
Use solamente un método de encendido que sea aceptado por los códigos locales. El fabricante de
este producto no se hace responsable por daños causados por calor excesivo o por el uso de
combustibles flamables.
Si cierra parcial o totalmente los puertas de ventilación puede controlar un Fuego causado por Grasa.
Después de un fuego causado por grasa, siempre tenga cuidado al abrir la tapa del asador pues el
fuego se puede levantar nuevamente cuando se vea expuesto al aire.
Lea y siga todas las instrucciones y advertencias en el paquete del carbón.
Se recomienda el uso de guantes protectores y accesorios de cocina con mangos largos al usar este
asador.
NUNCA toque la parrilla para cocinar, el carbón o el asador para verificar si está caliente.
Para apagar el carbón, cierre completamente las puertas de ventilación y la tapa.
PELIGRO
ADVERTENCIA
CUIDADO
ANTES DE COMENZAR:
1. Lea las instrucciones cuidadosamente.
2. Verifique que cuenta con todas las partes.
3. Tenga cuidado con las partes de metal
laminado.
4. Guarde el instructivo cuando haya terminado de
armar el asador para consultarlo en el futuro.
NO use combustible de encendedor si usará un iniciador
eléctrico para carbón. Siga las instrucciones incluidas
con el iniciador..
Abra las puertas de ventilación, abra la tapa del asador y
quite la parrilla. No bloquee las aberturas de ventilación.
Forme en el centro una pirámide de 50-60 con los
pedazos de carbón.
Si no está usando un iniciador eléctrico, aplique el
combustible de encendedor. Enciéndalo
cuidadosamente con un cerillo.
Cuando desaparezcan las llamas y los carbones
estén medio grises, use una herramienta para
distribuir uniformemente el carbón.
Recomendación: Si lo desea, puede agregar virutas de
madera húmeda.
Coloque nuevamente la parrilla, ponga la comida y cierre
la tapa del asador.
Si usó un encendedor líquido no ponga la carne ni cierre
la tapa del asador hasta que hayan desaparecido las
llamas.
SI COCINA CON LA TAPA DEL ASADOR
CERRADA.
1.Cerrar parcialmente las puertas de ventilación
restringirá el flujo de aire, se bajará la temperatura
de cocción y se aumentará el tiempo de cocción.
2. Cerrar las puertas de ventilación por completo
apagará el fuego.
UUSSOOCCOORRRREECCTTOOPPAARRAAHHaacceerruunnffuueeggoo
RECOME N D AC I O NE S PPARA
CO N T RO L AR EELCCAL O R
NOTA: Guarde este producto en un lugar seco.
Las cenizas oxidarán rápidamente el metal si se
dejan en el asador.
(Pg. 18)
The Coleman Company, Inc. (“Coleman”) warrants that
this product shall be free of mechanical and electrical
defects in material and workmanship to the original
purchaser from the date of purchase for the time set forth
below. This warranty does not cover normal wear of parts
or damage resulting from any of the following; negligent
use or misuse of the product, use of improper voltage or
current, use contrary to operating instructions, or
disassembly, repair or alteration by any person other than
an authorized service center. This limited warranty applies
to all parts for a one- (1) year period. We DO NOT
WARRANT in any way the paint finish of the product.
Coleman's obligation is limited to repair or replacement, at
Coleman's option, of the warranted product or part.
DO NOT RETURN THIS PRODUCT OR ANY PART TO
THE PLACE OF PURCHASE OR TO THE
MANUFACTURER.
Returns should be made to an authorized service center
only. Answers to questions regarding this warranty or for
your nearest authorized service center may be obtained
by calling toll free 1-800-356-3612.
DISCLAIMER
Product repair or replacement as provided under this
warranty is your exclusive remedy. COLEMAN SHALL
NOT BE LIABLE FOR ANY INCIDENTAL OR
CONSEQUENTIAL DAMAGES OR BREACH OF ANY
EXPRESS OR IMPLIED WARRANTY ON THIS
PRODUCT OR ANY PART THEREOF, EXCEPT TO THE
EXTENT PROHIBITED BY APPLICABLE LAW, ANY
IMPLIED WARRANTY OF MERCHANTABILITY OR
FITNESS FOR A PARTICULAR PURPOSE ON THIS
PRODUCT OR PART THEREOF IS LIMITED IN
DURATION TO THE DURATION OF THE ABOVE
WARRANTY AS TO THE PARTICULAR PART. Some
states do not allow the exclusion or limitation of incidental
or consequential damages, or allow limitation on how long
an implied warranty lasts, so the above limitation or
exclusion may not apply to you. This warranty gives you
specific legal rights, and you may also have other rights,
which vary, from state to state.
This warranty is not valid in Mexico.
LIMITED WWARRANTY
The Coleman Company, Inc. («Coleman») garantit au
premier acheteur, à partir de la date d'achat et pour la
durée indiquée ci-dessous, que ce produit est exempt de
tout défaut mécanique ou électrique dans les matériaux et
la fabrication. La garantie ne couvre pas l'usage normal
des pièces ou les dommages causés par l'usage
négligent, l'utilisation incorrect du produit, l'utilisation
inadéquat du voltage ou du courant, l'utilisation à
l'encontre du mode de fonctionnement, et le
désassemblage, les réparations ou les altérations
effectués par toute personne ne travaillant pas dans un
centre de service autorisé. La garantie limitée s'applique à
toutes les pièces pour une durée d'un (1) an. Cependant,
la garantie NE COUVRE PAS, en aucun cas, l'enduit de
peinture du produit. L'obligation de Coleman se limite à la
réparation ou au remplacement des pièces et du produit
garantis, selon sa discrétion.
SVP NE PAS RETOURNER LE PRODUIT OU LES
PIÈCES AU LIEU D'ACHAT OU AU FABRICANT.
Ceux-ci doivent être retournés à un centre de service
autorisé. Pour toute question concernant la garantie ou
pour obtenir les coordonnées du centre de service
autorisé le plus près de chez vous, composez le numéro
sans frais 1-800-356-3612.
RENONCIATION
Les réparations ou le remplacement des pièces ou du
produit qui sont stipulés dans cette garantie sont les seuls
droits et recours du consommateur. LA SOCIÉTÉ
COLEMAN NE PEUT ÊTRE TENUE RESPONSABLE
POUR TOUT DOMMAGE ACCIDENTEL OU INDIRECT
OU POUR BRIS DE GARANTIE EXPRESSE OU TACITE
EN CE QUI A TRAIT À CE PRODUIT OU CERTAINES
PIÈCES. À L'EXCEPTION OÙ CETTE DISPOSITION
SOIT INTERDITE PAR LA LOI, TOUTE GARANTIE
TACITE DE QUALITÉ MARCHANDE OU DE JUSTESSE
POUR UN USAGE PARTICULIER DE CE PRODUIT OU
DE CES PIÈCES EST LIMITÉE À LA DURÉE DE LA
GARANTIE MENTIONNÉE CI-DESSUS. Certaines
provinces ne permettent pas qu'il y ait exclusion ou
limitation des dommages accidentels ou indirects, ou qu'il
y ait limitation de la durée de la garantie tacite. Dans ce
cas, les limites et exclusions mentionnées ci-dessus ne
peuvent s'appliquer. Les dispositions de la présente
garantie procurent des droits particuliers au
consommateur, et il est possible que d'autres droits soient
applicables en vertu des lois dans chacune des provinces.
Cette garantie n'est pas valable au Mexique.
G A R A N T I E LLI M I T É E
La Empresa Coleman. Inc (“Coleman”) garantiza que este
producto no tiene defectos mecánicos o eléctricos de
material y mano de obra. Esta garantía es válida para el
comprador original a partir de la fecha inicial de compra y
hasta el tiempo indicado a continuación. Esta garantía no
cubre el desgaste normal de las partes o daños causados
por cualquiera de las siguientes razones: uso negligente o
inapropiado del producto, uso con voltaje o corriente
inapropiado, uso diferente al establecido en las
instrucciones de operación, desarmado, reparación o
alteración por cualquier que no sea Coleman o un centro
de servicio autorizado. Esta garantía aplica a todas las
piezas por un periodo de tiempo de un (1) año. NO
GARANTIZAMOS de ninguna manera el acabado de la
pintura del producto. Coleman elegirá si repara o
reemplaza el producto o cualquiera de sus componentes
que presenten defectos durante el periodo de garantía.
NO REGRESE EL PRODUCTO O ALGUNAS DE SUS
PARTES AL LUGAR DE COMPRA O AL FABRICANTE
Las devoluciones deben proceder sólo mediante un centro
de servicio autorizado. Respuestas a preguntas referentes
a este garantía o referente al centro de servicio autorizado
más cercano pueden obtenerse llamando gratis al 1-800-
356-3612.
RESPONSABILIDAD LIMITADA
El único remedio según la presente garantía es la
reparación o reemplazo. COLEMAN NO SE HACE
RESPONSABLE DE CUALQUIER DAÑO INCIDENTAL O
CONSECUENCIAL CAUSADO POR EL
INCUMPLIMIENTO DE CUALQUIER GARANTÍA
EXPLÍCITA O IMPLÍCITA POR ESTE PRODUCTO O
ALGUNA DE SUS PARTES. EXCEPTO HASTA DONDE
LO PROHIBA LA LEY APLICABLE, CUALQUIER
GARANTÍA IMPLÍCITA DE COMERCIALIZACIÓN O
VIDA PARA UN PROPÓSITO EN PARTICULAR SE
LIMITA EN LA DURACIÓN POR LA VIGENCIA DE LA
PRESENTE GARANTÍA. Algunos estados, provincias o
jurisdicciones no permiten que se excluya o limite cualquier
daño incidental o consecuencial o se limite a cuánto pueda
durar una garantía, de manera que las limitaciones o
exclusiones no aplican a usted. Esta garantía le da el
derecho legal, y puede tener otros derechos que varíen
entre estados o provincias.
Esta garantía no aplica en México
G A R A N T I A LLI M I T A D A
(Pg. 19)
2
3
3
16
16
4
4
5
5
5
42
27
32
25
41
60
61
61
40
58
59
51 52
50 50
43 55
47
53
56
45
44
4
4
18
18 49
63
62
13
13
11
9L
9R
11
48
46
64
41
11
2
(1-PRE-ASSEMBLED
PRÉ-ASSEMBLÉE
PREVIAMENTE ARMADO)
(1-PRE-ASSEMBLED
PRÉ-ASSEMBLÉE
PREVIAMENTE ARMADO)
17
PRE-ASSEMBLED
PRÉ-ASSEMBLÉE
PREVIAMENTE
ARMADO
8
BQ
2
(5-PRE-ASSEMBLED
PRÉ-ASSEMBLÉE
PREVIAMENTE ARMADO)
4
7
(Pg. 20)
2
3
4
5
9L
9R
11
13
16
18
25
27
32
40
41
42
43
44
45
46
47
48
49
50
51
52
53
55
56
58
59
60
61
62
63
64
1
1
1
1
1
1
1
2
2
1
1
1
1
1
1
1
1
1
1
1
4
1
1
1
1
1
1
1
1
1
1
1
1
1
1
1
1
1
10010A2311
10030-5401
10010-3011
10010-3021
10010-2511
10010-3111
10010-3111
10010-2611
10010-2611
10010-1571
10010-0701
10010-3601
10010-3601
10010-3601
10010-2381
10010-2381
10010A2111
10010-1151
10010-5401
10010-5401
10010-1161
10010-1211
10010-1171
10010-3151
10010-2381
10010-2381
10010-2381
10010-1211
10010-2201
10010-2211
10010-2201/10010-2211
10010-2201/10010-2211
10010-2201/10010-2211
10010-5391
10010-5421
10010-1551
10010-1551
10010-1171
Key # Qty.
Part #
Full Base
Axle & Hair Pins (2 ea)
(4) Legs (Black) & (2) Feet
(4) Legs (Stainless Steel) & (2) Feet
(4) Leg Brackets
Left Side Table
Right Side Table
Side Brackets
Side Brackets
Large Wheel Set (2 pc)
(2) Feet
Control Panel
Control Assembly
Control Knob
Left Hinge Link
Right Hinge Link
Bottom Casting
Liner
Lift Assembly
(2) Lift Wire Brackets
Handle Grip
Vent Shield
Vent Ring
Ash Pan Support Wire
(2) Hinge Brackets
(4) Hinge Pins
(2) Back Hinge Links
Top Vent
Grill Lid (Green)
Grill Lid (Black)
Nameplate
Lid Handle
Handle Insulator
Charcoal Grate
Cooking Grid
Ash Pan
Ash Pan Handle
Vent Ring Grip
Discription
2
3
4
5
9L
9R
11
13
16
18
25
27
32
40
41
42
43
44
45
46
47
48
49
50
51
52
53
55
56
58
59
60
61
62
63
64
1
1
1
1
1
1
1
2
2
1
1
1
1
1
1
1
1
1
1
1
4
1
1
1
1
1
1
1
1
1
1
1
1
1
1
1
1
1
10010A2311
10030-5401
10010-3011
10010-3021
10010-2511
10010-3111
10010-3111
10010-2611
10010-2611
10010-1571
10010-0701
10010-3601
10010-3601
10010-3601
10010-2381
10010-2381
10010A2111
10010-1151
10010-5401
10010-5401
10010-1161
10010-1211
10010-1171
10010-3151
10010-2381
10010-2381
10010-2381
10010-1211
10010-2201
10010-2211
10010-2201/10010-2211
10010-2201/10010-2211
10010-2201/10010-2211
10010-5391
10010-5421
10010-1551
10010-1551
10010-1171
Réf.#Qté.
No de pièce
Embase de montage
Goupilles d'essieu
(4) Pieds (Negro) & (2) Embouts de pied
(4) Pieds (d’acier inox) & (2) Embouts de pied
Supports de pied
Tablette latérale gauche
Tablette latérale droite
Support latéral
Support latéral
Roues
(2) Embouts de pied
Tableau de commande
Ensemble de réglage
Bouton de réglage
Bras de liaison gauche
Bras de liaison droit
Coquille inférieure
Plaque de revêtement
Ensemble de levage
(2) Étriers de levage
Écran d'évent
Manche de poignée
Anneau d'évent
Étrier de bac à braise
(2) Patte de charnière
(4) Broches de charnière
(2) Bras de liaison arrière
Évent supérieur
Couvercle de barbecue (Verde)
Couvercle de barbecue (Negro)
Plaque du fabricant
Poignée de couvercle
Isolant de poignée
Grille à charbon de bois
Grille de cuisson
Bac à braise
Poignée de bac à braise
Manche de Anneau d'évent
Description
2
3
4
5
9L
9R
11
13
16
18
25
27
32
40
41
42
43
44
45
46
47
48
49
50
51
52
53
55
56
58
59
60
61
62
63
64
1
1
1
1
1
1
1
2
2
1
1
1
1
1
1
1
1
1
1
1
4
1
1
1
1
1
1
1
1
1
1
1
1
1
1
1
1
1
10010A2311
10030-5401
10010-3011
10010-3021
10010-2511
10010-3111
10010-3111
10010-2611
10010-2611
10010-1571
10010-0701
10010-3601
10010-3601
10010-3601
10010-2381
10010-2381
10010A2111
10010-1151
10010-5401
10010-5401
10010-1161
10010-1211
10010-1171
10010-3151
10010-2381
10010-2381
10010-2381
10010-1211
10010-2201
10010-2211
10010-2201/10010-2211
10010-2201/10010-2211
10010-2201/10010-2211
10010-5391
10010-5421
10010-1551
10010-1551
10010-1171
Clave # Cantidad
Parte #
Base completa
Perno del eje
(4) Piernas (Noir) & (2) Patas
(4) Piernas (Acero Inoxidable) & (2) Patas
Soportes de pie
Mesa lateral izquierda
Mesa lateral derecha
Apoyo lateral
Apoyo lateral
Ruedas
(2) Patas
Panel de control
Sistema de control
Botón de control
Eje izquierdo de bisagra
Eje derecho de bisagra
Casco inferior
Alineador
Sistema de izado
(2) Soporte de alambre de izado
Proteccion de ventilación
Asidero
Anillo de ventilación
Alambre de apoyo de la bandeja de ceniza
(2) Abrazadera de bisagra
(4) Pernos de bisagra
(2) Ejes traseros de bisagra
Ventilación superior
Tapa del asador (Vert)
Tapa del asador (Noir)
Placa de datos
Mango de la tapa
Aislamiento del mango de la tapa
Parrilla para carbón
Parrilla de cocción
Bandeja para ceniza
Mango de la bandeja para ceniza
Asidero de Anillo de ventilación
Descripción

Other manuals for LC30001E

1

This manual suits for next models

1

Other Coleman Grill manuals

Coleman 3000 Series LG30610EB User manual

Coleman

Coleman 3000 Series LG30610EB User manual

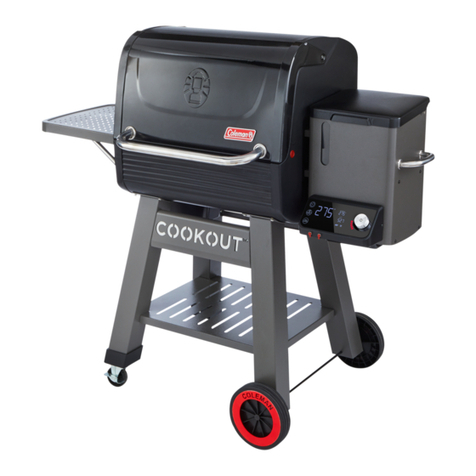
Coleman COOKOUT PELLET GRILL User manual

Coleman

Coleman COOKOUT PELLET GRILL User manual

Coleman EVEN HEAT User manual

Coleman

Coleman EVEN HEAT User manual

Coleman 4000 Series LG40811E User manual

Coleman

Coleman 4000 Series LG40811E User manual

Coleman Even Heat 85-3068-0 User manual

Coleman

Coleman Even Heat 85-3068-0 User manual

Coleman 9959 Series User manual

Coleman

Coleman 9959 Series User manual

Coleman 84-3140-6 User manual

Coleman

Coleman 84-3140-6 User manual

Coleman 9930 Series User manual

Coleman

Coleman 9930 Series User manual

Coleman RoadTrip 9945-700 User guide

Coleman

Coleman RoadTrip 9945-700 User guide

Coleman EVEN HEAT User manual

Coleman

Coleman EVEN HEAT User manual

Coleman 8450 Series User manual

Coleman

Coleman 8450 Series User manual

Coleman 5100 LP Gas Series User manual

Coleman

Coleman 5100 LP Gas Series User manual

Coleman Gas Barbecue User manual

Coleman

Coleman Gas Barbecue User manual

Coleman EvenHeat 85-3092-0 User manual
Coleman

Coleman EvenHeat 85-3092-0 User manual

Coleman 5600 Series 9990-646 Application guide

Coleman

Coleman 5600 Series 9990-646 Application guide

Coleman 5100 Series 9990-132 Application guide

Coleman

Coleman 5100 Series 9990-132 Application guide

Coleman EvenHeat Series User manual

Coleman

Coleman EvenHeat Series User manual

Coleman LG206-SPB User manual

Coleman

Coleman LG206-SPB User manual
Coleman 3300 Series DT331-BBF User manual

Coleman

Coleman 3300 Series DT331-BBF User manual

Coleman 2000 Series LG200-EDB User manual

Coleman

Coleman 2000 Series LG200-EDB User manual

Coleman 9949 Series User manual

Coleman

Coleman 9949 Series User manual

Coleman 9922-750 User manual

Coleman

Coleman 9922-750 User manual

Coleman 9995- Series User manual

Coleman

Coleman 9995- Series User manual

Coleman CM9916 User manual

Coleman

Coleman CM9916 User manual

Popular Grill manuals by other brands

Fisher & Paykel DCS BFGC-30 Installation instructions and user guide

Fisher & Paykel

Fisher & Paykel DCS BFGC-30 Installation instructions and user guide

Weber Q2200 owner's manual

Weber

Weber Q2200 owner's manual

Weber Performer instruction manual

Weber

Weber Performer instruction manual

Backyard GBT1321WRS owner's manual

Backyard

Backyard GBT1321WRS owner's manual

BORETTI Bernini use and care manual

BORETTI

BORETTI Bernini use and care manual

YATO YG-20013 instruction manual

YATO

YATO YG-20013 instruction manual

Barton 96811 Owner's manual and safety instructions

Barton

Barton 96811 Owner's manual and safety instructions

TEFAL GC713D40 Instructions for use

TEFAL

TEFAL GC713D40 Instructions for use

Bartscher GP1200 instruction manual

Bartscher

Bartscher GP1200 instruction manual

ASGUN K96BHAA use and care manual

ASGUN

ASGUN K96BHAA use and care manual

BBQ GFS2616AD-1 instruction manual

BBQ

BBQ GFS2616AD-1 instruction manual

KitchenAid 720-0891B Installation Instructions and Use & Care Guide

KitchenAid

KitchenAid 720-0891B Installation Instructions and Use & Care Guide

KitchenAid KFRS271T Installation Instructions and Use & Care Guide

KitchenAid

KitchenAid KFRS271T Installation Instructions and Use & Care Guide

George Foreman GRP100 Series owner's manual

George Foreman

George Foreman GRP100 Series owner's manual

Matador LEGEND 4 Reference manual

Matador

Matador LEGEND 4 Reference manual

Premium PG18 Use & care manual

Premium

Premium PG18 Use & care manual

Bull 47628 Assembly & operating instructions

Bull

Bull 47628 Assembly & operating instructions

NUTRICHEF PKGRST46 user manual

NUTRICHEF

NUTRICHEF PKGRST46 user manual

manuals.online logo
manuals.online logoBrands
  • About & Mission
  • Contact us
  • Privacy Policy
  • Terms and Conditions

Copyright 2025 Manuals.Online. All Rights Reserved.