Collomix VIBA 15 Owner's manual

Edition 2.3-05
Operating and
Servicing Manual
Shaker Viba 15 &
Viba 25
Machine number:
Year of manufacture:

Shaker VIBA 15 &VIBA 25 Collomix Rühr- und Mischgeräte GmbH
D-85080 Gaimersheim

Collomix Rühr- und Mischgeräte Gmbh Shaker VIBA 15 &VIBA25
D-85080 Gaimersheim
Edition 2.3-05 1
Contents
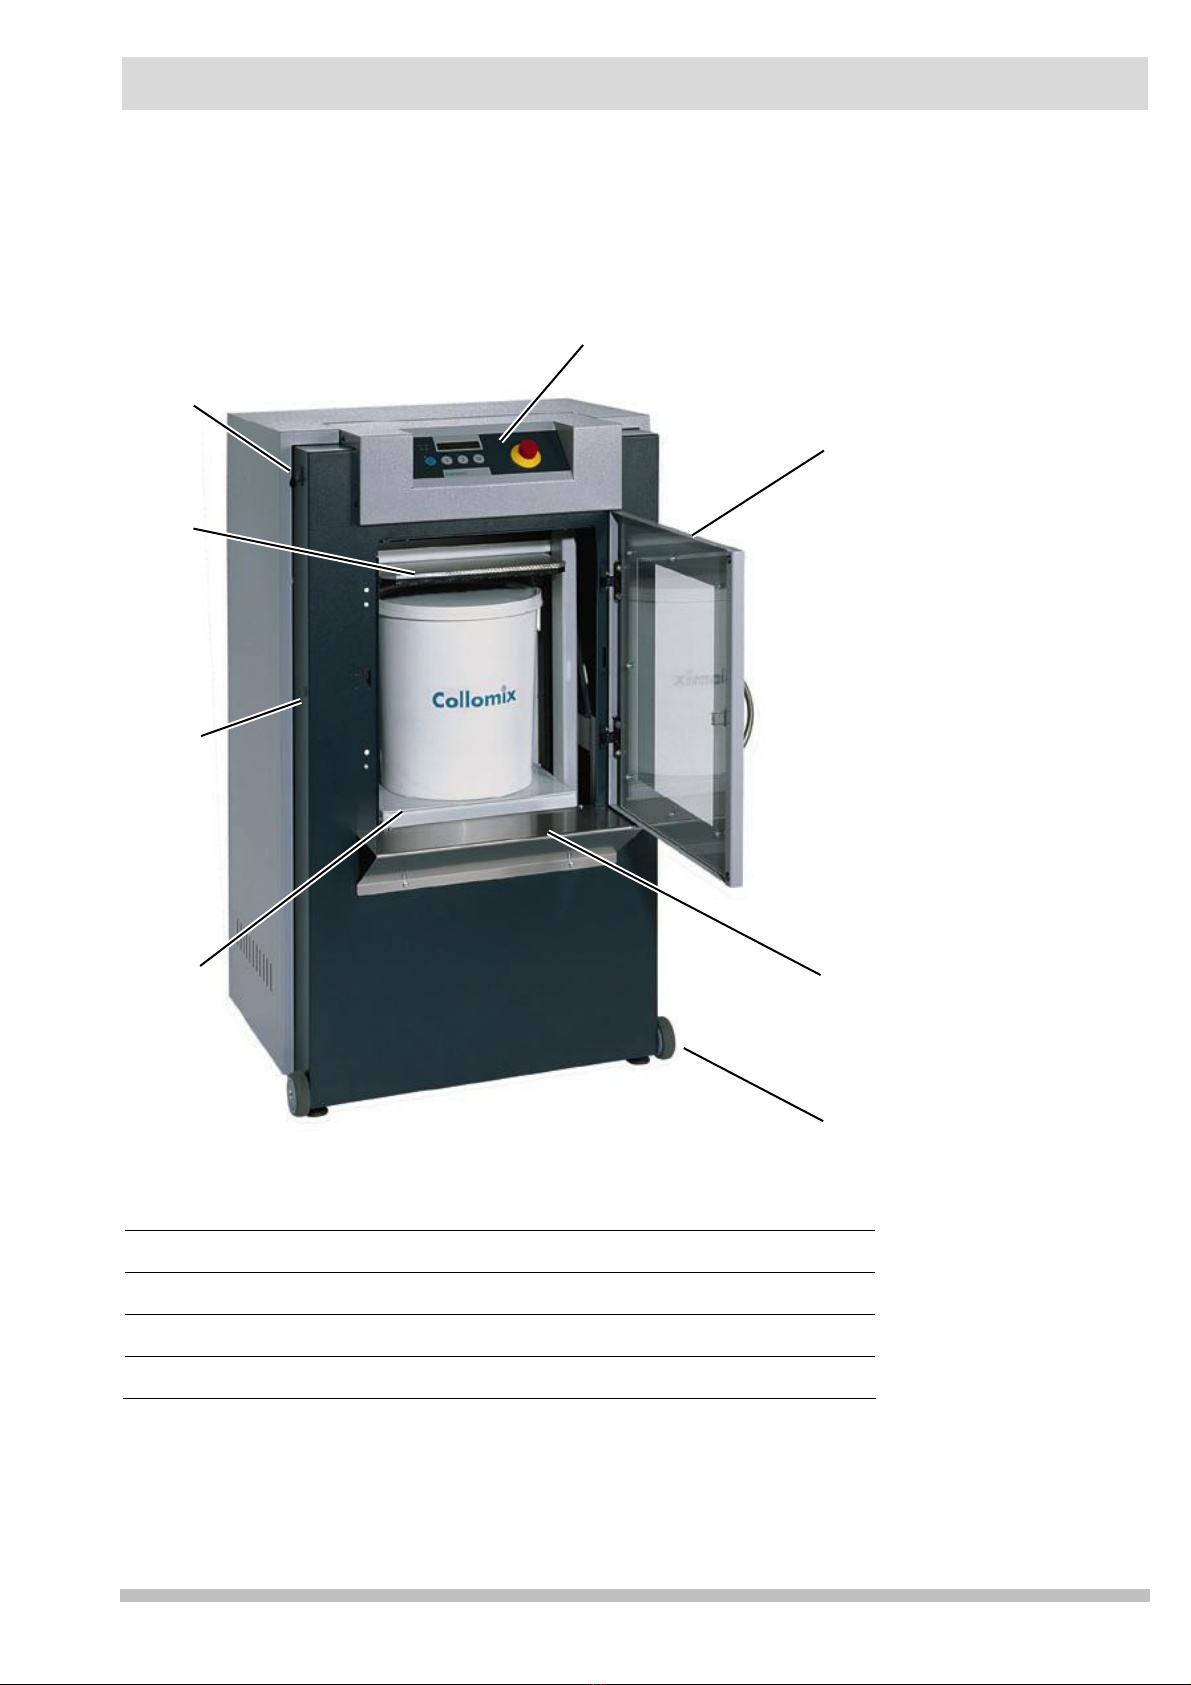
1. Layout drawings ...................................................................................3
1.1 Machine components ........................................................................... 3
1.2 Variants ............................................................................................... 4
1.3 Operator's controls ............................................................................... 5
2. General information ............................................................................6
2.1 Proper use............................................................................................ 6
2.2 Working principle ................................................................................. 6
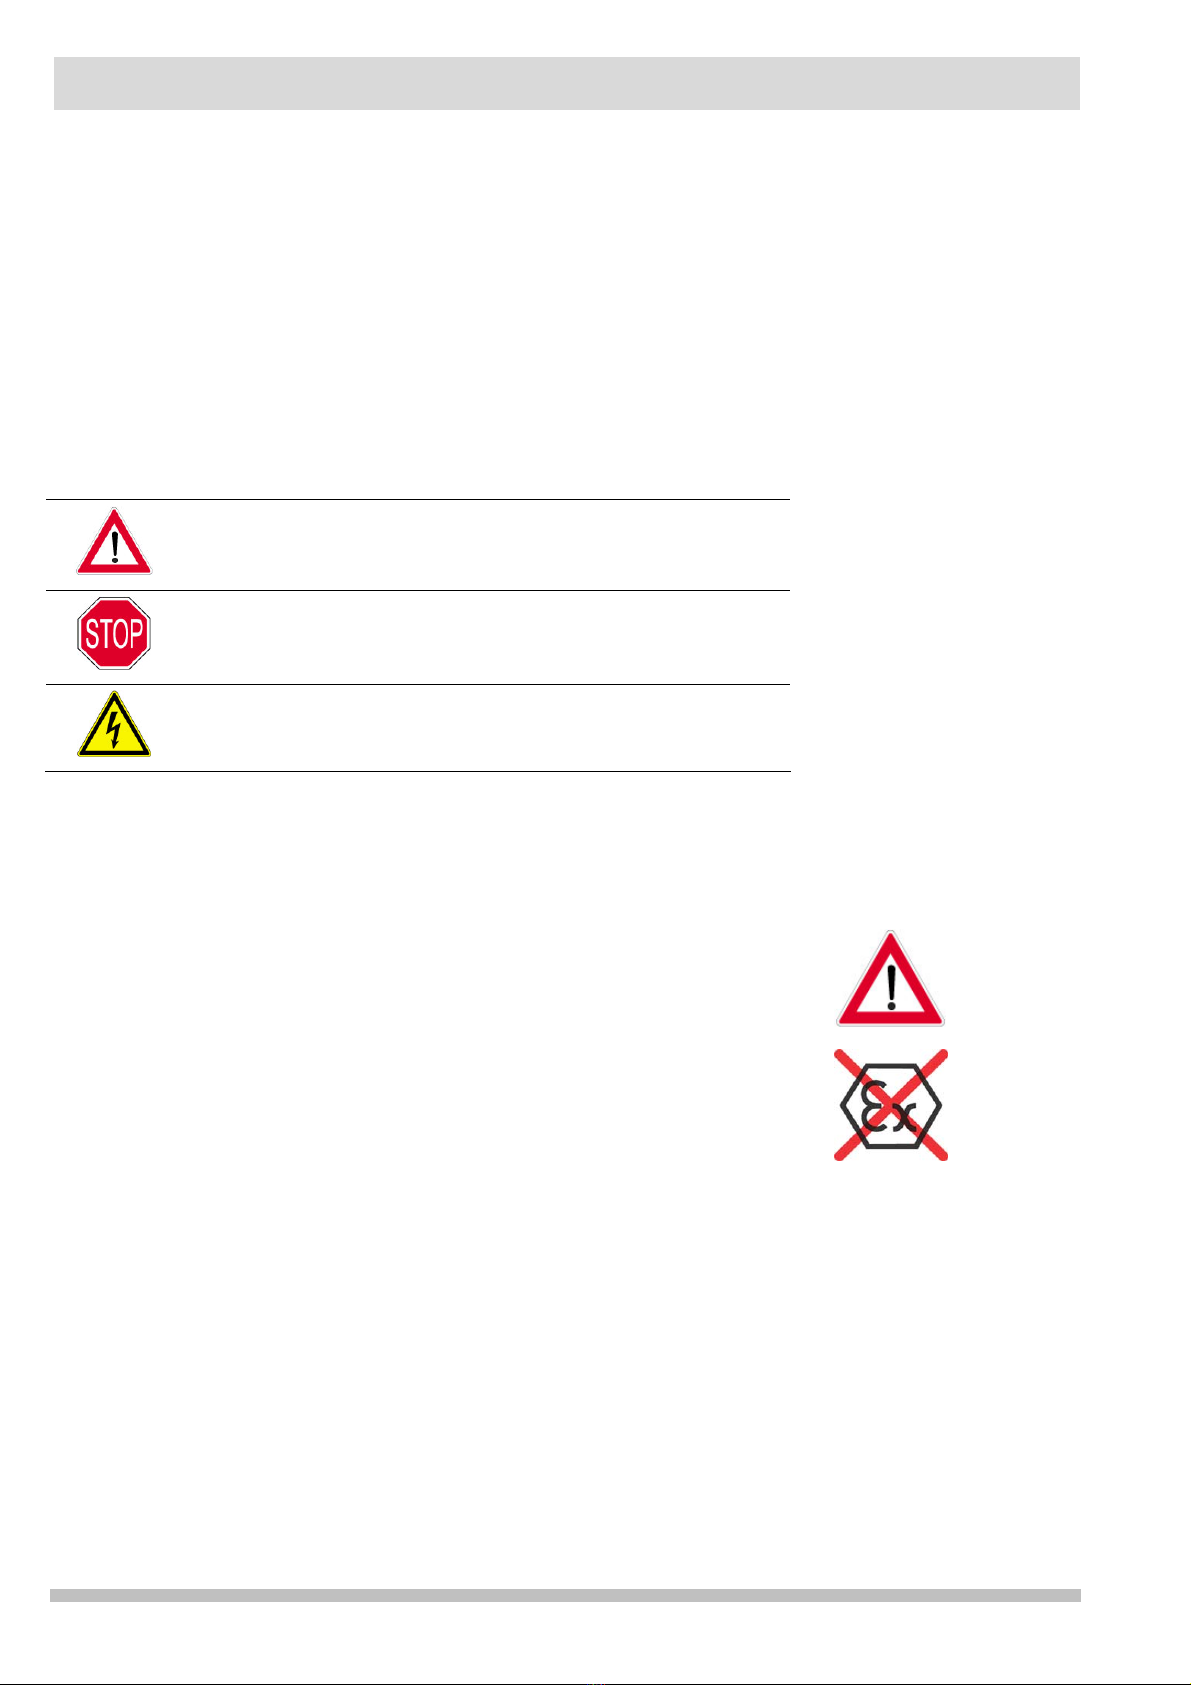
3. Safety instructions ................................................................................7
3.1 Safety-relevant components.................................................................. 8
4. Using the machine for the first time ....................................................9
4.1 Installing the machine – Transport notes ............................................... 9
4.2 Removing the transport brace ............................................................... 9
4.3 Fitting the loading shelf and the door handle........................................ 9
4.4 Moving the machine........................................................................... 10
4.5 Manual door release .......................................................................... 10
5. Operation ...........................................................................................11
5.1 Switching on the machine................................................................... 11
5.2 Trial run ............................................................................................. 11
5.3 Loading the container......................................................................... 11
5.4 Starting the mixing cycle..................................................................... 12
5.5 Ending the mixing cycle ...................................................................... 12
5.6 Stand-by ............................................................................................ 12
5.7 Triggering the Emergency Stop function .............................................. 13
5.8 Average mixing cycles ........................................................................ 13
6. Program flow......................................................................................14
6.1 Switching on....................................................................................... 14
6.2 Mixing cycle........................................................................................ 14
7. The service menu................................................................................15
7.1 Activating the service menu ................................................................ 15
7.2 Operator prompting ........................................................................... 16
7.3 Service menu sequence ...................................................................... 17
7.4 Setting the operating parameters........................................................ 18
7.4.1 Switching output function test (TEST OUTPUTS) ............................................... 18
7.4.2 Changing the mixing times (TIME 1 – 3)........................................................... 18
7.4.3 Low/high clamping pressure changeover point (SMALL POT HEIGHT) *only VIBA
25 19
7.4.4 Opening and closing the mixing unit (DC-MOT FREERUN) ............................... 19
7.4.5 Setting the end stop of the mixing unit (DC-MOT ENDPOS).............................. 20
7.4.6 Setting the low clamping pressure (DC-MOT CLAMP LOW) *only VIBA 25 ....... 21
7.4.7 Setting the high clamping pressure (DC-MOT CLAMP HIGH)........................... 22
7.4.8 Switching on the shaker motor (SHAKER MOT)................................................. 23
7.4.9 Saving changes (SAVE TO EPROM) .................................................................. 23
7.4.10 Deactivating the service menu.................................................................. 24

Shaker VIBA 15 &VIBA25 Collomix Rühr- und Mischgeräte GmbH
D-85080 Gaimersheim
2Edition 2.3-05
8. Layout of the control system...............................................................25
8.1 Rotary pulse encoder *only VIBA 25 ....................................................26
8.2 Door switch ........................................................................................27
8.3 Shaker motor......................................................................................28
9. Messages and troubleshooting..........................................................29
9.1 Cancelling messages ..........................................................................29
9.2 Initialization........................................................................................30
9.3 Error messages ...................................................................................31
10. Maintenance and cleaning ................................................................32
10.1 Inspections .........................................................................................32
10.2 Cleaning ............................................................................................32
10.3 Maintenance intervals.........................................................................32
10.4 Maintenance checklist.........................................................................33
10.5 Spare parts list....................................................................................34
10.6 Exploded drawings..............................................................................39
10.6.1 Housing .................................................................................................. 39
10.6.2 Housing VIBA 15 ..................................................................................... 40
10.6.3 Housing VIBA 15 & VIBA 25 INOX ........................................................... 41
10.6.4 Housing VIBA 25 ..................................................................................... 42
10.6.5 Housing VIBA 25 DOOR .......................................................................... 43
10.6.6 Door VIBA 15 and VIBA 15-25 INOX ....................................................... 44
10.6.7 Door Viba 25........................................................................................... 45
10.6.8 Door Viba 25 DOOR ............................................................................... 46
10.6.9 Sliding door guide Viba 25 DOOR ........................................................... 47
10.6.10 Mixing frame Viba 15 .............................................................................. 48
10.6.11 Mixing frame Viba 25 .............................................................................. 49
10.6.12 Clamp motor VIBA 25.............................................................................. 50
10.6.13 Oscillating frame Viba ............................................................................. 51
10.6.14 Drive Viba ............................................................................................... 52
10.6.15 Control unit............................................................................................. 53
11. Annex .................................................................................................54
11.1 Technical data ....................................................................................54
11.2 Warranty ............................................................................................54
11.3 Recycling and disposal ........................................................................55
11.4 Declaration of CE conformity ..............................................................55

Collomix Rühr- und Mischgeräte Gmbh Shaker VIBA 15 &VIBA25
D-85080 Gaimersheim
Edition 2.3-05 3
1. Layout drawings
1.1 Machine components
Machine components
1. Mixing table 5. Control panel
2. Manual door release 6. Door
3. Clamping plate 7. Loading shelf
4. Main switch 8. Roller
5
4
2
1 7
6
3
8

Shaker VIBA 15 &VIBA25 Collomix Rühr- und Mischgeräte GmbH
D-85080 Gaimersheim
4Edition 2.3-05
1.2 Variants
VIBA 15 VIBA 15 INOX &VIBA 25 INOX
VIBA 25 VIBA 25 DOOR

Collomix Rühr- und Mischgeräte Gmbh Shaker VIBA 15 &VIBA25
D-85080 Gaimersheim
Edition 2.3-05 5
1.3 Operator's controls
Control buttons
Button E
•OPEN the clamping unit
•QUIT stand-by mode
•STOP mixing cycle prematurely
•ACKNOWLEDGE messages
Button I •Mixing cycle I (works setting: 1:00 minutes)
Button II •Mixing cycle II (works setting: 2:00 minutes)
Button III •Mixing cycle III (works setting 3:00 minutes)
EMERGENCY STOP
Control buttons
LCD display
LEDs for 230 V mains voltage and 24V control voltage

Shaker VIBA 15 &VIBA25 Collomix Rühr- und Mischgeräte GmbH
D-85080 Gaimersheim
6Edition 2.3-05
2. General information
Before you use the machine for the first time, please read this operating manual
and the safety instructions carefully and follow the information exactly.
Keep this manual safe and within immediate reach.
The machine is to be used only by persons who have read the operating manual and
who are acquainted with the occupational safety and accident prevention regulations in
force in your country.
Those parts of the manual that are important for the correct and safe operation
of the machine are printed in bold type.
Pictograms and symbols used in this manual
The "caution" symbol is used to indicate a situation in which persons
are at risk of suffering physical injury. The warning must be heeded at
all costs.
The "stop" symbol is used to indicate a situation in which the machine
is at risk of being damaged.
The "hazardous electric voltage" symbol is used to indicate live
components that may pose a risk to life and limb.
2.1 Proper use
The Viba 25 is a stationary shaker for closed, tightly closing, round, rectangular and oval
containers made of metal or plastic.
It can be used to mix all types of paints, master batches, house paints, industrial paints
and other low-viscosity materials.
Practical applications are to be found in the wholesale and retail paint trade, in the paint,
lacquer and chemical industries, and many other related sectors. This shaker is
particularly ideal as a component in paint dosing systems.
The VIBA can be used with containers from 40 mm to 400 mm in height with a maximum
footprint of 340 x 370 mm.
Never use the machine in areas where a potentially explosive atmosphere may
arise, either permanently or temporarily.
2.2 Working principle
Material in the clamp-mounted container is mixed by means of linear forces of inertia
generated through an alternating orbital shaking movement.
This mixing principle guarantees that low-viscosity materials are prepared at high speed.
The duration of the mixing cycles can be programmed as required by a service technician
using the control buttons (works setting: 60,120 and 180 seconds).

Collomix Rühr- und Mischgeräte Gmbh Shaker VIBA 15 &VIBA25
D-85080 Gaimersheim
Edition 2.3-05 7
3. Safety instructions
For your own protection, read the safety instructions carefully and follow them
exactly.
Observe the electrical regulations in force at your company and those listed in this
manual when you install the machine.
Wear safety shoes when installing or relocating the machine.
Make sure the machine stands securely.
Keep your work place tidy. There is a higher risk of accidents at an untidy work place.
Consider ambient conditions. Do not install the machine in damp rooms. Provide good
lighting and good access.
Keep third parties away from your work place.
Close the machine when it is not being used. Projecting parts may injure you and
others.
Take care of the power cable. Make sure it is laid neatly and where it cannot be
damaged. Protect the cable in particular from heat, sharp edges, oil and acid. Check the
cable and plug regularly for signs of damage. Use only suitably approved extension
cables and plugs.
Do not overload the machine. Check that the weight and dimensions of the
mixing container are suitable.
Never lift large and heavy containers into the machine by yourself.
Use only undamaged and sturdy mixing containers. If you don't, the container may burst.
The mixing container has to be closed completely.
Make sure that the mixing container sits in central position on the mixing table.
Secure the container handles with rubber bands or adhesive tape.
Take good care of the machine. Make sure that the moving parts move smoothly and
without restriction. Remove any dirt immediately. Follow the maintenance instructions.
Do not use high-pressure equipment to clean the machine.
Make sure that the safety devices work properly and are clean.
Do not use the machine if the door or the acrylic glass window is damaged. If the
acrylic glass window is broken, do not reach into the interior! There is a high
risk of injury from rotating components.
Do not start the machine with the housing open. Pull out the power plug! There
is a high risk of accidents!
Before switching on the machine after maintenance work, check that no wrenches or
setting tools are left inside the machine compartment.
Examine the machine for signs of damage. Check regularly that all parts are in good
working order. Have repairs carried out only by the manufacturer or an approved
specialist.

Shaker VIBA 15 &VIBA25 Collomix Rühr- und Mischgeräte GmbH
D-85080 Gaimersheim
8Edition 2.3-05
Use only original replacement parts.
Do not start the machine if any safety devices or switches are defective.
Always pull out the power plug before carrying out any maintenance work.
The VIBA is not to be operated in any way different to that described in the
operating manual.
In particular it is prohibited
•to operate the machine if any parts of the housing are missing
•to operate the machine with any defective parts
•to bridge or deactivate any safety devices
•to operate the machine in areas with a potentially explosive atmosphere
•to use and install non-original replacement parts
•to run the machine for longer than 20 minutes (risk of the mixing container bursting)
3.1 Safety-relevant components
Closed housing
The housing is a stationary safeguard and partition that can only be opened with the use
of tools.
Machine door with interlock
The door is an interlocking safeguard and partition. It is impossible to start the machine
when the door is open. The door is not unlocked until after the mixing cycle is ended and
the mixing container released.
Emergency Stop function:
With the Emergency Stop function you can
•reliably interrupt the control voltage supply so that the machine is unable to move.
•bring the machine to a halt when it is running.

Collomix Rühr- und Mischgeräte Gmbh Shaker VIBA 15 &VIBA25
D-85080 Gaimersheim
Edition 2.3-05 9
4. Using the machine for the first time
4.1 Installing the machine – Transport notes
Your VIBA Shaker is delivered in reusable cardboard packaging on a wooden pallet.
Use a suitable hoist to lift the machine off the pallet. Be particularly careful with the
bottom of the machine so that no bearing parts are damaged or bent. Weight: 168 kg.
Place the machine on firm, level ground and check the proper alignment by using a
water level. Slight unevenness can be compensated with the height-adjustable machine
feet using a size 17 fork wrench. To ensure that the machine runs as smoothly as
possible, always set the machine feet as low as possible.
4.2 Removing the transport brace
The mixing unit is secured by a lashing strap to protect it from damage in
transit. This transport brace has to be removed before you put the machine into
operation for the first time!
Switch on the machine with the main switch (4). The word READY will appear in the
LCD display and you can open the door by hand.
Refit the transport brace whenever you want to transport the VIBA Shaker over long
distances.
4.3 Fitting the loading shelf and the door handle
The loading shelf and the door handle are delivered separately.
To fit them you must first open the door of the VIBA Shaker as described in 4.2.
Fit the door handle and the loading shelf with the supplied mounting materials as shown
in the pictures along side.
opening the lashing strap

Shaker VIBA 15 &VIBA25 Collomix Rühr- und Mischgeräte GmbH
D-85080 Gaimersheim
10 Edition 2.3-05
4.4 Moving the machine
The VIBA Shaker has two transport rollers at the front end of the housing. Moving the
machine over short distances is thus easy and requires little effort.
•Grip under the panel above the door recess with the one hand and hold the top of
the housing with the other.
•Carefully tilt the machine forward until the transport rollers come to rest on the floor.
•You can now push the machine along on its rollers with ease.
4.5 Manual door release
The door of the VIBA Shaker comes with a safety interlock. The door is locked when a
mixing cycle is started and cannot be opened while the machine is working. For servicing
purposes, however, it is possible for the door interlock to be released by hand.
Releasing the safety door interlock
•Remove the plastic plug cap from the left side of the machine.
•Use a screwdriver to push the release button of the door interlock
•Open the door.
Do not start the machine if any safety devices are defective or modified!
Grip the machine Move the machine

Collomix Rühr- und Mischgeräte Gmbh Shaker VIBA 15 &VIBA25
D-85080 Gaimersheim
Edition 2.3-05 11
5. Operation
5.1 Switching on the machine
The machine is switched on with the main switch (4).
Switch-on is followed by an initialization routine. The word READY appears in the display
when initialization is completed.
If any errors occur during initialization they will be indicated in the display. For further
information see Messages and troubleshooting.
5.2 Trial run
It is best to carry out a trial run with an empty mixing container when you are
starting up the machine for the first time or after carrying out maintenance work
or repairs.
Remove the transport brace, tools and any other loose items from the inside of
the machine.
If the machine wobbles while it is working, adjust the machine feet to compensate the
differences in height. It is prohibited to operate the machine on its shipment pallet.
5.3 Loading the container
Open the door (if necessary cancel "STAND-BY“ mode by pressing button E).
Press button E to move the clamping unit apart to match the height of the container.
Secure the container handle with a rubber band or adhesive tape and place
the mixing container on the mixing table in central position. It is also possible to
shake several identical containers simultaneously. In this case, make sure the
containers are placed on the mixing table in a symmetrical arrangement.
Positioning the containers
Collomix Shaker init
Version X.XX
•
d=55
c 80 / 25 / 160
•
Collomix Shaker init
000011 cycles
•
Ready
1:00 2:00 3:00
LCD display:
Initialization
Don't stack the
containers!

Shaker VIBA 15 &VIBA25 Collomix Rühr- und Mischgeräte GmbH
D-85080 Gaimersheim
12 Edition 2.3-05
5.4 Starting the mixing cycle
The door has to be closed to start the mixing cycle.
Start the mixing cycle by pressing one of the timer buttons I, II or III.The
corresponding mixing times are indicated in the LCD display above the buttons.
The mixing container is clamped in the clamping unit and the mixing cycle started.
The remaining mixing time is indicated in the display as the mixing cycle progresses.
5.5 Ending the mixing cycle
The mixing cycle is ended automatically when the selected mixing time is over.The
clamping unit is opened and the door interlock released. You can open the door and
take out the container.
You can end the mixing cycle prematurely before the selected mixing time is over by
pressing button E. The mixing cycle is ended as normal. The clamping plate opens and
the door interlock is released.
The machine is then ready for the next mixing cycle. When you have finished using
the machine, be sure to switch it off with the main switch!
5.6 Stand-by
If approximately 60 minutes pass without the user actuating any function, the VIBA will
automatically switch to stand-by mode. All unnecessary consumers are switched off and
the door can no longer be opened.
To quit stand-by mode, press BUTTON E. The machine will then return to base
position and you are again able to open the door.
Ready
1:00 2:00 3:00
•
•
Mixing t = 1.00
clamping
•
Mixing t = 1.00
pot clamped
•
Mixing t = 0.59
mixing
LCD display:
Start mixing cycle
t = 0.00 or
•
Mixing t = 0.00
wait
•
Mixing t = 0.00
unclamping
•
Ready
1:00 2:00 3:00
LCD display:
End of mixing cycle
E 000 Stand-by
> press "E" to quit
•
•
Ready
1:00 2:00 3:00
LCD display:
Stand-by

Collomix Rühr- und Mischgeräte Gmbh Shaker VIBA 15 &VIBA25
D-85080 Gaimersheim
Edition 2.3-05 13
5.7 Triggering the Emergency Stop function
Press the Emergency Stop button to switch off the machine if ever the container
develops a leak or its handle becomes loose or some other potentially dangerous
situation for man or machine arises while the mixing cycle is in progress.
After the machine is switched off, the mixing unit will coast to a standstill and remain in
this position.
The Emergency Stop button has to be unlocked again by hand. This is done by
turning the red actuator clockwise.
After unlocking the Emergency Stop button you must cancel the message in the display
by pressing button E.
Both the mixing unit and the door interlock are automatically released. You can then
remove the container.
CAUTION!
The Emergency Stop button only interrupts the program flow. The machine is not
disconnected from the mains supply!
Therefore, before performing any maintenance work or repairs be sure to
always disconnect the machine from the mains by pulling out the power plug!
5.8 Average mixing cycles
The VIBA Shaker has three mixing cycles whose lengths can be individually programmed
by a service technician.
The length of a mixing cycle depends on the properties of the material to be mixed. The
times quoted in the following table are intended to serve as a guide only. Depending on
the actual material it may be necessary to select a longer mixing cycle in order to obtain
optimal results.
Material to be mixed Mixing time
House paints, industrial paints - 60 seconds
Dispersion paints 60 - 150 seconds
Ready-mixed plasters 150 - 240 seconds
E 020 Emergency stop
> unlock switch
•
•
Ready
1:00 2:00 3:00
LCD display:
EMERGENCY STOP

Shaker VIBA 15 &VIBA25 Collomix Rühr- und Mischgeräte GmbH
D-85080 Gaimersheim
14 Edition 2.3-05
6. Program flow
6.1 Switching on
After being switched on with the main switch the VIBA Shaker first carries out a
self-test and initializes the control system. For further details see chapter 6.
•Display of software version
Collomix Shaker init
Version X.XX
•
•Display of system-internal parameters
d=55
c 80 / 25 / 160
•
•Display of mixing cycles performed so far
Collomix Shaker init
000011 cycles
•
•Basic display when no faults are active. The
mixing cycle can be started.
Ready
1:00 2:00 3:00
6.2 Mixing cycle
•You have to be in the basic display to start a
mixing cycle.
Ready
1:00 2:00 3:00
•
•Select the cycle with the mixing time required by
pressing button I, II or III. The corresponding
mixing times are indicated in the display above
the buttons. •
•The selected mixing time is indicated in the LCD
display. The container (pot) is being clamped.
Mixing t = 1.00
clamping
•
•Clamping of the container (pot) is completed.
Mixing t = 1.00
pot clamped 80
•
Mixing t = 0.59
mixing
•The mixing cycle begins. The time remaining to
the end of the mixing cycle is indicated on the
right in the display . •
•The mixing time has elapsed and the cycle has
ended.
Mixing t = 0.00
wait
•
•The container is being unclamped.
Mixing t = 0.00
unclamping
•
Ready
1:00 2:00 3:00
•The door can be opened and the container
removed. The VIBA Shaker is ready for the next
mixing cycle.

Collomix Rühr- und Mischgeräte Gmbh Shaker VIBA 15 &VIBA25
D-85080 Gaimersheim
Edition 2.3-05 15
7. The service menu
Various machine parameters such as mixing time, speed and clamping pressure can be
set in the service menu. These parameters were set by the manufacturer and there is
normally no need to make any subsequent changes.
The service parameters set by the manufacturer are listed in a sticker beside the
control pcb.
These parameters can be used as starting values for programming a new printed circuit-
board if ever a replacement is necessary.
Changes in the service menu must be left strictly to authorized and suitably
trained personnel. We can accept no warranty claims or liability for any damage
due to changes to the parameters.
7.1 Activating the service menu
The service menu is activated by repositioning jumper ST8 on the control pcb.
Caution: This work must be left strictly to authorized and suitably trained
personnel. Live parts of the pcb may be touched when the control panel cover is
open. Before you leave the machine in this condition make sure that the
machine is disconnected from the power supply and secured against
unauthorized use!
•Switch off the machine with the main
switch
•Remove the cover from the control panel
•Move jumper ST8 on the control pcb to
SERVICE
•Switch on the machine with the main
switch
•The service menu is shown in the display
ST8 connector on the control pcb
SERVICE
OPERATION
Control pcb
Settings made by the
manufacturer
TEST OUTPUTS
M_DOOR
service menu

Shaker VIBA 15 &VIBA25 Collomix Rühr- und Mischgeräte GmbH
D-85080 Gaimersheim
16 Edition 2.3-05
7.2 Operator prompting
A - Menu point
The title of the currently displayed menu point is shown at the top left of the display.
B - Operating values
Feedback values for clamping pressure or electric current consumption. The relationship
between the feedback value and the corresponding physical variable can be determined
through the assignment tables in the menu description. (See 7.4 Setting the operating
parameter.)
C - Parameters
Setting for clamping pressure or electric current consumption value. The relationship
between the feedback value and the corresponding physical variable can be determined
through the assignment tables in the menu description.
D - Assignment of functions to buttons
The indicated function is triggered by the button positioned underneath.
Press button “E“ to call up the next menu point.
DC-MOT ENDPOS 3
CLS 40 OPEN EDIT
Button
„E
“
A
B
D
C

Collomix Rühr- und Mischgeräte Gmbh Shaker VIBA 15 &VIBA25
D-85080 Gaimersheim
Edition 2.3-05 17
7.3 Service menu sequence
7.4.1 Door interlock function
test TEST OUTPUTS
M_DOOR
7.4.2 Edit mixing cycle 1
TIME 1
+ 1:00 -
7.4.2 Edit mixing cycle 2
TIME 2
+ 2:00 -
7.4.2
…
Edit mixing cycle 3
TIME 3
+ 3:00 -
7.4.3 *only VIBA 25 SMALL POT HEIGHT
+ 220 -
Low / high clamping
pressure changeover
point
7.4.4 Open and close mixing
unit by hand
DC-MOT FREERUN 3
CLS OPEN
7.4.5 Mixing unit end position
DC-MOT ENDPOS 3
CLS 40 OPEN EDIT
7.4.6 Clamping pressure for
small containers
*only VIBA 25 DC-MOT CLAMP LOW
+ 25 -
7.4.7 Clamping pressure for
large containers
DC-MOT CLAMP HIGH 3
CLS 70 OPEN EDIT
7.4.8 Switch on the shaker
motor SHAKER MOT OFF
ON OFF
7.4.9 Save changes
SAVE TO EEPROM
SAVE

Shaker VIBA 15 &VIBA25 Collomix Rühr- und Mischgeräte GmbH
D-85080 Gaimersheim
18 Edition 2.3-05
7.4 Setting the operating parameters
7.4.1 Switching output function test
(TEST OUTPUTS)
TEST OUTPUTS
M_DOOR
•
•
•The door interlock function can be tested in the
TEST OUTPUTS menu:
Button III (M_DOOR) door interlock.
The door is unlocked for as long as the button is
pressed.
TEST OUTPUTS
M_DOOR
•
•Press button “E“ to call up the next menu point.
•
7.4.2 Changing the mixing times (TIME 1 – 3)
Buttons I, II and III can be assigned 3 different mixing times. The works settings can be
changed in steps of 10s [m:ss] as required:
TIME 1
+ 1:00 -
•
•Set mixing time 1
Button I ( + ) Increase the mixing time
Button II ( - ) Decrease the mixing time
•
TIME 1
+ 0:30 -
•The set time is indicated in the display.
•
•Press button “E“ to call up the next menu point.
•
TIME 2
+ 2:00 -
•Set mixing time 2
See "Setting the mixing time 1" •
•
TIME 3
+ 3:00 -
•Set mixing time 3
See "Setting the mixing time 1" •
This manual suits for next models
4
Table of contents
Other Collomix Paint Sprayer manuals