Assura® 2-piece Drainable Pouch with EasiClose™ Outlet
Instructions for Use
Filter - These pouches have an integrated filter specially developed for colostomy/ileostomy patients.
The filter allows gas to escape without the risk of odor.
Each box of pouches is provided with filter covers, which are
needed to close off the filter when bathing or swimming.
Pouch shape/design - The pouches are offered in mini, midi, and maxi versions and feature an
anatomical shape. Designs are available in three versions - transparent, opaque with cloth front, cloth
front with a design. For soft cover pouches, pat the pouch dry with a towel after showering.
Wafer - Available in Standard Wear and Extra-Extended Wear adhesives. Also available in flat, convex
light (shallow convexity) and convex (deep convexity).
Outlet - Available in standard outlet (for soft, loose output) and WIDE outlet (for thicker output).
Assura 2-piece Drainable Pouch with EasiClose Outlet – Instructions for Use
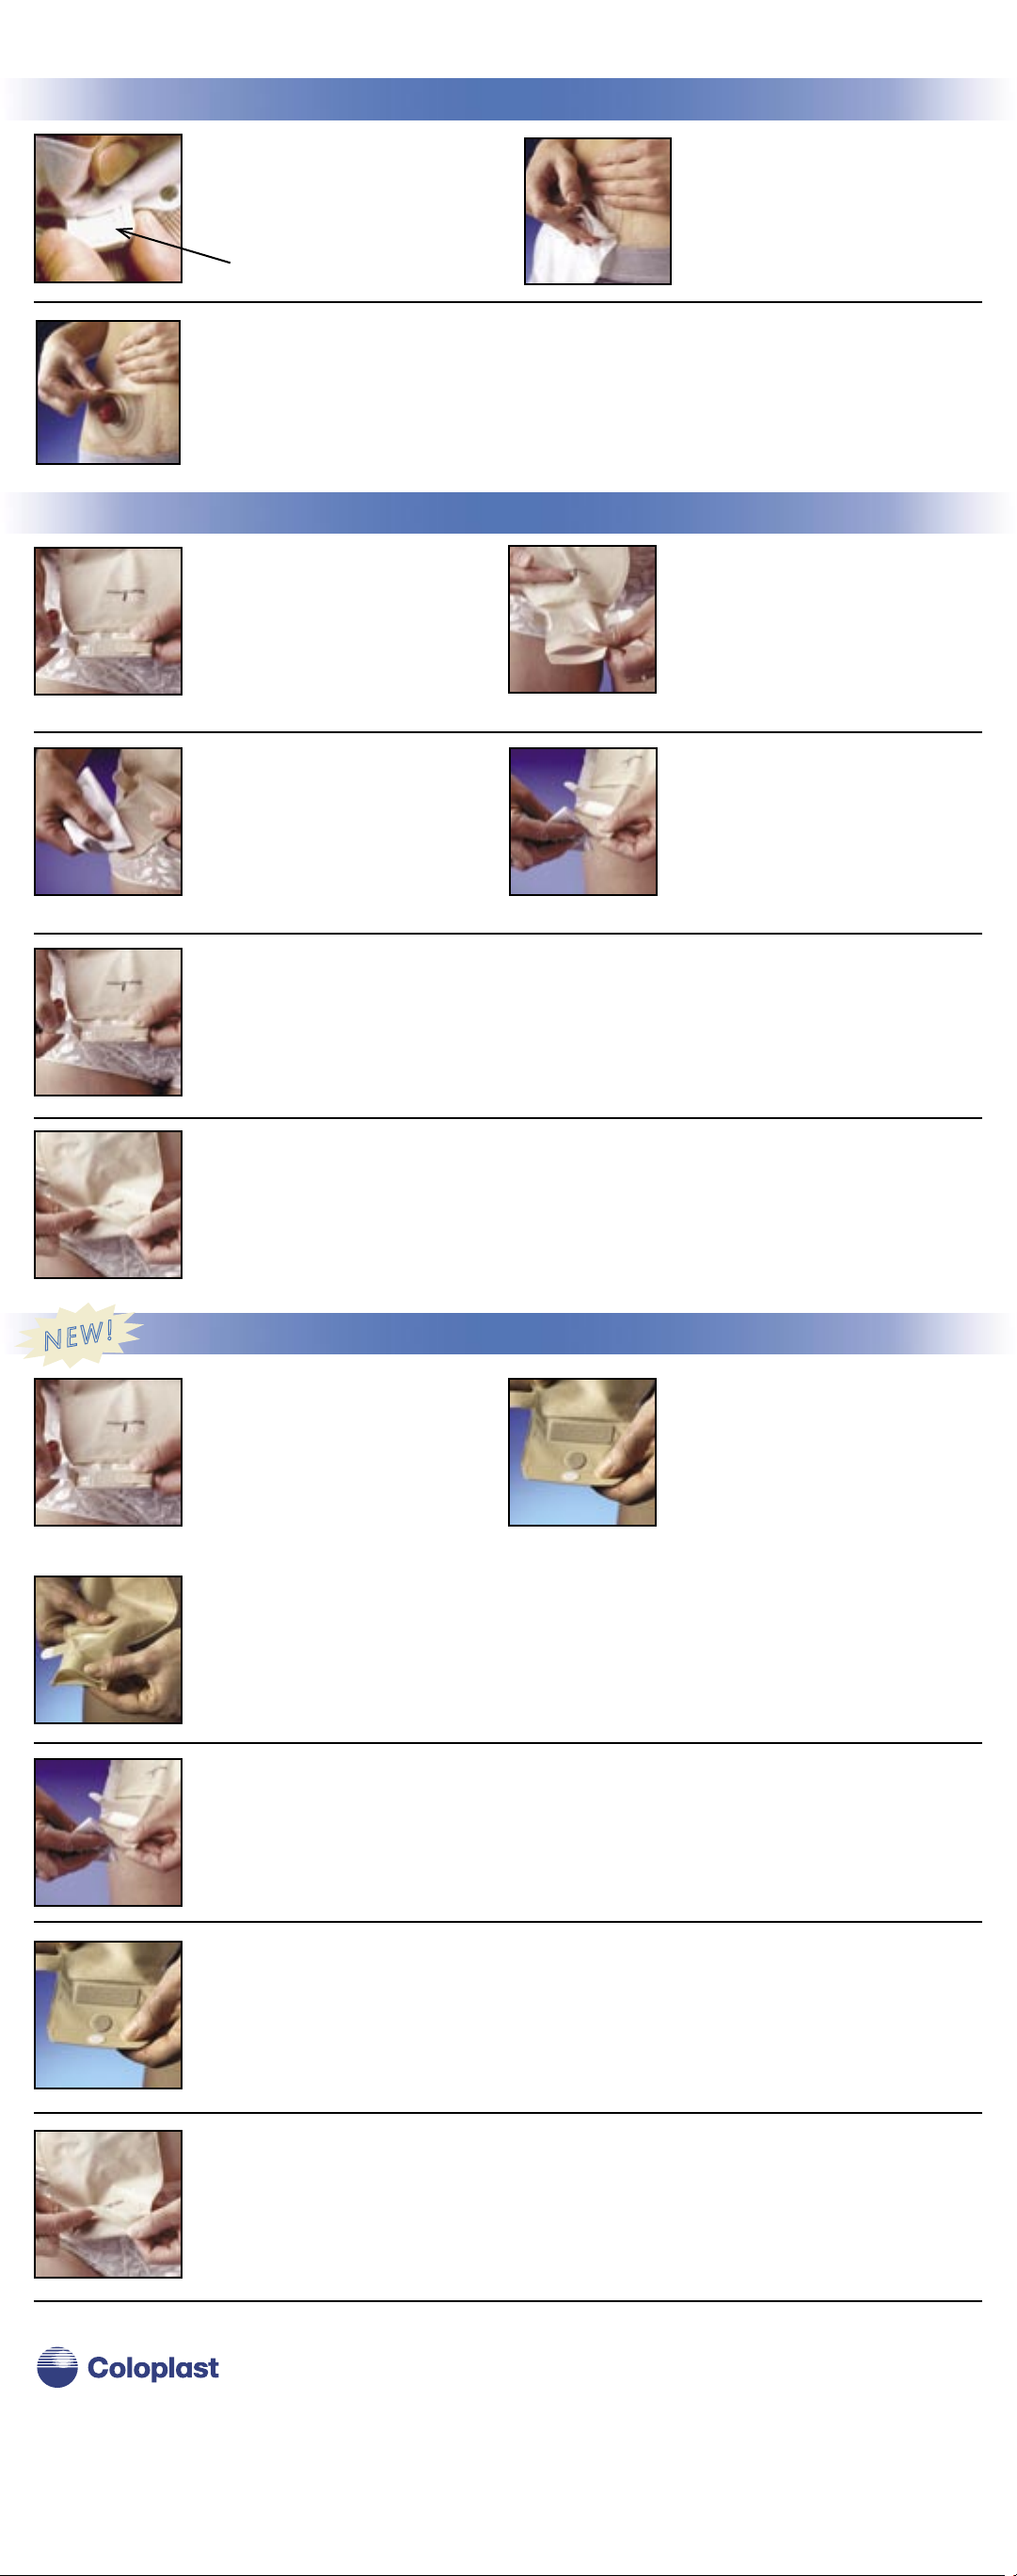
OUTLET PROCEDURE
2. Sealing of outlet - Seal the outlet by folding the Velcro® hook ears onto the foam
plate and press firmly. If desired, fold once more as described under EMPTYING
OF POUCH, #4.
1a. Closing of pouch before
use - With the Velcro® hook
ears facing up, fold the lower
foam plate over the larger
foam plate (as if you were
sealing an envelope).
1b. Roll the outlet inward
towards the pouch two
more times.
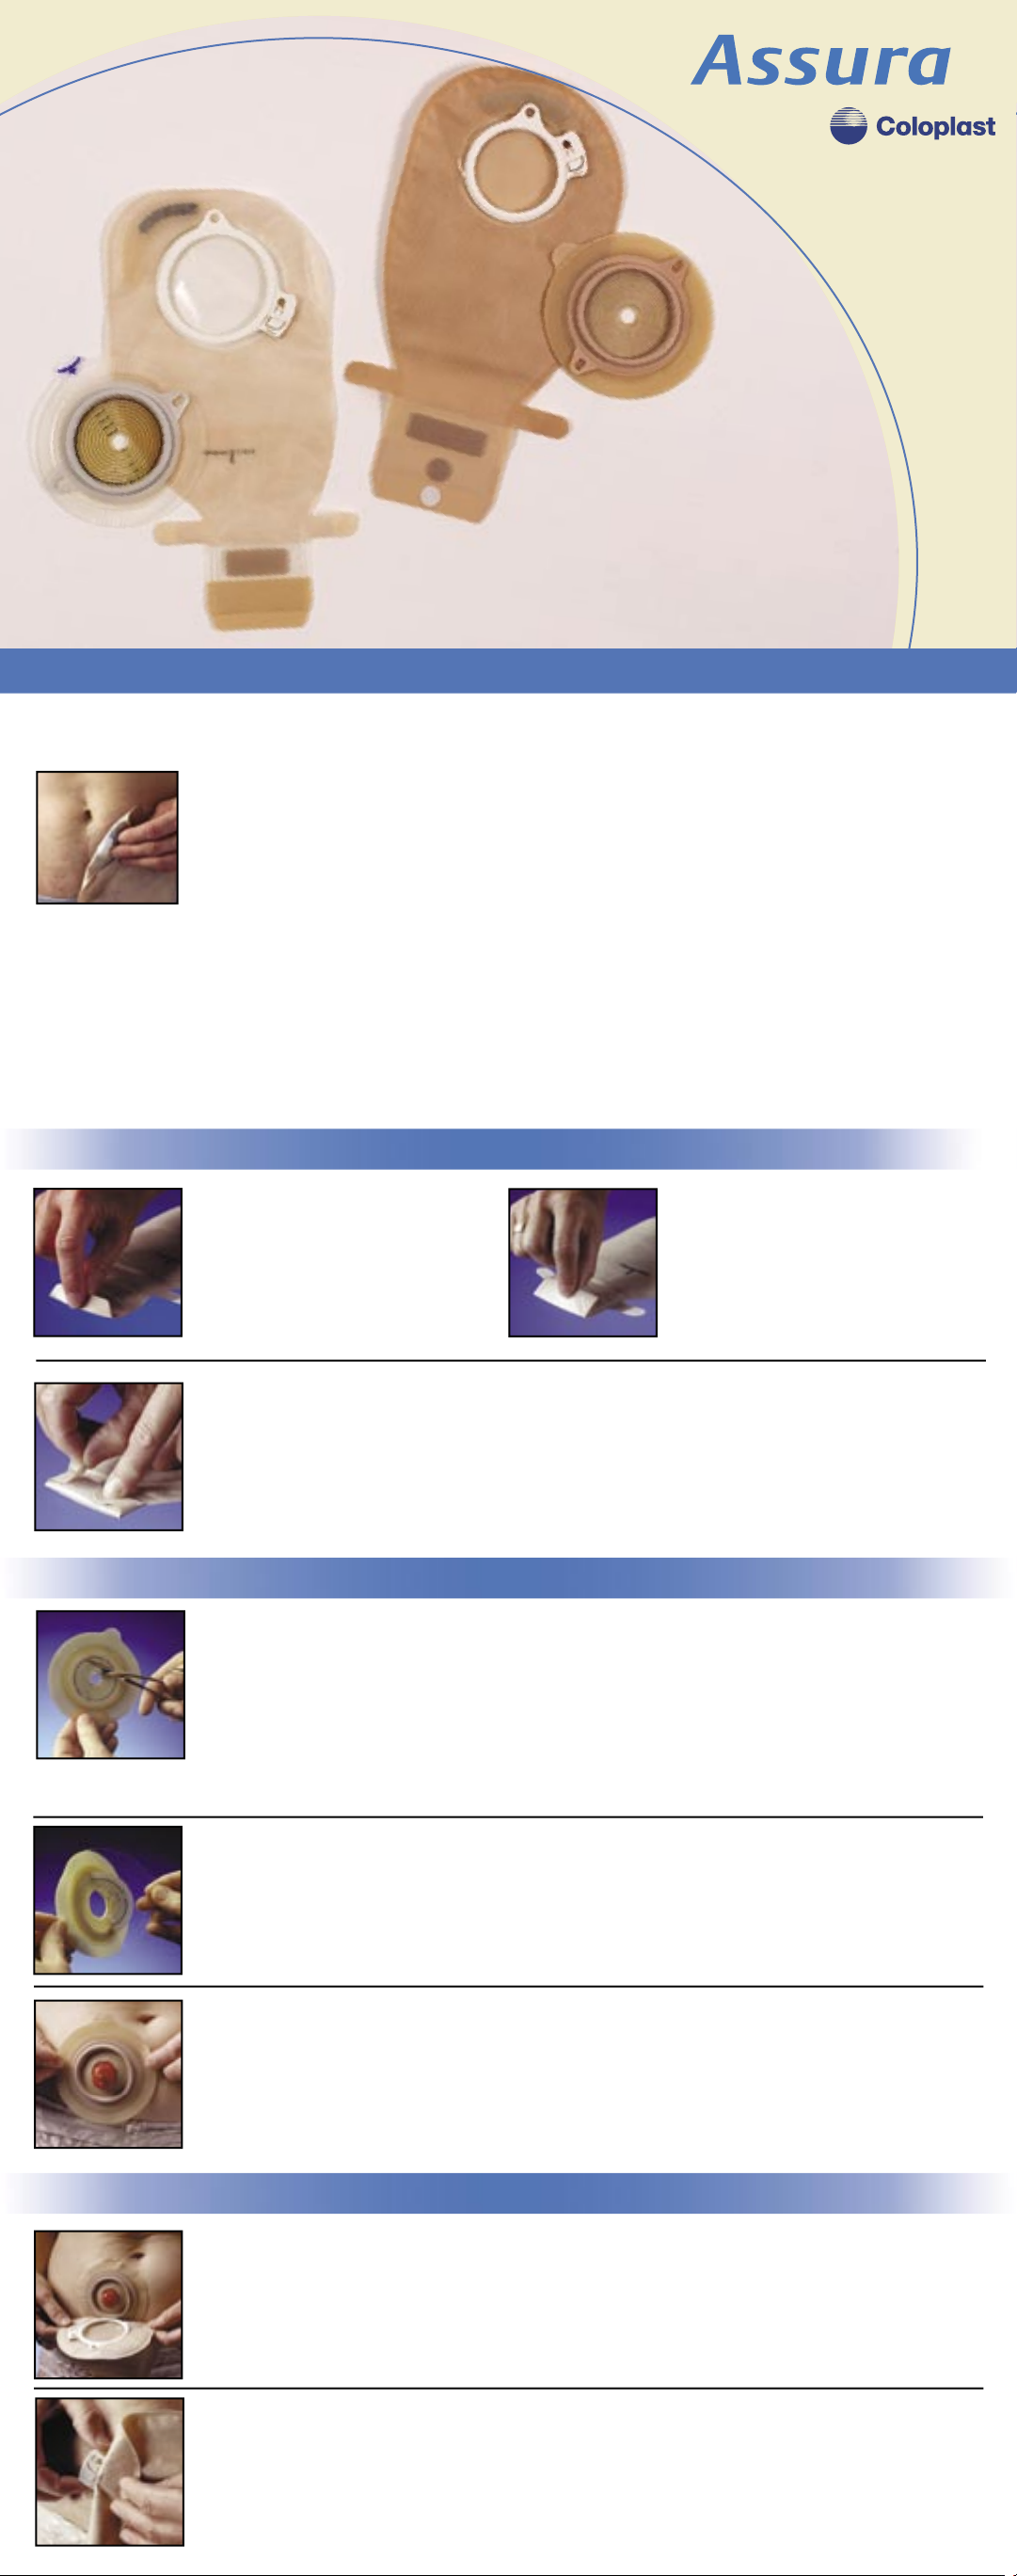
PREPARATION
1. Cutting the wafer - Trace size and shape of stoma onto the cutting guide. Cut
the hole in the wafer to fit (recommended cutting hole is 1/16" larger than stoma,
or cut hole same size as stoma, with four radial slits). If the opening of the
wafer is larger than the stoma, leakage may occur. Cutting is easier with curved
scissors. Do not cut beyond the last circle on the guide.
Ensure skin is clean and dry before applying the wafer. Stoma size may change
over time, so measure stoma before placing an order.
2. Removal of protective paper - Remove the transparent protective paper. Place
one thumb on the tab and pull the protective paper away with the other hand.
3. Application of wafer - Place the wafer on the skin ensuring a snug fit around
the stoma. Press firmly against the skin starting at the bottom and smoothing
upwards with fingers.
Tip: Warm wafer between hands for one to two minutes, causing the adhesive to
warm up to your skin – resulting in better wear time.
POUCH APPLICATION WITH ASSURA LOCKING MECHANISM
1. Application of pouch - Make sure the lock ring is open. Press the coupling
rings on the pouch and wafer together, starting at the bottom. Run your fingers
around the coupling on the outside of the pouch from the bottom to the top.
When a slight click is heard, the pouch is securely positioned on the wafer. The
pouch may then be turned to its optimal position.
2. Locking the pouch - Once the pouch is in optimal position, close the lock ring.
To do this, use two fingers and squeeze the two ends of the lock ring together.
When a click is heard, the pouch is securely locked to the wafer.