GWD 900 Wireless Microphone Owner’s Manual
7
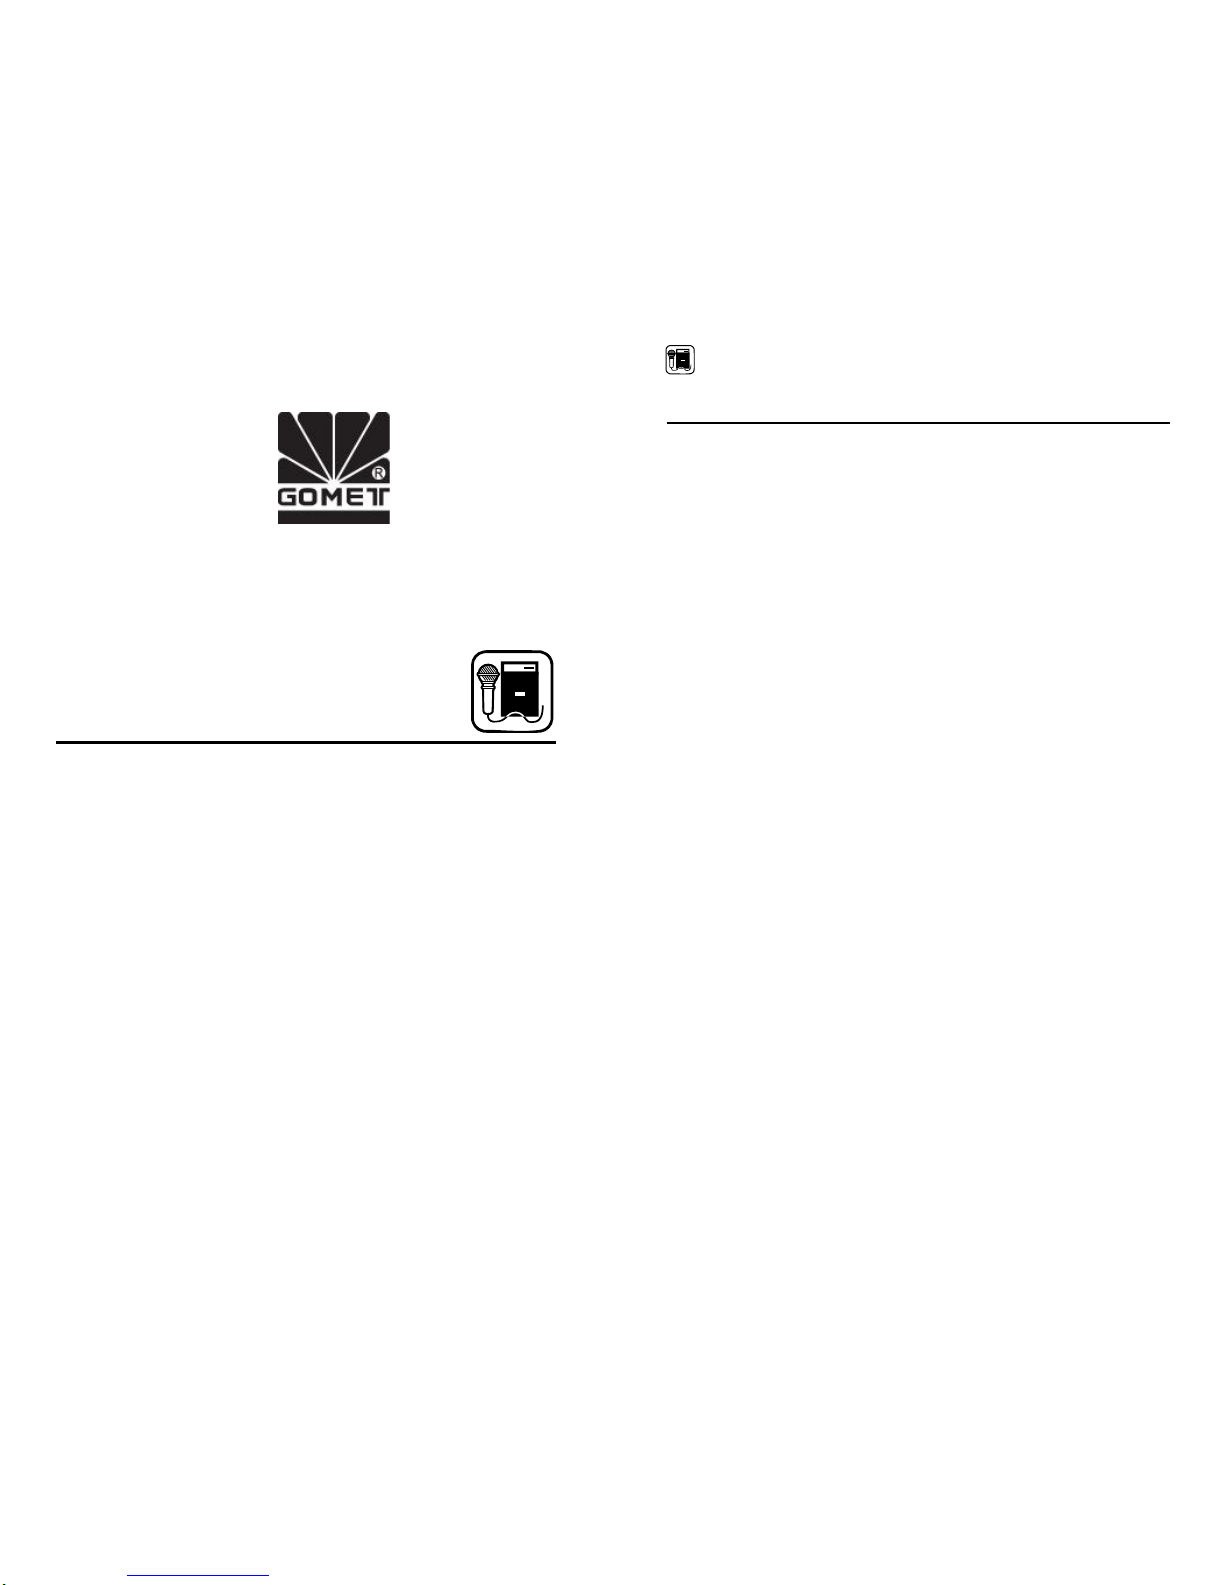
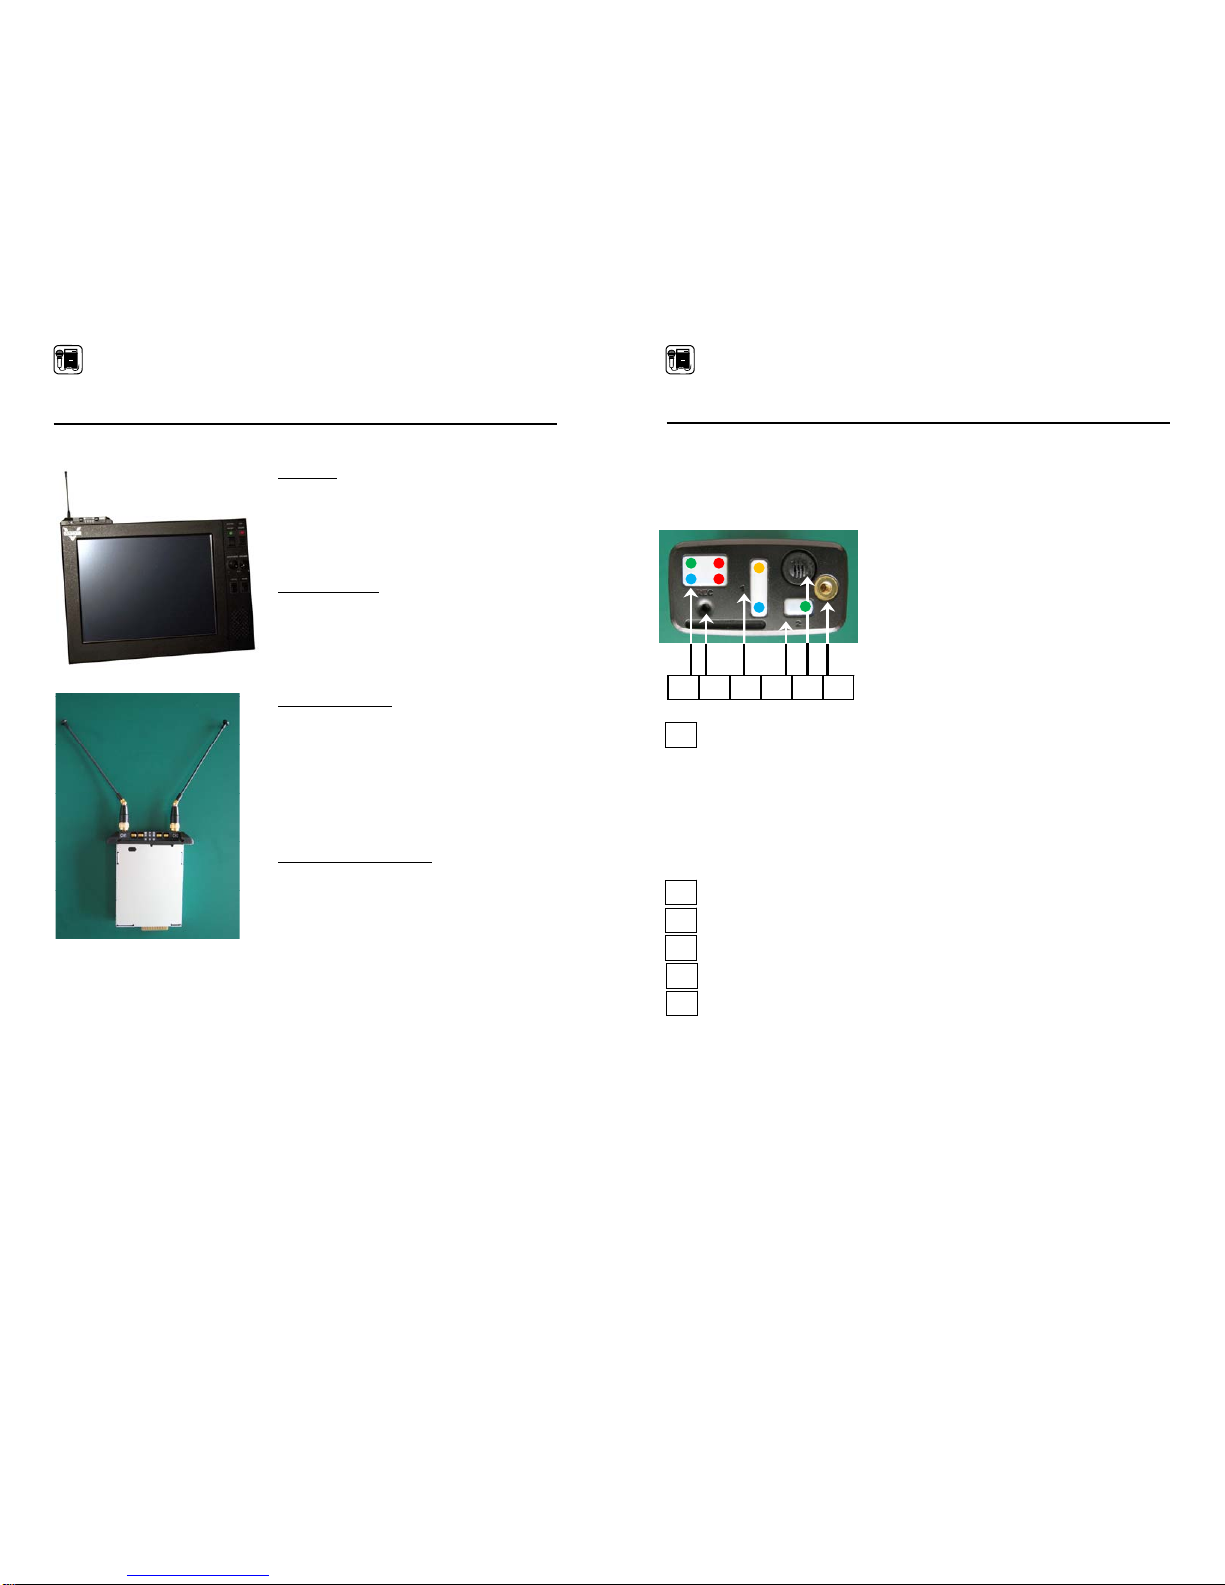
System Overview
Wireless Microphone SCMIC-TRAN2/GWD910T
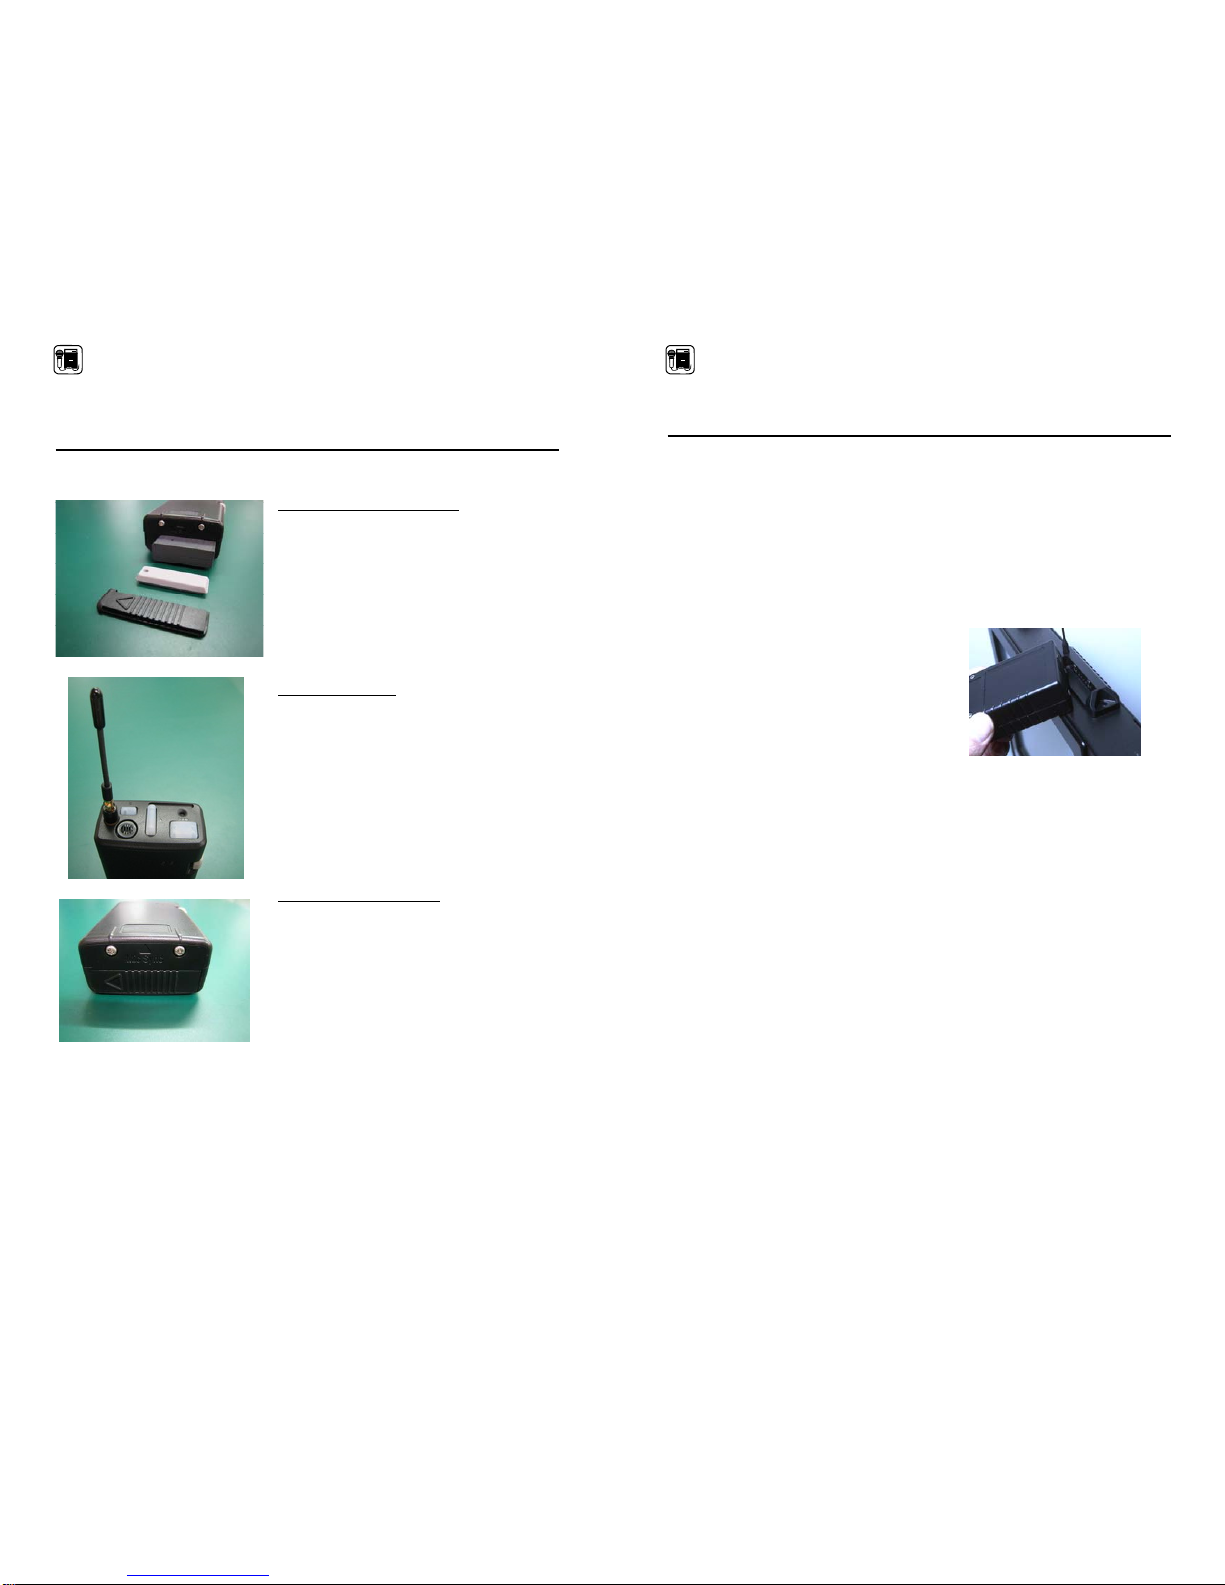
Battery Selection and Installation
The GWD910 wireless microphone is powered by
a rechargeable lithium-ion battery. The wireless
microphone housing is designed to prevent
incorrect installation of the battery. Do not force
the battery in to the housing. Reversed batteries
may cause damage to the wireless microphone.
The battery compartment is located at the bottom
of the wireless microphone. Slide off the battery
cover and remove the silicon seal, at this point the
battery is free to slide out.
Transmitting Antenna
The GWD910 Wireless Microphone includes a
flexible antenna, which is package separately to
prevent damage. Remove the antenna from the
package and tighten the antenna to the wireless
microphone. For best result, allow the antenna to
extent fully. If the signal is marginal, please
experiment with different wireless microphone
position on your body. Do not attempt to remove,
replace or change the length of the transmitting
antenna, which might result in damage of the
audio system and may violate FCC regulation
Wireless Microphone Contact
The wireless microphone contact is used to
synchronize the frequency of the wireless
microphone and the receiver. It is also the contact
for the battery charger.
GWD 900 Wireless Microphone Owner’s Manual
8
Operating Procedure
The GWD910 is designed to eliminate unnecessary hassle of pairing a receiver with a
particular wireless microphone. With the latest technologies, the GWD910 is able to
synchronize the frequency of any GWD910T Wireless Microphone with any GWD910R
Receiver.
Just follow these few simple instructions to ensure maximum performance:
1. Check out any GWD910T Wireless Microphone and make sure it is fully charged
before operation.
2. Please be sure the IN-CAR VIDEO SYSTEM is ON before proceeds any further.
3. Slide the wireless microphone
contact directly on top of the
receiver’s register contact (located on
the top of the IN-CAR VIDEO
SYSTEM monitor module) until a
confirmation tone has sound. This
indicates the receiver’s register
contact has synchronized the
frequency of the receiver and the
wireless microphone. Wireless
microphone is now on standby mode
and is ready for use.
4. Please only synchronize one wireless microphone to one receiver.
5. There are three methods to activate recording on the wireless microphone:
a. Press the ON or Panic Button once on the wireless microphone for
recording.
b. Activate video recording at the IN-CAR VIDEO SYSTEM. This action
will automatically trigger wireless microphone recording.
c. Turn on the light bar or siren in the patrol car. This action will also
automatically trigger wireless microphone and video recording.
6. To prevent accidental audio shut off. The only way to return wireless
microphone to standby mode from recording mode is to stop the video recording
from the IN-CAR VIDEO SYSTEM.
7. During recording mode, if the warning sounds and the yellow LED flash, this
means the signal is marginal or weak. At this time, please step closer to the
receiver or reposition the wireless microphone until the warning stops. However,
if the warning persists and exceeds 30 seconds, the wireless microphone will
automatically shut off and return to standby mode. If user returns within the
signal range again while the video is still recording, the receiver will re-initiate the
wireless microphone automatically.
8. For charging, simply place the wireless microphone to the charger and leave it
charging for at lease 6 (six) to maximize battery capacity.