Comfier CF-6023 User manual

Neck Massager
CF-6023
User Manual

Instruction
Thank you for purchasing COMFIER Neck Massager. Comfier neck
massager is of a streamline ring -shaped design consistent with the
human cervical vertebra physiological curvature. It combines four
functions of low frequency electric pulse, magnetic effect, far infrared
heating and circular traction which can lead the curative effect to reach
directly the body's deep tissues.This massager can help promote local
blood circulation, relax local muscles and relieve fatigue, thus it's
applicable to health care and prevention of neck pain, numbness of
shoulders and arms, headache and dizziness arising from cervical
vertebra diseases.
Please read carefully all the safety instructons and warnings in this
manual before using the product. Please retain this user manual for
further reference.
• Ergonomic design, perfectly fit the neck curve;
• Wireless remote control with LCD display,easy to operate
• Synchronous health care system combining low-frequency electric
pulse therapy, magnetic effect, FIR heat moxibustion and ring
traction is applied to form an efficient composite energy field;
• 3 levels of heating for options
• 2 automatically-combined electric pulse modes & 4 manual
modes are available for different demands;
• Built-in Several magnets;
• Built-in rechargeable battery.
2
Features

1.Product specifications
Name: intelligent cervical vertebra massagen Tvpe: PG-2601B19
Power supply: 5V DC 1A
Power adaptor(optional): Input100-240V AC 50/60Hz 0.2A
Output 5V DC 1A
Lithium battery: 3.7V DC 1500mAh
Input power: 5W
Host size: 166x134x42mm
Remote control size:37x82.5x11.8mm
Net Weight: about 190 g
2. Normal working conditions
+5°C~+40°C;Ambient environment: +5°C~+40°C;
≤80%; Relative humidity: ≤80%;
86kPa-106kPa; Atmosphere pressure: 86kPa-106kPa;
3. Electrical performance
1Hz-1000Hz. Pulse frequency: 1Hz- 1000Hz;
20µs-400µs. Pulse width: 20µs 400µs
Pulse shape: square;
Rated load impedance: 500Ω, with a tolerance of ±10%;
Heating temperature: +38°C~+48°C (under a temperature of 25°C);
Surface magnetic field intensity: not less than 0.01T;
Timing time: 5-30 minutes, with a tolerance of ±10%:
4. Transport and storage conditions
-20%°C ~+55%°C, Ambient temperature:-2°C-+55°C;
≤93%;Relative humidity: ≤93%;
50 kPa-106 kPa. Atmosphere pressure: 50 kPa-106 kPa.
3
Technical Parameters and Specifications

Product Host
Conducting/Heating Strip
Power Output
Interface
Power Iutput
Interface
Working/charging
Indicator
ON/OFF
(Power button)
4
Contents
• Neck Massager
• Cordless LCD controller
• USB charging cable

1. Wet your cervical part and the conducting strips with a wet towel first
and then fit the massager closely to your neck; if there is any sweat on
your neck, please clean it first.
2. Press the host" " power button to turn on the machine, and the
machine remains on standby,the power indicator flashes. (The host
maintains the waiting signal receiving state for 1 minute. If the remote
control signal is not received within 1 minute, it will automatically shut
down). Press the remote control " " button to power on, the host beeps
"beep", the screen backlight is lit, and the host power indicator light is on
and not flashing, then the machine starts to work in Mode 1
(Pulse intensity at Zero”o”, heating at level 2 and timer of 15-minute)
5
Instruction for use
Electric pulse
(6 modes)
Heat Indication
(3 levels)
On/off/
Timer Button
Press to turn on,
Short Press again
to set the mer of
5/10/15/20/25/30,
Long Press(3 Seconds)
to turn off the device
Down Button
Press to decrease pulse
intensity,16 levels for opons
Timer Indication
(5/10/15/20/25/30)
Pulse intensity
(16 levels)
How to Operate Funcon Buons
UP Button
Press to increase
pulse intensity, total
16 levels for opons
Mode Button
Press to change the massage
mode between M1 to M6
Heating Button
Press to turn on heat, you
may cycle through 1/2/3 level
or off sengs

6
Instruction for use
Six Massage Modes:
M1: Auto-combination mode
M2:Auto-combination mode
M3: Scratch
M4: Shiatsu
M5: Rolling
M6: Beating
Note:
1.In each massage mode, you can freely set the heat level,pulse
intensity,and timer to achieve the best massage as you need.
2.Please set an appropriate massage intensity for yourself. It is
recommended to choose a lower intensity in the first use.
3.If you want to turn off the machine, please press on/off button
on machine or long press on/off button on controller for 2-3 seconds.
! Attention
You should allow your body some rest periods. To avoid straining your
muscles too much, we recommend to not exceed a continuous massage
of 15 Minutes per time and not exceed 3 times use one day

7
Battery Charging
Charge the baery
Connect the USB cable to any USB charger, it can be plugged in the
portable power bank, mobile phone battery chargers, laptop and any
USB port.
1. When the buzzer beeps for continuous three times during massage,
The battery power is low, please charge it in time.
2.While charging, the button indicator will be green & flashing.
3.When full charged, the button indicator will keep green, not flashing.
4.Normally it takes about 2 hours to fully charge the battery.
5.After full charged, the machine can work continously for 5 days
(twice a day and up to 30 minutes each time)
6.Machine will stop working when charging
(In order to protect the product, please always turn off the machine
before charging)
7.It is recommended to fully charge the battery at least once a month,
as its service life will be shortened if not in use for a long time.
Baery Disposal Warning:
The unit contains a Lithium Ion battery.
The disposal method of used batteries should be
Comply with relevant urban environmental protection regulations.
Please contact your local recycling center to find out how to
properly dispose of the product.
Laptop Power bank Phone adapter

8
Instructions for button battery of controller
Ensure button battery CR2032 has been properly installed in the
remote control, as shown below, use one coin or straight screwdriver
to unscrew battery cover at the groove, then make the positive side of
button CR2032 upward, put it in the battery house of remote control,
and insert the positioning pin on the top of the battery cover, then
press the battery cover tightly.
Installation Diagram
1.The remote controller is powered by Model. CR2032 button battery.
It is not rechargeable battery, it can be used for about 3months
(30min each day).
2.When the LCD backlight becomes dim or Pressing the buttons to
control the massager is not sensitive, it indicates that the battery
capacity is low,please replace it with a new battery;
3.Take out the battery if the Product is not used for a long time.Or
The controller may malfunction due to battery leakage.
4.Please do not use the battery other than specified one.
5.Do not misplace positive and negative electrodes of the battery,
please place positive up and negative down.
The method of remote control battery installation

9
Remove the Rechargeable battery
How to remove the rechargeable battery
1. The lithium battery built into this product contains substances that
may pollute the environment. Before disposing of this product, the
built-in lithium battery should be taken out
2. Before disassembling the product and takina out the lithium battery
e sure to turn off the power or turn off the power
3. The detailed steps for taking out the lithium battery are as shown in
the igure below. Disassemble the product in the order of ①-②and take
ou the lithium battery.
4. The removed lithium battery should be safely disposed of and
discarded in a place specified by the government or in a recycling unit.
(as the picture shows)

The warning symbols and illustrations shown in the manual are
intended to enable you to use the product safely and correctly and to
prevent injury to you and others.
Warning signs and their meanings are as follows:
it indicates that there is a danger of personal casualty or
serious injury in case of improper use of this product.
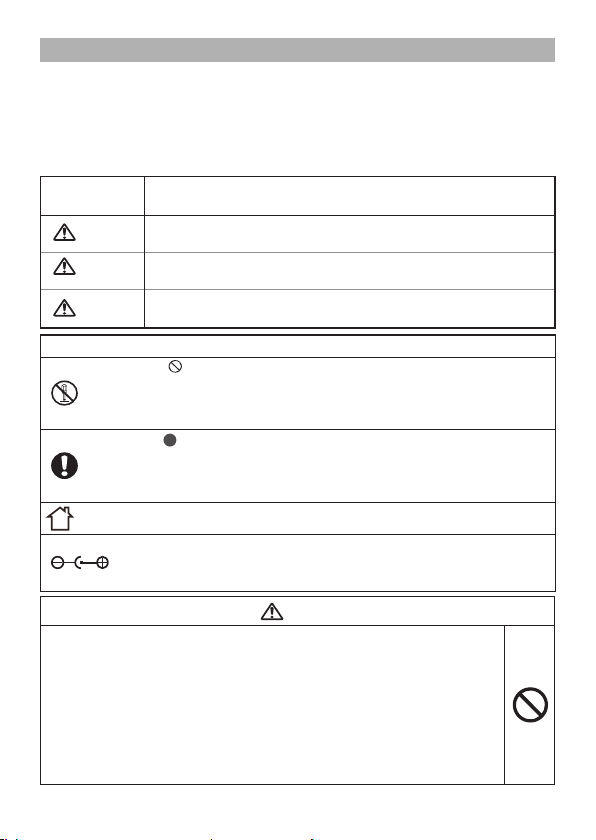
The symbol" "means prohibition (thinas not permitted).
The specific contents of such prohibitions are shown behind or near
this symbol with words or illustrations. The symbol on the left means
"Dis-assembly Prohibited".
The svmbol means compulsive requirements (things that must be
obeyed). The specific contents of such compulsive requirements are
shown behind or near this symbol with words or illustrations.
The symbol on the left means"general compulsive reguirements"
Symbol indicating that the machine is for indoor use only
The symbol means that the inner surface is the positive pole of
the DC ower supply, and the upper side is the negative pole of
the DC power supply.
It indicates that there is a risk of personal casualty or serious
iniury in case of improper use of this product
It indicates that there is a risk of personal iniury or product
damage in case of improper use of this product.
Danger
Warning
Attention
Warning
Symbol Meaning
Legend Symbols
10
Safety Instructions
Never use this apparatus with other electronic medical devices such
as heart pacemaker, artificial heart-lung machine used to sustain
life EKG machine. etc., or otherwise it will lead to a dangerous situation.
patient is being treated with high frequency surgical equipment and this
massager, it is likely to give rise to a burn at the massager's electrode
or damage this product. If this massager is used near short-wave or
microwave therapeutic equipment (1 meter),
it will be possibly unstable in output.
Danger

11
Safety Instructions
This apparatus cannot be used for pregnant women and those in
menstrual period and people with sensitive skin, heart disease,
abnormal blood pressure, malignant tumor, cerebral vascular disease,
or acute disease, or others under treatment before consultation
with the doctor
1. Please don't use this massager near your heart, head, mouth or
private part, skin with a disease
2. Prohibit using it for patients with perceptual disability.
3. Prohibit using it for patients not sensitive to heat.
4. Don't use it in high temperature, electromagnetic radiation,
inflammable or damp places
5. Prohibit using it when bathing, sweating or sleeping
Please don't disassemble, repair and refit this massager without
permission, or a trouble or electric shock will be caused.
1. Don't move this massager during use. To change the massage area,
power it off first before changing, or otherwise a serious irritation
will be caused
2. Don't use this massager on children or those without expressing
ability consciousness.
3. In case of any discomfort in using this massager, stop using
immediately and seek a doctor
Warning
Attention

12
Troubleshooting and Solution
Failure to Boot
Is the internal rechargeable
batterv of the main unit low?
Is charging normal?
Whether the host is in
standby state
Is the power of button cell
of remote control low
Check whether the massager
electrodes contact directly
with the patient's neck skin.
Check whether there are
some hairs, clothing or
accessories appear at the
contact of electrodes and skin
Is there any adjustment
to the massage?
Check whether the
massage lasts too long.
Check whether the patient is
massaged in a high intensity Properly reduce the intensity.
Suitable time for treatment is
15-20 minutes.
Check whether the massager
electrodes contact closely
with the patient's neck skin.
Wet the patient's neck skin with
a wet towel first and then contac
the electrodes closely with skin
and properly adjust the intensity
and treatment mode.
The massager
displays
normally but it
doesn't
massage or the
patient feels
nothing
Patient feels
a sharp pain.
The massager electrodes must
contact directly with the patient
s neck skin
Please remove or move
the article.
After the massage device is
turned on, the default state is
0 gear strength, and it is
necessan to adjust the strength,
or some customers have no
feeling fon the 1-2 gear strength,
please increase the intensity.
Replace button cell CR2032
Check if the USB charging cable
is plugged in. After the correct
connection, the massager
charging indicator will flash
Press the power button of host
to enter standby state, and ther
press the remote control to
turn it on.
If it is in low power, please power
it with an extemal power supply.
Problems Inspection Item Solution

Patient feels
a sharp pain.
Check whether the patient's
skin is sensitive to electrodes
Check whether the weather
is cold and the patient's skin
is dry
Use after staying up late
Check whether there are
some hairs, clothing or
accessories appear at the
contact of electrodes and skin.
Check whether the massager
electrodes contact closely with
the patient's the patient's
neck skin.
Check whether the electrodes
become dirty or oily.
The stimulation
is quite weak.
Red dot after use Is there a strong tingling
sensation during use, is it
useful for other ointments?
Check whether the battery is
in low power
If the power is low, please use
an external power supply.
Please stop using it, usually
3-5 days will disappear on
its own
Clean the surfaces of
electrodes.
Please make the electrodes
contact closely with the patient's
skin and then properly adjust the
intensity and massage mode.
Please use the next day afte
the day and night due to
electrolyte drop.
Please remove or separate the
jewelry and hair
Wet the patient's skin and the
surfaces of electrodes with a
wet towel
Check if the patient's skin had
any allergies in the past; if any
slight allergy, please shorten
the massage time; and if any
serious allergy, please stop
using this apparatus immediately
and then offer desensitization
treatment
13
Troubleshooting and Solution

1. Cleaning and Maintenance
1) Before cleaning and maintaining this product, please turn off the
main unit.
2) Please wipe it with a dry soft cloth or dry towel
3) Please clean the conducting strips frequently with a wet soft cloth
or towel dipped with water; if they are too dirty, please wipe with
neutral detergent or soft damp cloth to clean the product.
4) Do not use corrosive detergent or soak it in water.
5) In the event of a malfunction, it should be repaired by professional
and technical personnel. Non-professionals are not allowed to
disassemble and assemble the machine by themselves.
2. Storage
1) Keep this massager out of reach of children.
2) Do not keep it in any place with high temperature, near fire or direct
sunlight, or it may faded or damaged
3) Please keep it into a box and keep in a safe, dry and cool place.
4) In the event of a malfunction, it should be repaired by professional
and technical personnel. Non-professionals are not allowed to
disassemble and assemble the machine by themselves.
14
Cleaning, Maintenance and Storage

15
Warranty
30 days unconditionally Return
Comfier product can be returned to receive a full refund for any reason
within 30days. Please contact our customers service
([email protected]), our staff will contact you within 24
hours.
90 days refund/replace
Comfier product can be returned / replaced within 90 days if the
product break down in the period of proper use.
24 months Warranty
If the product break down within 24 months in the period of proper use,
customers can enjoy the relevant warranty to get them replaced.
Attention!
No warranty will be given to any force majeure and man-made causes
to a defective product, such as improper care, personal tear down and
willful damage,etc.
If you have any issue about the product, please feel free to contact us
by sending email to [email protected] We will strive to
provide the best service possible within 24 hours.
WARRANTY REGISTRATION !
1) Find Comfier Facebook page and like it:
www.facebook.com/comfiermassager
Enter "Warranty" to messenger to activate 2-years FREE warranty
and get a chance to get a $33.99 valued neck massager only $0.19
OR 2) Send message “Warranty” to [email protected]
to activate 2-year FREE warranty and get a chance to get a $33.99
valued neck massager only $0.19

COMFIER TECHNOLOGY CO.,LTD.
Address: 17421 Gale Ave, Unit a,
City of Industry,CA, 91748
www.comfiermassager.com
www.facebook.com/comfiermassager
Tel: +1.248.819.2623
Table of contents
Other Comfier Massager manuals

Comfier
Comfier CF-2206G User manual

Comfier
Comfier CF-1902C User manual

Comfier
Comfier CF-4906 User manual

Comfier
Comfier CF-5202N User manual

Comfier
Comfier CF-3603U User manual

Comfier
Comfier CF-4803 User manual

Comfier
Comfier CF-3603U User manual

Comfier
Comfier CF-4104 User manual

Comfier
Comfier CF-4906 User manual

Comfier
Comfier CF-6901 User manual

Comfier
Comfier CF-2118 User manual

Comfier
Comfier CF-4902G User manual

Comfier
Comfier CF-2913 User manual

Comfier
Comfier CF-4807 User manual

Comfier
Comfier CF-2309AH User manual

Comfier
Comfier CF-3001S User manual

Comfier
Comfier CF-6302G User manual

Comfier
Comfier CF-6006NG User manual

Comfier
Comfier CF-4902LB User manual

Comfier
Comfier CF-1902 User manual