manuals.online logo
Brands
  1. Home
  2. •
  3. Brands
  4. •
  5. Comfort Stat
  6. •
  7. Thermostat
  8. •
  9. Comfort Stat CP1819 User manual

Comfort Stat CP1819 User manual

day/time
program
PROGRAMMABLETHERMOSTAT
OwnersManual
Model:CP1819
L
Congratulations!
Your new thermostat will provide years of reliable service. By saving energy, your
thermostatwill payfor itselfduringits firstseasonof use. Thanksyouforbuyingour
product!
Please read this manual for complete instructions on installing and operating your
thermostat.Ifyourequirefurtherassistance,pleasefeelfreetocontactus
IMPORTANTINFORMATION
1.Thisthermostatisdesignedtoworkonthefollowingsystems:
ŸGas–StandingPilot ŸOil–FiredFurnace
ŸGas–ElectronicIgnition ŸSingleStageHeatPumps–
withnoauxiliaryheat
ŸGas–FiredBoilers ŸElectricAirConditioning
ŸGas–MillivoltSystems ŸElectricFurnace
ŸOil–FiredBoilers
This thermostat will NOT control multistage heat pumps or 110/220V baseboard
electricheatingsystems.
2.TemperatureRange
Thisthermostatcanbeprogrammedbetween45˚Fand95˚F(7˚Cand35˚C).However,
it will display room temperatures from 30˚F to 99˚F (0˚C and 37˚C). “HI” will be
displayed ifthe temperatureis higherthan 99˚F(37˚C), and“LO” willbedisplayedif
thetemperatureislowerthan30˚F(0˚C).
Thisthermostatwillautomaticallycutoffin Heatmode ifthe temperaturerises above
95˚F (35˚C), and automatically cutoff in Cool mode if the temperature drops below
45˚F(7˚C).
3.CompressorProtection
Thisthermostatprovidesa4minutesdelayaftershuttingoffthecoolingsystembefore
it can be restarted. This feature will prevent damaget o your compress or caused by
rapid cycling. It does not prevent a rapid compressor restart due to short power
outages.
4.BatteryWarning
TwofreshAAalkalinebatteriesshouldprovidewellaboutoneyearofservice.However,
whenthebatteriesbecomedrained,theLowBatteryIndicatorwillflashonthedisplay.
When this message occurs, install new alkaline batteries. You have approximately 1
minutetochangethebatteriesandkeepthethermostat’sclockandprogramsettings.
Oncethebatterieshavebecometoolowtoensureproperoperation,yoursystemwill
beturnedoff,andthedisplaywillbeclearedexceptforflashingLowBatteryIndicator
ontheLCDdisplay.
CAUTION: When only the Low Battery icon flashes on the display,
thethermostatisshutdown,andyoursystemwillnolongeroperate.
Inthiscondition,thereisnotemperaturecontrolofyourdwelling.
NOTE:Thebacklightwillnotfunctionwhenthethermostatisinlowbatterycondition.
NOTE: If you plan to be away from the premises over 30 days, we recommend that
youreplacetheoldbatterieswithnewalkalinebatteriespriortoleaving.
5.Powersupply
Thethermostatshallbepoweredby24VACandwithbatteriesasbackup.
FEATURES
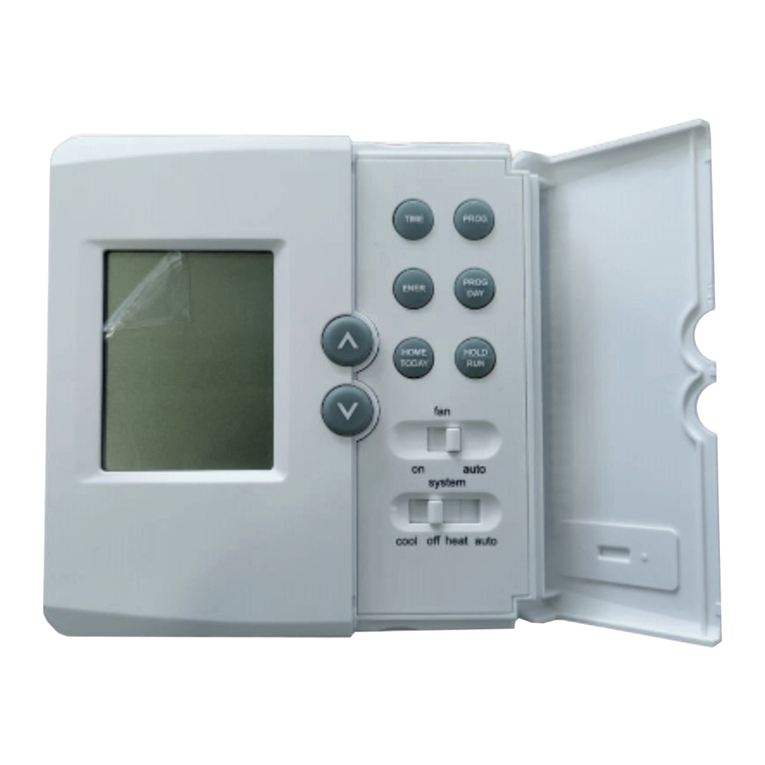
Structureofthermostatandexplanationforthekeypads
hea toffcoo l on auto
day/ time filter
pro gram hold
syst em fan
LCDDisplay:Shows
Time,Day,Temperature,
ProgramNumber,and
otherfeatureinformation
asrequired.
L
Backlightkey
BatteryCompartment:
Frontaccessallows
easyinsertionoftwo
AA1.5Vbatteries.
UpandDownKey:Keyfor
changingtheTemperature
setting.Alsousedforincreasing
anddecreasingselectionsinthe
Time,Program,andSpan
functions.
/re turn
FanSwitch:Fan
switchforAutomatic
orContinuousfan
operation.
SystemSwitch:
Selectorswitchfor
Heat,Cool,andOff.
Day/TimeKey:
Usedforentering
theClocksetting
mode.Usewiththe
UpandDownkeys
tosetthetimeandday.
FilterKey:Resets
filterchange
countertozero.
ProgramKey:Used
forenteringandmodifying
Programs.UsewiththeUp
andDownkeystoset
timesandtemperatures.
PresswheninClocksetting
modetoselectbetween12
and24hourclockmodes.
Hold/ReturnKey:Usedfor
settingapermanent(vacation)
hold,andforreturningtothe
normaldisplayfromDay&
Timesetting,Programming,or
Spansettingmodes.
FrontDoor:
Batterycover
Openwithone
fingerfromtop.
FrontDoor: CoverkeysOpenwith onefingerfromleftorright.
OPERATION
SettingDayandTime
Ÿ The LCD will show this information when
batteries are first installed. The temperature will
updateafterafewseconds.
Ÿ During time and day setting mode, the
temperatureandprogramdisplayswillgoblank.
ŸExamples:SettheThermostattothecurrenttimeof2:16pmonSaturday.
RefertotheStepsbelow.
STEP1:
Ÿ Press to enter time and day setting mode. The
current hour and the AM/PM indicator will be
flashing.
ŸPressupordowntochangetheHourupordown
tothecurrenthour.
NotetheAM/PMindicator,asthedisplaywillchangeat12AMand12PM.
STEP2:
Ÿ Press again to change from hour setting to
minutesetting.Thecurrentminutewillbeflashing.
Ÿ Press up or down to change the Minute up or
downtothecurrentminute.
STEP3:
ŸPressagaintochangefromminutesettingtoday
setting.Thecurrentdayswillbeflashing.
ŸPressupordowntochangetheDayupordown
tothecurrentday.
STEP4:
ŸPressagaintochangebacktothenormaldisplay.
NOTE: You may press /return at any time during Day and Time setting to
returntothenormaldisplay.
12Hr./24Hr.TimeFormat
Yourthermostatissetfromthefactoryinnormal12(AM/PM)timeformat.Tochangeto
24 hour (military) time, press              during time and day setting mode to
toggle between the 12 hour and 24 hour formats. The AM / PM indicator will not be
displayed in24 hourmode.Boththecurrenttimeand allprograms willautomatically
changetotheselectedformat.
PROGRAMMING
Thefollowingtimeandtemperaturesettingsarepreprogrammedintothethermostat:
TemperatureinF˚(C˚)
ProgramNumber Time Heat Cool
1 6:00am 68˚F(20˚C) 78˚F(26˚C)
2 8:00am 60˚F(16˚C) 85˚F(29˚C)
3 4:00pm 68˚F(20˚C) 78˚F(26˚C)
4 10:00pm 60˚F(16˚C) 82˚F(28˚C)
ŸAll7daysoftheweekhavethesamedefaultprograms.
PersonalProgramSchedule
ŸYoucanrevisethefactoryprogramstomatchyourownschedule.UsethisPersonal
Program Schedule to determine which times and temperature settings match your
comfortandenergysavingrequirements.Useapencilsoyoucanreviseyourrecords
eachtimeyouchangeyourprogramsettings.
Heating
Day Program1 Program2 Program3 Program4
Monday –
Friday
Time
Temp
Time
Temp
Time
Temp
Time
Temp
Saturday –
Sunday
Time
Temp
Time
Temp
Time
Temp
Time
Temp
Cooling
Day Program1 Program2 Program3 Program4
Monday –
Friday
Time
Temp
Time
Temp
Time
Temp
Time
Temp
Saturday –
Sunday
Time
Temp
Time
Temp
Time
Temp
Time
Temp
RevisingPrograms
ŸFamiliarizeyourselfwithmanuallychangingprograms,sothatyoucaneasilymodify
the programs as your comfort needs change. Follow the steps below to changethe
programtimesandtemperature.
NOTE:
1)Theprogramtimecanbesetin10minuteincrements.
2)Theprogramtemperaturecanbesetinincrementsof1˚F(1˚C).
3) After 15seconds without akey press, thethermostat willret urnto normaldisplay
mode.
4)Whensettingtheprogramtime,notetheAM/PMindicator.
STEP1:
ŸSlidetheSystemSwitchtotheHEATorCOOLpositiontoprogramthe
correspondingsystem.
NOTE:iftheSystemSwitchisintheoffposition,
thelastpositionusedwillbeprogrammed.
STEP2:
ŸPresstoenterprogrammode.HEATorCOOLwillbedisplayedonthe
LCD.
STEP3:
ŸTheProgramhourandAMorPMindicatorare
flashing.Presstochangethehour.
STEP4:
ŸPressagaintochangetotheminuteposition.The
currentminutewillbeflashing.
ŸPresstochangetheminute.
STEP5:
Ÿ Press again to change to the program temperature. The
currentprogramwillbeflashing.
ŸPresstochangethetemperature.
STEP6:
ŸPressagaintomovetothenextprogramnumber.
ŸRepeatStep3through5tochangetheremainingWeekdayand
Weekendprograms.(Thereareatotalof8programs)
ŸAftercyclingthroughall8programs,pressagaintoreturnthedisplayto
normal.
ŸPressatanytimetoexittheprogramMode.
ReviewingPrograms
To review your program settings, press repeatedlytocyclethrough
theprograms.Youcanalsomakechangesatanytime.
SystemselectorSwitch
The System Selector switch on the front of the thermostat
determines the operating mode of the thermostat. You may select
COOL,OFF,HEAT.
NOTE: Anytime you install or remove the thermostat from the wall plate, slide the
System Selector to the OFF position to prevent the possibility of a rapid system
OnOff.
Fanswitch
The Fan switch should normally be located in the AUTO position.
The Fan will be turned on along with normal operation of your
system.Inanormalgasoroilfurnace,theFanwillbeturnedonby
yourfurnaceafteritswarmupdelay.Forelectricheat,airconditioning,andheatpump
operation,theFanwillturnonwiththesystem. ToruntheFanoncontinuously,slide
theFanswitchtotheONposition.
TemporaryManualOverride
To temporarily change the current set temperature without affecting your
program:
ŸPresstochangetoyourdesiredSetTemperature.
Holdthekeyfor2secondstofastadvancetheSet
Temperature.
ŸPresstoreturntonormalmode,orwait5seconds
forittoreturnautomatically.
ŸThecurrentprogramnumberwillflashtosignifytheTemporaryOverride.
Ÿ Atthe next program changetime, the Temporary Override is
cancelled,and the next program temperature  becomes the
setpoint  temperature.
Ÿ Press to confirm the Temporary
Override,
PermanentOverrideoraDesignatedDayOverride
To hold your Manual Override for vacation or Until a
DesignatedDay.
Ÿ Press to make the current program
temperature the HOLD temperature.
HOLDwillbedisplayedontheLCD,andtheProgramnumber
willdisappear.
ŸFollowtheTemporaryManualOverrideinstructionsabovetochangethe
PermanentManualOverridetemperature.
ŸYoucanconfirmtheheldsettemperaturebypressingforlessthan1
second.
ŸPressagain.Holddaywillbedisplayed
onthelcdandtheclockwilldisappear.
ŸPress Day key to add override days. Press
Programkeytoreduceoverridedays.
Ÿ Follow the Temporary a Designated Day
OverrideinstructionsabovetochangethePermanentManualOverride
temperature.
ToendOverride:
ŸUnder Permanent Override Press hold/return key twice. Under a Designated Day
Overridepress the hold/returnonce. Thethermostat willreturn
tothecurrentprogram,andtheHOLDdisplaywillbecanceled.
FilterChangeIndicator
Yourthermostatalsokeepsarecordofthenumberofhoursyourfilterhasbeeninuse.
To Maximizeyour system’sperformanceand energyefficiency,changeorcleanyour
filterregularly.
Ÿ When the total system runtime for heat and cool reaches
400 hours, “FILT” will alternate with the current
time on the LCD display to remind you need
cleanorchangeyoursystem’sfilter.”Filt”willcontinuetoflash
untilthecounterissetbacktozero.
ŸPress to review total filter usage. The display will blink ”FILT”,then show the Filter
Monitorcounter.After15seconds,thedisplaywillreturntonormalmode
In this example, the counter is at 410 Hours,
26Minutes.
ŸTo reset the Filter Monitor counter, depress Filter key for 3
seconds.thedisplaywillblink,andthecounterwillberesetto
zero.
SPANSetting
Your thermostat is set at the factory tocycle at 2˚F (1˚C) above and below the set
temperature.(Span=2)Thissettinghasbeendesignedtoprovideacomfortableroom
temperature under most all conditions. However, if you find your sy stem
cyclingtoofast ortoo slow, thenthe Spancanbe adjustedto modifythe
cycletime.
Ÿ Press and hold BOTH (up and down keys) for
three seconds. The display will flash, and SPAN
willbedisplayedontheLCD.
Ÿ Press to raise the Span to 3. This setting
INCREASEStocycletimebyallowingyoursystem
torunLONGER.
ŸPresstolowertheSpanto1.ThissettingDECREASESthecycletime
bycausingyoursystemtorunSHORTER.
The Span settings remain the same for both HEAT and COOL. The Span can be
changedatanytime,andisindependentofprogramtimesortemperatures.
Backlighting
Your thermostat has an electroluminescent lamp that backlights the display for easy
viewinginthedark.
Whenanykeyispressed,thedisplayisilluminated.
The display will remain illuminated for 8 seconds after the last key is pressed. This
allowsthelighttostayonifyouneedtooperateseveralkeys.
Note: If the thermostat is in Low Battery warning condition, the backlight will not
operate.Replacewith2newAAalkalinebatteriestorestoretheBacklightfunction.
LowBatteryWarning
Your thermostat has a twostage lower battery warning system.
When the batteries are first detected to be weak,the first stage
low battery warning is indicated by “BATT” flashing on the LCD
display. At your earliest convenience, you need to replace the
batterieswith2newAAalkalinebatteries.
When the batteries become too weak for normal operation, the
thermostat enters the second stage low battery warning which
shuts down the thermostat. In this condition, “BATT” flashes
aloneonthedisplay,andthethermostatwillturnyoursystemoff.
Yoursystemwillremainshutoffuntilthebatteriesarereplaced.
Note:ThethermostatwillstillkeepthecurrentSetTemperatureandFilterruntimein
memoryuntilnewbatteriesareinstalled. Afterconfirmingthatnewbatterieshavebeen
inserted,thethermostatwillreturntonormaloperation.
AutoRecovery
Auto Recovery calculates how early to turn you system back on, so that the room
temperature is already comfortable by the start of the comfort temperature program
period.AutoRecoverywork’sinbothHeatandCoolmodes.
ŸWhenthethermostatisinAutoRecoverymode,thedisplaywill
alternate“RECO”withtime,andtheprogramindicatorwillflash.
ŸAutoRecoverycanbedisabledbyslidingtheRecoveryswitch
onthecircuitboardtodisable.
ŸAutoRecoverywillnotoperateifPermanentholdorTemporary
holdisinoperation.
ŸAuto Recovery can be canceled manually if Hold/RETURN is pressed during the
recoveryprocess.
ŸAutoRecoverywillbecanceledandchangetonextperiod.
ErrorMode
If the thermostat is unable to control your system due to an
unexpectedbatteryproblem,thethermostatwillenterErrorMode.
In this condition, the thermostat flashes “E1”or “E2”on the LCD
display, and shuts off your system. To correct this problem,
replacethebatterieswith2newAAalkalinebatteries,evenifyou
haverecentlyreplacedthem.Movethebatteryoutholdanykeythenplacethebattery
again.Youwillneedtoreprogramyourthermostatandconfirmnormaloperation.
IfErrorModereturns,pleasecallusforfurtherinformation.
Lcddisplay information Lcddisplay information
E1 SensorError E2 Systemswitch
AutoCutOff
Your thermostat will automatically cutoff in Heat mode if the room temperature rises
above95˚F(35˚C).ItwillcutoffinCoolmodeiftheroomtemperaturedropsbelow45˚F
(7˚C).
Note: that if your system has malfunctioned and no longer responds to thermostat
controls,theAutoCutOffwillhavenoeffect.
day/time
day/time
hold /return
heatoff
cool
system
p ro g r am
day/time
day/time
da y/tim e
pro gram
p ro g r am
p ro g r am
heat
off
cool
system
on auto
fan
hold /return
filter
p ro g r am
p r o g r a m
M
H
program
hold
hold /return
hold /return
hold /return
hold /return
filter
SelectorSwitches
Inorderforthisthermostattocontrolyoursystem,thesystemtypemustbespecified
by the selector switches  onthe print ed circuit  board insidet he thermostat. There is
alsoaselectorswitchforyourchoiceofFahrenheitorCelsiustemperaturedisplay.
ŸF˚/C˚selector(Fahrenheit/Celsius)
Your thermostat is set forF˚ mode from the fact ory. In order to change to C˚ mode,
slidetheswitchtoC˚andMovethebatteryoutandwaitforabout1minutethenplace
thebatteries..
NOTE: Unless press any key about 2 seconds without the battery, then place the
battery again. the thermostat will not change temperature mode. All programs and
settingswillbelost.
ŸHeatingSystemSelector(HG–HEswitch)
Thefactorypositionforthisswitchisinthe“HG”position.Leaveinthispositionifyou
haveagasfurnaceoranoilburner.Ifyouhaveanelectricfurnace,testtoseewhether
theHeatandFancomeonasexpectedafterinstallation.IftheFanoperationisnormal,
leave it in the “HG” position. If the Fan does not come on within a minute of the
thermostatcallingforheating,changetheswitchpositionto“HE”.Thesystemselector
hasnoeffectinthecoolingmode.
NOTE: “HG” position is for gas and most other systems. “HE” position is for certain
electricsystemshavingafanrelay.
ŸSystemSelector(STANDARD–HEATPUMPswitch)
ThefactorypositionforthisswitchisintheSTDposition.Leaveitinthispositionifyou
have ANY system that uses gas, oil, electric, or hot water heating. If you have a
singlestageHeatPump(noauxiliaryoremergencyheatsource),thenslidetheswitch
totheHPposition.Besurethereversingvalvewireisconnectedtothecorrectterminal
foryourheatpump(Y/O)or(W/B).
ŸAutoRecoveryselector(DISABLE/ENABLE)
YourthermostatissetfromthefactorywiththeAutoRecoveryFeatureenabled,which
complieswiththeEPAENERGYSTARProgram.IFyouprefertousenormalrecovery,
slidetheswitchtotheDISABLEposition.
INSTALLATION
WhatYouNeed
Thisthermostatincludestwo#8slottedscrewsandtwowallanchorsformounting.To
installyourthermostat,youshouldhavethefollowingtoolsandmaterials.
ŸSlottedScrewdriver(s)
ŸSmallPhilipsscrewdriver
ŸHammer..
ŸElectricdrilland3/16”bit
ŸTwo1.5V(AA)sizealkalinebatteries(included)
RemoveOldThermostat
CAUTION:Donotremoveanywiringfromexistingthermostatbeforereadingthe
instructionscarefully.Wiresmustbelabeledpriortoremoval.
INPORTANT!Turnoffthepowertothefurnaceatthemainpowerpaneloratthe
furnace.
Remove existing thermostat cover and thermostat. See Figure 1. Some thermostats
will have screws or other locking devices that must first be removed. Once the wall
mounting plate is exposed, look for wires. If wires are not visible, they may be
connectedtothebackofthewallplate.Again,lookforscrews,tabs,etc.Somemodels
havedoorsthatopentoexposewiresandmountingscrews.SeeFigure1.
TypicalHomeThermostats
Figure1
WiringLabeling
Ÿ Each wire coming from the wall to the existing thermostat is connected to terminal
pointonthatthermostat.Eachof theseterminal pointsis usuallymarked withacode
letterasshowninTableAbelow.
ŸNotethatthisthermostathasmultiplefunctionterminalsthatallowSingleStageHeat
Pump capability. Standard systems use: Rh, Rc, G, Y, W.[SingleStage Heat Pumps
use:R,Y,G,andOorB.]TableAbelowshowsthemultiplefunctionsoftheterminals.
Usetheterminalsthatmatchyoursystem.
ŸThenumberofwiresinyoursystemcanbeasfewastwo(forheatonlysystems),as
many as eight, or any number in between. If you follow the labeling procedures
correctly,youdonothavetobeconcernedabouthowmanywiresthereare.
ŸThereisoftennoterminalmarkingontheexisting
thermostat of two wire, heat only systems. Just
connecteitherofthewirestotheRHterminal,then
connect the other wire to the W terminal to
completethecircuit.
ŸIMPORTANT!BEFOREDISCONNECTINGANY
WIRES, APPLY THE SELFADHESIVE LABELS
PROVIDEDTOTHEWIREASSHOWNINTABLE
ABELOW.(Forexample,attachthelabelmarked
Wtothe wirethattoestotheWorHterminalonyourexistingthermostat.)IGNORE
THECOLOROFTHEWIRESsincethesedonotalwayscomplywiththestandard.
ŸAfterlabelingwires,disconnectthemfromtheexistingthermostat.
ŸRemoveexistingwallplate.Tomakesurewiresdonotfallbackintowallopening,you
maywanttotapethemtothewall.
ŸIfholeinwallislargerthannecessaryforwires,sealthisholewithinsulatingmaterial
so that nohot orcold aircan enterthe back ofthe thermostatfrom the wall. This air
couldcauseafalsethermostatreading.
TableA
Ifthecodeletteronyour
existing
Thermostatis
thenmarkthewirewith
labelshown
andconnectto
thermostatterminal
shown
NOTE: Do notconnect a “Common” wire(sometimes labeled “C”)to anyterminal on
this thermostat. Tape up the wire and do not use. This wire provides electricity to
nonbatterypoweredthermostats.
MountWallplateandThermostat
Ÿ Remove the wall plate from your thermostat by pressing the release tab on the
bottomofthethermostat.SeeFigure2.
Figure2.
ŸPositionwallplate onwall andpull existingwires through largeopening.Thenlevel
forappearance.Markholesfor plasticanchorsprovided,ifyourexistingholesdonot
lineupwiththoseonthewallplate.
ŸDrillholeswith3/16”bitandgentlytapanchorsintothebolesuntilflushwithwall.
Ÿ Reposition wallplate to wall, pulling wires through large opening. Insert mounting
screwsprovidedintowallanchorandtighten.SeeFigure3.
Figure3.
NOTE:5WireSystems
IfyourthermostathasonewiremarkedRorRh(2,3,or4wiresystem),thenleavethe
jumperwirebetweentheRhandRcterminalsonthewallplate.Otherwise,ifyouhave
separateRhandRcwires(5wiresystem),thenremovethejumperwirebetweenthe
RhandRcterminals.
ConnectWiresandMountThermostattoWallplate
ŸMatchandconnectthelabeledwirestotheappropriatecodedterminalscrewsonthe
wallplate.(See Figure4,5.)Ignoreanywires whichmaybe present,butwhich were
noteconnectedtotheoldthermostat.
ŸRefertotheWiringDiagramsbelowtobesureyoursystemiswiredcorrectly.
ŸIfyoursystemisasinglestageheatpumpandusesanOorBwire,youmustmove
the System Selectorswitch inside thethermostat to the Heat Pump position.If you
have a normal furnace or electric system, leave the switch inthe Standard position.
RefertotheSystemSelectorsectiononthebackformoreinformationonthisswitch.
ŸBesuretotightentheterminalscrewssecurely,otherwisealoosewirecouldcause
operationalproblemswithyoursystemorthermostat.
Ÿ Push excess wires back into the hole to prevent interference when installing the
thermostattothewallplate.
ŸMakesuretheSystemSwitchissettoOFF,andtheFanSwitchissettoAUTO.
Ÿ Insert the bottom tabs on the thermostat body into the slots at the bottom of the
wallplate.Press the topof thethermostatbodytosnap it intothe wallplate.Referto
Figure6.
NOTE: Do not force the thermostat onto the wallplate, as the terminal pins may be
damaged.Ifitdoesnotsnapproperly,thethermostatmaynotwork.
Ÿ Insert the two AA size alkaline batteries, observing the polarity marked inside the
batterycompartment.
ŸSwitchonthemainpoweratthepanelorfurnace.
Figure4                       Figure5
Figure6
WiringDiagrams
TROUBLESHOOTING
Problem Solution
1. Check battery connections and
batteries.
NoDisplay
2. Move the battery out and wait for
about1minute
EntireDisplayDims. 1.ReplaceBatteries.
Auto Fan Does Not Turn On
Properly.
1. Move HG/HE selector to correct
position.
1.Checkthatthefunctionswitchisin
the correct position (“HEAT” or
“COOL”).
2.Theremaybeasmuchas4mintue
delaybeforethesystemturnsOn–
wait and check. (Compressor
protectiondelay.)
3. Check your circuit breakers and
switchestoensurethere ispower
tothesystem.
4.Replacebatteries.
5. Make sure your furnace blower
doorisclosedproperly.
6.Ifyournonheatpumpsystemonly
uses 4wires, be sure the jumper
wire is installed between the Rh/B
andRc/Oterminals.
7. Check the position  of the
Reversing Valve selector switch:
StandardorHeatPump.
Heating or Cooling Does Not Go
OnorOff.
8. If you have singlestage heat
pump, be sure the jumper wire is
installed between the Y and W
terminals.
ErraticDisplay 1. Movethe battery outholdanykey
then place thebattery again. Then
reprogram.
If unit continues to operate in the
Offposition.
1.Replaceunit.
Thermostat permanently reads
“HI”,“LO”,or“E1”,“E2”..
1.Replaceunit.
Ifyouexperienceanyotherproblems,callusfortechnicalassistance.
Theservicenumberis18665919898
W
G Y RH
RC
WallmountingPlate   Thermostat          Cover
1 2 3 4
RECO VER Y EN A BLE D ISA BLE
STD HP
HG HE
K6
JP1
K5
CENTI GRAD E  F AH REN HEIT
Y1
Y1
RH
RC
G
Y/ O
W/B 
Y1
AC2 4V
AC2 4V
N
L
N
L
Y/O
Rh
Rc
G
L
N
Y1
W/B
RH
G Rc Rh Y/O W/BY1
Wallplate
Terminals
Jumper
Fan
Relay
Cool
Contactor
HeatRelay
orValve
System
Selector
STD
HP
Fan
Relay
Compressor
Contactor
Reversing
Valve
Wallplate
Terminals
System
Selector HP
STD
Wallplate
Terminals No
Jumper
System
Selector HP
STD
Jumper
Heat
Mode
Cool
Mode
OR
Heat24Vor
MillivoltSupply
HeatRelay
orValve
Wallplate
Terminals
Jumper System
Selector HP
STD
Wallplate
Terminals
System
Selector
HeatRelay
orValve
Jumper
HP
STD
Fan
Relay
Fan
Relay
Wallplate
Terminals
Cool
Contactor
System
Selector HP
STD
Jumper
4WireHeat/CoolSystem
5WireHeat/CoolSystem
SingleStageHeatPumpSystem
2WireHeatOnlySystem
3WireHeatOnlySystem
3WireCoolOnlySystem
G Rc Rh Y/O W/BY1
Fan
Relay
Heat
24V
Supply
Cool
Contactor
Heat
Relay
orValve
G Rc Rh Y/O W/BY1
120V
AC
120V
AC
120V
AC
120V
AC
120V
AC
120V
AC
N
L AC24V
NL AC24V
NL AC24V
N
L AC24V
NL AC24V
NL AC24V

Other Comfort Stat Thermostat manuals

Comfort Stat CP1919 User manual

Comfort Stat

Comfort Stat CP1919 User manual

Comfort Stat CP2815 User manual

Comfort Stat

Comfort Stat CP2815 User manual

Comfort Stat CP1818 User manual

Comfort Stat

Comfort Stat CP1818 User manual

Comfort Stat BLU2810 User manual

Comfort Stat

Comfort Stat BLU2810 User manual

Comfort Stat CP2020 User manual

Comfort Stat

Comfort Stat CP2020 User manual

Comfort Stat BLU1719 User manual

Comfort Stat

Comfort Stat BLU1719 User manual

Comfort Stat BLU2801 User manual

Comfort Stat

Comfort Stat BLU2801 User manual

Comfort Stat BLU2810 User manual

Comfort Stat

Comfort Stat BLU2810 User manual

Comfort Stat TOUCH ME 1 User manual

Comfort Stat

Comfort Stat TOUCH ME 1 User manual

Comfort Stat CP1717 User manual

Comfort Stat

Comfort Stat CP1717 User manual

Popular Thermostat manuals by other brands

Honeywell v owner's manual

Honeywell

Honeywell v owner's manual

Honeywell RTH7400 series Quick installation guide

Honeywell

Honeywell RTH7400 series Quick installation guide

Trane TZONE950AC52ZA installation guide

Trane

Trane TZONE950AC52ZA installation guide

Arduino R205 Series instruction manual

Arduino

Arduino R205 Series instruction manual

HOTOWELL HTW-31-KT13T Series quick start guide

HOTOWELL

HOTOWELL HTW-31-KT13T Series quick start guide

Daikin EKRTR installation manual

Daikin

Daikin EKRTR installation manual

Siemens RDE20.1 manual

Siemens

Siemens RDE20.1 manual

Venstar T1035 owner's manual

Venstar

Venstar T1035 owner's manual

Robertshaw RS5220C user manual

Robertshaw

Robertshaw RS5220C user manual

Honeywell LP907A installation instructions

Honeywell

Honeywell LP907A installation instructions

CLIVET HID-TConnect quick guide

CLIVET

CLIVET HID-TConnect quick guide

ICM Controls SC 2311 Installation, operation & application guide

ICM Controls

ICM Controls SC 2311 Installation, operation & application guide

Johnson Controls KONOzw Operation guideline

Johnson Controls

Johnson Controls KONOzw Operation guideline

hager 25501 quick start guide

hager

hager 25501 quick start guide

Cadet SMART-BASE SBFT2 installation instructions

Cadet

Cadet SMART-BASE SBFT2 installation instructions

Aube Technologies TH123 owner's manual

Aube Technologies

Aube Technologies TH123 owner's manual

Braeburn Builder 1010 user manual

Braeburn

Braeburn Builder 1010 user manual

Tekmar tekmarNet 4 537 Installation & operation manual

Tekmar

Tekmar tekmarNet 4 537 Installation & operation manual

manuals.online logo
manuals.online logoBrands
  • About & Mission
  • Contact us
  • Privacy Policy
  • Terms and Conditions

Copyright 2025 Manuals.Online. All Rights Reserved.