Comfortmaker CMHT03 User manual

Please read instructions before commencing installation
Comfort Maker : Three Room Heat Transfer Kit
Installation Instructions
Model:CMHT03. Order Code: FAN0846
COMFORT MAKER
Auckland/Christchurch New Zealand Fax: (09) 259 1661
PUB0195 iss:04 04/17
Hints:
• Before making any holes in ceilings check for access behind the ceiling, taking care
to avoid ceiling joists, etc.
• Check the distance you want to run the duct. The shorter the duct runs the more
efcient the fan is.
• Remember! The hot layer of air is dispersed across the whole ceiling so it is not
necessary to install the inlet grille directly near the re ue. The grille should be at
least 1 metre from the ue in order to avoid excessively high temperatures.
• Although the fan is ball bearing mounted and very quiet it is recommended to
mount it on a solid surface such as the top plate of a wall partition or, better still,
suspend the unit from the rafters. This will ensure the quietest operation and
eliminate any resonance.
Installation Instructions:
1. Choose the inlet location within the already heated room and cut a 155mm Dia.
hole. CARE MUST BE TAKEN TO CUT AN ACCURATE AND NEAT HOLE. Mount
the eggcrate inlet grille using the screws supplied.
2. Choose the outlet location in the room to be heated. Cut a 150mm Dia. hole for the
diffuser. Remove the clip-in centre portion of the circular diffuser and the clamp
ring. The diffuser is inserted into the cavity and xed using the screws provided.
The clamp ring is not normally required. However should you have difculty with
screwing into the Gib, use the clamp ring over the spigot. Screwing through the Gib
into the clamp ring will produce a secure xing for the diffuser.
3. Fitting of ducting: Straight runs without tight bends are most efcient. The inner
duct should be stretched reasonably tight to assist efcient airow. Where joins in
ducting on longer runs are necessary we advise the use of a proper duct connector
sleeve (Order code: DCT0059) to form the joint on. Stretch insulation over
maximum amount of each joint to avoid heat-loss.
4. Locate the best mounting place for the fan unit in the ceiling space. Ensure the
correct airow direction is maintained when mounting the fan. Make the wiring
connections. For heat transfer it is recommended that the high speed connection
is used for the Mixo fan, see Mixo installation instructions. It is recommended
all wiring be performed by or in conjunction with a registered electrical contractor.
Note that a suitable junction box will be required to connect the fan and incoming
supply.
COMFORTMAKER ACCESSORIES
Thermostat Accessories:
• FAN5555 - UT - T1 Ultecon Automated Touch Screen Thermostat
• FAN5856 - UT - M1 Ultecon Mechanical Thermostat
Duct/Diffuser Accessories:
• DCT0088 - 150mm x 3 metres Insulated Ducting
• DCT0059 - 150mm Duct Connector
• DCT0058 - 150mm Adjustable Diffuser
• DCT0091 - 150:150:150 Branch Take Off
• DCT0173 - Duct Tape
Note: A maximum extended length of 15 metres is recommended with this system
FAN5555 FAN5856

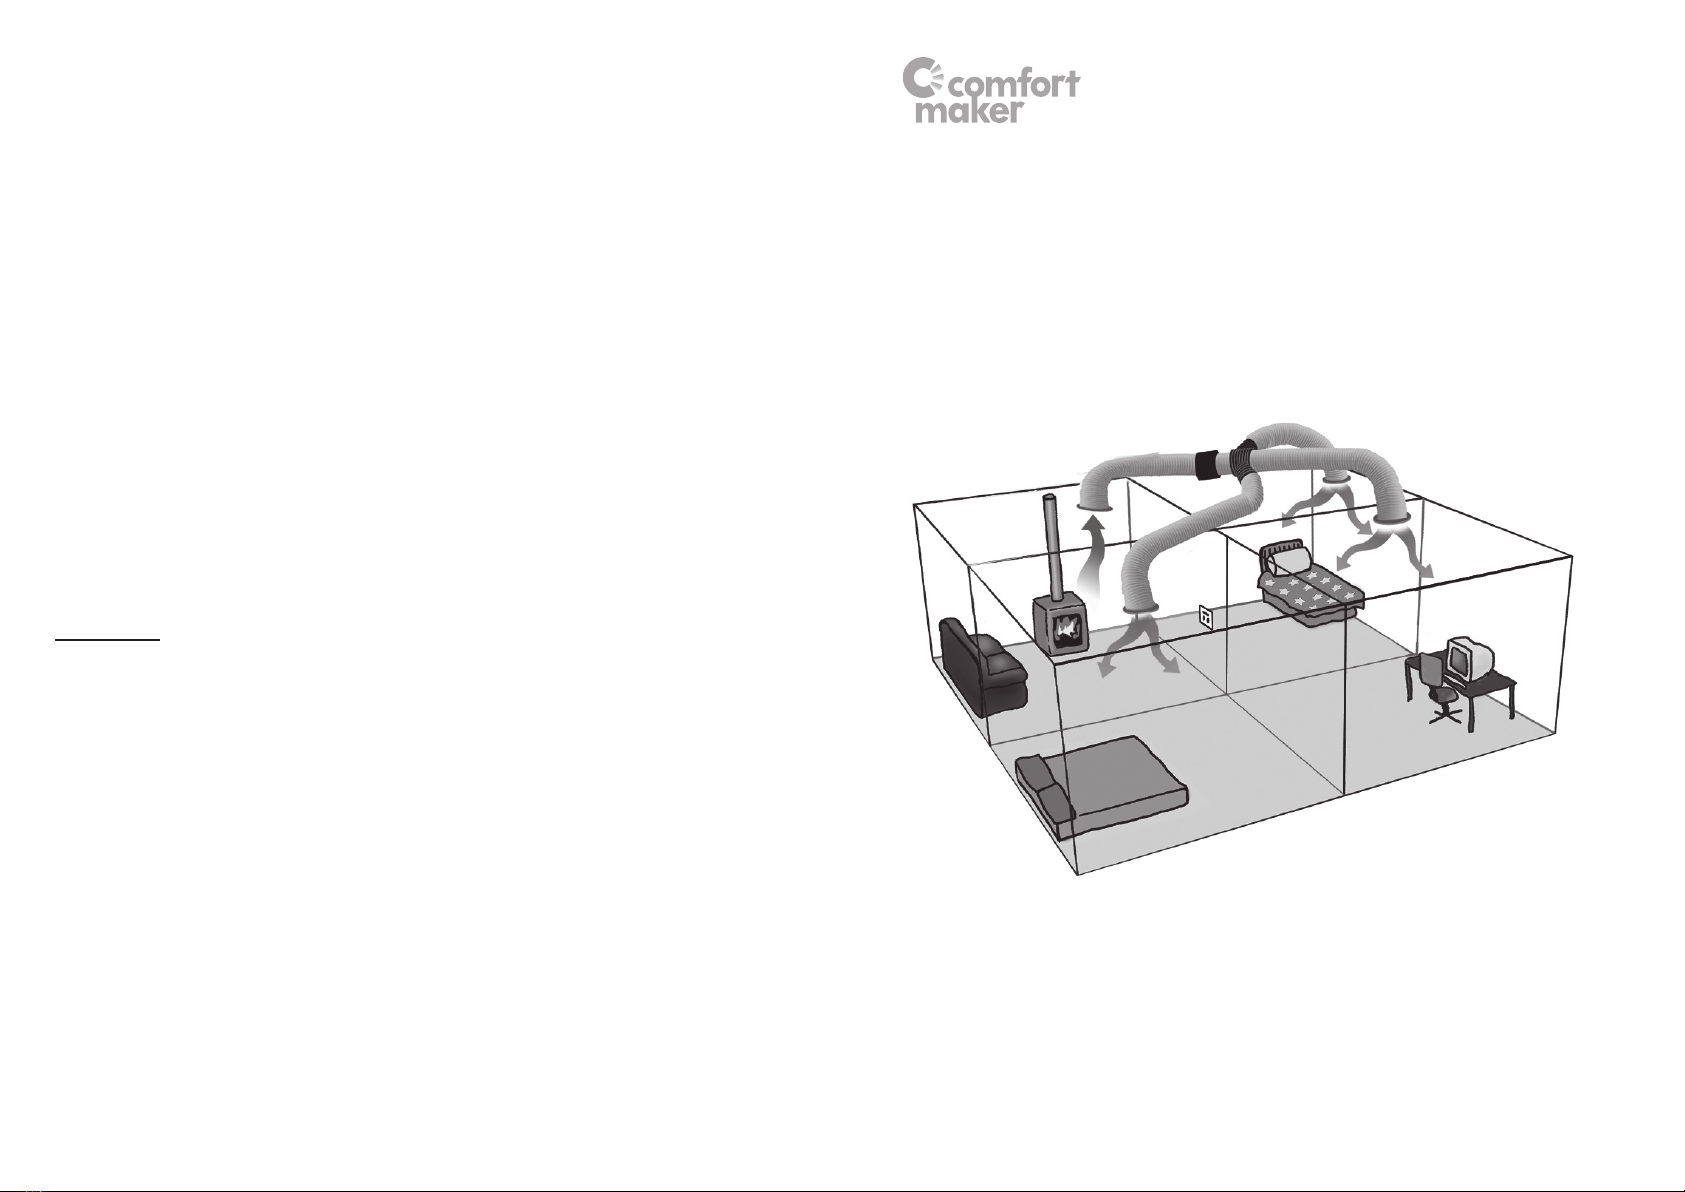
Comfort Maker Three Room Heat Transfer Kit
Components Included in this kit
• 1 x Mixed Flow 150mm Fan
• 5 x 3 metres 150mm Insulated Ducting
• 2 x Branch Take Offs
• 1 x Eggcrate Inlet Grille
• 3 x Adjustable Circular Outlet Diffuser
• Fittings & Fixings
5. Run and connect all ducting between the inlet grille, fan and outlet diffuser. Check
all joints are secure, duct tape is provided for this purpose. The system can now
be run on test.
6. Please Note: When connecting insulated duct to the spigots, you rst secure the
‘CORE’ to the spigot with duct tape. Then pull the ‘INSULATION’ up to the joint
and tape the ‘OUTER SLEEVE” to the spigot with the duct tape.
7. Use adjustable diffuser outlets to regulate the airow to each room. To adjust the
diffusers turn the cone clockwise to decrease the airow, anticlockwise to increase
the airow.
NOTE: This system does not generate heat. To ensure that heat is not lost through
our transfer system, your excess heat capacity in the source room, available for
transfer, must exceed the overall heat losses in the target room. The following points
are worthy of consideration, to optimise the performance of your system;
• Do you have enough excess heat?
You may need to run your heat source at higher output levels.
• Is your property well insulated?
Heat loss through poor insulation costs you money.
• Background heating takes time - Give the system time to create warm air
circulation through the house which may take several hours to establish.
IMPORTANT
• Switch off mains supply before making any electrical connections. If in any doubt contact a
qualied electrician
• This appliance is not intended for use by persons (including children) with reduced
physical sensory or mental capabilities, or lack of experience or knowledge, unless they
have been given supervision or instruction concerning the use of the appliance by a
person responsible for their safety.
• Young children should be supervised to ensure that they do not play with the appliance.
• If it is intended to install an air transfer system into a room where gas appliances are
used for the heat source, the gas re installation company must be consulted before
undertaking installation. Section G4/ 2.2 (Mechanical Ventilation) of the NZ Building Code
refers to certain safety criteria which should be considered when installing mechanical
ventilation in a room where gas appliances are used. The gas heating installation
company can advise on these aspects.
• Precautions must be taken to avoid the back-ow of gases into the room from the open
ue of gas or other open-re appliances when mounted in outside windows or walls.
• If the supply cord is damaged, it must be replaced by the manufacturer, its service agent
or similarly qualied persons in order to avoid a hazard.
• The fan is to be installed so that the blades are more than 2.1m above the oor.
SPECIFICATION:
Electrical: 220-240V ~50Hz
Fan Wattage: 70W
Airow Max: Low Speed: 420m3/hr
High Speed:560m3/hr
Max Temperature: 50°C
Sound Volume: 47 dB(A) 3m
See the list of ComfortMaker accessories overleaf
This manual suits for next models
1
Other Comfortmaker Heater manuals
Popular Heater manuals by other brands

Vornadobaby
Vornadobaby Sensa Owner's handbook

Kermi
Kermi TBN10 Instructions for installation

Argos
Argos Value 450W Panel Heater instruction manual

CLIMASTAR
CLIMASTAR SMART TOUCH 500 Installation manual and user's guide

Winterwarm
Winterwarm WWH-EC instruction manual

Saunum
Saunum Spa Session Instructions for use and installation