IMPORTANT
Please read this instruction manual carefully before
operating the unit
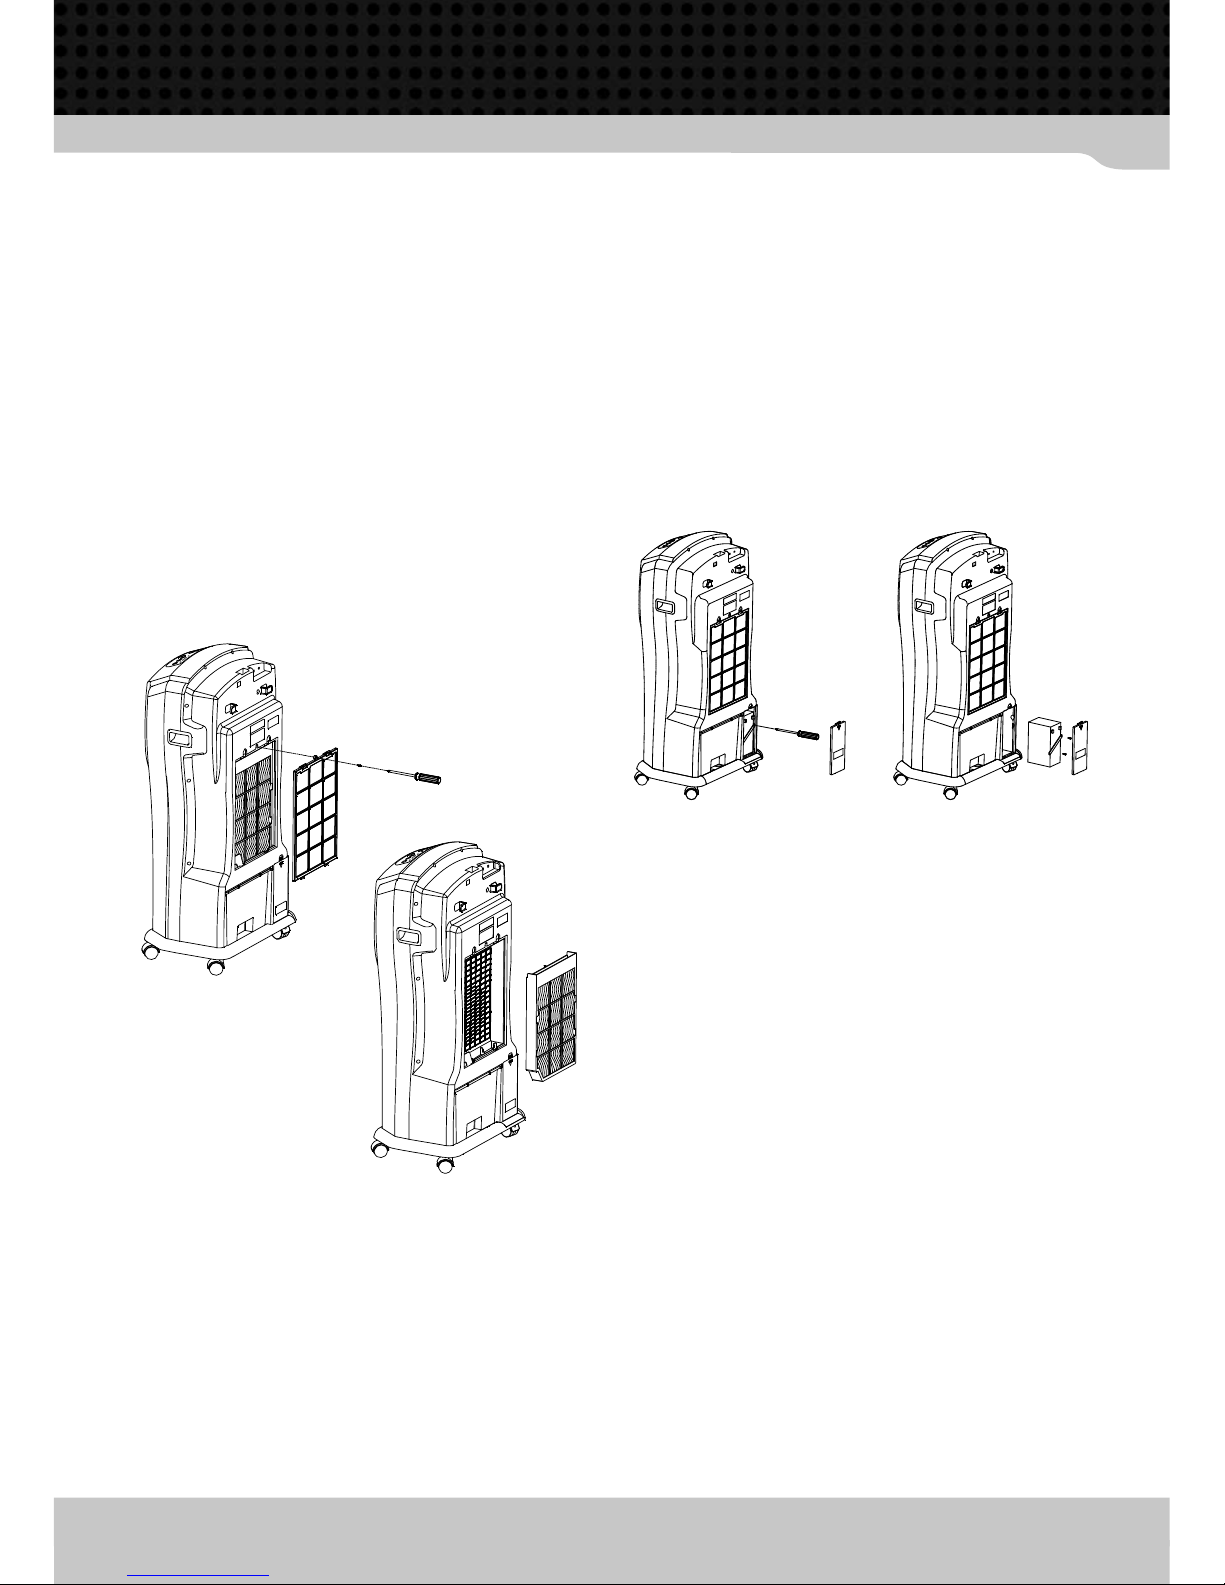
• Remove isolation tape in battery compartment before charging
battery for the first time – this is located behind the battery
inside the battery compartment
• Charge battery for minimum of 12 hours before first use or if
unit has not been used for a long period of time
• If unit is being stored away for a long period of time without
use, remove water and battery from unit
• Indoor use only
• Wipe clean with damp cloth only – do not use any abrasive
cleaners
• Store in a cool and dry place, away from children when not in
use
• Switch off and disconnect from power outlet when not in use
or before cleaning
• This appliance is not intended for use by persons (including
children) with reduced physical, sensory, or metal capabilities
or lack of experience and knowledge unless then have
been given supervision or instruction concerning use of the
appliance by a person responsible for their safety
• Ensure children are supervised when they are around the
appliance
WARNING
DO NOT use non rechargeable batteries
• Place unit in well ventilated area when in use or recharging
battery
• Disconnect unit from power supply before removing the battery
• When placing the battery in unit, ensure it is installed as
indicated inside battery compartment
• Do not dispose of battery in fire
• To be repaired by qualified persons only
• DO NOT expose to rain
• If adaptor cord becomes damaged, it must be replaced by a
qualified person
• This unit is not intended for use by persons (including children)
with reduced physical, sensory or mental capabilities or lack of
experience and knowledge
• Children must be supervised at all times when around this unit
• Unplug from power source when not in use unless recharging
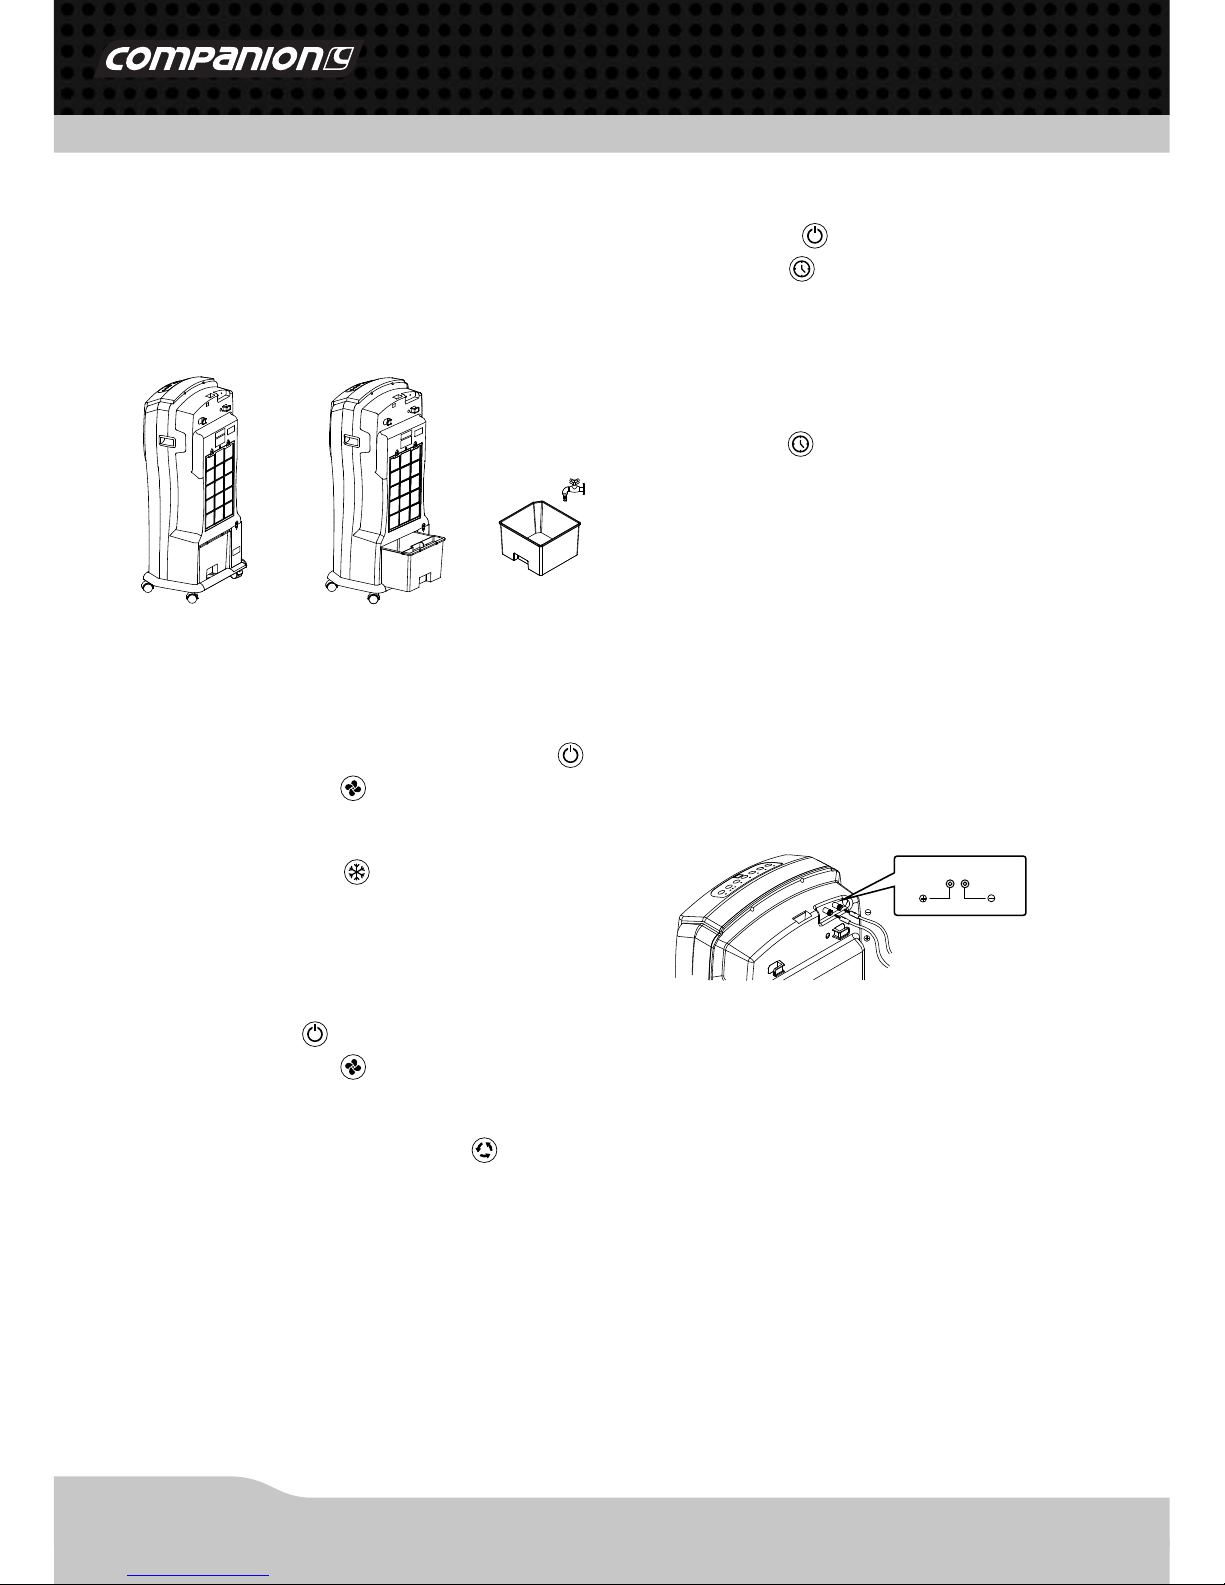
• Empty the water tank before storing or transporting the unit
• Do not use the cooler function if unit is to be used in a damp
space
• Do not operate the unit if there is any damage to the power
plug or cord – take unit to an authorised service agent for
replacement
• Do not use cooler when water tank is empty; water level in
tank must be above minimum level in order for this function to
operate
• Do not place fingers or foreign objects inside fan grill during
operation
• Any repairs to be undertaken by an authorised service agent
only – do not attempt to undertake any required repairs
yourself
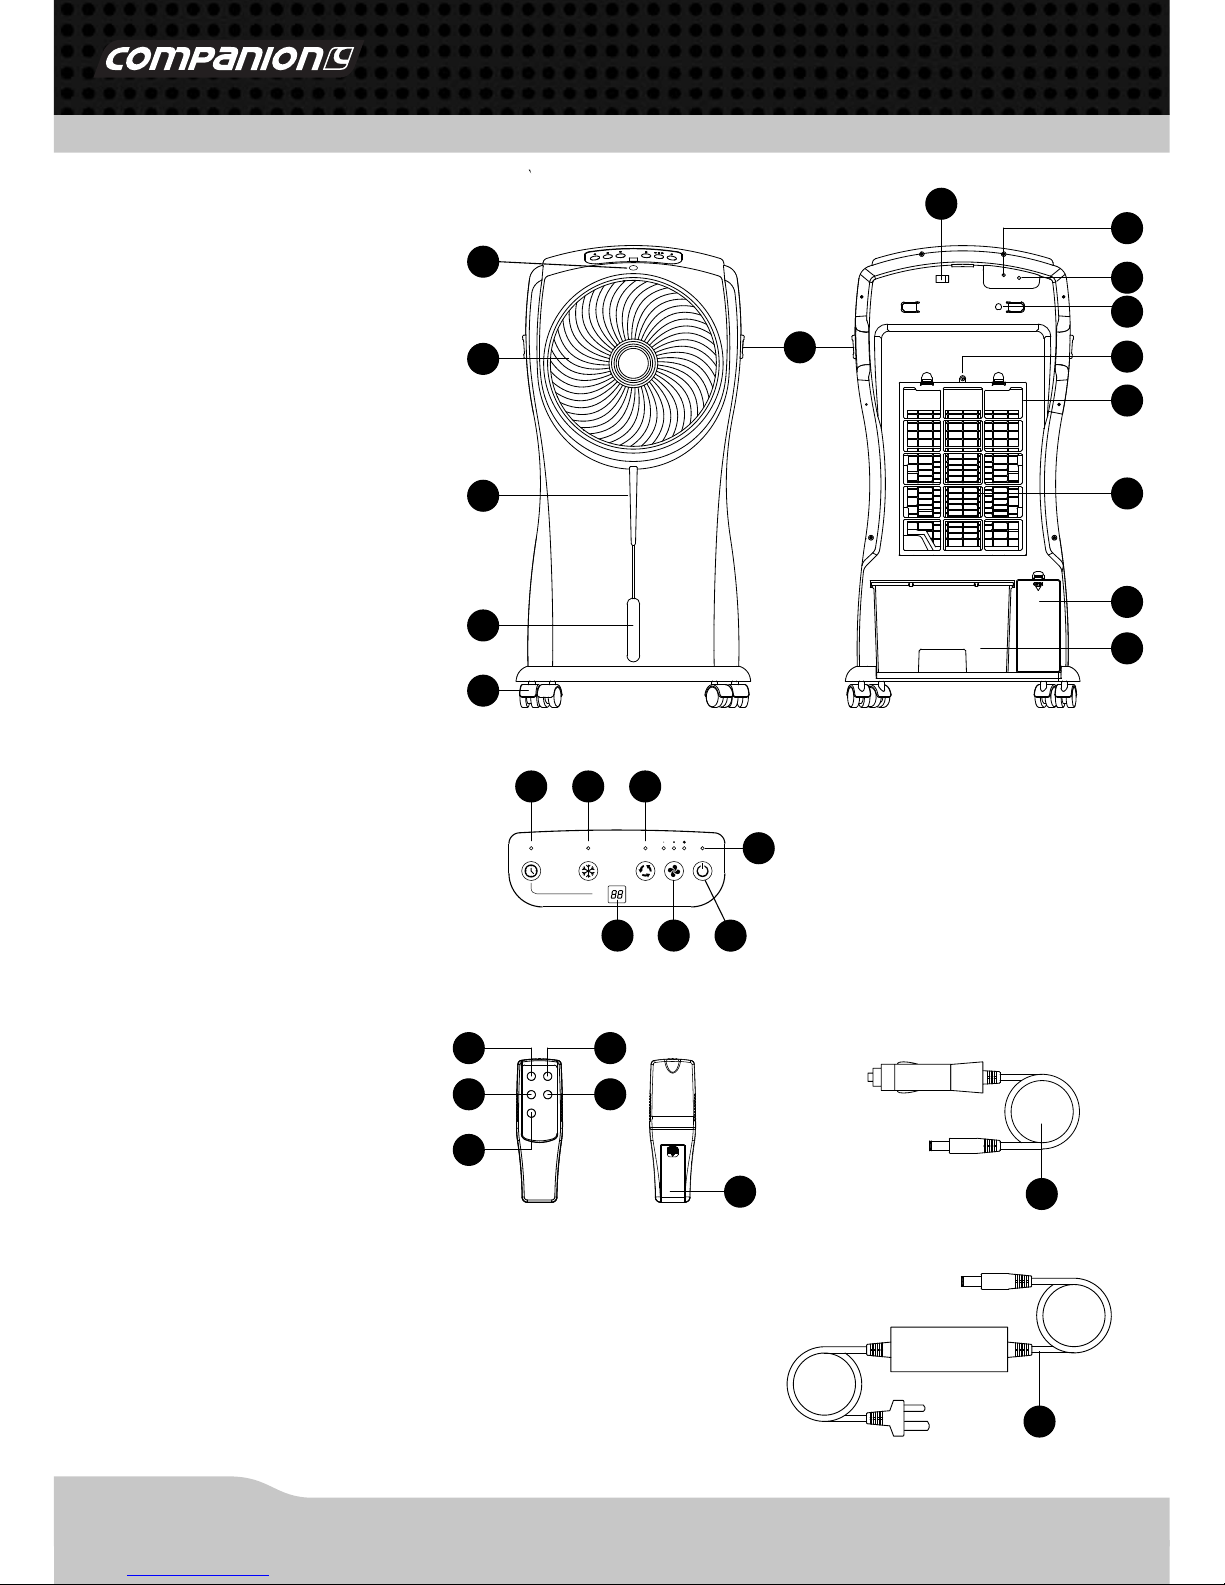
TO ATTACH WHEELS
• Attach the four wheels to the base of the unit using the
included wrench, tightening each wheel in a clockwise
direction
• Wheels can be locked in position if required
REMOTE CONTROL
• Open the rear battery compartment and insert 2 x AAA
batteries (not included) as indicated.
Close compartment cover.
• Remote control must be aimed at the sensor on the front of the
appliance (1), and will not function from beside or behind
the appliance.
3