COMPOST KITCHEN iCompost User manual

1
Users Guide
Ver: 1.1
Model: iCompost (2L)
BY THE COMPOST KITCHEN (PTY) LTD

2
Table of Contents
1 Safety Instructions 2
2 Safety Standards 2
3 Specifications 3
4 Introduction 3
5 General Description 4
6 Setup 5
7 Regular Use 5
8 Functions 7
9 Maintenance 8
10 Troubleshooting 9
11 Frequently Asked Questions 10

2
1 Safety Instructions
When using electrical appliances, basic safety precautions should always be followed including the following:
1.1 Read all instructions before using your iCompost device.
1.2 To protect against risk of electrical shock do not put the iCompost unit in water or other liquid.
1.3 This appliance is not intended for use by children or by persons with reduced physical, sensory, or mental
capabilities, or lack of experience and knowledge. Close supervision is necessary when any appliance is used
near children. Children should be supervised to ensure that they do not play with the appliance.
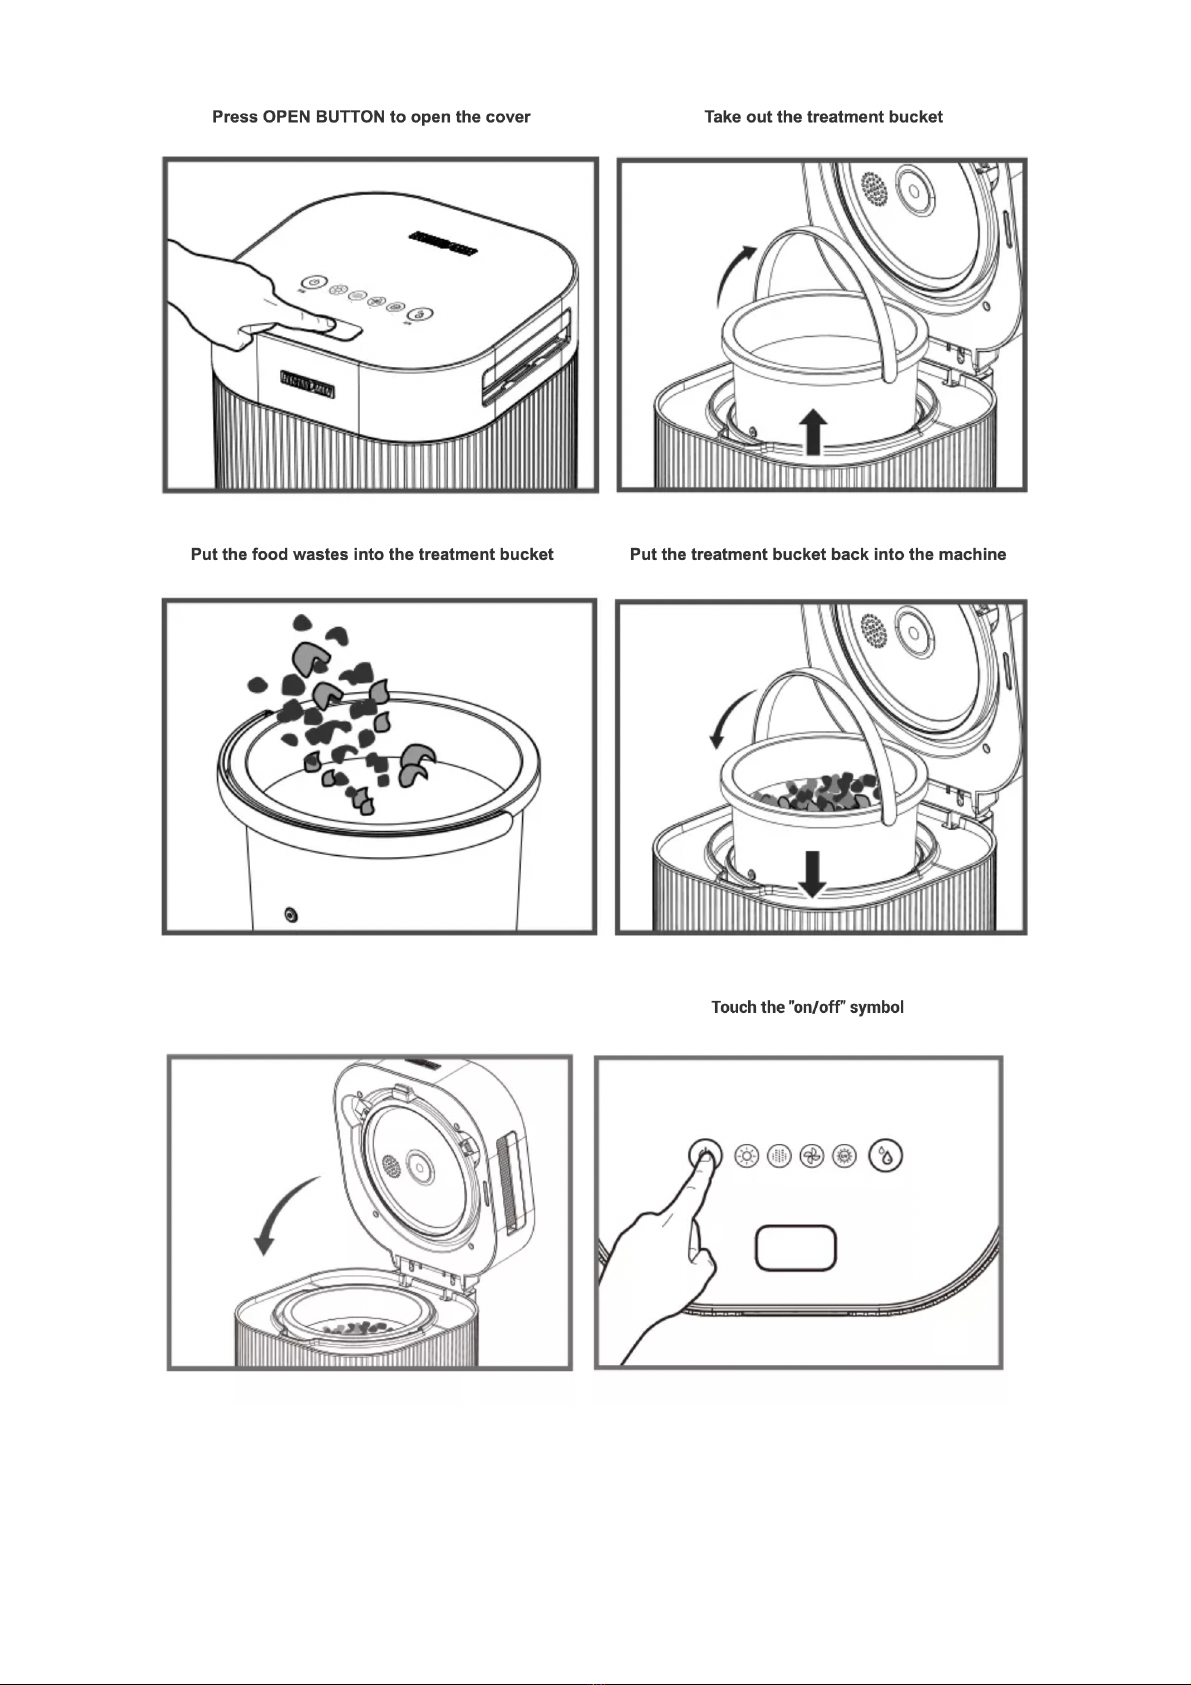
1.4 Turn the appliance OFF, then unplug from the outlet when not in use, before assembling or disassembling
parts and before cleaning. To unplug, grasp the plug and pull from the outlet. Never pull from the power cord.
1.5 Avoid contacting moving parts.
1.6 Do not operate an appliance with a damaged cord or plug, or after the appliance has malfunctioned, has been
dropped or damaged in any way. Contact iCompost Technical Support for information on the inspection,
repair, or adjustment
1.7 The use of accessories that are not sold by the manufacturer are not recommended, it might result in fire,
electric shock or injury.
1.8 Do not let the power cord hang from a table or counter.
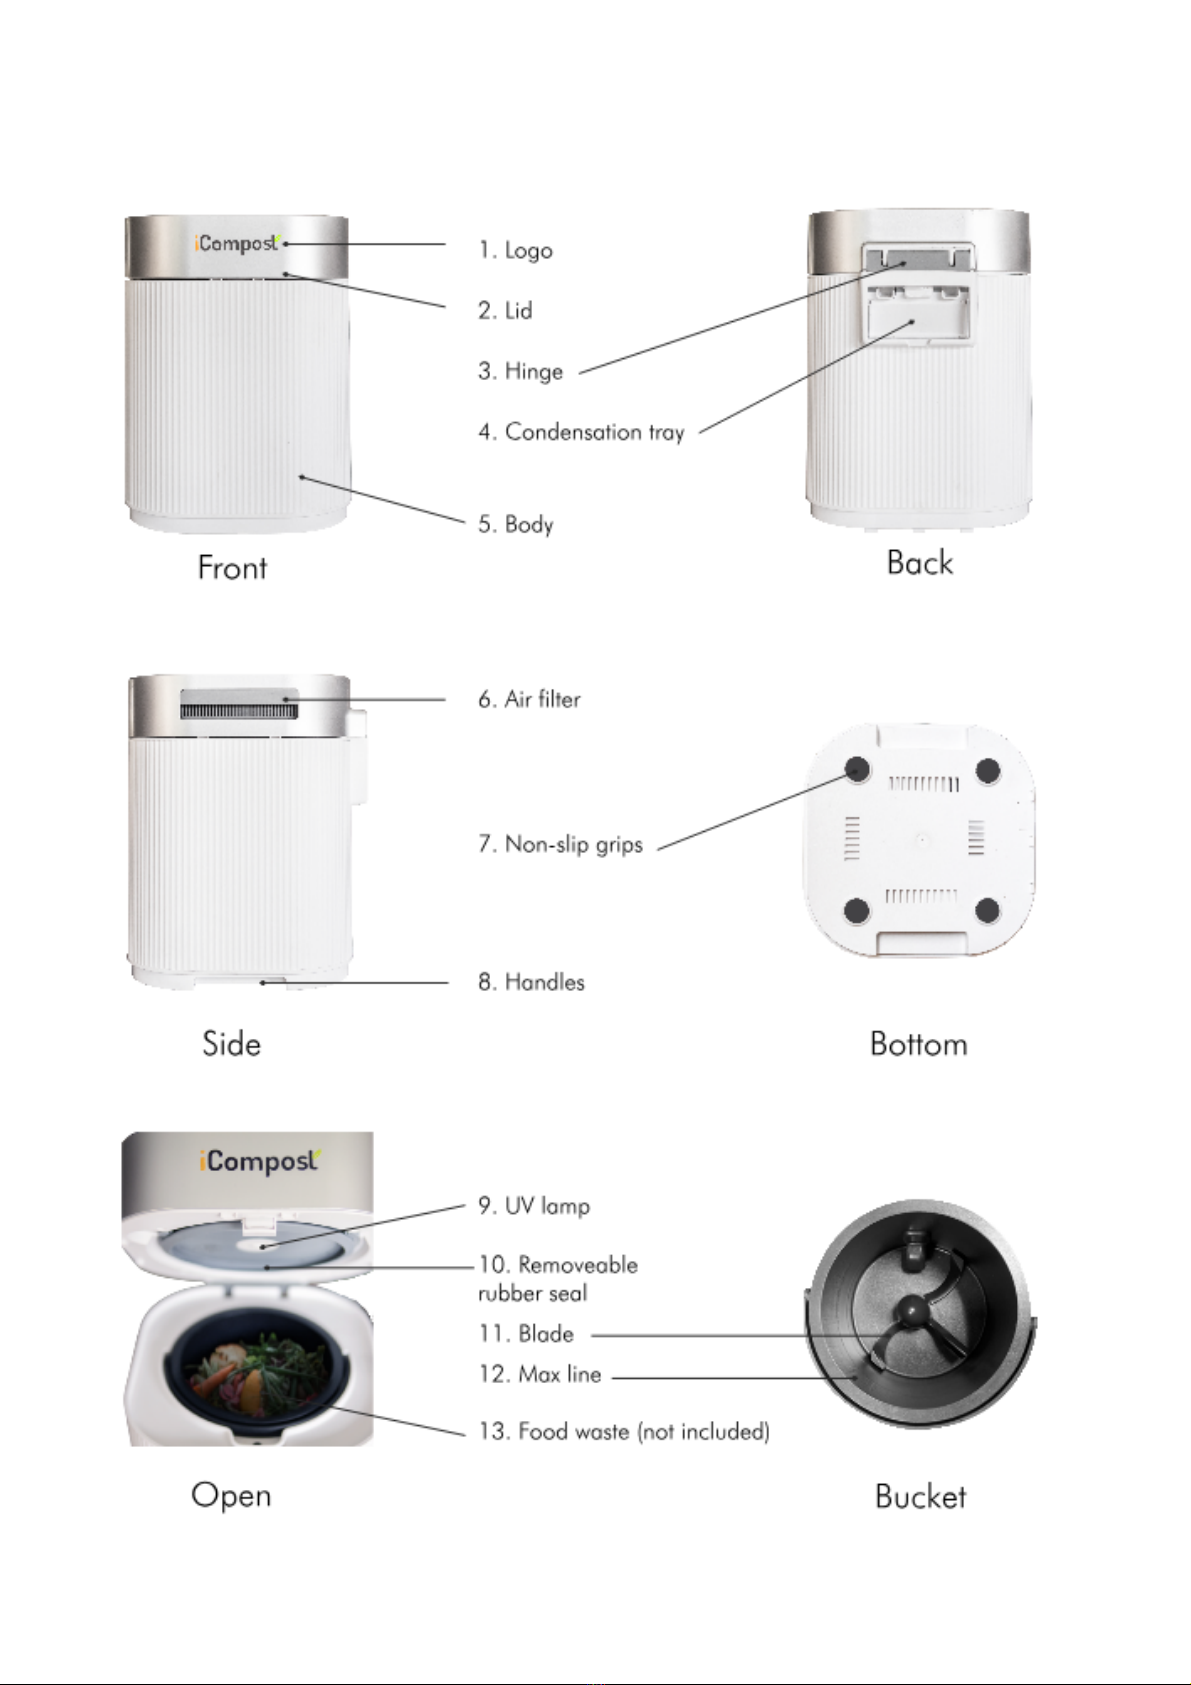
1.9 The blades are sharp. Handle carefully.
1.10 The machine will not activate if the lid is not closed fully to prevent accidental harm. Do not attempt to bypass
the safety feature
1.11 Do not fill the bucket above the maximum fill line to avoid risk of injury or damage to the appliance.
1.12 CAUTION To provide continued protection against risk of electric shock, connect to properly grounded outlets
only.
1.13 CAUTION - HOT Risk of burns. Wait until the end of the cycle, when the cooling phase is complete, before
removing the bucket.
1.14 Unplug the device before inserting or removing parts.
1.15 For indoor, household use only
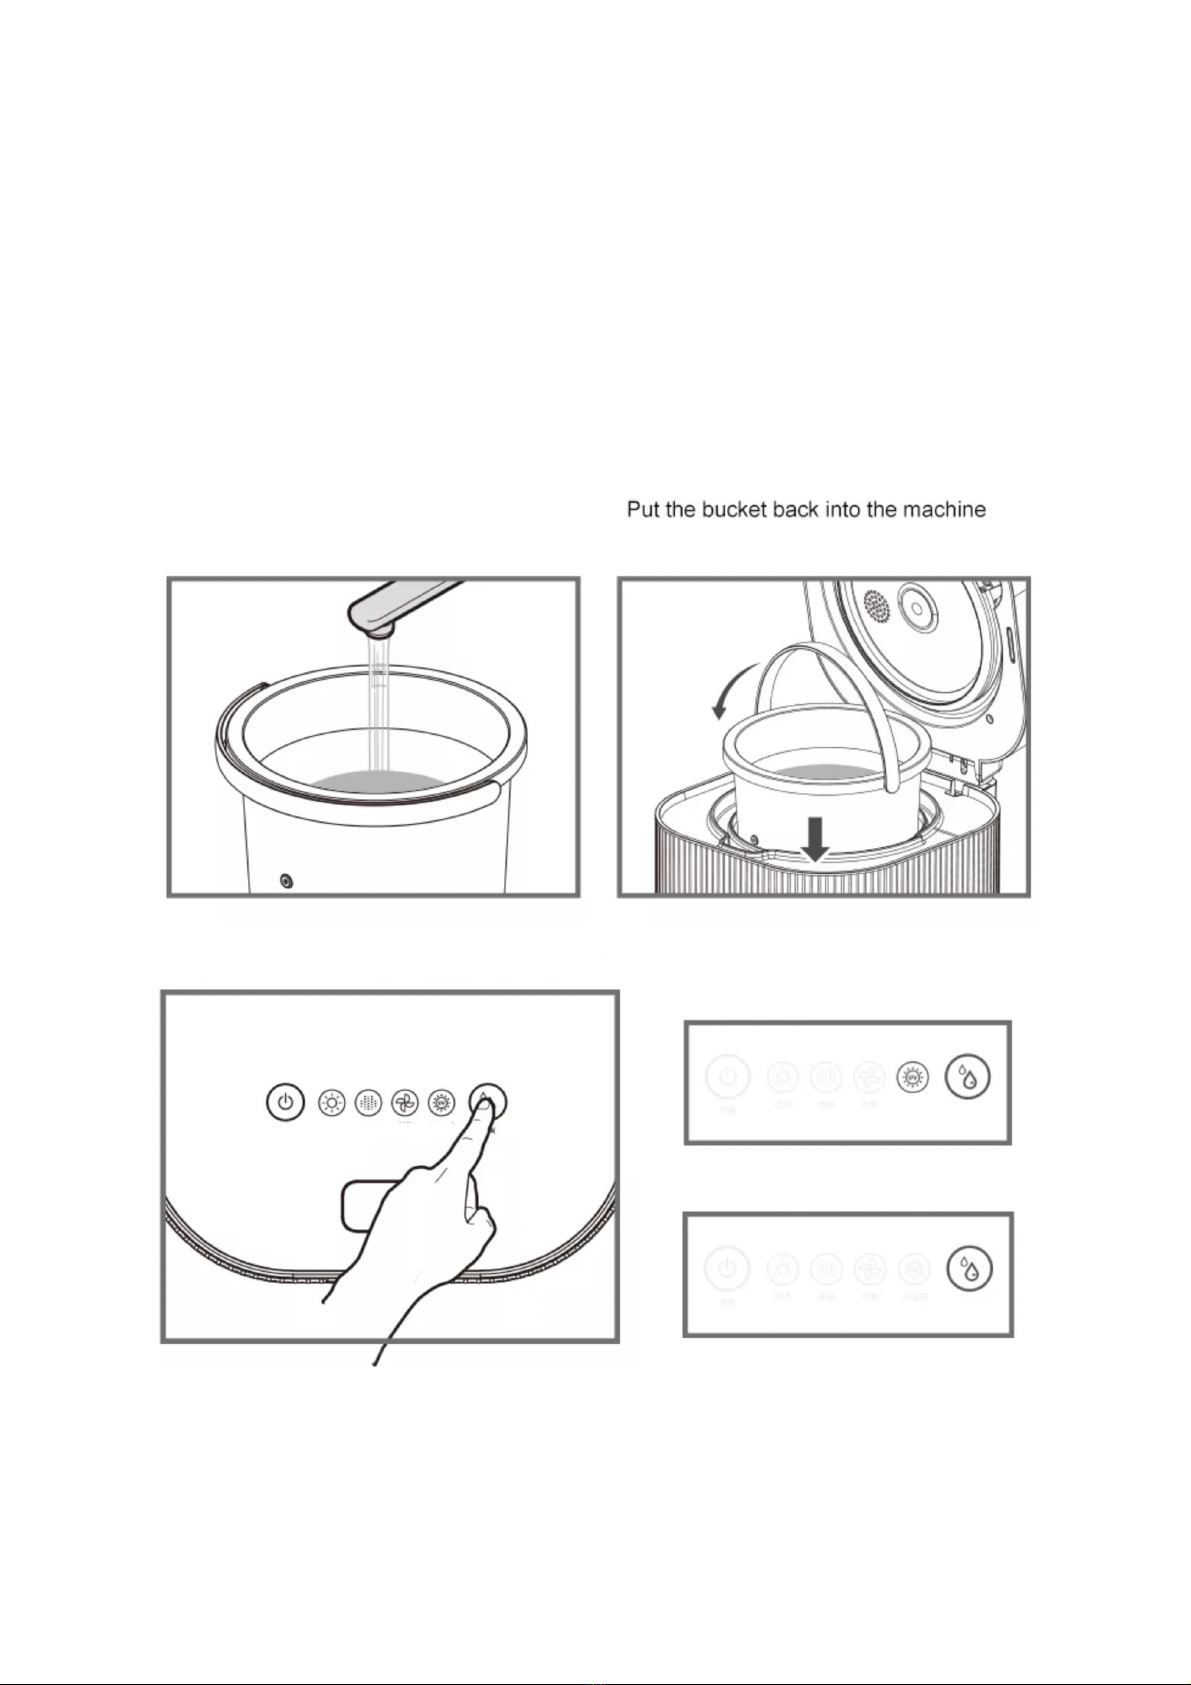
1.16 Be careful not to mistakenly pour water in the machine thinking that the bucket is there when it is actually not
2 Safety Standards
This equipment has been independently tested by an accredited laboratory and found to comply with the limits for
SANS 60335-1 / IEC 60335-1 Household and Similar Appliances. iCompost is permitted for sale in South Africa under
Letter of Authority No. 176781001 issued to THE COMPOST KITCHEN (PTY) LTD.

3
3 Specifications
Product Name
iCompost
Model No.
2L
Input
230 V , 50 Hz
Rated Power
500 W
Processing Capacity
2 L or 1 kg
Feed type
Batch
Net Weight
9.8 Kgs
Product Size
H379 X L288 X W308 mm
Product Color
White
Warranty
1-Year (see full policy at www.icompost.co.za/warranty-policy)
Motor rating
2800 Rpm
UV type
UVC 270nm max
Bucket material
Aluminium, non-stick coated
Body material
ABS
Motor type
Brushless
Safety feature
Auto-Reverse Grind System, Overload Protector
4 Introduction
Congratulations on your purchase and welcome to iCompost!
Our soils are in deep need of repair and our landfills are filling up with food waste, however, the food waste can be
used to repair our soil. The objective of iCompost is to make composting such a pleasant and convenient experience
that it kick-starts a ‘compost revolution’, where it inspires all people do something to transform their food waste into
compost that can be used to repair soil.
iCompost turns your food waste into compost at the touch of a button. Every day you put your kitchen scraps in the
machine, press START, and when you wake up in the morning you will have early-stage compost that you can use in
your garden.
Composting is more of an art than a science, so your experience using iCompost will differ from day to day, and will
require judgment and adjustment, but this Users Guide contains the basic do’s and don’ts to ensure the device
works optimally.

4
5 General Description

5
6 Setup
6.1 Remove the stickers in and around the bucket
6.2 Remove the thin plastic, transport protector film on the control panel
6.3 Place on a flat, dry, stable surface in a well-ventilated area
6.4 Ensure the air filter is inserted into slot with the ‘iCompost’ branding side down
6.5 Ensure the condensation collector tray is inserted
6.6 Place in a well-ventilated room. Avoid placing it in a cupboard or box. Recommended places to keep the
machine are near a window, in the garage, kitchen, scullery or balcony.
6.7 To ensure proper ventilation, make sure that the air filter side does not have any obstruction
6.8 Plug in iCompost
7 Regular Use
7.1 Filling
7.1.1 Make sure the bucket fits low and snugly
7.1.2 Only fill food waste up to the engraved maximum line in the bucket
7.1.3 You can fill the bucket daily and run it when it is full, however it is recommended to not keep the waste
more than 1 week
7.1.4 If the machine is plugged in, it will automatically go into Storage Mode after 10 seconds, where it keeps
a UV light on to sterilize the waste, and it will turn slowly to mix the waste. The fan will also activate
gently to prevent the waste from smelling
7.1.5 Storage Mode is indicated by the UV and Power indicator being illuminated
7.1.6 For a full list of what can and can’t go in iCompost, see our blog: www.icompost.co.za/blog
7.2 Running
7.2.1 Hold ON for 2 seconds to begin a cycle. 3 beeps will confirm activation and the Power and Dry indicator
will be illuminated
7.2.2 Avoid opening while a cycle is running. The cycle will have to start again after cooling
7.2.3 If the electricity is interrupted, it will have to start again when the power resumes, but the cycle might
be shorter than usual since drying has already occurred previously
7.2.4 Add 4 Tbsp Compost Activator per cycle. If the waste is very wet, 6 Tbsp can be added
7.2.5 When the cycle is complete, it will beep 3 times and automatically go into Storage Mode after 30
minutes. Storage Mode will come on and off periodically.

6
Close the lid by pressing firmly

7
8 Functions
Drying mode is on. The heating plate starts to
heat the bucket and the blade starts to turn
periodically
Drying and Grind modes are on. The heating
plate keeps heating the waste, and the blade
turns at ‘full speed’. This phase could last
approx.. 1.5 hrs depending on the moisture of
the waste
Drying and Grind modes are complete.
Cooling & UV-C (sterilization) modes are
activated
After 3 beeps, the cycle is complete, and
the lights go off. After 30 minutes,
Storage Mode will be activated with
Power and UV indicators lit.
Long press Power & Clean mode for 5
seconds to clear any error.
If the lid is opened during a cycle, the
device will enter Safe mode where it will
not be able to restart until the
temperature of the heating plate has
reduced to normal.

8
9 Maintenance
9.1 Cleaning
9.1.1 If compost is stuck on the bottom or side, fill halfway with water, then press Clean mode.
9.1.2 If food gets stuck on the inside rubber seal, remove it for cleaning by pressing 2 clips simultaneously
9.1.3 Careful not to pinch fingers in the blade while cleaning
9.1.4 Avoid using metal cleaning objects on the non-stick surface of the bucket
9.1.5 Empty the condensation tray after each use
Fill water to just above the blade
The “UV” and “Clean” mode indicators
light up. Sterilizes for 15 mins
Touch the Cleaning button on the panel
Only “Clean” mode indicator lights up.
Boils water for 15 mins

9
9.2 Refreshing Air Filter
9.2.1 Pull out the cartridge,
9.2.2 Remove 2 screws
9.2.3 Empty the spent Activated Carbon in your
compost heap or mix it with your soil
9.2.4 Fill fresh Activated Carbon from a refill packet
9.2.5 Seal 2 screws again
9.2.6 Shake the cartridge to remove any dust
9.2.7 Insert the cartridge back into the machine
10 Troubleshooting
Symptom
Cause
Solution
10.1
Beeps 5 times with Heat and
Grind light continuously flashing
Blade is stuck from too large food,
long fibers in food or too much
food
Remove excess food.
Hold Power and Clean to clear
any error
Fill with water and put on Clean
mode
10.2
Beeps 5 times after opening
mid-way through a cycle
The heating plate is too hot to start
Hold Power and Clean to clear
any error.
Allow to cool for 10 mins then try
again
10.3
Makes ‘flatulence’ noises
‘Rubbery’ waste is getting stuck
under the blade and rubbing
against the bucket
Cut up large pieces of waste
before putting in bucket
10.4
Mold growing on output
compost
Perfectly normal and a good sign of
a good output
Cover with soil
10.5
Odour while operating
Too low carbon/nitrogen ratio or
filter is saturated
Add more Compost Activator or
refresh filter
10.6
Output compost was chunky
This sometimes happens with
sticky waste such as melon
Add more dry material like bread
10.7
A ‘cake’ layer forms on the
bottom and sides of the bucket
The waste heated unevenly and
too quickly
Add more water to the waste at
the start. Use Clean mode to
remove
10.8
Cycle goes on much longer than
5 hours
The moisture sensor could be
clogged with debris
Remove the air filter during
operation to clear the vents
10.9
Cycle was very short and the
output was still wet
Removing the air filter during
operating can cause the humidity
sensor to think that the contents
are completely dry
Avoid removing the air filter
during operation unless 10.8.
Restart the cycle

10
11 Frequently Asked Questions
11.1 Can I add paper towels, biodegradable plastics and compostable cups inside iCompost?
iCompost has not been tested with these objects so it is not recommended to add them.
11.2 Can I run a half load? How full is the minimum and maximum?
You can run a load as small as you want, however do not run it on empty. There is an engraved line inside the bucket
which indicates the maximum.
11.3 What happens if I open the lid or iCompost is unplugged in the middle of a cycle? Can I add waste while a cycle
is in progress?
The cycle will be interrupted and will have to start from the beginning after the machine cools down again.
11.4 What does the Compost Activator do?
The Compost Activator is a proprietary blend of ingredients that accelerate partial biodegradation, balance the
carbon/nitrogen ratio, balance the pH, and prepare the output compost for further degradation in the soil.
For further support, join the iCompost owners’ community where you can learn
from others’ experiences or share yours. You can find it through our social media pages.
Scan the QR code below or visit icompost.co.za/users-guide-icompost for the latest updates
www.icompost.co.za
Facebook: @compostkitchen
Instagram: @thecompostkitchen
The Compost Kitchen (Pty) Ltd
Reg. No. 2019/166214/07

11
By The Compost Kitchen (Pty) Ltd
Table of contents
Popular Kitchen Appliance manuals by other brands

Wolfgang Puck
Wolfgang Puck BCRM0020 Use and care

Kalamazoo
Kalamazoo Artisan Fire Pizza Oven Use and care guide

Blueair
Blueair BBB23-1B Installation & operation manual

Tesla
Tesla MultiCook M80 Deluxe manual

emerio
emerio CRM-112856.1 instruction manual

TZS First AUSTRIA
TZS First AUSTRIA FA-5110-3 instruction manual