Comrex BRIC-Link II User manual

1) Left Audio/AES3 Input: Accepts professional level,
balanced analog audio, or if configured, AES3 stereo
digital audio for input.
2) Right Audio Input: Accepts professional level, balanced
analog audio.
3) Left Audio/AES3 Output: Delivers professional level,
balanced analog audio, or if configured, AES3 stereo
digital audio for output.
4) Right Audio Output: Delivers professional level, balanced
analog audio.
5) Ethernet: 1000baseT connection for network
connections.
6) Power: 4 Pin connector for attachment of Comrex approved
DC power adapter. Requires 24V DC @ 1A
Figure 1 – Rear Panel Diagram and Descriptions
Setting up the Hardware
This document describes how to quickly set up and
use BRIC-Link II in its most common, point-to-point
mode. More detailed instructions are contained in the
manual on the CD shipped with the unit. It may also be
downloaded from the Comrex web site at
www.comrex.com
Quick Start Guide
At a minimum, BRIC-Link II needs a source of power, an
audio connection, and a network connection.
Audio connections on the XLR jacks are wired in the
following fashion:
1 Ground
2 Balanced Audio +
3 Balanced Audio -
With a nominal input level of 0dBu (+20 dBu full scale).
You may apply AES3 digital audio to the left I/O connectors
if dip switch #1 (Input) and #2 (output)
are up.
Audio inputs should be applied
and levels checked with
dip switch #4 down. If the
audio indicators are showing
red, it indicates the level is
approaching or reaching
clipping stage. It is OK for audio levels to reach the yellow
stage often.
The Ethernet connector is a standard 1000baseT.
A normal patch cord, such as used for a computer, should
be connected here.
1 2 3 4 5 6

Initial IP configuration is handled using the Windows
or MAC based Comrex Device Manager software. This
program was provided on the CD included with the BRIC-
Link II hardware, and can also be downloaded from the
Comrex website.
In order to configure BRIC-Link II, the Device Manager
must be run on a computer located on the same physical
LAN connection as the BRIC-Link II hardware. If this is not
possible, you may need to connect an Ethernet crossover
cable between the BRIC-Link II and the computer for
configuration.
Once power is applied to BRIC-Link II, you have five
minutes to configure the IP settings. After five minutes,
the power must be cycled on the hardware to make these
changes.
As shipped from the factory, BRIC-Link II is configured for
DHCP, which means it will attempt to obtain an IP address
from your network. Using the Device Manager software,
you can change this to a fixed IP with fixed Netmask,
Gateway, and DNS settings.
As shown below, running the Device Manager and clicking
the Scan for Devices button will produce a list of all
Comrex IP codecs found on the LAN.
Figure 2 - Device Manager Figure 3 - IP Configuration
Using the Comrex Device Manager
Choosing the codec that appears in the left hand list,
followed by pressing the Network Settings button, allows you
to set the IP parameters of the codec, as shown above.
Once you know the IP address (or have changed it
using the Device Manager), the rest of the setup
and operation of BRIC-Link II is done via the built-in Web-
based Interface.

Once your IP settings are configured and BRIC-Link II has
cleanly booted on your LAN, it’s time to take a look at the
BRIC-Link II Web-based Interface. This is done by pointing
a web browser on your LAN to the BRIC-Link II IP address.
To do this, simply type the address into the URL bar of your
browser.
Once you are connected to BRIC-Link II, a login screen
will appear. Key in any user name along with the default
password comrex (case sensitive) to get to the Main User
Interface display.
So now it’s time to make a connection on BRIC-Link II.
We will assume that the network and audio connections
have been made. Before you can establish an outgoing
connection on BRIC-Link II, you must enter the remote
connection information into the Connections tab. This acts
like a phone book, saving the names and IP Addresses of
everyone to whom you connect.
As shown below, BRIC-Link II comes pre-programmed with
three connections. Loopback is chosen when you wish
to test BRIC-Link II by connecting the local encoder and
decoder together. The other two entries are connections
to Comrex in Massachusetts, and these may be used for
your testing (when they’re not busy with other users). We
maintain two CD players on these codecs, feeding voice and
music audio respectively.
Controlling BRIC-Link II via the Web-Based Interface
Figure 5 - Store New Remote
Figure 4 - Connections Tab

To create your own outgoing connection, click Store New
Remote as shown in figure 5 to get the entry pop-up. Choose
a name for the remote (e.g.. WXYZ) followed by the IP
address of the remote. Leave the password field blank.
Finally, you will need to choose a profile to use when making
these connections. BRIC-Link II includes several common
default profiles to choose from, each of which enables a
simple full-duplex link using one of the available algorithms.
If you wish for a more complex feature set when making
this connection, you will need to click over to the Profile tab
and set up a specific profile using your custom parameters.
Custom options can include one-way transmission, different
encoders in each direction, specialized packet arrangement,
etc. See the manual for more information on Profiles.
Once your remote connection entry is correct, it’s simply a
matter of pointing and clicking to connect and disconnect
a remote. When a connection is attempted, the Current
State value in the connection table will change to reflect
the progress of the connection. If the connection fails, the
reason for failure will be shown in the Last State category. If
it succeeds, the encoder and decoder mode will be reflected
in the Transmit and Receive Status columns.
Disconnecting is just as simple - Highlight the desired
connection and click Disconnect to end the connection.
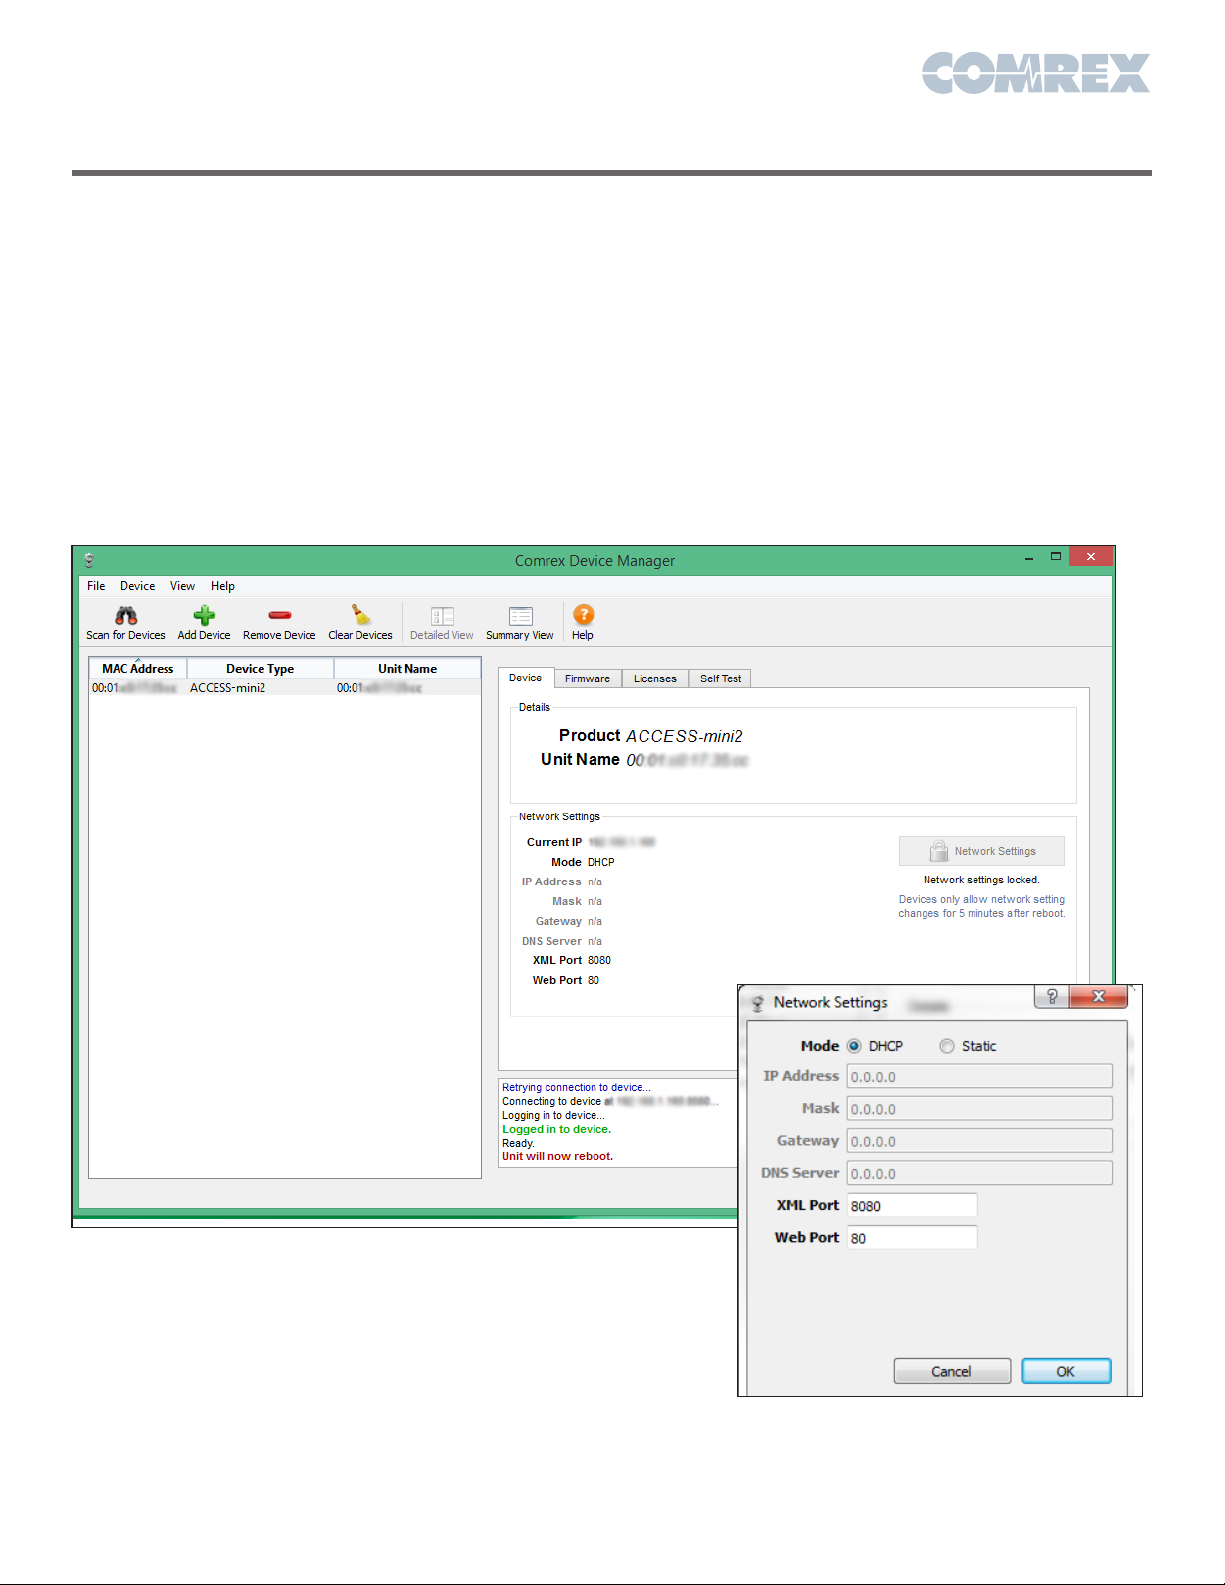
Controlling BRIC-Link II via the Web-Based Interface (cont.)
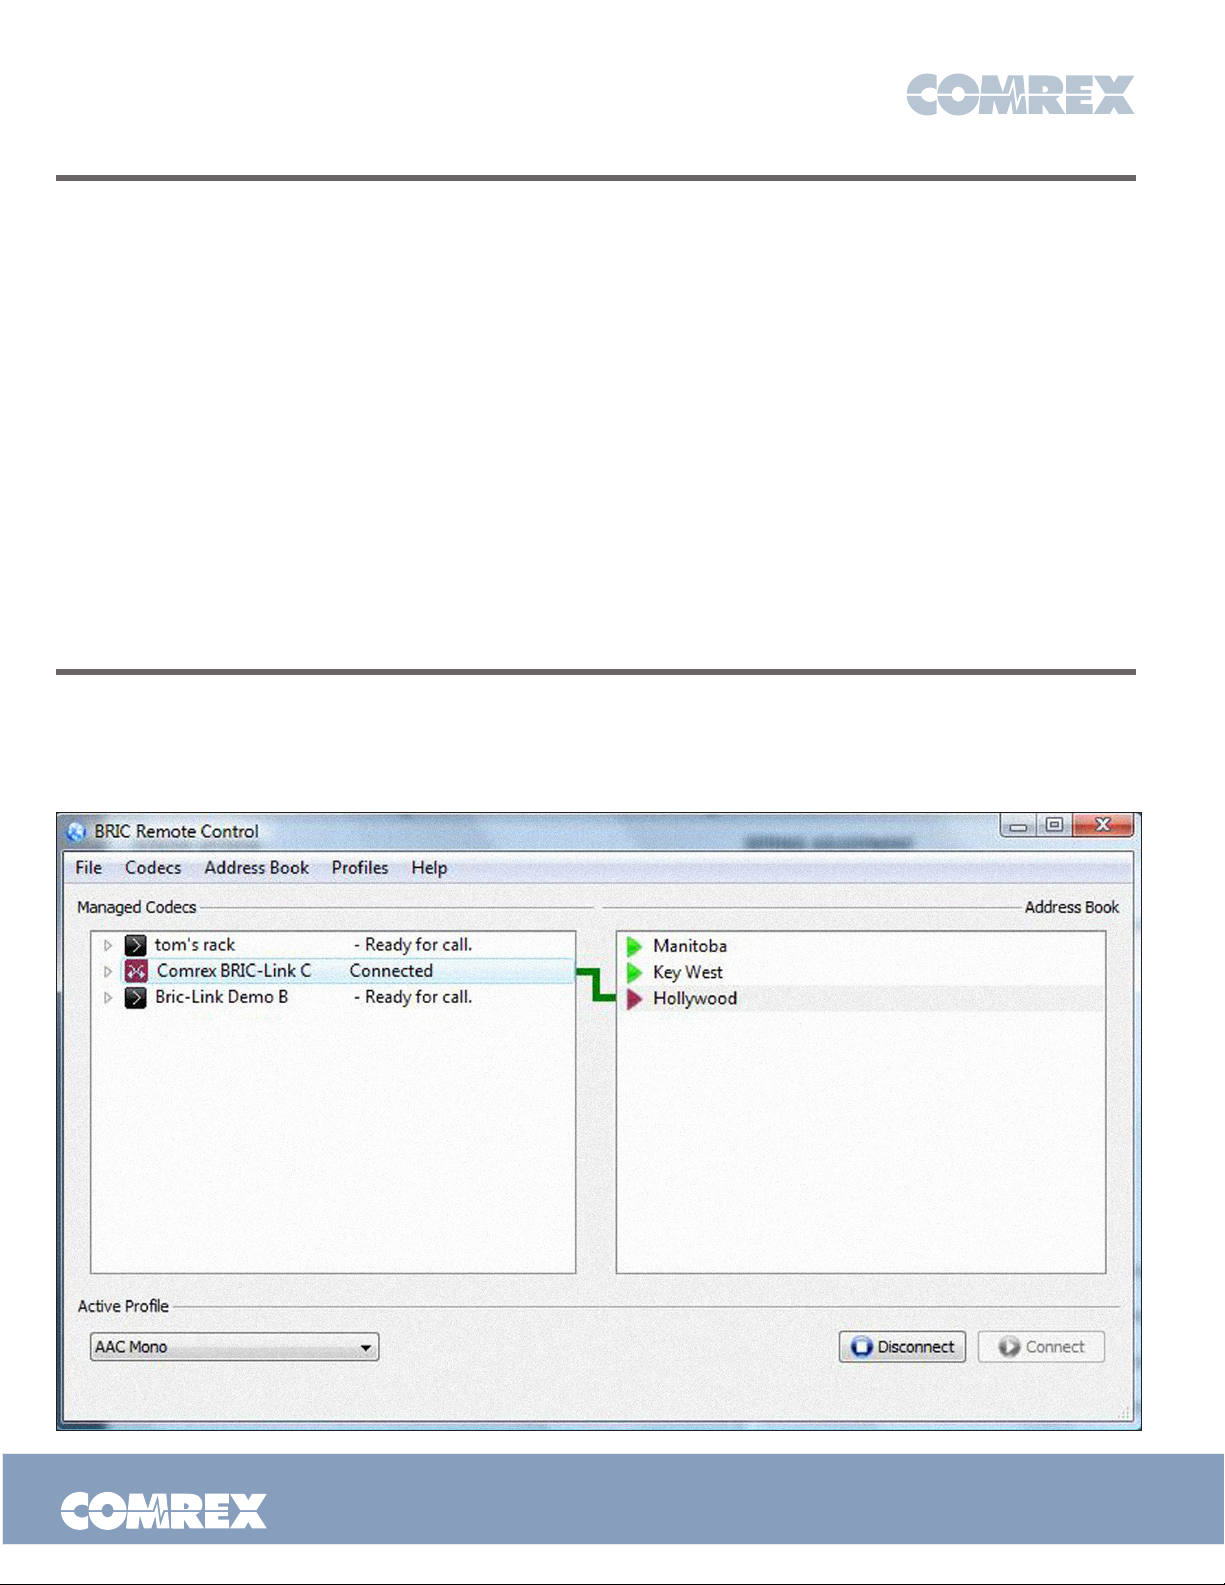
BRIC Remote Control Software
Toll Free in USA: 800-237-1776 • www.comrex.com
e-mail: info@comrex.com
19 Pine Road, Devens, MA 01434 USA
Tel: +1-978-784-1776 • Fax: +1-978-784-1717
Put Comrex On The Line.
If you have several BRIC-Link IIs to control all at once, use
the BRIC Remote Control software included on the CD. This
will allow you to create a common address book, common
Profiles, and set up and make connections between all your
BRIC-Link IIs with a single interface. Instructions for how to
use the program are available under the “Help” menu.
BRIC
RC
REMOTE CONTROL
Other manuals for BRIC-Link II
2
Table of contents
Other Comrex Media Converter manuals