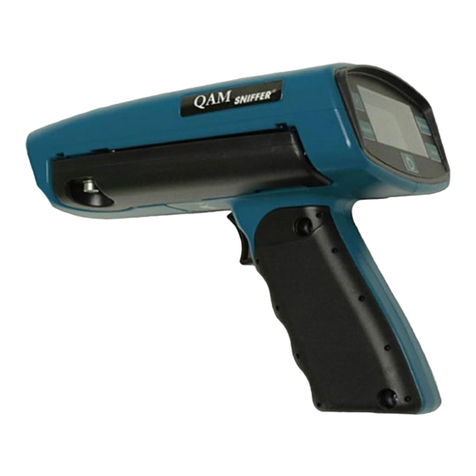
ComSonics SNIFFER SLEUTH User manual


Warranty
ComSonics, Inc. warrants this product free of material and workmanship defects for a period of one
year. The warranty starts from the original date of shipment.
Remedies provided under Warranty are exclusive and in lieu of all other warranties expressed or
implied. The liability to ComSonics is limited to product repair or replacement at the discretion of
ComSonics. ComSonics shall not be liable for any incidental or consequential damages.
The warranty does not cover the following:
•Parts or components not supplied by ComSonics, or modified parts and components.
•Any product or part failure that results from accident, abuse, misuse, neglect, or unauthorized
repairs or modifications by individuals other than ComSonics personnel.
•Failures caused by use of this product in extreme climates or moisture conditions.
•Sniffer Sleuth Battery Pack.
Technical Support
ComSonics maintains a Technical Support Service for customer convenience. Contact a Technical
Support Representative by telephone at 1-800-336-9681 or 1-540-434-5965; Fax at 1-540-432-9794;
Return Information
Safely package products returned for repair, calibration, etc. Please enclose information on the reason
for return. Ship the product prepaid.
All material in this manual is the property of ComSonics, Inc. and protected under the United States
copyright law. No material shall be reproduced or used in any form or by any means (graphic,
electronic, or mechanical, including photocopying, recording, taping, or information storage and
retrieval systems) without the written permission of:
ComSonics, Inc.
1350 Port Republic Road
Post Office Box 1106
Harrisonburg, Virginia 22801 USA
Phone: (540) 434-5965 USA Toll Free: (800) 336-9681
Fax: (540) 434-9847
Email: marketing@comsonics.com
Internet: www.comsonics.com
Snifferis a registered trademark of ComSonics, Inc.
SnifferSleuthis a trademark of ComSonics, Inc.
1996-2002 ComSonics, Inc. All Rights Reserved
Document No. 100863-001 Rev. B

Sniffer Sleuth User’s Manual i
Table of Contents
Specifications ................................................................................................. ii
Read This First!............................................................................................. iii
Introducing Sniffer Sleuth.............................................................................. 1
Setup Function Modes:
Mute ......................................................................................................... 3
Loudness .................................................................................................. 4
Distance.................................................................................................... 5
Squelch..................................................................................................... 6
Battery...................................................................................................... 7
Frequency................................................................................................. 8
External Antenna ................................................................................... 10
Using Sleuth in the Field.............................................................................. 12
Using Sleuth with the Docking Station ....................................................... 13
Using Sleuth with an External Antenna....................................................... 15
Changing the Battery ................................................................................... 16
Appendix A: Adjusting the Dipole Antenna................................................ 17
Appendix B: EC Declaration of Compliance .............................................. 18

ii Sniffer Sleuth User’s Manual
Specifications
Operating frequency ranges 80 ~ 120 MHz (Model 001), 120 ~ 150 MHz (Model 002)
Tuning increments 1.0 kHz
Tuning stability < ±1.0 kHz
Terminal sensitivity:
with Sniffer I.D.
-72 dBmV (0.7 µV/m @ 126 MHz)
with Sniffer
Transmitter -76 dBmV (0.4 µV/m @ 126 MHz)
Detector bandwidth ± 6.0 kHz
Mute Sniffer I.D.or standard Sniffertransmitter tag activated
Squelch 0 ~ 1000 µV/m in 10 µV/m increments
Communications output Proprietary / RS-232 levels
Operating temperature range 0 °F ~ 120 °F (-18 °C ~ 49 °C)

Sniffer Sleuth User’s Manual iii
Read This First!
The following is provided to assist you in initially using your Sleuth.
Unpacking the Unit
The Sleuth, its charger, and any ordered accessories are included in a single shipping container
designed to provide the maximum protection during shipment. Immediately upon receipt, inspect the
container and contents for signs of physical damage. Notify the freight forwarder of any damage
detected.
It is advisable to keep the original shipping container for use when returning the unit for re-
calibration.
Battery Care
The Sleuth is powered by a battery pack of nickel-cadmium cells. In order to receive the maximum
benefit from them, care must taken to ensure that the recommended operating practices are followed.
As supplied from ComSonics, the Sleuth battery pack is only partially charged. Before using
the unit for a full day’s operation, the battery pack must be charged for 4 to 6 hours.
Additional Reading!
To get the most life out of your batteries, read the pamphlet Getting the Most From Your Batteries
included with your Sleuth shipment; there is also a section on Changing the Battery.

iv Sniffer Sleuth User’s Manual

Sniffer Sleuth User’s Manual 1
Introducing Sniffer Sleuth
Sleuth is a hand-held signal leakage detection device. When programmed, Sleuth makes active
measurements on a chosen frequency and shows the results on a liquid crystal display (LCD). It
indicates detected leakage by receiving and processing a modulated carrier.
Sleuth can detect leaks at up to 500 feet with a sensitivity of -76 dBmV (0.4 µV/m), or -72 dBmV
(0.7 µV/m) if the Sniffer I.D. tag system is used. There are two models that differ only in their tuning
ranges: the model 100760-001, which operates in the range of 80 ~ 120 MHz in increments of 1 kHz,
and the Model 100760-002, which operates in the range of 120 MHz ~ 150 MHz in increments of
1 kHz.
Sleuth has Sniffer II/III and SnifferIDtone discrimination capability: it can be set to detect one or
both of two discrete “tag” signals injected into a television signal by a SnifferIDsignal source.
Sleuth operates in one of two modes: a “video” mode, in which Sleuth generates its own audio tone
based on the signal from a video sensing system; and a “Sniffer” mode, in which Sleuth amplifies a
received signal for its audio output (see Using Sleuth in the Field, Operating Modes). Muting
suppresses the audio output but not the readout displays. Sleuth also discriminates between signal
leakage and such non-signal RF radiation as power lines and burst noise.
Sleuth has a built-in dipole antenna, or can be adapted to work with a handheld dipole antenna. The
Docking Station adapts Sleuth for monopole antenna use. Sleuth can also be used with the GeoSniffer
for vehicle-based mapping of RF leakage. (See Using Sleuth with the Docking Station and Using
Sleuth with an External Antenna, and Setup Function Modes: External Antenna for details.)
When Sleuth’s dipole antenna is fully retracted and
stored normally, the unit has the functionality of a near-
field probe antenna. Common-mode reception enabled
by the folded antenna elements collapses the sensitivity
to a forward direction, increasing Sleuth’s near-field
isolation capability. The illustration demonstrates
Sleuth’s field of sensitivity in this way.
Rechargeable nickel-cadmium (NiCad) batteries are used to power Sleuth. Although intended for
hand-held operation. Sleuth can also be operated from a vehicle power system through the use of an
optional Docking Station. (See Using Sleuth with the Docking Station.)
The Sleuth battery is shipped with only a minimal charge and must be recharged
before operation. The Sleuth’s battery type requires 3 to 4 hours to recharge fully. See
the Getting the Most from Your Batteries pamphlet for more information.
!
!

2Sniffer Sleuth User’s Manual
Introducing Sniffer Sleuth
The Sleuth “panel” is equipped with two keys. The ON / OFF
button turns Sleuth on and off. The FUNCTION button
switches the Sleuth from its normal, or operating, mode into
one of the Setup modes. Repeated presses of the FUNCTION
button scroll through each of the different setup functions and
then back to the operating mode. After five seconds with no
additional key presses, any of the function modes returns to
the operating mode automatically.
Readings taken by Sleuth, as well as various user preference settings and status indicators, are
displayed on an LCD panel that faces the user when Sleuth is in use:
•the µ
µµ
µV/m indicator displays readings taken by Sleuth in µV/m while the device is in operating
mode;
•the distance indicator displays the distance setting of Sleuth (or, in Frequency Setup mode, the
target frequency which Sleuth can be set to tune);
•the tachometer-style relative indicator displays relative signal strength in the operating mode;
•the reference mark, displayed at center scale, indicates that Sleuth has locked onto a target
signal; and
•the battery low indicator appears when the battery has approximately five minutes of operating
time

Sniffer Sleuth User’s Manual 3
Setup Function Modes: Mute
Sleuth powers up in its operating mode, allowing you to instantly begin to make measurements.
There are seven additional “Setup” function modes: Mute, Loudness, Distance, Squelch, Battery,
Frequency, and External Antenna, which you can use to change Sleuth’s operating parameters. In
each of these modes, Setup is highlighted, as well as the particular setup function; the display shows
only those parts that are relevant to the function. The FUNCTION button and rocker switch serve to
control parameters within the chosen mode. Any changes made in these function modes are “saved”
instantly and require no additional key presses. When the device is powered up, all function settings,
except External Antenna, are retained from the last time they were adjusted.
The Mute mode allows Sleuth’s tag detection capability to be turned on (to detect either or both of
two possible tones, generated by the Snifter I.D. signal source), or off, allowing Sleuth to detect any
signals within specified parameters. These options cause slightly different behavior in Sleuth
depending upon which of Sleuth’s two operating modes are in use (see Using Sleuth in the Field).
To access this function, turn Sleuth ON; after the self-test, press the FUNCTION button until Setup
and Mute are both displayed; Mute will be flashing.
Press the rocker switch up or down to toggle between the
“on” settings (see the explanation of mute options for the
two operating modes in Using Sleuth in the field, Operating
Modes) and Mute Off.
To return to the operating mode or to access another Setup
function mode, press the FUNCTION button until the
desired mode is highlighted. If no key press activity is
detected after five seconds, Sleuth automatically returns to
the operating mode.

4Sniffer Sleuth User’s Manual
Setup Function Modes: Loudness
The Loudness mode allows adjusting of Sleuth’s speaker volume.
To access this function, turn Sleuth on; after the self-test, press the FUNCTION button until
Loudness is flashing.
To change the loudness, press the rocker switch down to decrease loudness; press the rocker switch
up to increase loudness. The relative indicator changes accordingly.
To return to the operating mode or to access another Setup function mode, press the FUNCTION
button until the desired mode is flashing. If no key press activity is detected after five seconds, Sleuth
automatically returns to the operating mode.

Sniffer Sleuth User’s Manual 5
Setup Function Modes: Distance
The Distance mode allows adjusting of Sleuth’s readout over different operating ranges. A strong
reading made at a distance of ten feet would be significantly attenuated if made at 150 feet. When the
distance setting is adjusted. Sleuth adjusts the reading accordingly. For instance, a signal reading 20
µV/m at a 10-foot distance would read more like 1 µV/m at 150 feet. By adjusting the Sleuth distance
setting to 150 feet, the reading is compensated so that it approximates a 10 foot reading.
The distance settings are designed to simulate typical distances encountered in cable installation
troubleshooting: 10 feet/3 meters is “normal” distance; 30 feet/10 meters is for street-to-suspended
cable, 75 feet/23 meters is for street-to-home, and 150 feet/46 meters is for street-to-backyard
setback.
To access this function, turn the Sleuth on; after the self-test, press the FUNCTION button until the
Distance display is flashing. The Distance Indicator remains active in this mode.
Changing the distance setting involves two steps: (1) When the Distance mode is first accessed,
pressing the rocker switch toggles the display between Ft. (feet) and m(meters). Press the rocker
switch until the desired setting appears; (2) press the FUNCTION button a second time to change the
distance range. Press the rocker switch to select a range; the selections available depend on whether
feet or meters was chosen in the previous step. Select from 10, 30, 75, or 150 feet, or 3, 10, 23, or 46
meters.
To return to the operating mode or to access another Setup function mode, press the FUNCTION
button until the desired mode is flashing. If no key press activity is detected after five seconds, Sleuth
automatically returns to the operating mode.

6Sniffer Sleuth User’s Manual
Setup Function Modes: Squelch
The Squelch mode allows adjusting of Sleuth’s squelch threshold.
To access this function, turn Sleuth on; after the self-test, press the FUNCTION button until Squelch
is flashing.
To change the squelch threshold, press the rocker switch down to decrease the threshold level; press
the rocker switch up to increase the threshold level. The threshold level can be set between 0 and
1000 µV/m, in increments of 10 µV/m.
To return to the operating mode or to access another Setup function mode, press the FUNCTION
button until the desired mode is flashing. If no key press activity is detected after five seconds, Sleuth
automatically returns to the operating mode.

Sniffer Sleuth User’s Manual 7
Setup Function Modes: Battery
The Battery mode displays Sleuth’s battery level.
To access this function, turn Sleuth ON; after the self-test, press the FUNCTION button until Battery
is flashing. The Relative Indicator remains active in this mode, displaying the relative battery level.
The battery symbol appears only when there are approximately five minutes or less operating time
left (see below); it can appear in operating mode (the Relative Indicator only indicates battery level in
the Battery Mode).
To return to the operating mode or to
access another Setup function mode,
press the FUNCTION button until the
desired mode is flashing. If no key
press activity is detected after five
seconds, Sleuth automatically returns to
the operating mode.

8Sniffer Sleuth User’s Manual
Setup Function Modes: Frequency
Allows adjusting of Sleuth’s target frequency.
To access this function, turn Sleuth ON; after the self-test, press the FUNCTION button until
Frequency is flashing. The Distance indicator now reads the previously-set target frequency,
followed by MHz instead of Ft. or mthat is displayed during normal operation.
When first entering the Frequency mode, you can use the rocker switch to toggle the frequency
between 80, 90, 100, or 120 MHz with the Model 100760-001, or 120, 130, 140, and 150 MHz with
the Model 100760-002. Subsequent presses of the FUNCTION key allow you to fine tune the
frequency by allowing adjustment of the frequency in increments of 1 MHz, 100 kHz, 10 kHz, etc.,
increasing one decimal place at a time in descending order; see the illustration on the next page.
For instance, to set the frequency of a Model 100760-002 (range: 120.0000 to 150.000) to 121.2625,
turn the unit on; after the self-test, press the FUNCTION button until Frequency appears. Press the
rocker switch until the display reads in the 120 MHz range; if the previous frequency was, say,
131.2255, pressing the switch up would change it to 141.2255, while pressing it down would change
it to 121.2255 (see NOTE at bottom of next page). Press the FUNCTION button again, and press the
rocker switch until the display reads 121. Press the FUNCTION button again, and press the rocker
switch until the display reads 121.2. Press the FUNCTION button again, and press the rocker switch
until the display reads 121.26. Press the FUNCTION button again, and press the rocker switch until
the display reads 121.262. Press the FUNCTION button again, and press the rocker switch until the
display reads 121.2625.
To return to the operating mode or to access another Setup function mode, press the FUNCTION
button until the desired mode is flashing. If no key press activity is detected after five seconds, Sleuth
automatically returns to the operating mode.

Sniffer Sleuth User’s Manual 9
Setup Function Modes: Frequency
Press FUNCTION again to exit the Frequency mode; this will occur automatically after 5 seconds.
NOTE: the model’s frequency range limits how far the frequency can be adjusted in any direction.
For instance, on a unit already set to 121.2255, pressing down will yield no results, as “111.2255”
would be below the 120.0000 limit. Likewise, on a unit set to 141.2255, pressing up will have no
effect because “151.2255” would above the 150.0000 limit. This applies to all the decimal places in
the frequency range.

10 Sniffer Sleuth User’s Manual
Setup Function Modes: External Antenna
When Sleuth is turned on (and not housed in the Docking Station), it always defaults to using the
internal dipole. However, this mode allows switching of the Sleuth’s antenna from the internal dipole
to an external hand-held dipole antenna.
The internal dipole antenna can be switched off manually by pressing the FUNCTION button until
Ext. Ant is flashing. Pressing the rocker switch toggles between the external antenna and the internal
dipole settings. If the internal dipole is in use, Ext. Ant. blinks; pressing the rocker causes the
blinking to stop, indicating that the external antenna setting is on. If the external antenna setting is in
use, Ext. Ant. does not blink; pressing the rocker causes the display to blink, indicating that the
internal dipole setting is on.
NOTE: Whenever Sleuth is inserted into the Docking Station (which is equipped with an external
antenna connection). Sleuth is automatically switched to the external monopole antenna setting.
Whenever Sleuth is turned off and powered up again, or if Sleuth is on and the external power source
is removed. Sleuth is automatically switched to the internal dipole setting.
To return to the operating mode or to access another Setup function mode, press the FUNCTION
button until the desired mode is flashing. If no key press activity is detected after five seconds, Sleuth
automatically returns to the operating mode.

Sniffer Sleuth User’s Manual 11
Using Sleuth in the Field
Sleuth is in its operating (normal) mode after it’s turned on and performs a brief self-test. Before
turning on Sleuth for field use, make sure the battery is fully charged, and make any user-preference
changes that aren’t likely to change during field use - e.g., target frequency, mute, and squelch. This
way Sleuth is ready the moment it’s powered up. Of course, any user preferences for the mute,
distance, squelch, frequency, and loudness can easily be changed during operation by pressing the
FUNCTION button repeatedly until the desired function is flashing. If no activity is detected after
five seconds. Sleuth will automatically return to the operating mode.
Operating Modes. Sleuth has two modes: mode 1 (video mode), in which Sleuth generates its own
audio tone, or mode 2 (Snifter mode), in which it amplifies the received signal for the audio output.
Depending upon which is used, the Sleuth’s audio behavior and the mute options will be slightly
different: mode 1, designed for video carriers, includes the ID tone options, and features a simulated
audio tone; mode 2 has “mute off” and “mute on”, and uses the audio signal from an external source,
such as a Sniffer II/III signal source. The table below describes the different options and settings.
To set the operating mode, power up Sleuth and press the FUNCTION button once during the self-
test routine. When it finishes, the display will show either 1or 2in the µV/m indicator (see below),
depending upon which mode was last used.
Mode 1 (video mode): Mute settings available
Mute setting Activates when... with…
Mute Off µV/m more than squelch level simulated audio tone, sweeping up
Mute ID1 µV/m more than squelch level & ID1 simulated audio tone, sweeping up
Mute ID2 µV/m more than squelch level & ID2 simulated audio tone, sweeping down
Mute ID1 & ID2 µV/m more than squelch level & ID1 & ID2 simulated audio tone, sweeping up (ID1) or down (ID2)
Mode 2 (Sniffer mode): Mute settings available
Mute setting Activates when… with...
Mute Off µV/m more than squelch level real audio
Mute µV/m more than squelch level &
Sniffer II/III signal
real audio

12 Sniffer Sleuth User’s Manual
Using Sleuth in the Field
On Sleuth’s LCD, the µV/m indicator displays the intensity of the signal it is detecting relative to the
distance range selected (see Setup Function Modes: Distance). The relative indicator displays the
intensity of the detected signal at ±10 dB from the selected sensitivity reference, which can be
changed by pressing the rocker switch up or down in normal mode; the numeric display over the
reference mark changes accordingly. The purpose of the relative indicator is to help find the location
of a signal leak. For instance, in trying to find a leak in a group of apartment buildings from out in the
street, set Sleuth to a high sensitivity to detect a signal over a wide area. As you begin to isolate the
signal to a definite location, step down Sleuth’s sensitivity reference to a lower level.
The sensitivity reference setting can range from 10 to 50 (see illustration): the
relative indicator displays a range (-10 dB at the lowest, 0 dB at center, +10
dB at the highest). The readouts below demonstrate Sleuth’s sensitivity
reference set at different reference settings. At 10 (1), the relative indicator
shows a reading that is higher than the indicator can display: the setting is too low for the intensity of
the signal being read. At 30 (2), the indicator is not registering, indicating that the sensitivity
reference is too high for the intensity of the signal being read. At 20 (3), the indicator is close to the
center, indicating that Sleuth’s sensitivity is at a useful level: the intensity should fluctuate visibly as
the Sleuth is moved in relation to the source of the signal being read.
The reference mark below the sensitivity reference indicates tag lock. When mode 1 (video mode) is
in use, the mark appears when Sleuth locks onto an ID signal. When mode 2 (Sniffer mode) is in use,
the mark appears when Sleuth locks onto a Sniffer II/III signal source.

Sniffer Sleuth User’s Manual 13
Using Sleuth with the Docking Station
The Docking Station is designed to allow Sleuth to be easily used in a vehicle. It provides a stable
platform for holding Sleuth so that the buttons and LCD can be easily seen, and extends battery time
by connecting the Sleuth to the vehicle’s power supply. The Docking Station also connects Sleuth to
a monopole antenna, which can be mounted on the vehicle roof.
Connecting the Docking Station to Your Vehicle
The numbers accompanying the text refer to the diagram on the next page.
1) Mount the Docking Station in your vehicle. The Docking Station features two ball joints with
four mounting screws. Mount the Docking Station so that you can reach the Sleuth buttons while
sitting in the driver’s seat of the vehicle, such as the dash or the transmission/engine hump.
2) Connect the Docking Station to the vehicle’s ignition or accessory fuse block circuit.
3) If using Sleuth with a GeoSniffer, connect the RS-232 data cable of the GeoSniffer mobile unit
and the Docking Station. (See the GeoSniffer User’s Guide for information on mounting,
connecting, and operating the GeoSniffer unit.)
4) Attach the monopole antenna to the Docking Station antenna connection.
Using Sleuth in the Docking Station
To use Sleuth with the Docking Station, mount the
Sleuth unit by inserting it into the Docking Station.
Because the power supply and antenna functions are
being supplied externally through the Docking
Station, Sleuth’s LCD will show the Ext. Ant.
(external antenna) display.

14 Sniffer Sleuth User’s Manual
Using Sleuth with the Docking Station
Installation Instructions
Docking Station
Table of contents
Other ComSonics Security Sensor manuals
Popular Security Sensor manuals by other brands

Axis
Axis FA4090-E installation guide

Sealey
Sealey PP4.V2 instructions

S+S Regeltechnik
S+S Regeltechnik RHEASGARD KLGF Series Operating Instructions, Mounting & Installation

Chauvin Arnoux
Chauvin Arnoux C.A 701 user manual

Bosch
Bosch Door/window contact II Quick instructions

Leuze electronic
Leuze electronic MLC 500 Original operating instructions

Guardian
Guardian 04810 instruction manual

B.E.G. LUXOMAT
B.E.G. LUXOMAT PD2N-KNX-BA-EM Mounting instructions

STEINEL PROFESSIONAL
STEINEL PROFESSIONAL US 360 operating instructions

Heatit
Heatit Z-SMOKE quick guide

Autronica
Autronica AutroFlame BG-201 Mounting instructions

DoCash
DoCash mini Combo user manual