Premier Pot Racks
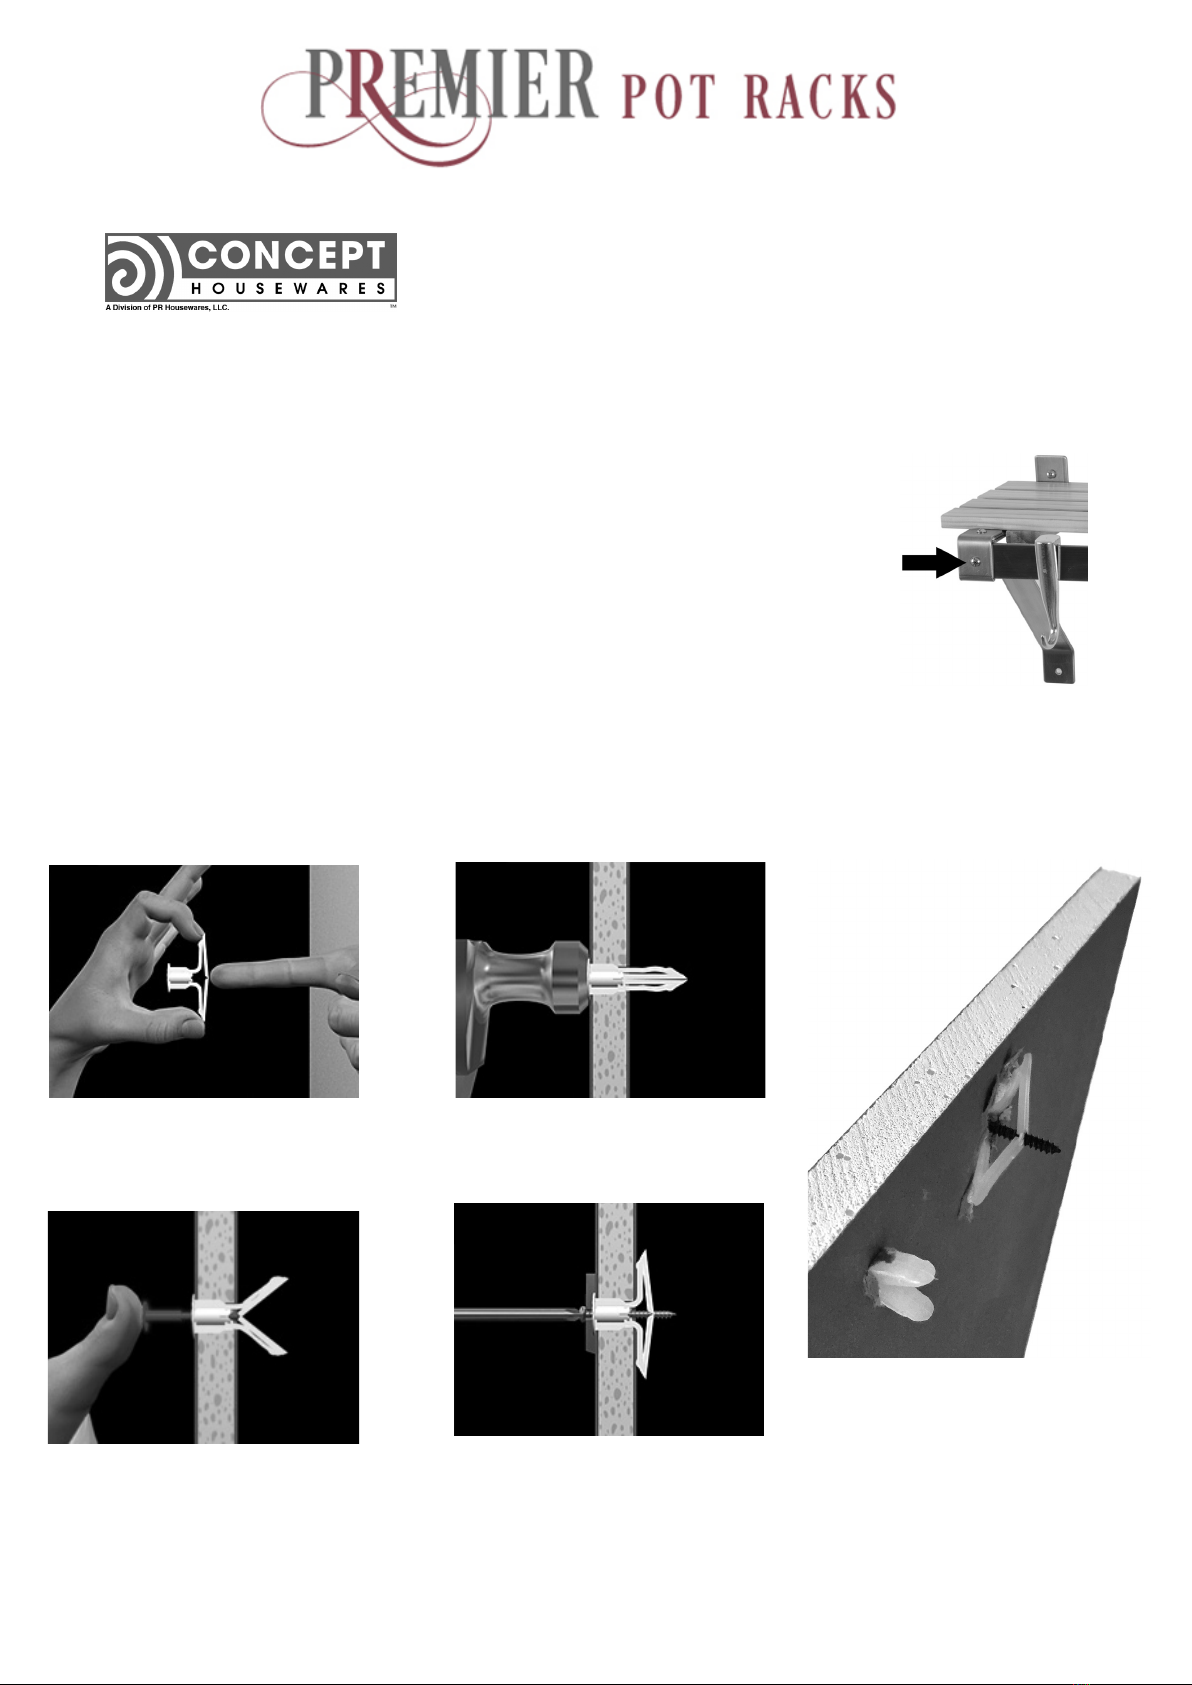
Photo F - Drill 5/16” diameter
(8mm) hole. Fold anchor in middle.
Photo G - Insert anchor in hole
and tap ush with wall.
Photo H - Insert key to pop anchor
open & lock behind hollow wall
(not necessary for thick or solid
walls). Do not force of hammer key.
Photo I - Place item over anchor. Insert screw and
tighten untill screw is ush with xture. Then, stop.
The anchors also wedge securely in thick or solid
walls, or in wood studs behind drywall.
Photo J - correct (top) and
incorrect (bottom).
Mounting Directions:
Undo the front facing screw on each bracket, (photo, E) insert flat bar
and replace screws. Note it may be necessary to use the flat head
screwdriver to hold back of screws while the Phillips screwdriver is
used on the front to tighten or loosen. Then with rough frame work
constructed use as a guide for installation. Measure carefully where
you want to mount the rack on the wall use a pencil to mark where
the screws attach to the wall.
Remove the unit and drill holes using a 5/16” drill bit. When possible
mount to a wall stud. Supplied anchors have a pull rating of 20 lbs. or
more each and a shear rating of 50 lbs. each.
Insert the anchors into the drilled holes. They may need to be tapped
in gently with a hammer. Use the supplied key to expand the anchor
behind drywall. (See Photos F to J on next page for proper and
improper anchor install). Use supplied screws to attach.
Photo E - Front facing screw
Wall Mounted Wood Pot Racks Models
PR-40322, PR-40326 and PR-49332
Page 2


