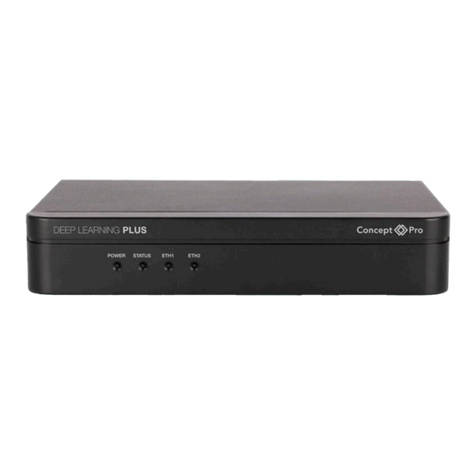
Concept Pro VHDIPL-32 User manual

VHDIPL-32
32 CHANNEL NVR
IP SURVEILLANCE
USER MANUAL

Precautions
Network Video Recorder(NVR)
ii Issue V1.1 (2014-07-15)
Precautions
Precautions
Ensure that this manual is fully understood before using this device, and strictly
observe regulations in this document referring to use of cctv systems. If the intention is
to install this device in a public place, it is required that the public are made aware of
this - "You have entered the area of CCTV surveillance" in a clear position. Failure to
use electrical products correctly may cause fire or severe injuries. To prevent accidents,
carefully read the following information:
Symbols
This document contains the following symbols, provided in this table with descriptions.
Symbol Description
Alerts you to a high risk hazard that could, if not avoided,
result in moderate or minor in injury.
Alerts you to a medium or low hazard that could, if not
avoid, result in moderate or minor in injury.
Alerts you to a potentially hazard situation that could, if
not avoid, result in damage, data loss, performance
deterioration, or unanticipated results.
Provide a tip that may help you solve a problem or save
time.
Provides additional information to emphasize or
supplement important points in the main text.
To prevent electric shocks, keep power plugs dry and clean.
!Strictly observe installation requirements when installing the device. The
manufacturer shall not be held responsible for device damage caused by users' non-
conformance to these requirements.

Network Video Recorder(NVR)
Precautions
Issue V1.1 (2014-07-15) iii
!Strictly conform to local electrical safety standards and use power adapters that are
marked with the LPS standard when installing and using this device. Otherwise,
this device may be damaged.
!Use accessories delivered with this device. The voltage must meet input voltage
requirements for this device.
!If this device is installed in places with unsteady voltage, ground this device to
discharge high energy such as electrical surges in order to prevent the power supply
from burning out.
!When this device is in use, ensure that no water or any liquid flows into the device.
If water or liquid unexpectedly flows into the device, immediately power off the
device and disconnect all cables (such as power cables and network cables) from
this device.
!Do not focus strong light (such as lighted bulbs or sunlight) on this device.
Otherwise, the service life of the image sensor may be shortened.
!If this device is installed in places where thunder and lightning frequently occur,
ground the device nearby to discharge high energy such as thunder strikes in order
to prevent device damage.
!Avoid heavy loads, intensive shakes, and soaking to prevent damages during
transportation and storage. The warranty does not cover any device damage that is
caused during secondary packaging and transportation after the original packaging
is taken apart.
!Protect this device from fall-down and intensive strikes, keep the device away from
magnetic field interference, and do not install the device in places with shaking
surfaces or under shocks.
!Clean the device with a soft dry cloth. For stubborn dirt, dip the cloth into slight
neutral cleanser, gently wipe the dirt with the cloth, and then dry the device.
!Do not jam the ventilation opening. Follow the installation instructions provided in
this document when installing the device.
!Keep the device away from heat sources such as radiators, electric heaters, or other
heat equipment.
!Keep the device away from moist, dusty, extremely hot or cold places, or places
with strong electric radiation.
!If the device is installed outdoors, take insect- and moisture-proof measures to
avoid circuit board corrosion that can affect monitoring.
!Remove the power plug if the device is idle for a long time.
!Before unpacking, check whether the fragile sticker is damaged. If the fragile
sticker is damaged, contact customer services or sales personnel. The manufacturer
shall not be held responsible for any artificial damage of the fragile sticker.

Precautions
Network Video Recorder(NVR)
iv
Issue V1.1 (2014-07-15)
Special Announcement
All complete products sold by the manufacturer are delivered along with nameplates,
operation instructions, and accessories after strict inspection. The manufacturer shall
not be held responsible for counterfeit products.
This manual may contain misprints, technology information that is not accurate enough,
or product function and operation description that is slightly inconsistent with the
actual product. The manufacturer will update this manual according to product function
enhancement or changes and regularly update the software and hardware described in
this manual. Update information will be added to new versions of this manual without
prior notice.
This manual is only for reference and does not ensure that the information is totally
consistent with the actual product. For consistency, see the actual product.

Network Video Recorder(NVR)
Quick Start Guide
Contents
Issue V1.1 (2014-07-15)
v
Contents
Precautions .....................................................................................................................i!
1 Specifications............................................................................................................. 1!
2 NVR Networking...................................................................................................... 3!
3 Hard Disk ................................................................................................................... 5!
3.1 Precautions........................................................................................................................5!
3.2 Hard Disk Recommendation ..........................................Error! Bookmark not defined.!
3.3 Video Storage Duration ....................................................................................................5!
4 Operation Instruction............................................................................................... 6!
4.1 Front panel........................................................................................................................6!
4.2 Rear panel .........................................................................................................................7!
4.3 Startup...............................................................................................................................8!
4.4 Shutdown ..........................................................................................................................8!
5 Quick Setup ............................................................................................................. 10!
6 Web Access............................................................................................................... 17!
7 FAQ............................................................................................................................ 19!
A Hazardous Substance Declaration...................................................................... 20!


Network Video Recorder(NVR)
1Specifications
Issue V1.1 (2014-07-15)
1
1 Specifications
System Features
CPU
Professional high-end SOC chip for NVR, dual-core, 930 MHz dominant
frequency, ARM CPU.
Operating
system
Embedded Linux operating system.
Embedded
software
Embedded complete CMS system, complete functions, user-friendly interface,
and simple and easy operation.
The unique "quick setup" function enables you to configure and manage the
NVR easily.
The unique networking mode of "private network for cameras" implements
plug and play access of cameras.
The real-time fault alarm mechanisms can timely report faults such as hard
disk fault, network fault, and camera disconnection.
The embedded Flash technology implements WebServer and supports real-
time monitoring and video playback in a common browser.
Real-time audio and video
Decoding
capability
Support H.264 High profile Level 5.0 decoding.
Video streams of up to 5M pixels can be decoded.
Real-time
monitoring
Support 32 channels of real-time video on demand (VOD) at the same time.
Support 1/4/6/8/9/16 split-screen video playing window and support video
sequencing playing.
Real-time
audio
Audio format: G711_A/G711_U.
Recording
Recording
capability
Support recording of a maximum of 32 channels and a maximum of 144 Mbps
bit rate.
Support the following resolution: 5M, 3M, 1080P, 720P, and D1.
Support multiple recording modes, including 7*24-hour, planned, alarm, and
manual.
Support the "video bookmarking" function. During real-time viewing, the
videos of interest can be tagged.
Hard disk
Support eight 1.5/3.0 Gbps SATA hard disks. The maximum capacity of a

1Specifications
Network Video Recorder(NVR)
Quick Start Guide
2
Issue V1.1 (2014-07-15)
The data listed in the preceding table is only for your reference. The recording time estimate
may be different from the actual recording time. The user shall be liable for any loss
incurred as a result thereof.
single hard disk is 4 TB.
Video
retention
duration
Eight 4TB hard disks are used and 32 videos whose highest total rate is 144
Mbps can be stored for 20 days.
Video
playback
Four videos can be played back simultaneously.
Support video playback based on time axis. The playback time can be
accurately positioned, making searching for an event quicker and easier.
Backup Support backup based on USB drives, portable hard disks, and network disks.
Monitor
Interface 1 VGA output and 1 HDMI output. Single-source display is supported.
Resolution 1024768, 1280720, 19201080
Network
Interface 2 RJ45 10/100/1000 Mbps adaptive Ethernet ports
Network
protocol RTP/RTCP, TCP/UDP, HTTP, DHCP, DNS, NTP
Others
Ambient
temperature
10°C to 50°C
Ambient
humidity
5% to 90%
Power
supply
110/220 V AC, 47 to 63 Hz, maximum output power: 200 W
Power
consumption
Low power consumption design is used. The maximum power consumption of
the motherboard is 15 W (not including USB ports).
Eight 4 TB hard disks increase the power consumption of 80 W.
Dimensions Chassis: 440 mm435 mm89.8 mm (lengthwidthheight)
Weight The net weight is about 7.805 kg and the gross weight including the packaging
material is 9.975 kg.
USB
interface
2 USB2.0 host interfaces used separately for backup based on USB and
connection of the mouse.

Network Video Recorder(NVR)
2NVR Networking
Issue V1.1 (2014-07-15)
3
2 NVR Networking
The NVR has two network ports, LAN1 and LAN2. Two networking solutions are
possible, private camera networking mode and open network mode.
Solution 1: Camera Private Networking Mode
A private network for cameras only include the IP cameras, switch and the VHDIPL, it
does not include any other network devices. The network is especially used to transmit
audio and video of the IP cameras to the VHDIPL. The private network for cameras
must be connected from LAN2 (G2) of the NVR to the LAN2 (G2) private network
port for cameras on the dedicated switch (by default, it is enabled upon delivery). For
details of the configuration, see quick setup in the NVR User Manual. The NVR can be
accessed through LAN1.
Once setup in private networking mode on LAN2, the NVR will perform the following
operation:
!Enable the DHCP service and automatically assigning IP addresses to IP cameras
(the DHCP function is enabled on the IP cameras).
!Automatically searches for IP cameras in the network.
!Automatically adds IP cameras found on the local network and sets 7*24-hour
recording.
Figure 2-1 Topology of the private network for cameras

2NVR Networking
Network Video Recorder(NVR)
Quick Start Guide
4
Issue V1.1 (2014-07-15)
Solution 2: Open Network Mode (Not recommended, use at own risk)
An open network includes many network devices other than just the IP cameras and
VHDIPL. The design of an open network can be organised freely so long as the
VHDIPL and IP cameras are on the same network, or IP range. When an open network
is used, ensure that port LAN1 (G1) on the NVR is used, there is no need for to use
LAN2 as this function is for a private network.
When an open network is used, the user needs to manually search for and add IP
cameras. For details, see Chapter 5 "Quick Setup".
Figure 2-2 Diagram of an open network with CCTV system

Network Video Recorder(NVR)
3Hard Disk
Issue V1.1 (2014-07-15) 5
3 Hard Disk
3.1 Precautions
!Formatting will clear all video data on the hard disk. Use this function only when
necessary.
!The NVR must be connected to a stable power supply during runtime; otherwise,
the hard disk may be damaged or data may be lost.
!To achieve a balanced performance, more than two pieces of hard disk are
recommended.
3.2 Video Storage Duration
Table 3-1 Video storage duration
Maximum Hard Disk
Capacity
Maximum Bit Rate Video Storage Duration
8 !4 TB 144 Mbps 20 days
Table 3-2 shows examples of video storage duration (his 24 hours).
Table 3-2 Examples of video storage duration
Hard Disk
Capacity
Bit Rate Video Count Video Storage
Duration
84TB D1, 1.5Mbps 32 60 days
84TB 720p, 3Mbps 32 30 days
84TB 1080p, 4.5Mbps 32 20 days
The data listed in the preceding table is for reference only. The recording time estimate may
be different from the actual recording time, based on the average bit rate the cameras are
using. The user shall be liable for any loss of video incurred as a result.

4Operation Instruction
Network Video Recorder(NVR)
6
Issue V1.1 (2014-07-15)
4 Operation Instruction
4.1 Front panel
Figure 4-1 shows the front panel of the NVR and Table 4-1 describes the interfaces.
Figure 4-1 Front panel
Table 4-1 Description of the front panel
NO.
Name
Description
1
KB/MOUSE
Input for USB mouse or USB keyboard
2
BACKUP
Connection interface for backup based on USB
drives or USB portable hard disks
3
HDD 1~8
LED indicators (blue) for hard drives installed
When a hard drive is installed, the LED
indicator is on. When a hard disk is reading or
writing data, the LED will flash.
4
SYS
Operation indicator (red). When the VHDIPL is
working properly, the LED indicator will be
steady.
5
PWR
Power indicator (red). After the NVR is
powered up, the LED indicator will be steady.
6
POWER
ON/OFF key of the VHDIPL.

Network Video Recorder(NVR)
4Operation Instruction
Issue V1.1 (2014-07-15)
7
4.2 Rear panel
Figure 4-2 shows the rear panel of the NVR and Table 4-2 describes the numbered
features.
Figure 4-2 Rear panel
Table 4-2 Description of the real panel
NO.
Name
Description
1
Ground connector
Grounding terminal for the device
2
Power
Input switch of the power supply
3
Power interface
110V/220V AC power input interface of the
device
4
OUT
1 alarm output (Boolean)
IN
1 alarm input (Boolean)
RS485
1 full-duplex RS485 communication inputs
5
Audio input
Linear audio input for connecting a
microphone
6
Audio Output
Linear audio input for connecting earphones
and audio(or PA) system
7
Reset
Press the key for 5s to restore factory settings.
8
HDMI interface
HDMI video cable input
9
HDMI & VGA switch
MON CLONE is used for dual-screen and
single-source display and output.
MON EXTEND is used for dual-screen and
non-single-source display and output.
10
VGA
VGA video cable input
11
G-LAN2 interface
RJ45 10/100/1000Mbps adaptive Ethernet
input
12
G-LAN1 interface
RJ45 10/100/1000Mbps adaptive Ethernet
input

4Operation Instruction
Network Video Recorder(NVR)
8
Issue V1.1 (2014-07-15)
In the preceding table, interfaces 4, 5 and 9 are reserved in design and the NVR does not
support these interfaces currently.
4.3 Startup
Please connect a power supply securely and turn the power switch to the on position,
the VHDIPL will then power-on. When the NVR is connected to a power supply, press
the Power key on the front panel, to turn on the NVR.
Before starting the NVR, ensure that the NVR is connected to a power supply properly
and a monitor is connected to the HDMI or VGA slot of the NVR correctly.
When the NVR is started, the power indicator becomes steady on and the NVR starts a
self-test and displays the test result on the screen. The startup process takes about 2
minutes.
When a hardware abnormality is detected, the self-test screen will stay on, select
continue or shutdown in the lower right corner of the screen. Click continue, then the
VHDIPL will display the login screen.
Hard disk detection is performed during startup. If the detection fails, possible causes
include
!The hard disk is new and unformatted. In this case, format the hard disk based on chapter
5“Quick Setup”
!The hard disk is damaged.
4.4 Shutdown
If you have not logged in to the NVR, press the POWER button in the front panel for
more than 3seconds. The NVR will shut down. When the power indicator on the front
panel is off, the NVR will have shut down successfully.
If you have logged in to the NVR, click in the upper right part or press the
POWER button for more than 3s. The shutdown page is displayed, as shown in Figure
4-3.

Network Video Recorder(NVR)
4Operation Instruction
Issue V1.1 (2014-07-15)
9
!During power-off, the system prompts Powering Off. In this case, do not
disconnect the power supply.
!When the NVR is working, try to avoid disconnecting the power supply by directly
pressing the POWER button on the rear panel or removing the power cable.
!In some environments, if the power source is abnormal, the NVR may not work
properly. In severe cases, the NVR may be damaged. In these situations, you are
advised to use regulated power supply.
Figure 4-3 Shutdown interface
Enter the password and click Shutdown. After you pass the user authentication, the
message "Are you sure to shut down?" is displayed. Click Yes. The NVR will shut
down.

5Quick Setup
Network Video Recorder(NVR)
10
Issue V1.1 (2014-07-15)
5 Quick Setup
To access the quick configuration of the NVR. From the live screen select the 'Quick
Setup' tab on the top menu bar.
Quick setup allows fast access to all the main features of the NVR, from setting the
time and date to configuring the local network and cameras. See below for a more
detailed description of each area, Figure 5-1.
Figure 5-1 Quick setup page
Description of Quick Setup Page
Area 1: Basic information and time synchronization functions.
!NVR Basic information configuration.
Name the NVR, set date and time. Note: If the cameras and the NVR do not have
the same time, there may be issues will playing back recordings.

Network Video Recorder(NVR)
5Quick Setup
Issue V1.1 (2014-07-15) 11
!Synchronize the time of the network cameras with NVR. You can select the manual
mode or automatic mode.
To set the time manually, click to open the NVR time configuration window.
To synchronize the connected cameras with the NVR, set 'Sync Camera Time' to
on.
Area 2: NVR Network Configuration
!The default IP address of the NVR is: Network1: 192.168.0.121; Network2:
192.168.1.121.
!The basic network section allows configuration of the IP address, subnet mask,
default gateway, DNS address and other parameters. Real-time display of the
network connection status and speed
!Network 2: Is the function that enables the private network for cameras, creating a
new IP segment for a local network. By default, the function is enabled.
!The VHDIPL supports a maximum of 32 IP cameras and the maximum recording
rate of 144 Mbps. If the total rate exceeds the value, the NVR may not steadily and
experience video loss
!For details of parameters, see Chapter 1 "Specifications".
The private network for cameras includes only IP cameras and NVRs and does not include
other network devices.
After the function of private network for cameras is enabled, the NVR will perform the
following operation:
!Enable the DHCP service and automatically assign IP addresses to IP cameras (Note: The
DHCP function needs to be enabled within the IP cameras aswell).
!Automatically search for IP cameras in the local network.
!Will automatically add IP cameras found on the local network and set 7*24-hour
recording.
Area 3: Hard disk management

5Quick Setup
Network Video Recorder(NVR)
12
Issue V1.1 (2014-07-15)
!Formatting will clear all video data on the hard disk. Use this function only when
necessary.
!The NVR must be connected to a stable power supply during runtime; otherwise,
the hard disk may be damaged or data may be lost.
You can manage the hard disk of the NVR as follows:
!Format the hard disk. Click Format. In the displayed dialog box, click Yes.
!Check the status of the hard disk (usable, abnormal, unformatted, and unavailable).
!Check the used space and total space of the hard disk.
Area 4: Select IP Cameras
When the function of private network for cameras is enabled, the NVR automatically
searches for IP cameras in the network.
!When the number of IP cameras in smaller than the number of channels the NVR
can manage, the VHDIPL will automatically detect IP cameras to be managed.
!When the number of IP cameras found is greater than the number of channels the
NVR can manage, will display the prompt (Figure 5-2), from here the cameras that
need to be managed by the VHDIPL can be selected by IP address, as shown in
Figure 5-2. The cameras will then also be set on 24*7 recording
Figure 5-2 Prompt message indicating discovery of a device
You must select the devices managed by the NVR. Click Ignore to use the IP cameras
already managed, or click Select. The Select Camera page is displayed, as shown in
Figure 5-3.

Network Video Recorder(NVR)
5Quick Setup
Issue V1.1 (2014-07-15)
13
Figure 5-3 Page for selecting cameras
Select the cameras to managed using the tick boxes (ticking and unticking), then use
the arrows to enable the management of the selected IP cameras. Click Apply to
complete selection of IP cameras.
Area 5: Camera Search and deletion
You must select the IP cameras manually when you don’t use the private network for
cameras, click Search Camera, the Camera Search page is displayed, as shown in
Figure 5-4.

5Quick Setup
Network Video Recorder(NVR)
14
Issue V1.1 (2014-07-15)
Figure 5-4 Page for searching cameras
Click ‘Scan’ to search the network (either local or open) for cameras. Click to
go to camera management selection page, the page is displayed as shown in Figure 5-5.
Select the cameras you want and then click Ok to complete selection of IP cameras.
Figure 5-5 Page for selecting cameras
To remove managed cameras, click in the camera list, select the cameras to
be removed, and click Left Arrow button to remove the camera from the management
list.
Table of contents
Other Concept Pro Network Hardware manuals