Concept Solutions CSLAA User manual

READ AND SAVE THESE IMPORTANT SAFETY
INSTRUCTIONS BEFORE USING THIS APPLIANCE:
When using an electrical appliance, basic precautions should always be followed to
reduce the risk of fire, electric shock, and injury to persons, including the following:
1. Use this appliance only as described in this manual. Other uses not
recommended may cause fire, electric shock or personal injury.
2. This product is intended for household use ONLY and not for commercial
industrial or outdoor use.
3. To protect against electric shock, do not immerse unit, plug or cord in water or
spray with liquids.
4. Close supervision is necessary when any appliance is used by or near children.
5. Unplug the appliance from the outlet when not in use, when moving from one
location to another and before cleaning.
6. To disconnect the appliance, grip the plug and pull it from the wall outlet. Never
pull by the cord.
7. Do not operate the appliance in the presence of explosive and/or flammable
fumes.
8. Do not place the appliance or any of its parts near an open flame, cooking or
other heating appliance.
9. Do not operate the appliance with a damaged cord or plug, if the product
malfunctions, or if it is dropped or damaged in any manner.
10. The use of attachments not recommended by the manufacturer may be
hazardous.
11. Place the unit on a dry level surface.
12. Do not operate if the housing is removed or damaged.
13. A loose fit between the AC outlet (receptacle) and plug may cause overheating
and a distortion of the plug. Contact a qualified electrician to replace loose or
worn outlet.
14. This appliance is designed to be free standing only, and should not be recessed
or built-in (fully recessed).
15. Locate the unit away from direct sunlight and sources of heat (stove, heater,
radiator, etc.). Direct sunlight will affect / alter the outside color of the appliance.
WARNING: To reduce the risk of fire, electric shock or personal injury, unplug
or disconnect the appliance from the power supply before servicing.
SAVE THESE INSTRUCTIONS FOR FUTURE USE
Save time and money. Before you call for service, check the Troubleshooting Guide
at the back of this manual. It lists causes of minor operating problems that you
can correct yourself.
WC202-7 Manual.indd 1 8/22/2006 11:15:04 PM

Warning: Changes or modifications to this unit not expressly approved by the
part responsible could void the user’s authority to operate the equipment
Unpacking the unit:
1. Remove the exterior and interior packing.
2. Check to be sure you have all the following parts:
a. One (1) wine bar with Perfect-Temp system
b. One (1) instruction manual
c. Two (2) wireless temperature probes
d. One detachable cord
Finding a good spot for your wine cooler:
• Place your wine bar on a flat surface that is strong enough to support it when
fully loaded.
• Allow 5 cm of space on the back side of the wine cooler to allow proper
ventilation.
• This wine cooler is designed to be free standing only, and should not be
recessed or built-in (fully recessed).
• Do not place any objects on top of the unit.
• Do not locate the unit in a moist place.
• The unit’s cooling system operates efficiently with an ambient temperature of
less than 21°C.
• Do not locate the wine bar in direct sunlight.
• ALWAYS REMOVE ALL BOTTLES BEFORE MOVING THE WINE
COOLER
A
B
C
D
E
A - Probe A (Left Zone)
B - Probe B (Right Zone)
C - Left Zone Wine Type Button
D - Right Zone Wine Type Button
E - Power Button
WC202-7 Manual.indd 2 8/22/2006 11:15:05 PM

SETUP CHECKLIST
□ Unit must be placed on a flat surface.
□ Unit should not be placed in direct sunlight.
□ Room should be 21°C or cooler for unit to
function properly.
□ Do not place unit next to a major appliance
that emits large amounts of heat, such as a
dishwasher, microwave, oven, barbecue, etc.
□ Do not plug unit into the same outlet as a
refrigerator.
□ Plug the unit into a standard wall outlet that
is of the same type as the power cord that is
included with the unit.
□ There should be 5 cm of clear space around
the unit’s vents.
□ Unit should not be built-in into a wall recess,
cabinet or niche
□ Unit should not be placed in any type of
enclosed area.
WC202-7 Manual.indd 3 8/22/2006 11:15:05 PM

Installing / Replacing Batteries in your Wine Bar’s wireless temperature probes
The Wine Bar’s Wireless Temperature Sensors already come with batteries installed
at the factory. Should the Sensor Unit batteries ever need to be replaced:
1. Open the Sensor Unit by removing the battery lid with a small flat head
screwdriver.
2. Remove the exhausted battery and replace it with a lithium button cell
“CR2032”
3. When inserting the new battery make sure that the positive “+” terminal of the
battery is upwards.
4. Replace the battery lid.
BE CAREFUL WHEN INSTALLING BATTERIES WIRELESS TEMPERATURE
SENSOR OF WINE BAR. INSTALLING THE INCORRECT BATTERIES OR
REVERSING THE POLARITIES COULD CAUSE PERMANENT DAMAGES TO
THE PRODUCT.
Operating instructions
Easy to Use Preset Mode
1. Turn on the Wine Bar by pressing the “POWER” button on the Main Unit
2. For each zone (left & right) set the wine setting according to the type wine
bottle you wish to chill by pressing the “SELECT” button. Keep pressing the
select button until the correct setting appears on the LCD & screen.
3. Once you have selected the appropriate temperature preset turn on the correct
temperature probe to activate that particular zone (Left or Right)
4. Your Wine Bar will now chill your wine to the appropriate temperature preset
selected and once that temperature is acheived it will maintain the set
temperature.
How the Display Works
The grapes below are displayed on the Wine Bar’s display each having its
own Preset setting automatically programmed into it to chill your wine to its
appropriate serving temperature. The preset temperatures can be modified
see the section “Manual Mode” for instructions on how to do so.
Red
17°C (63°F)
Rosé
13°C (55°F)
White
10°C (50°F)
Champagne
9°C (48°F)
The lines below are displayed on the Wine Bar’s display when the unit is on.
The empty line indicates the target temperature (according to the preset you
have selected) whereas the solid line indicates the actual temperature that is
being mesured by the wireless temperature probe.
WC202-7 Manual.indd 4 8/22/2006 11:15:06 PM

Operating Instructions (Continued)
Manual Mode (Modifying the Default Temperature Settings)
Your Wine Bar comes pre-programmed at the factory with suggested serving
temperatures for Reds (17°C / 63°F), Rosés (13°C / 55°F), Whites (10°C / 50°F), and
Champagnes (9°C / 48°F). These settings can be modified if you wish to suit your
needs. To modify the default temperature setting:
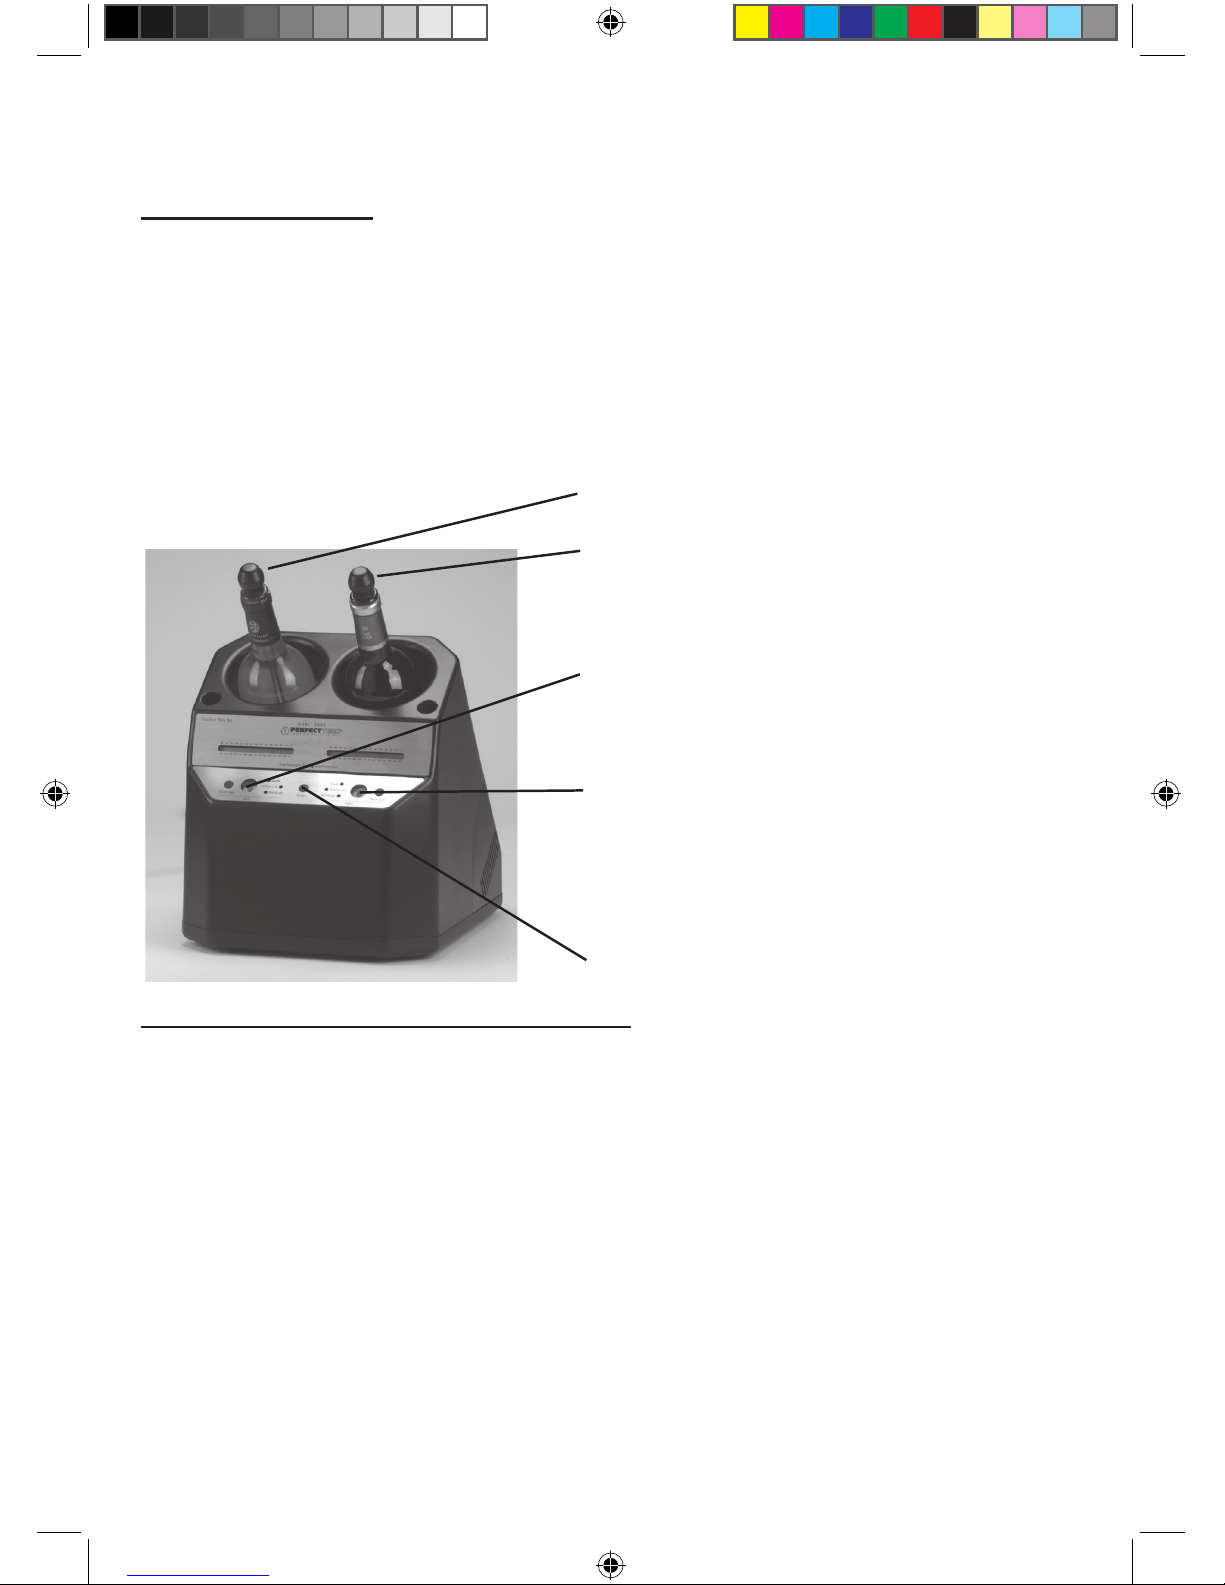
1. Turn on the Wine Bar by pressing the “POWER” button and select the preset
you wish to modify by pressing the “SELECT” button.
2. Turn off the Wine Bar by pressing the “POWER” button momentarily. Then
press and hold the “POWER” button until both the Red LED & Preset
Temperature Bar (Empty Line) start flashing.
3. Once flashing press the “SELECT” button to lower the Preset Temperature
Setting by 1°C (~1.8°F). You can cycle through to a warmer temperature just
by continuing to press the select button. Once you have selected the modified
temperature do not touch any button for approxiametly 5 seconds the Red LED
& Preset Temperature Bar will stop flashing and the iTemp will save the new
temperature for the preset you modified.
*Note: You can change the Default Temperature Setting of the preset at anytime by
following steps 1-3 above. This new setting will be stored until it is modified or the
power to the Wine Bar interupted. Should this occur the Default Preset Temperature
Settings will return to the factory programmed temperatures.
Cleaning instructions:
Below is a listing of general cleaning tips that should be taken when cleaning your
wine cellar.
When cleaning your wine cellar, be cautious when using any type of cleaning
products, some individuals may have allergic reactions to the chemicals in some
of these products. By using solvents to clean your wine cellar, you may damage
its finish, hence it is recommended to use mild detergents, baking soda and water.
Never spray or squirt any type of liquid onto your wine cellar. If a spray is needed,
spray the liquid onto a cloth and then use the moistened cloth to rub down the wine
cellar.
• Always unplug the wine cellar before cleaning.
• Wash the inside surface with a warm water and baking soda solution. The
solution should be about 2 tablespoons of baking soda to a quart (~1 litre) of
water.
• Wash the racks with a mild detergent solution.
• The outside of the wine cellar should be cleaned with a mild detergent solution.
• Use a damp cloth or sponge to clean the control panel.
• Always dry all the parts with a clean dry cloth before plugging the wine cellar
back into the receptacle.
AVOID ABRASIVE PRODUCTS SUCH AS SCOURING PADS AND
POWDERS. THEY WILL PERMANENTLY DAMAGE THE FINISH
OF YOUR WINE BAR
WC202-7 Manual.indd 5 8/22/2006 11:15:07 PM

Table of contents