Conceptronic CM3G User manual

Copyright®2007 by Conceptronic – All rights reserved
www.conceptronic.net
Page 1 of 7
CM3G-CM3GP-CM3GPP
Media Giant
How to…
Record from a embedded DVB-T TV tuner with the
Conceptronic CM3G/P/PP

Copyright®2007 by Conceptronic – All rights reserved
www.conceptronic.net
Page 2 of 7
This how to document describes how you can connect and use your CM3G/P/PP to record digital channels
from a TV with an embedded DVB-T tuner within this document this will be mentioned as a TVDVB-T).
TTENTION: This feature can only be used in certain TV models, not all TV models will allow you to
record from a embedded DVB-T tuner. Please check your TVs manufacturer manual if this is possible.
Important
As mentioned before not all TVs with embedded DVB-T tuner have the required connections to let the
CM3G/P/PP record digital channels.
It is mandatory that your TV has some kind of video output to let the CM3G/P/PP record digital channels.
It could be that the video output from the TV only allows an analog tuner signal instead of DVB-T. Then
please check with the TVs manufacturer to do a correct configuration.
It should be mentioned in your TVs manufacturer manual if your TV has a video output available.
Follow the steps as seen below to watch and record digital channels from a TV embedded DVB-T tuner with
your CM3G/P/PP.
Step 1: Connecting TVDVB-T to the Conceptronic CM3G/P/PP
We will use a composite cable yellow, white, red) and the RCA to SCART adaptor. These cables are included
with your CM3G/P/PP.

Copyright®2007 by Conceptronic – All rights reserved
www.conceptronic.net
Page 3 of 7
In this example we use connection EXT1(RGB) as video output from the TVDVB-T.
Connect the SCART adaptor to the video output of your TV. Connect one side of the composite cable to the
SCART adaptor and the other side to the AV1 Input “ V1 IN” of your CM3G/P/PP.
Note: Be sure that the RCA to SCART adaptor is set in OUTPUT mode.
Step 2: Connecting Conceptronic CM3G/P/PP to TV
Refer to chapter six “Connecting your Media Giant”) of the CM3G/P/PP manual on how to connect the
CM3G/P/PP to your TV.

Copyright®2007 by Conceptronic – All rights reserved
www.conceptronic.net
Page 4 of 7
Step 3: Recording from TVDVB-T
When all cable connections have been made turn on your CM3G/P/PP and your TVDVB-T. The menu of the
CM3G/P/PP will be shown on your TV. If this is not the case, refer to chapter seven “First-Time
Configuration”) of the CM3G/P/PP manual.
There are two methods to record from a digital TV tuner. The first one is to start recording instantly and the
second one is a scheduled recording.
Instant recording (One Touch Record)
1. Turn on your TVDVB-T. Press the ‘SOURCE’ button twice on the CM3G/P/PP its remote control to select
“Video 1” video input. If your TVDVB-T is turned on then you will be able to watch digital channels
through the CM3G/P/PP.
2. Use the TVDVB-T remote control to select the digital) channel from which you want to start recording.
3. Press the red ‘RECORD’ button on the remote control of the CM3G/P/PP to start recording instantly.
4. To stop recording, press the ‘STOP’ button on the remote control of the CM3G/P/PP.
Note: Do not turn off the CM3PVR or TVDVB T during the recording. Also do not press
any buttons on either of the remote controls or devices itself. Doing so might result in an
incomplete recording.

Copyright®2007 by Conceptronic – All rights reserved
www.conceptronic.net
Page 5 of 7
Scheduled recording
You can set a scheduled recording to let the CM3G/P/PP start recording at a specified date/time.
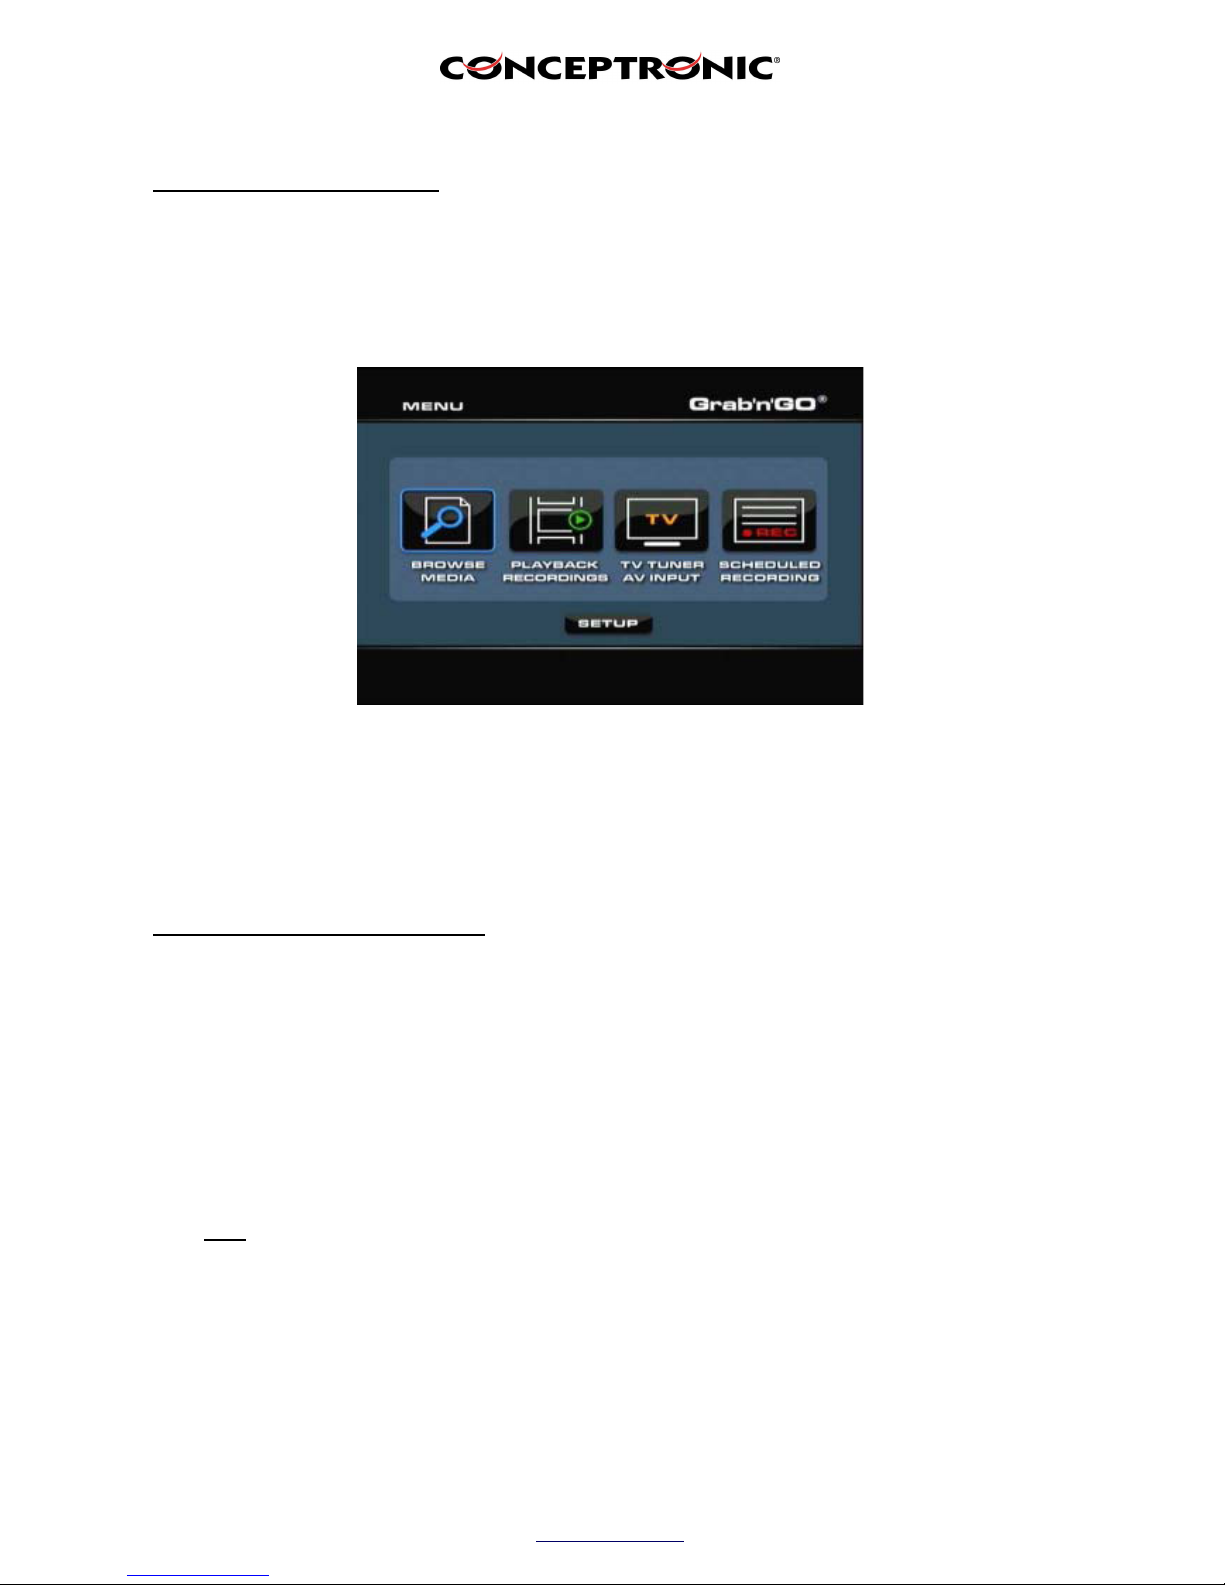
1. Select “Scheduled recording” at the initial menu. The following image will be shown on your screen:
The Scheduled Recording menu shows 5 options, which can be selected with the left and right navigation
buttons 8) of the remote control:
dd: Add a new scheduled recording.
Edit: Edit an existing scheduled recording.
Delete: Delete a scheduled recording.
Status: Change the status of the scheduled recording list.
History: Display the scheduled recording history list.
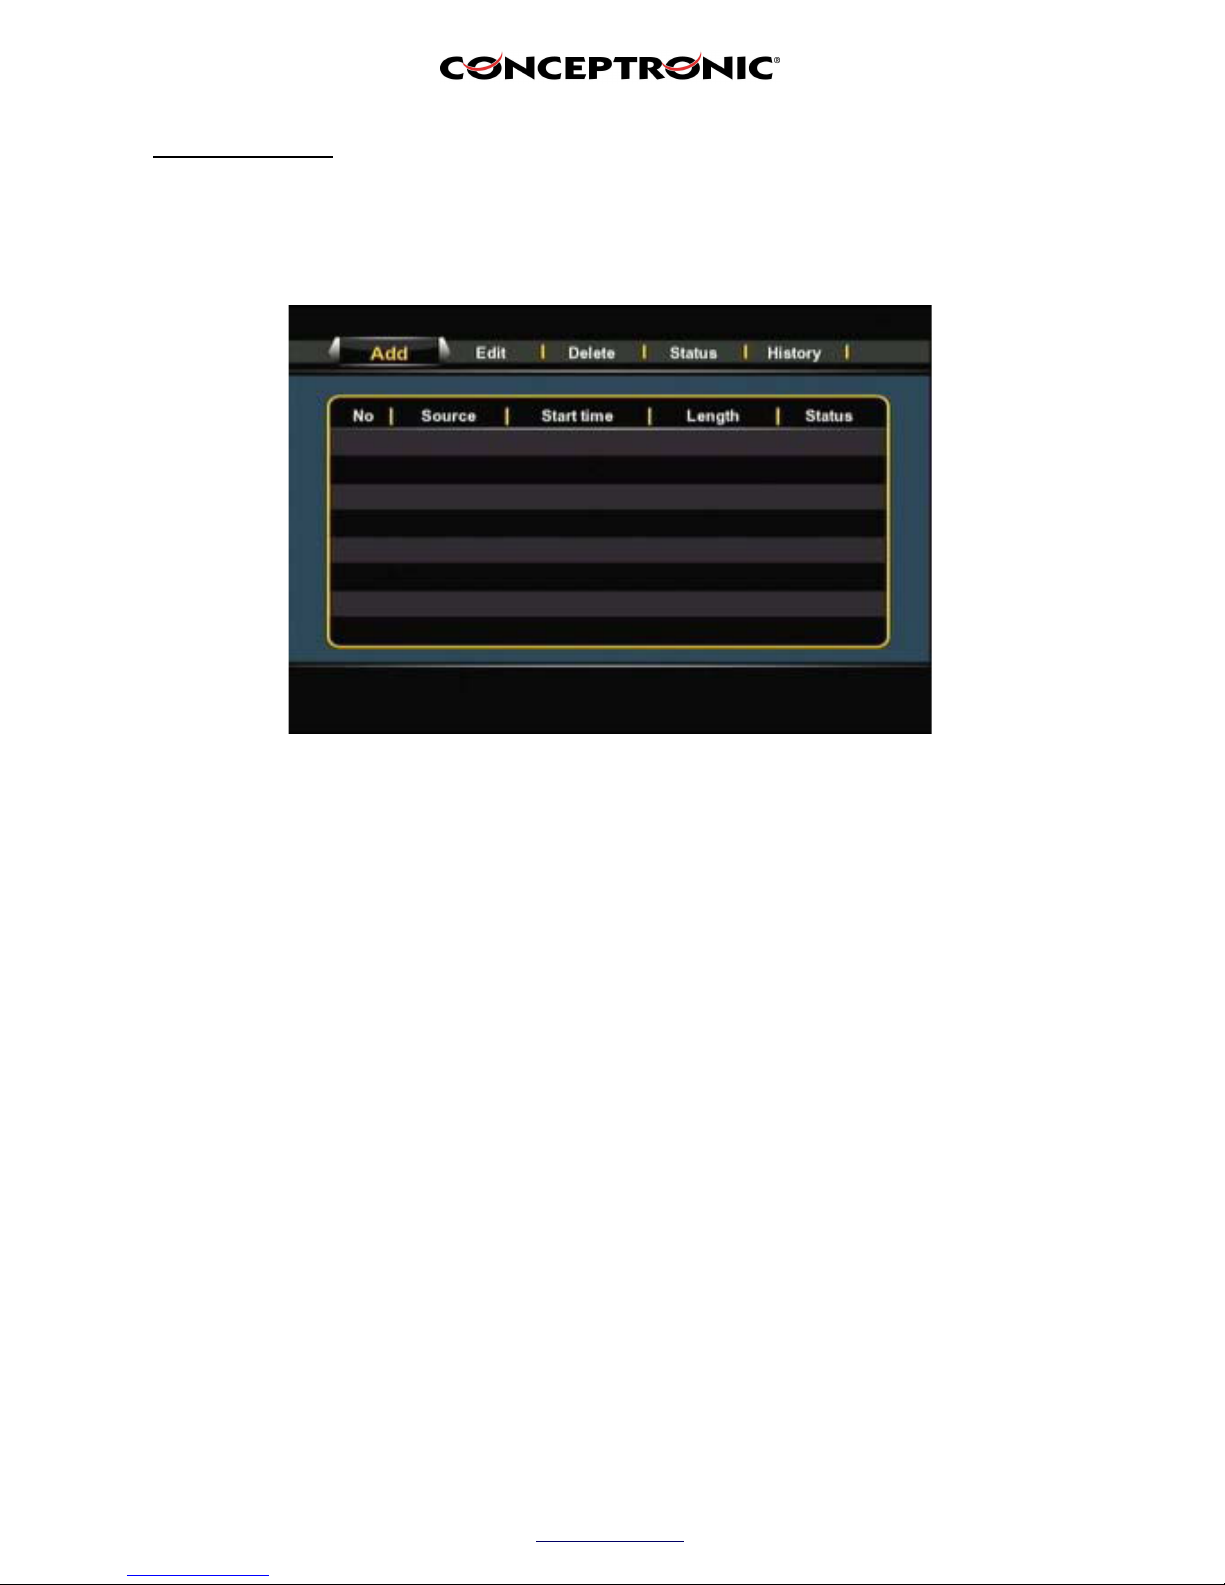
2. Select “ dd” and press “Enter” on the remote control to create a new scheduled recording.
By default, the ‘Source’ field is selected.
All options can be changed with the up and down navigational buttons 8), and you can select another
field with the left and right navigational buttons 8).
3. Choose “VIDEO1” as source of the recording.
4. Set the correct date for your recording.
5. Set the correct start time for your recording.
6. Set the length of your recording.
7. Set the repeat option for your recording. You can select the following options:
‘Once’, ‘Everyday’, ‘Mon-Fri’, ‘Mon-Sat’, ‘Sun’, ‘Mon’, ‘Tue’, ‘Wed’, ‘Thu’, ‘Fri’ or ‘Sat’.
You can Skip the ‘Device’ field, since you can only record on the internal harddisk.

Copyright®2007 by Conceptronic – All rights reserved
www.conceptronic.net
Page 6 of 7
8. Set the recording quality. You can choose between ‘HQ’, ‘SP’, ‘LP’, ‘EP’ and ‘SLP’.
Note: Changing the ‘Quality’ field influences the quality of your recording and the amount of
space needed for the recording. The available recording time for each quality setting is
shown in the upper left part of the scheduling window.
9. Set the ‘Nicam’ option to ‘on’ or ‘off’.
The Nicam option should be set to ‘on’ if the source you want to record from broadcasts with 2 different
audio sources for example: Eurosport).
10. When all the options are set for your recording, press the ‘Enter’ button 28) on the remote control to
save the schedule.
11. A confirmation popup will be shown on your screen. Select ‘Confirm’ and press the ‘Enter’ button 28)
on the remote control to save the schedule.
The recording is now programmed as a scheduled recording and the unit will start recording on the
programmed time and channel, even when the device is set to ‘Standby’.
Make sure the TVDVB-T is set to the right channel for the recording and leave it turned on.

Copyright®2007 by Conceptronic – All rights reserved
www.conceptronic.net
Page 7 of 7
Note: The unit detects copy protection on the connected source, for example MacroVision
protection on DVD discs. When a connected source is copy protected, the unit will prevent
recording and shows a warning message when the record button is pressed.
Note: Do not use the switch on the back of the CM3G/P/PP to turn off the device, since it will not
be able to turn on itself when a recording needs to be started. The device always needs to be
in stand by mode when a recording is scheduled.
Note: The Media Giant records in HQ (High Quality) by default. You can change the recording
quality in the Setup menu.
This manual suits for next models
2
Table of contents